Jump to content

troopermaster

Member
  • Posts

    3,638
  • Joined

  • Last visited

  • Days Won

    12

Everything posted by troopermaster

  1. I just watched a couple of Ross's videos. Let's just say he does things differently from me. If you ever get stuck on something, your best reference is always the original armour. While these types of assembly videos are good for beginners, they lack certain details when it comes to accurately building armour.
  2. CAP is the name of the armour maker who recast TE. Doubled up parts means the same parts are used for left and right, so instead of having four unique parts to make up the shins for instance, you have two. Same goes for the arms and shoulder bells, they are the same parts 'doubled up'. That's common for the type of kit you have.
  3. It's nothing like an RS. It's cast from a TE derived kit like CAP but with almost all the arm and leg parts doubled up.
  4. When trimming the drop boxes, trim the outer parts first (I make mine 15mm thick) then put the inner parts inside them the same way up and draw a trim line all the way around. I cut inside this line a good 2mm so that they will sit flush inside the outer part. Make sure you get the elastic straps riveted to the inner parts before you glue them together if you are using rivets. Better to leave gluing the drop boxes together until you have assembled your belt.
  5. The first thing you need to realise about the original ANH armour (and TM) is that none of the parts match up perfectly. That is just how they were. Just cut your joining strips to match the shorter part for screen accuracy or longer if you prefer to hide the mismatch - either is good In regards to sizing the biceps, tape them together as you have and try taking your helmet off your head (or just pretend if you haven't built the helmet). You don't want any binding when you flex your muscles. You won't be doing any acrobatics so they don't need to be too loose but they should be able to slide up and down your biceps freely, same goes for the forearms when you come to assemble those too.
  6. How does anyone with a PVC kit add a seamless shim?
  7. They are easy to glue if you know the right technique
  8. Drill the holes for the brackets in the crease of the return edge. Don't be too particular as the original brackets were placed in the creases or even on the face of the armour if the return edge had been trimmed too much.
  9. Surely someone with PVC kit has had to go to the extra trouble of blending their shims in before?
  10. I believe acetone doesn't work at meting PVC like it does for ABS so I am keen to learn how the experts on here do it. You are not allowed to have shims with visible joints so they must be blended in if you want to achieve certain levels. Looking forward to learning how to do this
  11. I would like to know how to make PVC paste too.
  12. I thought I would show you guys my new ANH shoulder bells. Well, they not exactly new as I made these several months ago and some of you may have already seen them on my Facebook page. But for those who have not seen them, enjoy
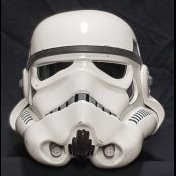
  13. I didn't take it that way, mate I just wanted to explain how they were done originally as you are not the first person to spray the whole helmet with the red primer.
  14. Nice work so far, Stuart! The 1.5mm ABS is by far my favourite plastic of all time. The way it flexes makes it perfect for trooping and it is the same ABS used for the original armour so that's an added bonus Looking forward to seeing more soon
  15. To back up what I am saying, look closely at this photo of the original helmets outside Shepperton Design Studio from 1976. It clearly shows the helmets without the ear caps are all white, including the rivets, and the helmets with ear caps fitted have unpainted screws that tells you they are unpainted white ABS. This is how they were sent to Elstree before the top coat and finishing details were painted
  16. Nope. That's where the top coat wasn't applied and the undercoat came off. Look closely, you can see traces of red and white where the ear caps were but has flaked off. The thicker topcoat stayed on and would have been applied to the ear caps.
  17. You really should have removed the ear caps first before spraying the red oxide primer. The originals were primed and undercoated white before the ear caps were added, so no red primer ever touched the ears. Just an FYI
  18. The snaps used on the original armour in ANH, ESB and ROTJ were made by Newey and the rivets used for the ammo strap are actually single cap rivets, not double cap
  19. They are the same. You want to talk armour? You are talking to the right person. I can see every detail in every armour, regardless what you are spoon fed. As I said, they are the same for both legs except for the way the ankles have been trimmed or made to look different.
  20. The RWA shins are the same for both sides but the ankles are trimmed differently. Put them side by side and you will see they are the same on both legs. The RS are the same for the both sides too but they have two outer parts doubled up compared to two right parts doubled up on the RWA.
  21. I think they are two right shins. I've noticed that before with RWA kits.
  22. I was just about to say those are not RS shins or knee plate. What is wrong with the RS shins?
  23. They sell the small bottles of acetone in places like Poundland or Poundworld for errrrm, a pound
  24. It is logical. Think of it this way - a flat strip of plastic will flex a great deal. Add a return edge onto it and it becomes rigid. The bigger the return edge will add more rigidity whereas the less of a return edge will increase flexibility. This is why I keep my return edges to a minimum when I build armour for people. You only really need a wider edge on some parts of the torso for the original strapping system, if you are using it.
×
×
  • Create New...