troopermaster
-
Posts
3,638 -
Joined
-
Last visited
-
Days Won
12
Content Type
Profiles
Forums
Gallery
Articles
Everything posted by troopermaster
-
Help Anovos armor getting scared.
troopermaster replied to Jebby10's topic in Hard Armor (General Discussion)
This is what I see. -------------- -
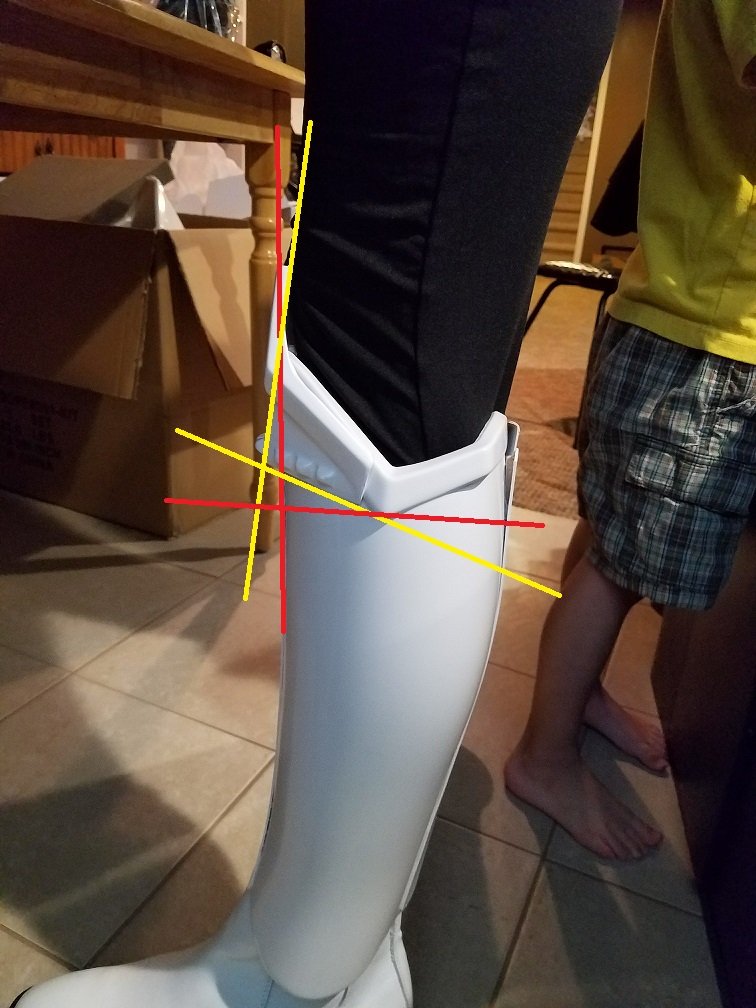
You really should get that knee plate flat against the shin. It not only looks bad but it will dig into your knee.
-
This is the original broken cod piece of the RS armour, clearly showing the brass rivet and washer.
-
Mat's ANH stunt TM 2mm ABS
troopermaster replied to ozzytrooper's topic in Build Threads Requireing Maintenance
The ear cap looks fine! They do not need to be air tight against the helmet so no need to start on the spare, go straight onto the right ear. Everything else is looking really good too. This is a very nice, well detailed thread. Keep up the good work -
The cod rivet is brass but the snaps are silver.
-
Robs WTF ANH Stunt build
troopermaster replied to Balue's topic in Build Threads Requireing Maintenance
I am going by 20 years of studying stormtrooper armour YAY!! It worked -
Robs WTF ANH Stunt build
troopermaster replied to Balue's topic in Build Threads Requireing Maintenance
Perfect! Although technically still missing the correct inner right half, you have the WTF shins assembled correctly -
Robs WTF ANH Stunt build
troopermaster replied to Balue's topic in Build Threads Requireing Maintenance
-
Robs WTF ANH Stunt build
troopermaster replied to Balue's topic in Build Threads Requireing Maintenance
Trying in vain to upload photos -
Robs WTF ANH Stunt build
troopermaster replied to Balue's topic in Build Threads Requireing Maintenance
Yes, you have. Walt has got it wrong. I have made an image to show you but I can't upload it. -
Robs WTF ANH Stunt build
troopermaster replied to Balue's topic in Build Threads Requireing Maintenance
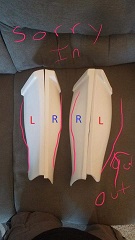
Just look at the size difference between the two sides. The shorter two halves go together and the longer two halves go together. On a side note, the RS comes with two outer left halves and two outer right halves. The RS does not have any inner halves. -
Robs WTF ANH Stunt build
troopermaster replied to Balue's topic in Build Threads Requireing Maintenance
Just so you know (and this doesn't affect anything) but you have the shins assembled incorrectly. I am not sure if the WTF comes with a doubled outer left part but I can clearly see you have a perfectly assembled left shin worn on the right leg. You can tell by how the back of the knee slopes down which should be towards the inside of your legs. You can see your right shin slopes outwards. Just a heads up for any other WTF guys who might be building their armour at the moment. -
That's the right forearm. You can tell by the flat joining edge is on the left as you look at it and on the left forearm it's on the right.
-
ANH Stunt Helmet Size question.
troopermaster replied to Twenin's topic in Assembly, Mods, and Painting
It looks like you may have already over trimmed it under the chin. You should have a nice rounded cut instead of the sharp angle under the chin, but you might get away with it once the rubber trim has been fitted.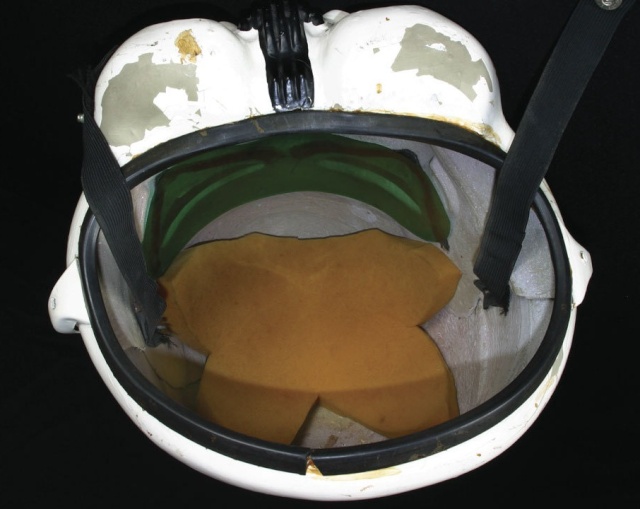
-
Stephen's RS ANH stunt build WIP (for small people)
troopermaster replied to Gwithian's topic in ANH Build Threads
Not quite. The left side of the armour matches up better than the right which is slightly shorter, so the notch falls short of matching up with the corner of the abdomen. The left side matches up better, but neither are exactly perfect matches. That's the beauty of the original armour The first photo you posted has a bit of perspective going on, making the abdomen look longer because it's closer to the camera. The second photo has both parts butted up together and you can see the parts match up like in the image I corrected. But you are right in the fact that the tops want to line up and disregard any mismatch lower down. You can't have it both ways when you are having to make all these changes to make the armour fit you properly. -
Stephen's RS ANH stunt build WIP (for small people)
troopermaster replied to Gwithian's topic in ANH Build Threads
This is how the parts should match up correctly.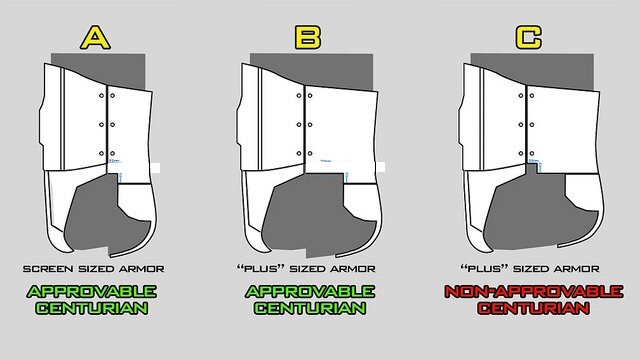
-
Stephen's RS ANH stunt build WIP (for small people)
troopermaster replied to Gwithian's topic in ANH Build Threads
The problem here is that the image posted is incorrect.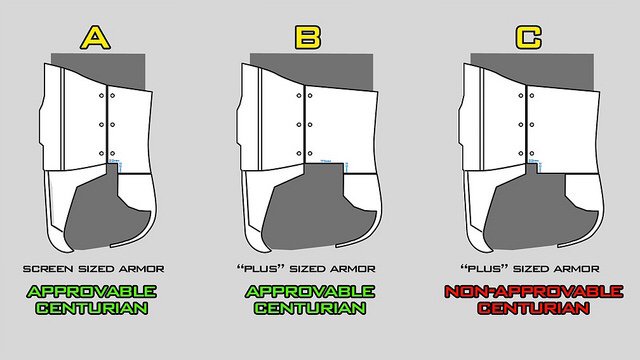
-
Here is an example of how a correctly fitted knee plate should look.
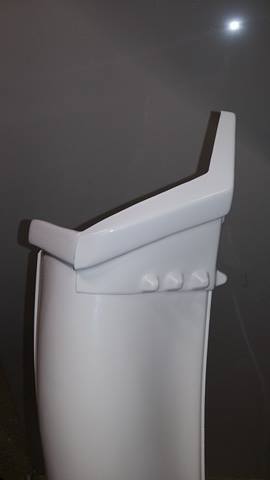
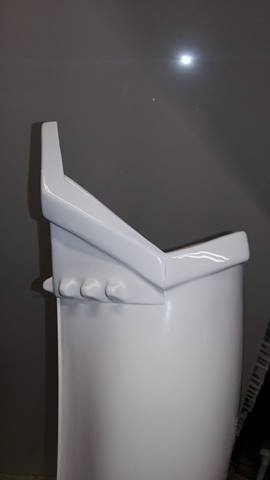
-
Stephen's RS ANH stunt build WIP (for small people)
troopermaster replied to Gwithian's topic in ANH Build Threads
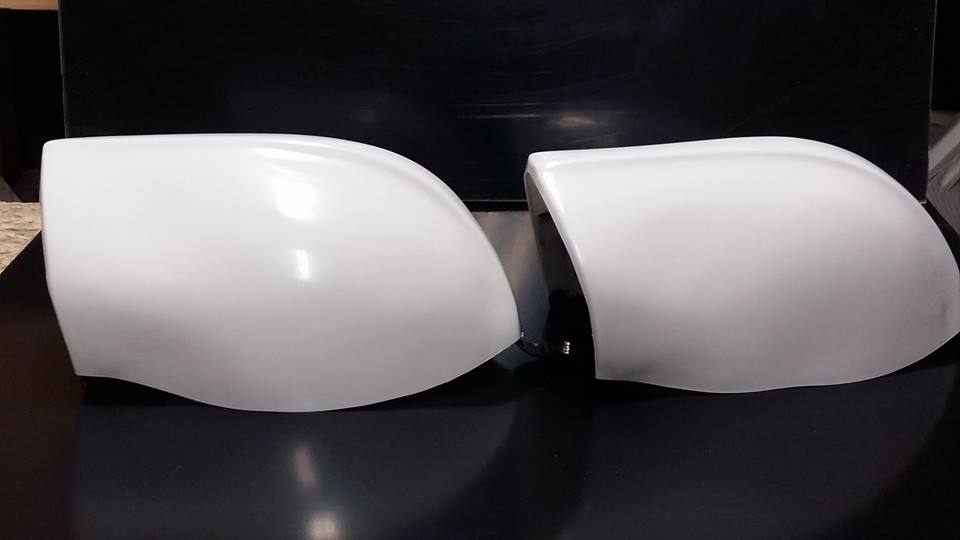
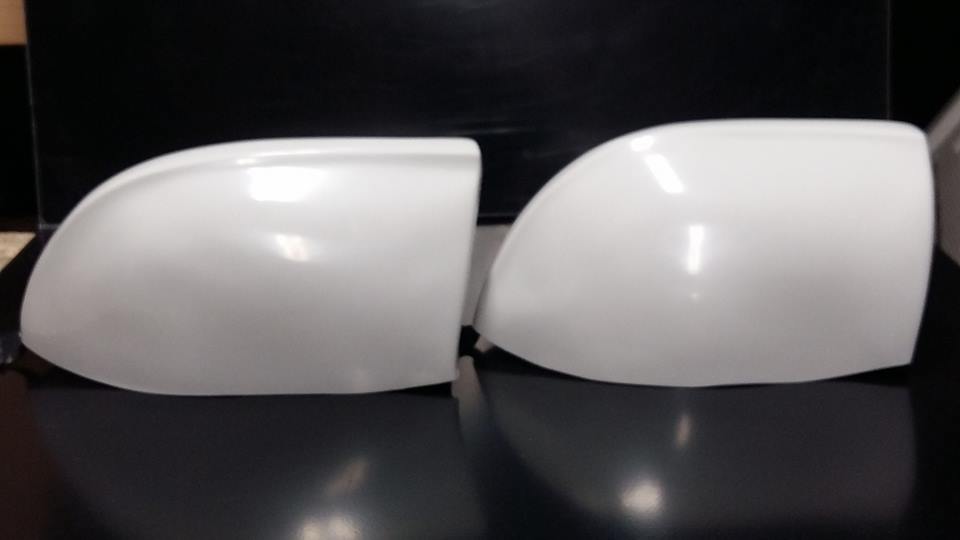
Try not to trim your shoulder bells in a straight line like you would if you followed your yellow tape. The real ANH shoulder bells were trimmed in a curved shape. Here are a pair of my bells to show you how to trim them, although I went for a wonky look and you might want to keep them a bit neater Trimming them in a curve really helps with the overall look and reduces gaps.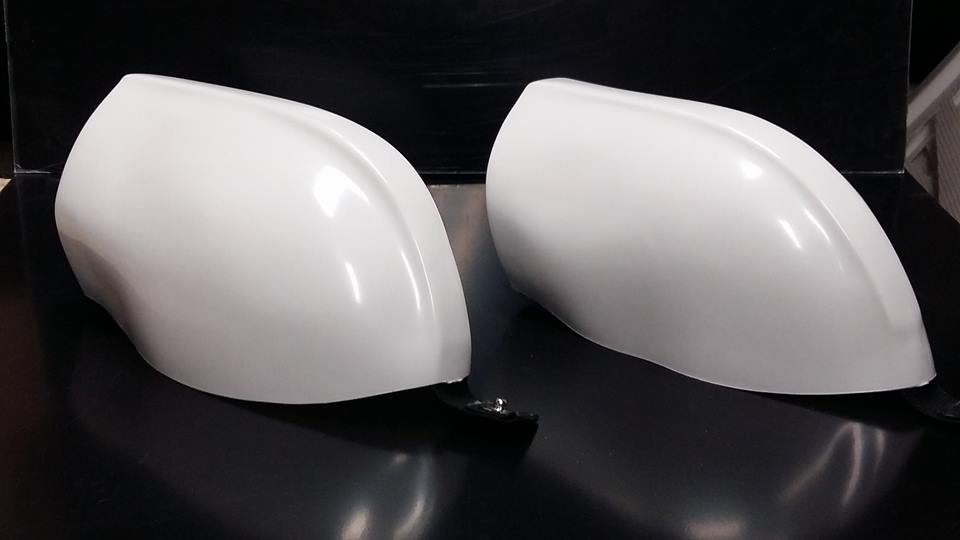
-
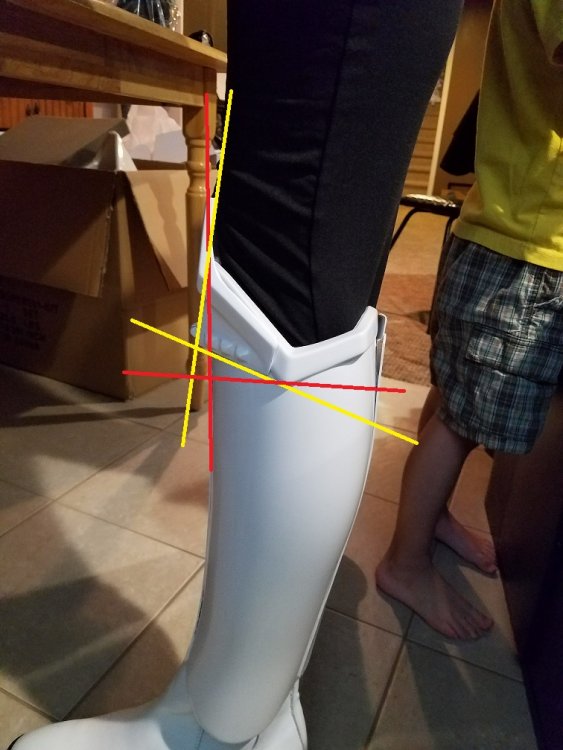
The problem with your knee plate digging into your knee is because it is not fitted properly. The plate wants to be flat against the joining strip following the red lines in the image, not angled inward following the yellow lines like you have it.
-
Yes, I have a large roll of the original material.
-
Hi guys, Here are some photos of a helmet I recently finished. I hope you like it! Cheers, Paul.
-
Mikes TM 2mm ANH Stunt build
troopermaster replied to Mikeyg's topic in Build Threads Requireing Maintenance
The flexible shaft is worth it's weight in gold -
Mikes TM 2mm ANH Stunt build
troopermaster replied to Mikeyg's topic in Build Threads Requireing Maintenance
I use this bit in my Dremel. I use tin snips to do most of the trimming and then the Lexan scissors for smaller cuts. This bit does a great job and lasts forever, but be careful when using it (or any other bit) as any slips can mark or damage the armour. After using the bit to do the fine trimming to my pencil lines, I scrape off the burrs with a sharp knife then sand smooth with fine sand paper. I find this process to the best technique for trimming the 2mm ABS. -
Sean's WTF ANH stunt build (first time builder!)
troopermaster replied to Seansull's topic in ANH Build Threads
Use whatever size strips you need to make the biceps comfortable on you. The strips do not need to be the same widths on the biceps and forearms, though they would ideally, but in reality it's not always possible. If you need to make them wider than usual then I would keep both sides the same width be it 25mm, 20mm, whatever