
TKSpartan
-
Posts
5,720 -
Joined
-
Last visited
-
Days Won
32
Content Type
Profiles
Forums
Gallery
Articles
Everything posted by TKSpartan
-
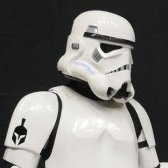
TK SPartan TFA FOTK Build Thread (KB Props)
TKSpartan replied to TKSpartan's topic in TFA Build Threads
I have practiced a lot with the D.O. 's Coloring Book -
TK SPartan TFA FOTK Build Thread (KB Props)
TKSpartan replied to TKSpartan's topic in TFA Build Threads
the best part is about to come -
Looking Great !! Easy pass
-
TK SPartan TFA FOTK Build Thread (KB Props)
TKSpartan replied to TKSpartan's topic in TFA Build Threads
TD BASEPLATE , AB AND BELT BOXES. TD BASEPLATE Trimmed and Sanded ALL BOXES AB BOXES ORDER AND SIZE BELT BOXES BELT BOXES ORDER REFERENCE IMAGE Return to Index -
TK SPartan TFA FOTK Build Thread (KB Props)
TKSpartan replied to TKSpartan's topic in TFA Build Threads
LEGS SECTION THIGS (same trimming both thighs) Trimmed and Sanded KNEES Trimmed and Sanded SHINS Trimmed and Sanded SPATS Trimmed and Sanded Return to Index -
TK SPartan TFA FOTK Build Thread (KB Props)
TKSpartan replied to TKSpartan's topic in TFA Build Threads
it's always a dirty start , trimming and sanding, looks like you'll never end . This last weekend I think I have finished trimming and sanding, (at least the first part before assembling adjustment that usually require some more trimming. ) I need to upload the Legs section. In a minute -
TK SPartan TFA FOTK Build Thread (KB Props)
TKSpartan replied to TKSpartan's topic in TFA Build Threads
ARMS SHOULDER BELLS Trimmed and Sanded BICPES Trimmed and Sanded FOREARMS Trimmed and Sanded FOREARMS COVERS Trimmed and Sanded FOREARMS BOXES Trimmed 1,5 mm Trimmed and Sanded HAND PLATES Trimmed and Sanded Return to Index -
Dremel Bit Recommendations
TKSpartan replied to xXMjollnirXx's topic in Getting Started - Read this First!
Hi Gracie, welcome to FISD. If I can make a suggestion, an additional tool you can use to trim some pieces is this kind of scissors : At least to me, it has worked great. -
Welcome to FISD Robin, looking forward to see some photos of your build. We are here to Help!!
-
ESB TK WIP - UKG - first build - hoping for centurian
TKSpartan replied to CallMeMrTibbles's topic in ESB Build Threads
Looking great Trooper ! -
ESB TK WIP - UKG - first build - hoping for centurian
TKSpartan replied to CallMeMrTibbles's topic in ESB Build Threads
The comments about the abs belt are Joseph's. Take a look back in this thread. -
ESB TK WIP - UKG - first build - hoping for centurian
TKSpartan replied to CallMeMrTibbles's topic in ESB Build Threads
None question is contentious in any way Richard, make all the questions you have with confidence, our main goal in the FISD is to Help . About the Canvas belt, the CRL states fot L3 Canvas belt can not contain patches of any sort. Canvas belt must be firm / sturdy in appearance. No creasing or sagging You can put the abs piece as you need but this must be not noticeable and please remember Joseph 's las recommendations some days ago about the AB Belt. CRL L3: The corners of the plastic ammo belt shall be trimmed at a 45 degree angle that that meets the outer edge of the cloth belt. "Also, when attaching your canvas belt to the ABS belt, remember that the lower angle of the 45 degree corners need to line up with the top and bottom of the canvas belt as seen below, and the button covers should not have too much space between them and the ends of the belt (green arrow)." Reference image You can also check this Trooper's solution to the same issue. Hope this can help -
Welcome Joe, looking forward for your BBB day photos.
-
ESB TK WIP - UKG - first build - hoping for centurian
TKSpartan replied to CallMeMrTibbles's topic in ESB Build Threads
Hi Richard, the photo you posted after the sniper knee trimming looks good to me, just a few adjustment is needed to fit better. As Joseph explained, different makers have some details that fit better than others . In this case RWA Armor allows to fit the sniper knee in a great manner, (I have done) . My suggestion was made in order to reduce, (not eliminate it cause is very difficult), a bit more the gap between the Sniper Knee and the Cover strip while keeping the alignment with the ridges. First photo Second Photo Original Gap I apologies if I wasn't clear and made you buy extra pieces. We are here to help and serve every step on the way and we'll be more than happy when you achieve the Centurion Badge under your name as we imaging the smile of pride in your face. Additionally , let me say you're doing a great work posting photos and making questions before taking the step. Keep it up. -
ESB TK WIP - UKG - first build - hoping for centurian
TKSpartan replied to CallMeMrTibbles's topic in ESB Build Threads
Do you have some pic? -
ESB TK WIP - UKG - first build - hoping for centurian
TKSpartan replied to CallMeMrTibbles's topic in ESB Build Threads
Hi Richard, glad to see your new sniper knee. When making a review, we consider not only the CRL as it but the screen Reference images . OPTIONAL Level two certification (if applicable): Sniper knee plate must be aligned with the ridges on the shin. REFERENCE IMAGES This is a recent build I made with a RWA Kit, as you can see the Snipper knee aligned with the ridges and closer to the cover strip. In your case , I would suggest you can trim the corners a little to allow the sniper knee to get closer to the cover strip and keeping the ridge alignment too. You could try trimming little by little . The 1mm abs thick could be easy to adjust. -
Polishing Kidney Shims - Dremel Buffer?
TKSpartan replied to Bullseye's topic in Assembly, Mods, and Painting
Hi Dave, first of all congratulations for your weight goal ! I think I need a bit drop off weight too. . for polishing my armor I have used car polish , some soft fabric and physicals power , why this?, using a Dremel could cause the plastic to melt a bit in some places , I think you could try some test in a scratch piece of abs plastic first. -
TK Monkus' RS Prop Masters ANH-S Build Thread (first build)
TKSpartan replied to TK Monkus's topic in ANH Build Threads
Hi Matt, What I do most of the time when building the thighs is : 1- to leave the 10mm each side in the front, it doesn't have to be perfect and usually there's a little ridge out. 2- Place and glue the cover strip. Only the front. 3- Using Painters tape , and with some help if possible, to adjust the back to my size and trace the line to cut. Reference Image. you can see a little ridge What I do to adjust the thigh in the back. Yelow lines mark the original thighs section before trimming. I would suggest to post a photo before trimming to be sure of the front and back. hope this can help you . -
Welcome Trooper !! Great looking armor.
-
Welcome to FISD . Good luck with your project.
-
TK SPartan TFA FOTK Build Thread (KB Props)
TKSpartan replied to TKSpartan's topic in TFA Build Threads
My prefered method for every armor build I make is usually about the same: 1- Triming and Sanding All 2- Painters Tape pre asemble, test fit 3- Measure, Adjust and Glue, test fit 4- Assemble , Test fit 4-Add details (Rivets, Greeblies etc.) test fit 5- Final Test Fit TRIMMING Ready to start, Reference Gallery, Build threads from others fellow troopers, a Imperial Cup of Tea and of course Scissors and tons of plastic ahead Note: I'll try to be the more simple an clear as I can Lets start form Top. This sections has some excess of plastic both sides and I'll trim the low front section in a conservative way till the moment I start assembling. ABDOMEN Trimmed and Sanded CHEST Trimmed and Sanded CHEST COVER Trimmed and Sanded BACK SECTION Trimmed and Sanded KIDNEY SECTION. Trimmed and Sanded I'll make the middle cut later when assembling. BUTT SECTION. Anovos like Trimming. Trimmed and Sanded COD SECTION. Trimmed and Sanded Return to Index -
BlueBoxFromSpace ATA ANH Stunt (first build)
TKSpartan replied to BlueBoxFromSpace's topic in ANH Build Threads
Hi, the covers are right sanded, I would suggest two options you could try: 1- Replace the snap for chicago screws, they have a flat surface so you can place the cover just in place. 2- Change the Snap piece , use the flat one instead of the cap one. Hope this can help. -
ESB TK WIP - UKG - first build - hoping for centurian
TKSpartan replied to CallMeMrTibbles's topic in ESB Build Threads
For tall Troopers is not a problem. -
ESB TK WIP - UKG - first build - hoping for centurian
TKSpartan replied to CallMeMrTibbles's topic in ESB Build Threads
In your case, you're in the right path. -
ESB TK WIP - UKG - first build - hoping for centurian
TKSpartan replied to CallMeMrTibbles's topic in ESB Build Threads
What we are looking is the thighs and shins cover strip alignment.
