

msouza
-
Posts
761 -
Joined
-
Last visited
Content Type
Profiles
Forums
Gallery
Articles
Everything posted by msouza
-

TK16003 Requesting ANH Centurion Status [452]
msouza replied to Denis09's topic in Request Centurion Status
Hi Denis, Thanks for your application for Centurion, always great to see your fellow troopers go for our highest level! CRL and Centurion Application Requirements All required photos are now in and, after review, we are pleased to welcome you to Centurion! On behalf of the DO team and myself, many congratulations! Other-Armor Fit/Assembly In this area we discuss areas that could benefit from additional improvement. Note that we consider both text (CRL) and pictures (screen caps/reference images) when reviewing submissions. And just like your EIB application we'll work from the top down. Lets start by taken a look at the traps on your helmet. I'm not sure if its the angle & lighting but it seams to be creeping up over the radius edges. Take a look at the photo of yours vs the screen used bucket and you'll see what i'm referencing. Reference Photos Next up well move on to your shoulders. Great job on taken Josephs advise you really got them where they need to be. What I'm talking about is the alignment of your right bicep to help you get that right up against your chest armor. While dressing just do a double check that the raised ridge on the bicep is lined up with the ridge on the shoulder,this should bring them in that last bit to give you that just stepped out of the Imperial Propaganda Poster look. Reference Photo I'll also point out that it looks as if you could use to pull up/down on your sleeves a bits as well or it might have gotten caught on the elbow. Again just a quick once over before stepping out into the Emperors Lineup . Lastly I'm going to point out your calves and again its just a simple alignment and making sure you look your absolute best and ready for Lord Vader's Inspection. The right one is spot on but the left could be in a little bit. Again its a simple look in the mirror or having your handler giving you a once over to make sure everything is in place. Reference Photo That should do it, great job on making the adjustment that your fellow troopers called out, the smallest detail can make a huge difference, congratulations & welcome to Centurion Trooper. -
TK16003 Requesting ANH Centurion Status [452]
msouza replied to Denis09's topic in Request Centurion Status
Enjoy the rest of your vacation!! -
TK16003 Requesting ANH Centurion Status [452]
msouza replied to Denis09's topic in Request Centurion Status
Sorry to be such a stickler but one last thing before we "move along" Looks as if your forearms return edge could use a little more work with the Dremel and as Joseph pointed out Per the CRL "No return edge on the inside of the front of the forearm is allowed." Once you post up new photos of them we can continue. Reference Photo -
Welcome Back Dave, Once you get the photos figured out we can begin!
-
TK76271 requesting ANH Stunt Centurion status [AP] (454)
msouza replied to MissionTrooper's topic in Request Centurion Status
Andrew, A couple things minor issues before we can continue. First item would be your belt drop box's. Per the CRL " Drop boxes are vertically aligned with the end of the ammo belt with minimal gap between belt and box." the first photo showing your belt laid out the drop boxes are lined up as they should be. Its in the second photo with your arms raised when it moves up. Like Glen pointed out nothing a little E-6000 cant fix and this way you'll always pass the Emperors Inspection Reference Photos Once you get the drop box's taken care of I'll need a new front facing photo with your arms by your side so can check for proper alignment of them I'm showing the CRL Model as a reference so you know what pose I'm looking for . Reference Photo Thanks -
TK 16003 ANH EIB Status APPROVED (TM) (941)
msouza replied to Denis09's topic in Request Expert Infantry Status
Hi Denis, Thanks for your application for EIB. Its always great to see your fellow troopers aiming for that little extra all while helping us reach our goal of 1000 EIB troopers! CRL and EIB Application Requirements All required photos are now in and, after review, we are pleased to welcome you to Expert Infantry rank. On behalf of the DO team and myself, many congratulations! Other-Armor Fit/Assembly In this area we review observations made by your fellow troopers and the DO team. Some observations may lead to suggestions to improve the overall look of your armor. Note that we consider both text (CRL) and pictures (screen caps/reference images) when reviewing submissions As with all reviews I like to work my way from the top down and and suggest things that'll help you achieve expert infantry and hopefully Centurion! First up is your helmet, It looks as if you could bring the brow trim up just a bit. If you take a look at the reference photo you'll see how there's about a 9 to 12 mm gap in between the top of the eyes and brow. Should be relatively easy fix, first would be to check the brow gasket hasn't slipped down Reference Photo Staying with the helmet my next suggested change would be your ear placement. Now this one is not as easy as the brow fix and its just a suggestion but hey you've built the armor so we have every bit of confidence that you can handle it. Take a look at the placement on the reference phot and you'll notice that they follow the angle of the temple trap. Reference Photo Next thing I'll point out is your shoulder straps, the right one in particular looks as if the elastic could use to be a little tighter or you might want to consider re-positioning it to help keep it aligned with your back plate. Reference Photo Last thing I'll touch on & point out is to watch for alignment issues. This could simply be from moving around and shifting things prior to taken photos but its always a good idea to have a fellow trooper give your armor a look over beforehand to give us that Empire approved look. . Reference Photo Centurion Requirements In this section we prepare you for Centurion. More photos may be requested in the future that allow us to make better decisions on possible adjustments. If there are any areas of concern they will be discussed here. Because Centurion photos show much more detail than EIB, items to pertaining to Centurion might be seen there and not here. We try to point out all that we can from what is seen, but the final accuracy is the responsibility of the trooper. First up would be your shoulder bells, take a look at the gap between your bicep and shoulder bell and try to minimize the gap between them and honestly that looks like it should take care of the gap between the shoulder armor and chest and back plate. You could also try by getting rid of the return edge on the shoulder bells and this will bring them in as well. Reference Photo Next we'll look at you pinstripes on the helmet and you can see that yours are much higher/longer than any reference photo and should be an easy fix before applying for Centurion. Your blaster has heavy weathering and the T-tracks look bent and misshaped. Painted black it might not be as visible. And that should do it. Real nice job on applying the fixes that your fellow troopers pointed out and over all its a pretty clean build. The Shoulders will be your main blocker for Centurion but with the skills you've shown here to reach EIB leaves no doubt in my mind i'll see you at the next level. - congrats, see you at Centurion -
TK42250 Requesting ANH Centurion Status (Anovos) (447)
msouza replied to alotmorestuff's topic in Request Centurion Status
Hi Josh, Thanks for your application for Centurion. We always appreciate seeing our fellow troopers aiming for our highest level. CRL and Centurion Application Requirements All required photos are now in and, after review, we are pleased to welcome you to Centurion! On behalf of the DO team and myself, many congratulations! Other-Armor Fit/Assembly In this area we discuss areas that could benefit from additional improvement. Note that we consider both text (CRL) and pictures (screen caps/reference images) when reviewing submissions Just a couple minor suggested fixes that we here at the Deployment Office would like to see. Looks as if you could touch up the paint on your D ring Also looks as if you could use a little adjustment on your thighs to get them a little higher about an inch or so. I know on mine I had to get rid of close to all the return edge I've put you next to the CRL model and you can see how it looks comparison The last thing that draws my eyes are your shins, I would like to see a bit more taper to them and it'll give those rebel scum less of a target. Reference Photo You were my first EIB application and as Sha Sha said I've might have had you jump through a couple extra hoops then required but the payoff is a really clean build and an great set of armor. - congratulations trooper & welcome to the ranks of Centurion! -
TK42250 Requesting ANH Centurion Status (Anovos) (447)
msouza replied to alotmorestuff's topic in Request Centurion Status
Just got everything back from the other DO’s give me 24hrs -
TK 16003 ANH EIB Status APPROVED (TM) (941)
msouza replied to Denis09's topic in Request Expert Infantry Status
Denis, I'm going to require a fix before we can continue, Per the CRL for Level 2 (EIB) "D-ring mounted on the rear." Should be a quick and easy fix , once installed post up a new photo and we can continue to get you approved! -
TK42250 Requesting ANH Centurion Status (Anovos) (447)
msouza replied to alotmorestuff's topic in Request Centurion Status
Hi Josh, Great to see you back & going for Centurion. Your next in line for me so give me a couple days and we'll get this going! -
TK-14292 Requesting TK Commander Centurion Status (AFP) # 444
msouza replied to Aizenoso's topic in Request Centurion Status
Hi Rodrigo , Thanks for your application, its always great to see fellow troopers wanting to take their armor to the highest level. CRL and Centurion Application Requirements All required photos are now in and, after review, we are pleased to welcome you to Centurion! On behalf of the DO team and myself, many congratulations! Other-Armor Fit/Assembly In this area we discuss areas that could benefit from additional improvement. Note that we consider both text (CRL) and pictures (screen caps/reference images) when reviewing submissions Like I said in your EIB application, weathering is open to interpretation and you have added some and I get that you want it to happen naturally. I would try to rub up against the right shoulder a little as well, Reference Photo Same with your belt. I know you've replaced it but would like to see a little aged look to it as well as Its a bit bright compared to the rest of the armor. You'll notice how the belt on the CRL model blends in with the Kidney Armor Reference Photo Last thing would be your sniper knee. You may want to trim the tops to follow the ridges along the top of the shin armor. And that should do it. I want to say congratulations and welcome to the ranks of Centurion, now go do the Emperor Proud Trooper! -
TK-14292 Requesting TK Commander Centurion Status (AFP) # 444
msouza replied to Aizenoso's topic in Request Centurion Status
Rodrigo, Thank you for all your patience with your application I really do appreciate it. After discussions with my fellow Deployment Officers the one fix I'm going to ask for before we finalize your application will be your neck seal. I know it seems like a small detail but we would like to see this in one piece. You've done a great job in quickly rectifying all the suggested fixes and I would hate to see something like your neck seal keep you from reaching Centurion. -
TK 16003 ANH EIB Status APPROVED (TM) (941)
msouza replied to Denis09's topic in Request Expert Infantry Status
Denis, I'll need the following photos before I can continue. 1) Cod and Butt Plate Attachment including photos on the snaps inside and out. 2) Right side details-Arms Raised 3) Left side details-Arms Raised Thank you -
TK 16003 ANH EIB Status APPROVED (TM) (941)
msouza replied to Denis09's topic in Request Expert Infantry Status
Hi Denis, Could you post the following photos for me, 1) The right side of your helmet showing the entire helmet 2) Right side details-Arms Raised 3) Left side details-Arms Raised Thanks -
TK-14292 Requesting TK Commander Centurion Status (AFP) # 444
msouza replied to Aizenoso's topic in Request Centurion Status
Not at all just finished up and it’ll go in for review tonight so you should be wrapped up shortly. Please keep in mind that we do these in order they’re received and sometimes Darth Reallife shows up from time to time, I had a potential hurricane off the coast put me behind about a week and I’ve just about caught up. Thank you again for your patience. -
TK-14292 Requesting TK Commander Centurion Status (AFP) # 444
msouza replied to Aizenoso's topic in Request Centurion Status
Rodrigo, Can you post a picture of your thermal detonator control panel showing the detail. Thanks -
TK- 98695 Requesting ANH Hero EIB Status (SDS) [935]
msouza replied to Helotech's topic in Request Expert Infantry Status
You can contact Walt from Walt’s Trooper Factory, his info is on the where to get armor from thread, he made two sets of bells standard & large,not sure how the color will match but he makes them -
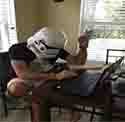
Hello Florian, Looks like you've gotten some great advise from your fellow troopers. Please upload the following photos, Once I get these we can continue. * Front and both sides of the knee sniper plate * Thigh ammo strip rivets outside and inside * TD showing front panel * D ring on rear of blaster * Closeup of shoulder straps (front and back) * Closeup of your ab buttons * Closeup of your hand plates * Closeup of belt * Closeup of boots
-
TK-14292 Requesting TK Commander Centurion Status (AFP) # 444
msouza replied to Aizenoso's topic in Request Centurion Status
Hola rodrigo Muchas gracias por su paciencia en su revisión, como decía que Darth Real Life se interpuso en el camino, pero todo está claro y estamos listos para continuar. Solo un par de días y tendremos esto terminado. -
TK- 98695 Requesting ANH Hero EIB Status (SDS) [935]
msouza replied to Helotech's topic in Request Expert Infantry Status
Hi Dave, Thanks for your application for EIB, and for helping us get that much closer to our 1000th EIB trooper! CRL and EIB Application Requirements All required photos are now in and, after review, we are pleased to welcome you to Expert Infantry rank. On behalf of the DO team and myself, many congratulations! Other-Armor Fit/Assembly In this area we review observations made by your fellow troopers and the DO team. Some observations may lead to suggestions to improve the overall look of your armor. Note that we consider both text (CRL) and pictures (screen caps/reference images) when reviewing submissions. As with all reviews we like to start from the top and work our ways down. Remember everything in this section is a suggestion that we feel make your armor that much closer to screen accurate.Some use it as a check list to complete while some do not. The choice is your. With that said, you ready? The first thing I'll call attention to the bottom screw on the right ear. The correct screws are used but I think you could countersink the bottom. Using a larger drill bit and ream by hand so you don't go through the original hole and have complete control and help set that a little flatter. The third photo I've attached is what I use to countersink on all my builds. Its really a great kit to have in your tool box to help get rid of all those nasty pinch points and armor bites. I got mine from mcmaster carr but amazon carries them as well. Reference Image Next I'll move onto your ab section and as your fellow troopers pointed out your ab buttons could use a trim. Reference Photo Onto your Kidney/Butt plate, again your fellow Troopers pointed out that you could adjust your strap a little.(Troopers helping Troopers)... On the back I used doubled over elastic as opposed to nylon just to give it the ability to go back into place after a bit of movement. . Reference Photo Also be sure to check the alignment when fastening your shins and try to keep that clean line. Reference Image Centurion Requirements In this section we prepare you for Centurion. More photos may be requested in the future that allow us to make better decisions on possible adjustments. If there are any areas of concern they will be discussed here. Because Centurion photos show much more detail than EIB, items to pertaining to Centurion might be seen there and not here. We try to point out all that we can from what is seen, but the final accuracy is the responsibility of the trooper. Just like EIB we'll work from the top down with the difference being requirement vs suggestion. Everything called out will be required fix's. Per the CRL: "There should be a minimal gap between the shoulder armor and the chest/back plates." The front look good but I would like to see the gap closed up on the back side. Reference Photo Reference Photo We're going to go back and address your ab details mainly the buttons. Per the CRL: "Ab button paint shall not extend beyond the bottom of the actual raised button." "No separate buttons are allowed." Looking at your ab buttons most of them are good to go (circled in green) but I will require that the ones circled red be addressed. This can be taken care of with a toothpick & mineral spirits. Dip the toothpick and use it as a eraser to shrink the painted buttons I will ask for a side detail shot of the buttons as well. Next up will be your abdomen section. Per the CRL; "Ideally there no gap between the abdomen and kidney armor. Abdominal and Kidney Plate align horizontally at top. A single visible seam line is present." Your so close to getting that gap closed up, great job on the weight loss. I don't believe you need to shim it either but I would highly suggest you follow the advise of your fellow troopers with the doubled over elastic strap as it helps pull the two together. I lost over 80 lbs to get into my armor so I know what your going through with that one. This is a top notch build just a couple minor adjustment and we'll get you on to the next level - congrats, see you at Centurion!! -
TK- 98695 Requesting ANH Hero EIB Status (SDS) [935]
msouza replied to Helotech's topic in Request Expert Infantry Status
Dave, The only thing standing between you and EIB is your under suit. Per the CRL for basic approval UNDER SUIT Black non-textured material, either one-piece or two-piece construction with no visible zippers or logos. There happens to be a great thread on this subject that can be found here. Once you get this removed please re post new photo of it. I wont make you get suited up but will need to see it completed before proceeding. -
TK- 98695 Requesting ANH Hero EIB Status (SDS) [935]
msouza replied to Helotech's topic in Request Expert Infantry Status
Dave, Thanks again for your patience. Now that hurricane Dorian is out of the area I can get back to normality and that includes getting you approved for EIB. Promise I'll get this review done by the weekend so hang in there I'll be right with you. -
TK-14292 Requesting TK Commander Centurion Status (AFP) # 444
msouza replied to Aizenoso's topic in Request Centurion Status
Hola Rodrigo good to see you going for Centurion!! I'll be with you shortly but living in Florida I have to deal with this crazy Hurricane that doesn't know what way it wants to go..... Hang in there trooper. Gracias -
Looks like you've got the A team on it Christian, You couldn't be in better hands then with these two troopers. Who's the armor maker? If all else fails I think I have a extra set of WTF ears if you need them.
-
Hey Derek Thanks for your application for EIB and helping us get that much closer to our March to 1000. Always great to see a fellow Makaze member go for higher ranks as well. CRL and EIB Application Requirements All required photos are now in and, after review, we are pleased to welcome you to Expert Infantry rank. On behalf of the DO team and myself, many congratulations! With all reviews we like to start at the Helmet and work our way down, keep in mind that whatever we point out are suggestions that we feel will make your armor look better. Some take them and go through them like a task list to complete them all and some do not, its entirely up to you. Lets get started shall we? Other-Armor Fit/Assembly In this area we review observations made by your fellow troopers and the DO team. Some observations may lead to suggestions to improve the overall look of your armor. Note that we consider both text (CRL) and pictures (screen caps/reference images) when reviewing submissions Great job on the frown fix that Mario has pointed out. And while your deploying the toothpick eraser trick to your frown area it looks as if you can also apply it to your vocoder. In my opinion this is probably the the hardest thing to paint cleanly by hand. I found it hard to get a steady hand position and had to do the same. A little elbow grease and a drop of mineral spirits goes a long way, I actually outlined mine with a permanent black marker to get the clean outline then just painted in the lines. Reference Photo Next up would be your ear placement. This is by far one of the most overlooked area on the helmet and I believe its because everyone is worried about the fit. Most tend to put them in a vertical position when they should follow the live given by the Trap on the temple area. I would consider this an intermediate fix because it will probably require ABS paste to fill the holes. But hey you've built this set of armor so I have all the confidence that you can do it. Reference Photo Next we'll move onto your Mid section, First thing to look out for will be the thermo detonator location as this is more of a alignment issue. Try to keep in mind that this armor was built to show off its clean and simplistic line. It's a;ways good practice to have a clan member or handler give a visual to make sure everything in in its place. Use the raised area as a guide and try to feel the ends of the thermo det are in line with them up with them. Reference Photo Next I want to draw attention to your butt plate, I think this is a combination of your COD strapping being a bit to long and the strap on the far right being long or could need to be moved a to the right a bit more to help keep it in the proper position. By shoring up that cod strap it'll help pull that in the correct position as well. Reference Photo Centurion Requirements In this section we prepare you for Centurion. More photos may be requested in the future that allow us to make better decisions on possible adjustments. If there are any areas of concern they will be discussed here. Because Centurion photos show much more detail than EIB, items to pertaining to Centurion might be seen there and not here. We try to point out all that we can from what is seen, but the final accuracy is the responsibility of the trooper. First adjustment would be your shoulder. Per the CRL: There should be a minimal gap between the shoulder armor and the chest/back plates. I would start by trimming off the return edge and check the fit before adjusting the straps Reference Photo Next I will require that you clean up the ab buttons and make them a bit smaller Per the CRL; Ab button paint shall not extend beyond the bottom of the actual raised button. You can pick up a stencil at any craft store and use it to mark out the correct sizing prior to cleaning up. Reference Photo These are the two major issues that would keep you from reaching Centurion but like I said earlier you built this armor so I have all the confidence that you can achieve it with a little more work. It may seem overwhelming but I like to print the list and go through them one by one checking them off so I can visually see what required. From all of us here in the Deployment Office at FISD Welcome Trooper & Great Job
