

spyder918
-
Posts
255 -
Joined
-
Last visited
Content Type
Profiles
Forums
Gallery
Articles
Everything posted by spyder918
-
 Please consider my application for ANH Stunt EIB Status Name: Hugh 501st ID: TK-21874 501st Member Page: http://501st.com/members/displaymemberdetails.php?userID=23211 FISD Forum Name: Spyder918 Garrison: Golden Gate Garrison Height: 5' 7 Weight: 185 lbs Armor: AP Helmet: AP Hand Plates: JustJoseph63 Neck Seal: Darman Belt: Kittell Holster: Darman Boots: Imperial Boots Blaster: Hyperfirm
 -
TK21874 requesting access - Golden Gate Garrison http://www.501st.com/members/displaymemberdetails.php?userID=23211
-
HOWTO: Another way to do lenses
spyder918 replied to spyder918's topic in Tutorials, Tips and HOWTOs
Just wanted to add a few updates to this. I decided to go a little different route with the studs. Instead of 'fake studs' I wanted to install some real screws to hold on the outer frame. So I removed all of the 'fake studs'. I drilled holes into the the outer frame, the lens, and the inner frame around each eye. I decided to go with torx screws to give it a more industrial look and I used aluminum standoffs for them to screw into. I bought all of the hardware from McMaster-Carr. I installed the standoffs in each hole and they were held in with CA glue to ensure a strong hold. Here is a pic of the black torx screw and aluminum standoff. Below is a pic with all of the standoffs installed in the inner frames. Once everything was dried and aligned, I re-glued the frames back onto the helmet using E6000. Here is the finalized look with all the parts bolted on. And another angle. -
HOWTO: Another way to do lenses
spyder918 replied to spyder918's topic in Tutorials, Tips and HOWTOs
Thanks Michael! -
What is everyone using for nomex gloves for trooping
spyder918 replied to nukem25rs's topic in ANH (Stunt and Hero)
Found this thread about gluing guards to Nomex gloves<br> <a data-ipb='nomediaparse' href='http://www.whitearmor.net/forum/topic/19798-glueing-white-rubber-hand-guards-on-nomex-gloves/page-3?hl=nomex'>http://www.whitearmor.net/forum/topic/19798-glueing-white-rubber-hand-guards-on-nomex-gloves/page-3?hl=nomex</a> -
HOWTO: Another way to do lenses
spyder918 replied to spyder918's topic in Tutorials, Tips and HOWTOs
-
HOWTO: Another way to do lenses
spyder918 replied to spyder918's topic in Tutorials, Tips and HOWTOs
Thank! No issues with them fogging up. I do have fans but also because the outside lens frames aren't completely sealed, air is able to flow in between the outside frames and the lenses. -
HOWTO: Another way to do lenses
spyder918 replied to spyder918's topic in Tutorials, Tips and HOWTOs
Thanks! -
HOWTO: Another way to do lenses
spyder918 replied to spyder918's topic in Tutorials, Tips and HOWTOs
This is an earlier pic but just so you can see what they looked like without all of the clamps and magnets Next, I took the frame for the frown and sanded it down. I made studs for the frame by using the leather hole punch tool and punched out a bunch of 'studs' with the leftover .40 size black styrene. I believe I used the hole size that was a few clicks from the largest hole, I don't remember. Then I took each stud, taped it on a piece of blue tape and lightly sanded the tops with some fine sandpaper just to soften the edges to mimic actual studs. I then took some angled tweezers for placement of the studs and using Testor's glue (orange tube) I glued each one on the frame. After a day of drying I used Rustoleum Flat Black and sprayed the entire frown frame. I also sprayed the eye frames using Model Master paint in Guards Red. I also wanted to use the same studs for the eye frames. To make them stick better, I used my dremel to sand down the paint for each stud for better adhesion. It was fairly easy, it was just very time consuming. I placed all the studs on some a strip of blue tape and sprayed them with the same Rustoleum Flat Black paint. I used the same Testors glue and same tweezers to carefully glue each stud. I also did a second set of eye frames just for kicks in a charcoal grey color. During this process I also painted the inside of my helmet a Satin Black. Here you can see where I've removed the blue masking tape from earlier. Next I took some of the pet/insect screen to create the frown screen. I found it easiest to glue the screen first before gluing the frame. It made placement easier and also, it allowed me to really shape the screen tightly around the teeth as the glue dried. I used the Testors glue in the corners and center since it dried faster than the E6000 but then used the E6000 for the other areas. I let it dry for about an hour. I then glued the frame onto the frown with E6000 and magnets to hold it in place. I set the magnets in the center first so I could keep the seal as tight as possible and then worked my way out to the edges, pushing each part of the frame as I stuck the magnets on. After about a day and a half here's what it looked like and the seal is quite tight. Here you can see where I removed the masking from the eye sockets. Again I did this so when I glued the lenses, it would have better adhesion to the unpainted putty. I didn't capture any pics of the gluing of the lenses, but it was fairly straight forward. I used E6000 along with the same clamps and magnets used before. I then used velcro for the outer frames so I can swap between the different colors. I'll probably end up gluing the outer frames later when I finally decide what color I like best. I learned a lot with this mod but at the same time I don't think I would do this again, haha. It was a lot of work! But then again that's true with the rest of our armor as well. Good luck to you if you decide to do this and I'll try my best to help out where I can. Thanks for looking! -
So a while back I saw a post of the interior of a helmet done by TK4205. I thought the way he did his lenses was just awesome. Here's a link to the his post so you can see what I'm referring to: Post #5 - http://www.whitearmor.net/forum/topic/30454-whats-inside-your-bucket/?hl=tk4205 I was determined to do this with my lenses as well. I spoke to him to get the details on exactly what he did and I tried my best to document this below for anyone else that may want to do this. I noticed a few asking for a tutorial as well. This is my first attempt at doing this, so forgive me if anything isn't clear. I'll try my best to explain/clarify if need be. Again, I take no credit for coming up with this. This was something I copied from what TK4205 did. I also did a few things a bit differently than TK4205. Below is my mini BBB with the arrival of my fully assembled AP helmet. The rest of my armor will be built by someone in my local garrison as I just don't have the time, as much as I'd like to do it. I don't want to say who it is just in case he's not comfortable with me saying it, but he's quite famous on FISD for his phenomenal builds My AP helmet in all of its glory So here's a list of everything that you'll need to do this mod. Some of these things you probably already have and some things I used to just be more helpful for me. JB Weld PlasticWeld putty - 2 tubes Glass bottle Mixing bowl Parchment paper Mask and goggles Dremel Heat gun or hot bath method (up to you and what you're comfortable with) Heat resistent gloves Leather hole punch tool Snips for cutting styrene Few sheets of styrene .30 and .40 sizes Blue masking tape Sandpaper - Fine: 300-400 grit Rustoleum paint/primer - Flat Black Model Master spray paint - Guards Red Chopstick (round not squared off) or something similar Vaseline Welder's shield in green Sharpies - 1 silver and 1 black (small tipped) or something similar Testor's glue (orange tube) E6000 Black pet/insect screen material Below is the JB Weld I used along with the type of bottle I used. You're probably wondering what in the world the Vaseline is for..haha. Here you'll see why. Take some Vaseline and rub it around the sockets of the eyes. I put some on the surrounding edges of the sockets as well as on the helmet. Basically you want to put it on all the areas where the frame of each eye socket will sit. I used Vaseline so the putty doesn't stick to the helmet as you'll see in the next step. Take the JB Weld putty out of the tube. The putty is what will become the frame for the lenses. Start to mix the putty with your hands. You can refer to the directions on the packaging also. I noticed dipping your hands in a little water periodically helps too as the putty is sticky and it dries pretty fast. You'll notice the putty has an inner layer that needs to be mixed with the outer layer. So I would roll it into a ball and try to knead the putty. I would also roll it, stretch it, wrap the 2 ends together and then twist it to better mix the layers. You'll know it's enough when the colors of the 2 layers eventually blends into one. Once you have it shaped into a nice roll as shown above, shape it around the eye socket. Make sure the putty sits a bit higher than the edge of the eye socket. Don't worry about it being too pretty at this point. Just make sure it evenly covers all areas of the eye sockets. Take the bottle and rub some Vaseline on it so it doesn't stick to the putty. Now roll it on top of the putty to even it out a bit. You don't have to use a ton of force. Again, it doesn't have to be perfect at this point. This is just to make sure the top of the putty is flattened a bit. Repeat the same process for the other eye socket. I left the putty to dry on the eye sockets for about an hour and then I pulled them off and left them sitting on some parchment paper overnight. The next day you'll notice the frames to be much harder, still a bit flexible but definitely firm. I then took my dremel and started shaping the frames. You'll definitely want to wear a mask and goggles while doing this as the dry putty gets very dusty and you don't want to breathe it in. I used a 3M Respirator Gas Mask. Have your helmet close by so you can constantly check the frames and see how close you're getting to the edges. You're basically going to dremel the top and sides of the frames. I left the back part (the part sitting against the helmet) alone. You don't want the frames to drop below the edges of the eye sockets since you want to attach the outside frames onto them. So you'll need to dremel and check, dremel and check. Be careful with this part because like everything else with our armor, if you cut or dremel too much, it's very hard to get it back if at all. Below are my frames after dremeling them down to size. What I did next is cut and shape the lenses. I had a spare piece of clear welder's shield and because it was clear it made it very easy to mark the outline of the frames. I used my thin tipped sharpie to outline the frames. I then cut the shapes out using my snips. Then I traced and cut out 2 more lenses with the green welder's shield using the clear pieces as my pattern. Again, this is just an extra step I took that was helpful for me. This next part was a bit tricky. Because the frames are curved a bit, I wanted the lenses to have a slight curve as well so that they would fit better onto the frames. If you plan on just gluing the lenses directly onto the frames, you can probably skip this step. I decided to use velcro for now just so I have options to swap different lenses and outer frames if I wanted to down the road. So to get the curve, I used a heat gun and a mixing bowl. I tried the hot bath trick, but goodness it just took way too long and I didn't have the patience to wait for the lens material to get hot enough. It's up to you however which way you're most comfortable with. I'm quite comfortable with the heat gun so I used this method. I put on my heat resistant glove and held the lens on the curvature of the bowl. I had to tape the bowl down a bit to keep it from sliding. I then lightly swept the heat gun over it a few times and the lenses conformed perfectly. The lenses stayed clear as well. There was no fogging or anything. I then used my dremel to shape the lenses to fit the frames. Next I took my .40 size styrene sheet to make the outside frames. I had an extra white sheet so decided to use this as a pattern for the black styrene sheet. After tracing the shapes for the outer frames on the white styrene sheet, I cut them out and then traced them on a sheet of black styrene. In retrospect I could’ve skipped this step. I was concerned I wouldn’t be able to trace on top of black. I then cut the shapes. I then velcro’d the styrene cut outs on top of each frame so it could stay attached as I shaped and cut out the holes with my dremel. Next was the frown. I took a sheet of plain paper and roughly traced a frame around the frown and teeth. I cut and trimmed the piece of paper so it properly fit around the frown. I then took the .30 size black sheet of styrene I had and cut, shaped, and trimmed the frame for the frown. I used a little thinner sheet of styrene for the frown as it really didn’t need a thick piece and it was also more flexible which will make gluing it on easier. Here are all 3 pieces cut and shaped. Next I took the frown and made a hump on each side so that it would clear the little bump inside of the helmet on each side of the frown. Again, using my heat gun, I took a round chopstick and placed one side of the frame of the frown over it. I held it and did a few light sweeps with the heat gun for the styrene to shape around the chopstick. I did this on both sides. It fit perfectly over the little bumps on each side. I held the frame of the frown with a few magnets so I could trace an outline with a pencil. I did this because I painted my helmet and wanted to mask off the area where the frame would be glued. I wanted to glue it on to the actual ABS verses on top of the paint so that the bond would be stronger. I did the same with the frames for the eye sockets as well. I forgot to snap a pic of that. You can see it towards the end of my thread. I finally glued my eye socket frames with e6000 and the usual clamps and magnets.
-
Getting started on an AP ANH Hero build. Wish me luck.
spyder918 replied to sparker86's topic in ANH (Stunt and Hero)
Welcome and good luck on your build! for AP! -
Jimmiroquai Rogue One Builds
spyder918 replied to jimmiroquai's topic in Build Threads Requireing Maintenance
Some amazing work Jim..wow! -
Painting inside bucket which is easier?
spyder918 replied to spyder918's topic in Assembly, Mods, and Painting
For sure..thanks Joseph for the reminder! -
Painting inside bucket which is easier?
spyder918 replied to spyder918's topic in Assembly, Mods, and Painting
Ah thanks so much for sharing your build with the pics...definitely a big help! Dig the way you did your fans as well...I need to figure out how to do that! -
Painting inside bucket which is easier?
spyder918 replied to spyder918's topic in Assembly, Mods, and Painting
Thanks guys for the tips! Much appreciated! -
Looking to just spray paint the inside of my bucket and wondering which is easier - spraying it put together or in separate pieces? One of the advantages I can see with painting it all put together is the bolts would all be painted, but other than that, not sure. Let me know your thoughts. Thanks!
-
Welcome Kurt! What a traumatic experience. I look forward to your build!
-
TK-23276 Requesting ANH Stunt EIB Status[AP][605]
spyder918 replied to zv288bot's topic in Request Expert Infantry Status
That Jar Jar on your scope screen is hilarious! -
Good luck on the build! Looking forward to the pics of that beautiful armor!
-
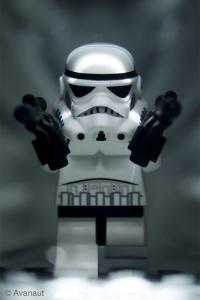
Dang..Lego needs to produce this!
-
TK-23276 Requesting ANH Stunt EIB Status[AP][605]
spyder918 replied to zv288bot's topic in Request Expert Infantry Status
good luck man!! -
zv288bot's AP ANH stunt build! Whoop Whoop!
spyder918 replied to zv288bot's topic in ANH Build Threads
Lookin good bud!..wish I had known about that trunk from Walmart..that's a great price and size too! -
SpiceCredits ANH Stunt Build Thread [AP]
spyder918 replied to SpiceCredits's topic in Build Threads Requireing Maintenance
Ah ok...purrfect! Thanks! -
SpiceCredits ANH Stunt Build Thread [AP]
spyder918 replied to SpiceCredits's topic in Build Threads Requireing Maintenance
Hey Rick..per your thighs are you using Pecap510's garter system? 'Per your thighs'...sounds like such an inappropriate question..haha...sorry. If you are using his system, how do you like it? -
Congrats and curious on when you placed your AP order? I ask because I'm still waiting for mine as well.
