
Artshot
-
Posts
584 -
Joined
-
Last visited
Content Type
Profiles
Forums
Gallery
Articles
Everything posted by Artshot
-

TK-24218 Requesting ANH-Stunt Centurion Status[AM][159]
Artshot replied to fuumantroop's topic in Request Centurion Status
Great Build! -
Just curious, but is it just a case of reshaping the chest piece and adding new returns or much more work ?
-
Excellent work applying the notches. When you polished the paste in the old rivet holes, does it go to the same shine as the surrounding armour ? The reason I ask is that I will have to shim my waist and I worry that a join of paste will be noticeable, if it's just a case of a lot of elbow grease to get rid of any sign, then I can cope with that....I think. Although I have toyed with the idea of either asking if Rob can add the notches and return edge for me on a set and buying an extra set of ab & kidney pieces to shim, that way as (if) I reduce my waist, I can swap the pieces out rather than remove the shim.
-
TK-61972 Requesting ANH Hero Centurion Status [NE][157]
Artshot replied to Haribon72's topic in Request Centurion Status
Stunning work on your build, I was especially drawn to how you dealt with keeping the cover strips flush on the back of your calves, nice recessed Velcro, an idea I may steal....erm borrow -
Excellent progress with this conversion, only hope I can make mine half as good.
-
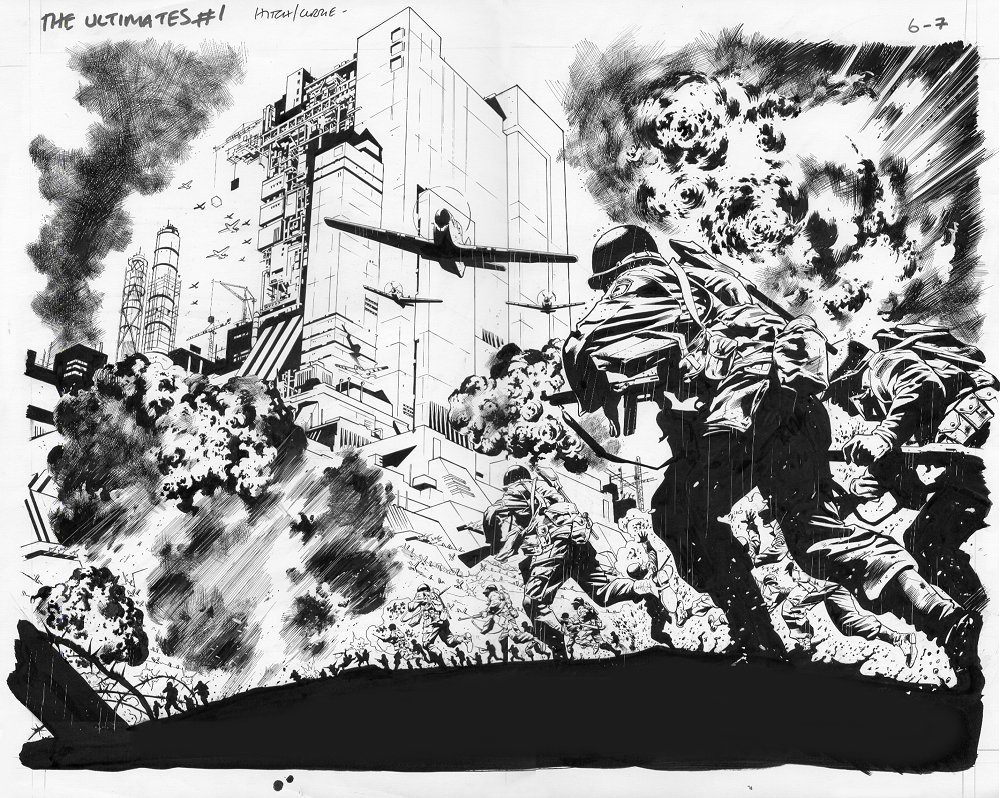
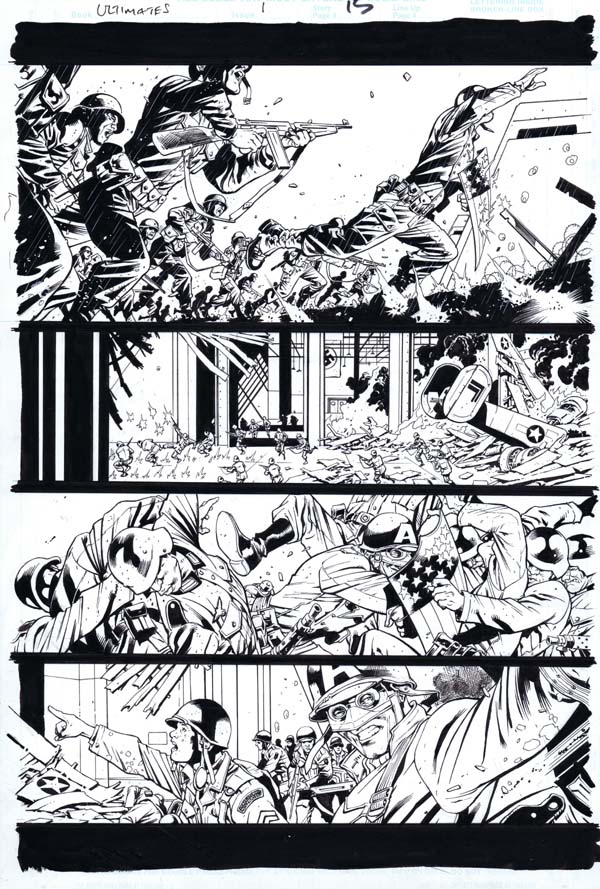
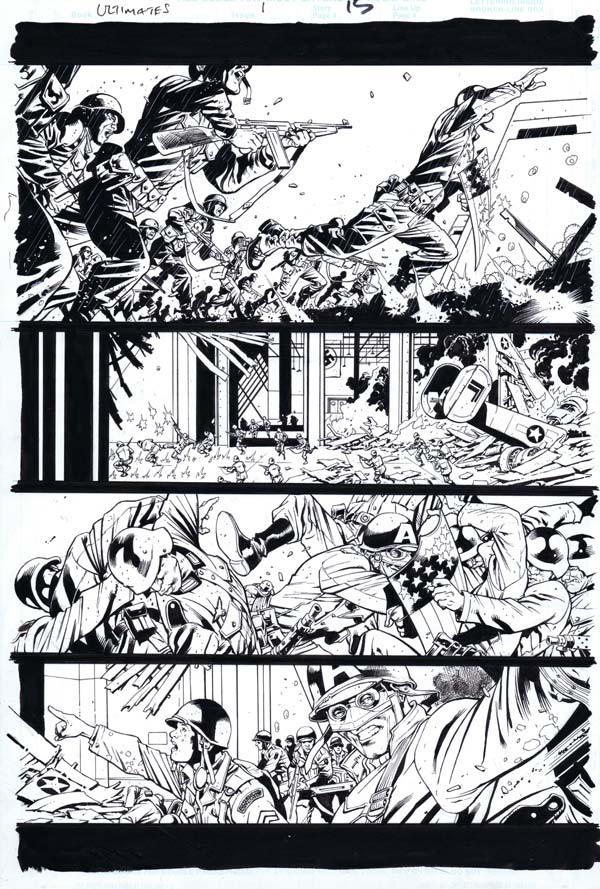
Just thought I would update my initial post about collecting original artwork with a few pictures. Two of my pride & joys Enjoy.

-
When I enquired with Rob about his RT-Mod armour, I was given the following sizes for his armour :- Calves - 17" Thighs - 26" Waist - 40" Forearm - 13.5" Bicep - 16" Helmet - 24" Since I am 6ft with a 42" - 44" waist (cycling a lot and eating healthier is bringing the waist down, but unfortunately having the side effect of increasing my thigh size) I found his armour was the more adaptable to my size, I don't like the idea of shimming, but it will need to be done to go centurion. The waist part used to confuse me until I realised it was around the belly button and not as you would normally measure a waist. Hope that helps. Art
-
TK-51878 Requesting ANH Hero Centurion Status [RT][154]
Artshot replied to Dark CMF's topic in Request Centurion Status
As an imminent (august) builder of a set of RT-Mod armour, I have followed your build closely...very closely, I may have been technically stalking your thread. Your Centurion build is looking good, I expect it to pass without any problem. -
RT-MOD ANH HERO Build
Artshot replied to gunslinger7788's topic in Build Threads Requireing Maintenance
I will be watching with interest as I will hopefully receive my brown box of armour in August Art -
I work for the fire & rescue service, providing CAD plans of premises for the on board data system on the fire trucks, basically when they get a call and on the way to a fire they consult the plans to plan there response, be it how to gain safe entry or what to expect inside. Been doing it one way or another for 26+ years.
-
Deactivated Sterling to E-11 Blaster......I hope.
Artshot replied to Artshot's topic in ANH BlasTech E11
The phrase "Proceed with caution" is normally my Red Button, however after poking at a few parts, I have the feeling that the deactivation may have affected some of the internals and stopped them from moving without a struggle, a struggle I am going to avoid Great photo, I originally went to college to study technical illustration so it brought back a lot of memories, got to love those exploded views. -
Deactivated Sterling to E-11 Blaster......I hope.
Artshot replied to Artshot's topic in ANH BlasTech E11
It's taking ages to clean up, but then I did not start by using a strong stripper on the paint and grime, I have been working the stubborn paint out with wet & dry, I am paying attention not to remove any dings or dents as I think they give character. I can only remove the trigger and trigger guard from the housing, which is a good thing as I would no doubt end up with a few pieces left over if I put it back together. I am not sure about paint at the moment, I am leaning towards flat black more than wrinkle, but I might use my Doopy build as a guinea pig. -
Evening All, just a small update. I eventually got the hex bolts (thanks Dday) fitted to the end of the barrel, I drilled out a channel in the resin and just screwed them into position, added a spot of super glue to lock them tight. I also decided to grind out the ejector port to add my own. Soon as I got the port open I decided to try and thin down the resin, mainly in the cocking handle channel, which meant the internal black pipe had to go, which was a challenge, basically as soon as the port was clear, I ground through the pipe into the interior resin to cut the pipe, I made sure to do it in an area that is supported on the exterior by the magazine housing, once it was separated I just used a long skewer to carefully work the pieces apart, from the end cap end, then it was just a case of sliding it along and out. Whilst I like most of the Doopy kit, the thickness of the barrel has always bugged me the advantage I have now is that I can use an actual sterling spring. While looking at the photos you might see the black edging on the port, I do that so that when I thin the resin down, I can see what I am doing easier, try it, it works. Looking at the port, it looks a little too wide, so I might have to fill it slightly once I double check sizes against my sterling. Incidentally while I have checked parts, the resin ejector and barrel shields need work as there too thick, I might cheat at this point and fashion new ones out of 2mm plasticard. Just a little comparison shot Hope you enjoy the photos.
-
Deactivated Sterling to E-11 Blaster......I hope.
Artshot replied to Artshot's topic in ANH BlasTech E11
Due to my stupid day job getting in the way of time spent on my build I have not made much progress, just been continuing cleaning up the paint and grime and accumulating parts for the build, although I now have a genuine Hengstler counter (thanks again Felix). I have resisted the urge to remove the pins from the stock and the pivot pin from the end cap lock, which has made cleaning more of a challenge, especially the end cap lock, it's taken a lot of WD40 to get it to move easier. Anyway, here's a few pictures to look over, got to admit, I like the steel look. I have spent a lot of time cleaning the rust and grime from the trigger housing, there's a small spring loaded pin that springs the trigger back into position, now that it's clean, there's a lot more action to the trigger, I only gave the trigger a quick soak as I want to retain it's weathered look. Incidentally for those building a Doopy kit (which is me), the selector switch does not sit flush against the trigger housing, there's about a 2mm gap, luckily I am in a position to scrutinise a real sterling as I build my Doopy kit. Enjoy the photos. -
I collect comicbook original artwork, which has taken me to San Diego Comic Con for years, which incidentally was where I first encountered the 501st, watching everybody form up on the Bayside stairs was a sight to see. Strangely of all the artwork I own, there's no Star Wars.....must rectify that this year.
-
Mine is just a combination of my first and second names, Yahoo suggested it when I joined, liked it so I kept it.
-
ZeroRoom's E-11 Scratch Build (Very Pic Heavy)
Artshot replied to ZeroRoom's topic in Build Threads Requireing Maintenance
Just when I think I have read all the best builds of the E-11, I go and find this one.........I think I need to sit in a dark room and consider my builds now. The bar has been well and truly raised. -
Deactivated Sterling to E-11 Blaster......I hope.
Artshot replied to Artshot's topic in ANH BlasTech E11
Thanks for the information Andy. I like the way you attached it, mainly because your not damaging the rear site, which is the way I want to go, I read somewhere, maybe on this site that the rail was fixed just by being slid under the pivot pin of the rear site, once it's removed and the pin put back in, while plausible, I think just putting a screw through it is more likely. I think I can get access to some T-Cut, I may just give it a try and see what results I can get. -
Deactivated Sterling to E-11 Blaster......I hope.
Artshot replied to Artshot's topic in ANH BlasTech E11
I spent a couple of hours last night cleaning away some of the last stubborn patches of paint on the main body and rubbing down a few areas with some WD40 The stock I will start on tonight...... I was thinking of removing the stock to make cleaning easier, but I have a horrible premonition of knocking the pins out, then never getting such a good fit again when I put it back together, same with the end cap catch, which is seriously gummed up with residual oils and greases, it's a pain to operate it. Here's my new questions for the day:- 1) Is there a way to put a better finish on the grip ?, mine is looking a little worn and I don't want to paint it. 2) I have decided to keep the paint on my M38 as it looks suitably weathered already, any recommendations on giving it a better finish ? 3) The screw at the end of the rail that goes into the end sight housing, is it a specific type, I tried looking for a movie reference shot, but could not find one. -
Deactivated Sterling to E-11 Blaster......I hope.
Artshot replied to Artshot's topic in ANH BlasTech E11
Good to know about the updated hex bolts, I will be dipping into the kit I got from Tino on a regular basis to swap things out for more accuracy. -
Deactivated Sterling to E-11 Blaster......I hope.
Artshot replied to Artshot's topic in ANH BlasTech E11
Ohhh it's all shiny....mostly This is were my Sterling conversion is up to (I keep jumping between this build and my Doopy build). After reading everybody's advice about using chemical dip to strip the paint from the Sterling, I was just about to purchase it when I realised that without being able to remove the inner barrel, which would make painting it difficult, I did not want to strip it via a dip, a good cleaning will suffice for the inner barrel as I like its colouring. So I opted for using paint stripper, which was a nightmare as the new environmentally friendly paint strippers have had all those handy paint stripping chemicals removed, it has taken multiple coats to get it to this condition, and lots of wet and dry to remove those stubborn bits that refuse to budge, even now, I know there's more to remove, i have ordered some elbow grease from Amazon. The hex bolts have now been ground out of the end of the barrel, when I say ground out, that's just the heads, the threaded body is still in there tying it all together. I used a fair amount of "Plumbers Mait", which sets like cement, to form the interior of the two bolt channels, I knew these were going to need a bit of work so I was not to concerned about making it look pretty, after 24 hours it was ready to start carving/sanding into shape. As I was waiting for it to set (although it sets solid in only a couple of hours), I spent my time cutting/grinding the threaded shafts from two new hex bolts supplied by Dday, I actually have accurate hex bolts as part of the T-Jay mod set, but liked the diamond pattern on these better as there more movie accurate. I will be affixing the hex bolt heads with epoxy glue once i have finished removing the remaining paint. There are a couple of smaller gaps that need filling on the barrel and some wet & dry work, but overall I am pretty happy how it's worked out, once the bolt heads are fitted and it's eventually painted, I think I might just get away with it I think my attention to detail may be my downfall, saying that, I now have an M38 scope to add to it and a Hengstler counter on it's way, courtesy of Felice. Stand by for the next thrilling instalment of "What was I thinking?" -
Time to make an end cap. Since the Doopy part has a small fill across the centre of the channel for the end ring, I needed to remove it……I love my Dremel. Next I prepared a small amount of “Plumbers Maitâ€, This stuff is great for things like this as it sets quickly and set’s like cement with a great ability to be sanded and carved into. As I pushed the “Plumbers Mait†into the channel I made sure to leave a small amount of channel through the centre, once I had it packed in, I wet the centre of the channel very slightly, this will help to stop the ring sticking. Next I pushed the ring into place, making sure to keep a couple of mm distance between the ring and the edges of the catch/hinge, once it’s in place I finished packing the rest of the channel and smoothed it down. Now here’s the boring part, the “Plumbers Mait†has a very quick setting time and has a small amount of expansion to it, so as it starts to dry, I gently kept rotating the ring through its axis, this will stop it sticking to the “Plumbers Maitâ€, also the water that was added will help lubricate the area, this stuff sets when wet. Once the “Plumbers Mait†sets the ring will still be able to rotate, it may need a couple of very careful rotations later when fully dry but hopefully it will look a little more accurate. After 24 hours everything is set solid and the ring still rotates, it actually has a little resistance which I like as it will not bounce about when the blaster is in a holster. To my eye the base is still a bit thick, however I will leave it until I glue it to the end cap before I thin it anymore.
-
In an attempt to make my blaster build as authentic as I can, I have been comparing Sterling parts to resin parts, most of the parts are pretty accurate, however I think the end cap needs some work, that's my next challenge, I already have a couple of ideas. The end cap ring bracket or whatever it's called, needs a bit of work, the resin part has a square channel going through it, with a blocked centre, however on examining the sterling part, it's actually just a circular channel going all the way through,the ring would have been bent and welded once it was threaded through the bracket, also the circular base area that attaches to the end cap is a lot thinner than the resin part, I can understand why the resin parts are the way they are as tolerances in resin while molding can be impractical for some shapes, but while I have the chance, I am going to try for a little more accuracy. I will be using a new ring supplied as part of T-Jays mod set. Standby by for the next instalment, where I either got away with it or deny everything.
-
I have been sitting staring at my pile of assorted pieces for my Doopy build for a couple of days, there's lots of pieces since I bought T-Jay's mod set and new power cylinders from Playfulwolfcub for it. Of course then I went and bought a Sterling and really side tracked myself. Anyway, having just re-read your build, I think it's time I got back into it, after all I hopefully have some RT-Mod armour coming in August, hope I have enough time to be ready for it Thanks for the inspiration..........now to tackle the dismantling of my ebay Monocular..... Art