Leaderboard
.thumb.JPEG.090a51d263498dd94183c8dca58c9ff4.JPEG)



Popular Content
Showing content with the highest reputation on 06/12/2026 in all areas
-
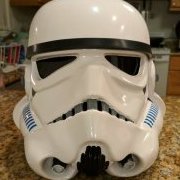
I believe the core issue with Galactic Armory (GA) files is that while they certainly resemble a Stormtrooper, they have too many structural inaccuracies to pass basic 501st approval. For me, the biggest red flag is the chest plate, which isn't remotely close to what we see on screen. (Granted, it's ultimately your GML's final decision that counts) Side-by-side, the curvature just doesn't match the screen-used armor. As you and others have pointed out, the bottom sides of the GA chest flare outward away from the body, whereas the screen-accurate armor curves naturally inward toward the wearer. This seems to be the exact issue you faced when trying to get the side wings to work, forcing you to shorten them significantly and force an inward curve just to make them fit. Moving down, a smaller but still notable issue lies with the thighs. They completely miss the raised, secondary smaller cover strip required by the CRL, which states that cover strips must be beveled, roughly ⅛" thick, and have a smaller cover strip layered on top. While this is a common flaw with many files on the market right now, it is most apparent on the GA version. The cover strips are beveled and approximately ⅛" thick that does not extend beyond the greave and has a smaller cover strip layered thereon. The helmet has been discussed in great detail, and the consensus across the detachment is that GA files simply do not meet the baseline for basic approval without an overwhelming amount of heavy modifications. Nico's is currently the gold standard within the community, but Meiloorun and ChrisThePropGuy are also making massive strides to compete with this. Furthermore, after scouring just about every 3D-print related build thread on the forum, it’s clear that approval isn't just a checklist. Even if all the basic requirements are technically met on paper, the GMLs still look at the armor from a holistic, full-body view to judge whether it truly captures the screen-accurate look and proportions of an R1TK. Please take all of this with a grain of salt, from one currently unapproved member to another. GA files are alright for general cosplay, and I completely understand not wanting to buy yet another set of files—it’s a total rabbit hole (coming from experience). However, the sheer amount of time and effort you’re about to invest in reprinting, repriming, and repainting these parts is astronomical. To guarantee you hit the base requirements for Legion approval, the smartest move would be to switch to Akira’s files, even if it's just for specific problem areas like the chest plate (since their back armor isn't much better than GA's anyway). I'm always happy to lend a hand if any other issues arise. That’s what this community is here for!2 points
-
Hi Justin, and thank you for your EIB application! First of all, we just wanted to let you know that your armor looks great. Great job! Thank you for your patience. CRL and EIB Application Requirements: All required photos have been submitted, and on behalf of the entire D.O. staff we are pleased to welcome you to the rank of Expert Infantry. Congratulations! Other-Armor Fit/Assembly; In this area we review observations made by your fellow troopers and the DO team. Some observations may lead to suggestions to improve the overall look of your armor, and please keep in mind that we consider both text (CRL) and pictures (screen caps/reference images) when reviewing submissions. Just a couple of minor details here. Starting with the helmet: L3. Ideally, placement of ears (and screws) should closely follow the rear angle of the trap above them As we always say, we're including this as a recommendation. You'd only need to adjust the position of the ears if the helmet looked “weird,” but that's not the case. REFERENCE IMAGES A simple dressing issue. It's better if clips, snaps, Velcro, etc., aren't visible. REFERENCE IMAGES Your blaster looks like is a cast rubber one... We've approved blasters like this one in the past. However, for more accuracy, you can modify it by adding the spring, changing the front sight... REFERENCE IMAGE From now, this type of Blaster will not be accepted for L3 due to a lack of accuracy compared to what is seen on screen. We will establish a grace period for the implementation of this new rule, so it will not affect your Centurion application if you decide to submit it. *************************************************** Centurion Requirements: In this section we prepare you for our highest tier of approval. Because Centurion photos must show more detail than EIB, items pertaining to Level 3 might be seen there and not here and additional photos may be required. We try to point out all that we can from what we are able to clearly see, but the final accuracy is the responsibility of the trooper. L3.-There should be a minimal gap between the shoulder armor and the chest/back plates. You can easily close that gap by shortening the elastic a little. REFERENCE IMAGES L2.-Ears shall have three screws per side, one above and one below the ear bar and one at the base of the helmet. Technically, it meets the requirement of three screws, but we think that for L3, the screw at the bottom of the ear should be positioned slightly higher ((not covered by the neck trim)). REFERENCE IMAGES L3.- No return edge on the inside of the front of the forearm is allowed. It's no big deal... Just a minute of sanding and it's done. Easy fix! REFERENCE IMAGE L3.-Lower thigh ridge joins (front and rear) shall butt-up flush against each other. Any gaps must be backed with ABS or filled as not to be noticeable. You can fill that gap with a little ABS paste, Sugru, or a similar product. REFERENCE IMAGES And that's it, Justin. We look forward to seeing your application for Centurion soon.2 points
-
Thanks, as I did some more research on the abdomen I can now see how to abdomen works, especially thanks to the photo you included. I have a 300x300x330mm build volume so printing the entire abdomen corset in one piece probably isn't going to work out so well, so I need to plan on how to split it. I'm both 2 inches and 30 pounds under what Akira's files are scaled for, and if you pair that with the fact that my body just isn't very proportionate (5'8" with a 6'2" wingspan, very long legs to a short torso), I am going to have to do some measuring and scaling. Now that I have better files, I might as well aim for Expert Infantry so that even if I don't get it first try, I still have some room to get into basic. Looking at the inner box for GA's backplate, it actually does have that inner lip that Akira's doesn't, so now I want the lip because I won't ever be able to unsee it. I'll take your advice for filling in the gaps because I don't want the Bondo to crack, but for now I'll just start working on my armor piece by piece until it gets approved. I'm going to talk with my GML if I can find them in order to ask some questions because you mentioned that it has to capture the look as a whole. If there are any other inaccuracies or details about Akira's armor that I should know about that would stop my armor from being level 2, I would really like to know now before I start printing all of my armor again.1 point
-
The arms between the Akira and Galactic Armory (GA) files appear very similar based on the GA renders and what I can see on my own Akira printed parts. You should easily be able to get away with using either for basic approval. The abdomen and kidney armor configuration is a bit unique. Per the CRL and screen-used armor, the abdomen is a "single entity" with a gap in the back utilized for a corset-style system, like this: This is then covered by a kidney/trauma plate that slots into the lower recess to ideally conceal the closure system, as outlined by the CRL. Looking at both the GA and Akira files, it appears to be just a plate that sits on the back, so there shouldn't be any tricky or overly complex engineering required here. There is a bit more to tackle with the rest of the build, but let me start by saying: don't be discouraged! This is by no means a cheap project. I originally started with a maximum budget of $250 and have far exceeded that due to trial and error, such as choosing the wrong filaments or buying multiple file sets. That said, you absolutely have this. For scaling purposes, Akira’s files (I am unsure about GA's) are well-proportioned for someone around 5'10" and 170–190 lbs. If you fall close to that range, you should be fine. However, keep in mind that his forearms and biceps run a bit large compared to the rest of the armor. Based on your initial prints from the GA files, you may want to scale down on the X and Y axes for the arms while keeping the Z axis (the height) at 100%. While Akira’s files have their own flaws, they will absolutely get you to basic approval with minor tweaks. My biggest concern with his back file is the inner box. While it does include the necessary cutout—similar to GA's file (minus the missing 8mm hole)—it lacks the proper lip that contains the cog and II components. This was a frustrating hurdle for me. However, looking back at @BigJasoni's build (this post here specifically), it appears he fabricated a "shim" by dropping a simple cube into his slicer and cutting out the center. (From Jason's build ^) I have done my best to replicate this fix digitally by making the insert box a separate entity, but I am still tweaking parts of the assembly that look perfect in a 3D space but require some real-world trial and error. When splitting large armor pieces like the backplate, I highly recommend adding dowels to aid alignment. Nearly any modern slicer (like Orca for instance) can do this automatically within the "Cut" tool by using the "Add Connectors" option. I am actually doing this right now with my own back armor test print since it exceeds my printer's build volume. Combining alignment dowels with CA glue or epoxy will create an incredibly strong initial bond. From there, you can reinforce the seam on the back with a soldering iron and excess filament like you noted. For post-processing the seams, Bondo Spot Putty is excellent, but only for blemishes under 1/8" thick. For deeper gaps, it's always safer to weld in extra filament, sand it down, and repeat until you create a slight high spot. It is much easier to sand down excess plastic than it is to fill a deep cavity with spot putty, which is highly prone to shrinking and/or cracking. If you need structural strength, standard two-part Bondo mix is better than spot putty, though it still has its limits (and can get pricey). Fiberglass-reinforced Bondo ("Kitty Hair") would be the absolute strongest option, but it is expensive, hazardous to breathe, and miserable to sand smooth—definitely keep that as a last resort.1 point
-
As much as I hate to accept it, you're right. I'm going to have to buy the Akira files and update the armor in pieces, starting with the chest and back, even though I've sadly already started working on the updated versions. Since you mentioned the cover strips on the thighs, I'm going to reprint those. The arms don't seem to have any MAJOR issues as far as I can see, but once I get around to it I think I'll start redoing the abdomen and kidneys, along with the belt and cod/posterior plates. Additionally, I was looking at the CRL and came across this: The kidney armor is separated in the back and covered by a rectangular plate. For oh so lucky me, the kidney plate is in one complete piece, which now means that the only way I can get approved is by redoing approximately 80% of my armor... Now knowing that this is going to be a much longer, and most importantly expensive, project, I've become slightly more unmotivated because once college comes this fall, I won't be able to continue efficiently making armor up until Spring. I'm going to continue doing what I can now during the summer with the new files and start working on them piece by piece. I've had to scale the armor by hand and by eyeballing some proportions, so if anyone knows of any free armor scalers I would appreciate it. Another one of my ideas was to 3D scan my body and scale the armor from there, along with more accurate measurements. Looking at 11b30b4's Rogue One TK sources, I noticed the flexible shoulder straps for TPU filament, so I might download those and pick up a roll of TPU. The rest of the armor I will print in either ABS or PETG, but as I said in my DLT-19 build thread, my basement might not be the best place for printing in ABS, so PETG will be the way to go here for me. You mentioned that Akira's back isn't much better than GA's, and the only difference I noticed was the hole in the back (which GA has in the TIE pilot armor, which is what I'm using for this new version of the chest) and some slight curvature. I like the way you (Sayless) separated your back and I understand if it's not possible, but if I could somehow use your files for the chest and back that would be amazing, but if they're not available then I'm fine with Akira's and don't have a problem with it. For gluing and attaching big pieces that my printer can't do in one piece, I've been attaching with pieces with a lot of very strong super glue, welding the inside pieces together, then using some spare filament strands to melt into the inside to give it a stronger hold. I've just been using Bondo to fill in the seams but I need to find a better way to fill in bigger seams to prevent cracking, but also don't want a method that's just too expensive. On a side note, apart from my own build, I noticed that since the Rogue One stormtrooper CRL has been changed from Rogue One to Non-Saga, therefore I'm wondering if or when the CRL will be updated to include appearances from other shows and movies, for example: A stormtrooper here and a stormtrooper on a ship in the Mandalorian (I couldn't find a good enough photo) are holding E-22's, which I think should be put on the CRL as an optional accessory since they're seen wielding them in the show. Additionally, and I know we don't have too many good references, but this unidentified stormtrooper commander from Tython has an orange (yes it's orange, man I hate color theory) pauldron, and I know that there aren't many examples of this pauldron on regular non-saga stormtroopers, but I still think the CRL should be updated in the future in order to include these.1 point
-
Appreciate all the info and help everybody. Thank you. Sent from my iPhone using Tapatalk1 point
-
Howdy Seth, Welcome to the FISD Forums. While similar, I would echo the suggestion to checkout MEPD. They will be the authority on sandies. Best of luck to you.1 point
-
As I continue to work in my little workshop I went ahead and bought all the necessary paints needed and have begun sanding. I know the best choice for armor right now are the Akira files, but as I look through other build threads, I'm wondering if it's even possible to get approved using Galactic Armory's files. I understand that I'm not going to get anything above basic, even at that, but I'm just thinking if most garrisons would let me join based off of these files. Arguably the most important part of the build is the helmet, so while I do have GA's helmet right now which seems to meet all basic certifications, I'm going to get started on working on the updated helmet when possible.1 point
-
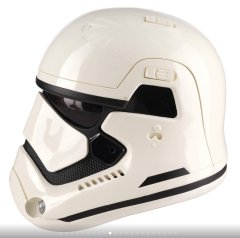
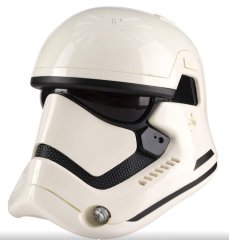
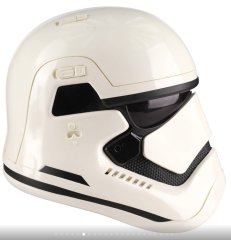
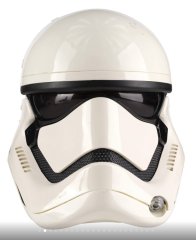
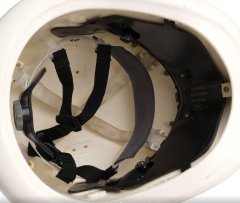
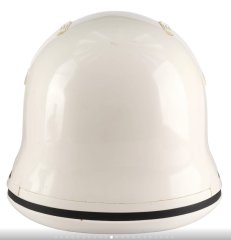
TFA Screen Used Helmet- Propstore Auction1 point
-
-
Hello and welcome aboard, there is a lot of information which may be useful even though you are going dirty as the costumes are very similar Your costume will need to meet base standards, CRL (Costume Reference Library) for Sandtrooper is here https://crls.501st.com/mepd/sandtrooper Good luck with the build1 point
-
Welcome aboard Seth! You can get a lot of help and support here, but might want to check out Mos Eisley Police Dept, also. They are the detachment specifically for Sandtroopers. https://forum.mepd.net/1 point
-
RS Props Dave's Darkside Deopt (AM) AP I think the first page a pretty extensive list.1 point
-
Welcome! The great thing about the ANH costume is that it's probably one of the most well documented costumes in the legion. There are a ton of great build threads (check the pinned ones in this sub-forum) so definitely spend a lot of time reading through them to get a sense of what's involved, the supplies you'll need, etc. The stormtrooper was a first costume for a lot of us (myself included) and you'll be surprised at how accessible a build it is. Since you're in Denver, you could also try to reach out to Mountain Garrison to see if they have any forums or build parties for prospective members. Take your time and good luck!1 point
-
Jason, Tarok is correct. IB only does runs once a month for a week at a time. So, if you go to their web site and get the message you posted, it’s because the run has not started. Also be sure to check out their FB page before you go grab those boots. Sometimes they run deals and discounts. Most of the time its for combos like the Shoretrooper pants, top, boots, gloves, and belt for a set price. As for the fit of the boots, the size chart for IB shows hot to measure the height of the boot from the bottom of your heal. However, I will tell you that I wear a size 10 reg in combat boots, Vans and Converse All Stars, and my ROTK boot is a EU size 43 or US 10. While IB does not do returns, if you get the wrong size, most likely there is a market to sell them to someone on FISD. The scaled sniper knee (left) looks correct in my opinion. I have no doubt that the strapping and buckles you put on the back side of the abdomen will work fine; however, if you are unable to tighten them up any further, Consider using smaller webbing and buckles since that will give you some additional clearance. Also, FYI the designers of RO actually used an elastic fabric similar to neoprene and a zipper, this was then attached to the inside of the armor with Velcro. You do not need to yours this way, but I wanted to make sure you were aware. Here are few pics of Justin’s (TheRascalKing) build and how he did the zipper closure. Very clean and nice. As for painting the TPU, you may have better luck with 100% silicone white caulk rather than the Kwik seal. The Kwik seal is petroleum based. Even if you print the TPU in white, most likely you will have the issue of it not being a gloss white, so really getting a clear gloss coating that wont crack should the main concern. As for E-11 suggestions. I have a Hyperfirm or HFX RO E-11 and I love it. Its rubber and looks very real. It also does not weight a ton. I will say that when I started my build, I was 100% of the mind that I wanted the S&T airsoft that I planned to modify to RO standards. I am so glad everyone talked me out of this idea. One 3-mile parade and you will be soooooooo glad to not have a boat anchor for a prop. Hell, it’s the whole reason I have rebuilt my T-21 three times. The weight of the weapon is a big deal that most people discount until your arms are screaming. So, I suggest a lightweight E-11 and that generally points towards 3D printed. However, if you drop a 3D printed E-11, most likely you will have a lot of parts for an E-11 rather than a complete E-11. In my opnion, the only way to go is a rubber gun. Hyperfirm is no longer in business and as far as I am aware of, the only real option you have for a rubber RO E-11 is Praetorian Blasters. Praetorian Blasters actually makes a nicer looking RO E-11 than my Hyperfirm in my opinion but they were not an option for me when I got my E-11. Two things you need to be aware of before you purchase an E-11 is that the RO E-11 have several differences from the OT E-11s All RO E-11s have a similar but different scope the M.H.R. (Minneapolis Honeywell Regulator Co.) M38 Telescope. 1943 model not the 1942 model seen on other E-11s. Also, the Henstler 400 counter with the small eagle is different from OT E-11s as is the power cylinders. So, make sure you are getting an accurate RO E-11. The other thing you need to know is that the rubber E-11s are not cheap, they run between $200-$300 dollars. Lastly, do not be mislead when I say the blaster is rubber, its not soft and flexible like a swimming pool noodle, it’s a rigid hard rubber like a tire. Well I hope some of this helps and keep up the great build.1 point