Leaderboard


Popular Content
Showing content with the highest reputation on 03/20/2025 in all areas
-
2 points
-
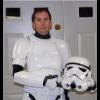
New to the group and saying hello from Wisconsin. Following my dream and putting together a TK kit. Everyone has been exceptionally helpful through this process.1 point
-
1 point
-
1 point
-
Thanks Andrew for corrections and clarifications. I wasn’t sure how much details I should put in the text and omitted several ones like the rear grip details on the baton same for the handle and strap on the interior of the shield, etc… I can certainly add them for additional clarity, as we have some good reference pictures to support. NB The Hot toys has some errors vs the movie references. The design is based on the movie when there were discrepancies1 point
-
1 point
-
Looking good Tom.1 point
-
Just right click an image and copy the img URL. Then come over to the forum and hit paste. Your armor looks quite good, but the DO staff would, of course, make the final call. You would want to get each cover strip straight and centered (thighs and shins) and have the cod centered between them. Note how the above has a large black space on one side of the cod - that would need to be adjusted for CRL photos. From the side angle, it appears the cod is coming quite far out from your center line. An elastic strap with velcro on either end (ala OTTK armor) can fix that. Additionally, the white armor that is visible above your black chest-to-back cross piece would ideally be trimmed away. It'll be more comfortable and give the correct look that we see on screen. The black should cover that edge from the side. This CAN be due to your arms raised posture making the armor ride up... ... however, the white abdomen armor is still visible above the black bridge piece in this shot with your arms lowered. Trimming that would certainly help with the overall look and armor fitment. Finally, your bucket seems to be riding a bit high. Do you have a lot of padding inside at the top? If so, you'd get a better fit and better visibility by removing that padding completely. Just have the bucket sit on the top of your head directly and pad it on the forehead and sides. It'll still be very comfortable that way. and I'll paste these in as well since I got this far. Please don't take my criticism harshly in any way. YOU LOOK FANTASTIC! Your armor looks great, the weathering looks spot on, the cracks and gold look great, and the ribbons seem to be the correct material as well. I'm just mentioning dressing issues, which are cake to fix. Bravo!!! ... but please wait for DO staff to chime in. @Deployment Officer Team1 point
-
1 point
-
1 point
-
Awesome Max!, looking forward to watching this build progress. The Nico files were considered pretty good back in the day for the Rogue 1 style Helmet. Here is a build thread where the member explains some modifications they did to those files for assembly and accuracy improvements. Also, if you haven't already, you check out our Rogue one resource section for several 3d files on helmets and armour parts. May be something here that could assists you.1 point