Leaderboard


Popular Content
Showing content with the highest reputation on 08/23/2024 in Posts
-
Congratulations trooper and welcome to Expert Infantry and the EI Honor Gallery3 points
-
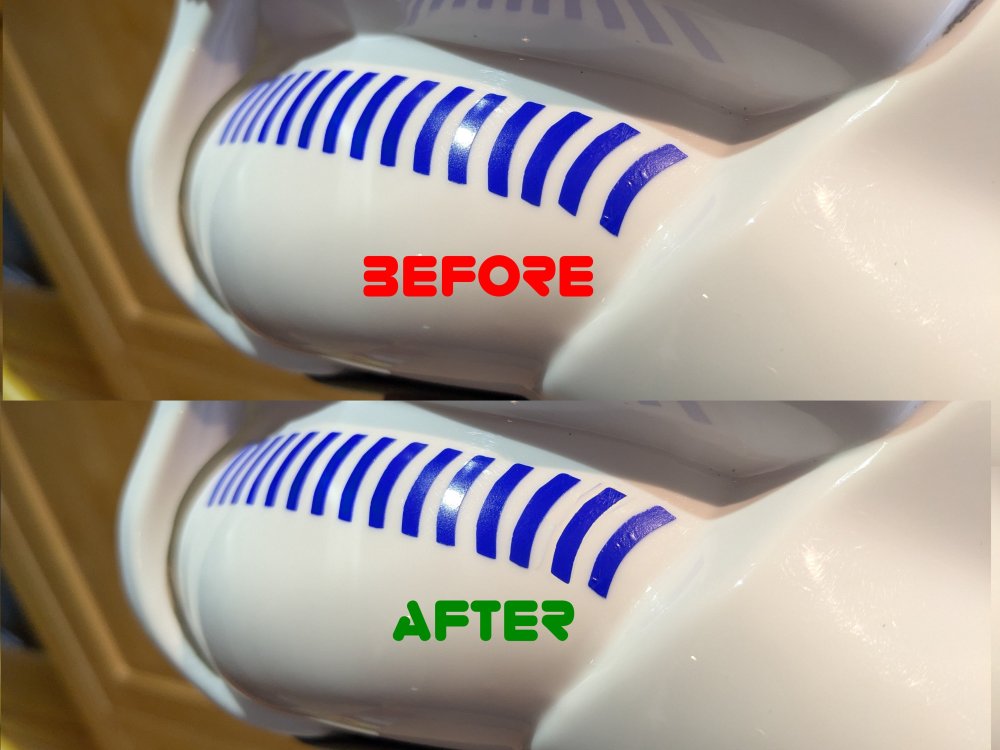
Apply some painters tape on top, carefully lift a corner, may need to run a knife just under it to get it started, then carefully peel backwards. I've done this to a few helmets in the past and it's worked quite well, you only really need to adjust a couple of the stripes to make it look right.3 points
-
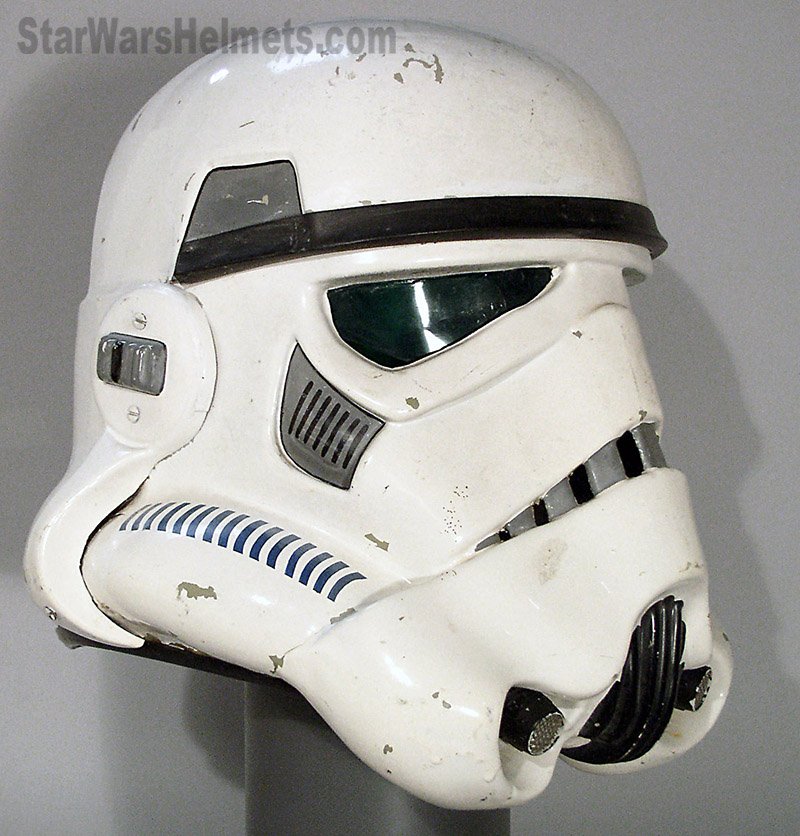
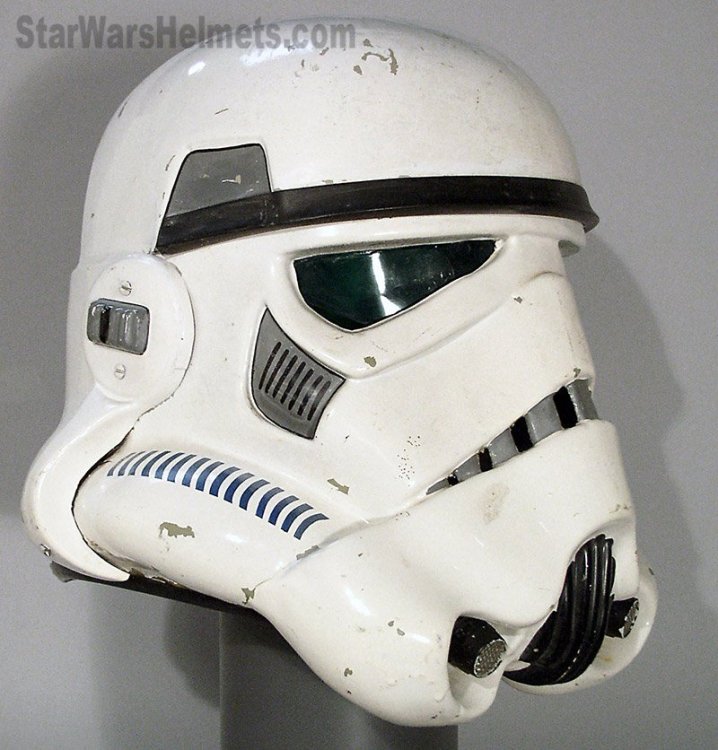
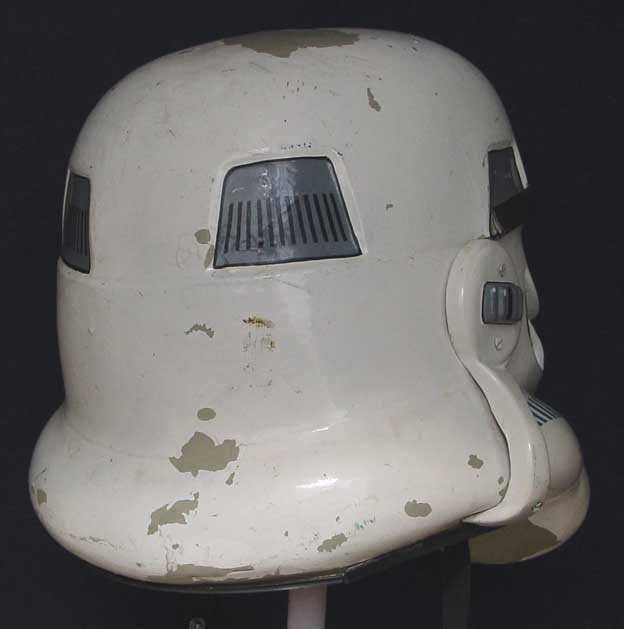
Before the DO's get here you may want to look through this guide as you seem to be missing a few photos, especially an "action" photo You may also want to clean up some of your black lines, they are a little thick and wobbly in places Only 7 lines in cheek traps and should be all the same length References Good luck with approval
 2 points
 -
Wow!!! Congrats Angie this is so exciting!1 point
-
This one is great This one the second stripe is a touch high but you should be ok Nice work
 1 point
 -
Congratulations #10791 point
-
1. Angie 2. Popovski 3. 87665 4. Letter 5. TKSpartan Here you go Angie. Congrats again! https://www.whitearmor.net/eib/certificates/87665-eib.png1 point
-
Hi Angela , and thank you for your EIB application! CRL and EIB Application Requirements: All required photos have been submitted, and on behalf of the entire D.O. staff we are pleased to welcome you to the rank of Expert Infantry. Congratulations! Other-Armor Fit/Assembly; In this area we review observations made by your fellow troopers and the DO team. Some observations may lead to suggestions to improve the overall look of your armor, and please keep in mind that we consider both text (CRL) and pictures (screen caps/reference images) when reviewing submissions. Centurion Requirements: In this section we prepare you for our highest tier of approval. Because Centurion photos must show more detail than EIB, items pertaining to Level 3 might be seen there and not here and additional photos may be required. We try to point out all that we can from what we are able to clearly see, but the final accuracy is the responsibility of the trooper. CRL: Requirements for all 501st costumes are proportional to the wearer in scale, fit and size. There are a few fit adjustment that you will need to do not only for get a Centurion level but for accuracy and confort when trooping. As you can see , your armor need some trimming and resize in biceps, forearms, thighs and cod armor. Can it be done? Yes, I have recently helped a new recruit with exactly the same situation . It takes an extra effort removing or trimming and regluing cover strips etc, but with patience you can do it. Reference Images Reference Images Reference images CRL L3: There should be a minimal gap between the shoulder armor and the chest/back plates. This looks like a simple strapping issue. The right side shoulder looks perfect, so shortening the left one shoulder strap and a bit could reduce the gap. Another trick here is to remove the Shoulder Bell's return edge to allow them to sit close the chest armor. Reference Images CRL: If silk or satin gloves are worn, the hand plates have the correct visible stitching with a 5 point/star pattern, equally spread out with 2 on each side and 1 in the middle front, double stitched with 2 holes at each point and sewn to the glove at each one using black thread. It looks like yours are silk or satin like gloves , you would need to remove the elastic strap and sew the hand plates to them. Reference Images CRL L3: Abdominal and Kidney Plate align horizontally at top This issue should fix if you make the armor fit adjustments detailed before. Reference images L3.: Ideally there no gap between the abdomen and kidney armor. Abdominal and Kidney Plate align horizontally at top. To solve this issue you can seal the seam using ABS paste, sand and polish. Reference Images CRL L3: Rivets are equally spaced along the depth of the armor and about 10mm from the edge. Yours are almost ok, it's just a matter of moving the kidney lower one and fill the remaining hole with ABS paste, sand and polish to get a great finish. Reference Images CRL L3: The top of the ABS ammo belt should sit at or just above the bottom of the central and vertical abdomen button panels. In looking at the reference images below, we are asking that you raise it a little more to at least cover more of the bottom of the ab-button plate(s). Ideally it should touch (or even overlap a bit) the bottom button(s). Reference Images CRL L3: The corners of the plastic ammo belt shall be trimmed at a 45 degree angle that that meets the outer edge of the cloth belt. The lower section is perfect while the upper will need a fix. I have fixed it by trimming the top section of the canvas belt just before the stitching line. Reference Images CRL L3: Drop boxes are vertically aligned with the end of the ammo belt with minimal gap between belt and box. Yours are just a bit too far in. Most Troopers use to add a bit of glue to the drop box elastic to keep them in place. Esay fix! . Reference Images CRL L3: Lower thigh ridge joins (front and rear) shall butt-up flush against each other. Any gaps must be backed with ABS or filled as not to be noticeable. This is an easy fix too. Gluing a small piece of ABS plastic behind and filling the front with ABS paste would do the job. Reference Images And that's all Trooper. It looks like a lot of work ahead but we are confidence that it can be done. You can count on us and the detachment members to help you every step on the way to achieve the next step. Centurion. Congratulations and welcome to EIB ranks!! Remember to request your EIB certificate HERE1 point
-
Thanks. Yes, I've seen others have to do this too. Not sure why the WTF kit does it this way.1 point
-
I am still working on my TK, got distracted for a bit getting my Cad Bane approved , but I am back on it!1 point
-
Hello and welcome James! Always good to see determination to research! It really pays off in the end! Tough one but extremely cool!!1 point
-
Nice work, you may want to adjust the front tube stripes a little: Level 2 Fall of tube stripe tops ideally lean toward the front. Comparison1 point
-
I have added your 25 troops badge, congrats!!1 point
-
I think you're doing an excellent job with your helmet so far. Glad you found a solution for the lenses. And getting the right padding for the helmet can definitely be a challenge. As far as the mesh goes for basic approval you're definitely fine. When I submitted for EIB one thing I had to change was adding a wider mesh as you referenced. I had the default WTF mesh and it wasn't wide enough. I can't for sure say if yours passes or not but I ended up needing to cut out the mesh from a kitchen strainer as it was a wider mesh1 point
-
With the visor I ended up not anywhere near where I thought, but it works. As mentioned in the previous post, the plastic wasn’t long enough to reach the ear screws, so I opted for the Chicago screw method. I made three of these posts like TKZombie did, out of the screw bases and some ABS: Traced and cut the visor, then drilled a hole in the center. After a test fit of the visor, it looked like I could get away with one screw, and some heat-bent ABS strip to tack it down: So the visor pressure-fits against the eye holes, and I’m gonna call this good enough. You’ll also note that I’ve added pads in weird places. This was an adventure. I spent a whole bunch of time discovering the true shape of my head. Basically it’s pointy near the back, then there’s a playground slide to the front of my face. And I guess my head is skinny, too, because the pads around the ears only barely touch me. And then since I’m Asian, my eyes are more forward to the visor, so I added padding at the nose so my face is pushed back a bit (see the Velcro in last photo?). Here’s what it turned out looking like. Still plenty of room for fans and electronics: This started getting exciting, so I went ahead and tried to finish the helmet. Studied a bunch of vocoder paint jobs, and got to work on that, since the other day I finally got a hold of the semi-gloss black. Lots of fine point painting, and mineral spirit toothpicking later, I had this: I think mine is closest to this reference: What say you, elders? I had done the hovi tips a little while ago, but didn’t post about them. I used the round mesh screens provided with the WTF kit, and I’m hoping it’s OK, because from the CRL I am still confused about what “Screens used shall be of a wide type mesh” really means. Dave’s Darkside videos were helpful here, too. Because the supporting area where the hovi tips sit is very thin plastic, they are backed with large washers about equal to the diameter of the tips. I then added the S-seal and the decals. Might I really be done with the helmet?1 point
-
I did something similar using motherboard mounting screws like you have in your PC. It was really tricky with the curve of the lens but after cutting them out I used Sugru to install the jackscrews. Once dried I used a small hand drill to line up and make holes in the lenses for the screws. You can see I still messed up a bit but in the end I'm really happy with the results and I can take them out if needed. Motherboard screws used: SGTKJSJS M.2 SSD screw Mounting Screws Kit for Asus Motherboards1 point