Leaderboard


Popular Content
Showing content with the highest reputation on 03/26/2023 in all areas
-
You can also recess the back of the snap with a little heat so it will lay flat when glue is applied2 points
-
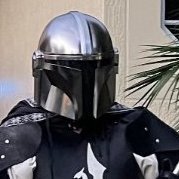
Hey all, I just recently got my BBB in from Dave's Darkside Depot so I thought I'd start getting active in the forums. I'm a complete newbie when it comes to this armor building but I'm in good hands because I have @SolderMaster to help me through it. I'm really jumping into the deep end though, as I'm aiming for Centurion grade straight away. I figure why not put the effort into it. I'm already a nerd, might as well be a mega nerd. Can't wait to meet some great people and make some great friends along the way!1 point
-
Oh my gosh. My thumbs were bleeding from rubbing off E6000! Sent from my SM-G781V using Tapatalk1 point
-
And just in case it hasn't been said previously, make sure you rough the surfaces with coarse sandpaper, will help the glue to grip a little more. You'd be amazed on how much a tiny dab of E6000 can grip, especially in places you've added too much and you are trying to clean up1 point
-
Thank you! Sent from my SM-G781V using Tapatalk1 point
-
It always amazes no mater how many ways you think something can be done you find someone else has a different method1 point
-
That’s a great idea. So simple and yet can’t believe I didn’t think about that. Sent from my iPhone using Tapatalk1 point
-
I did use the male end for the post which is flush . Sent from my SM-G781V using Tapatalk1 point
-
First word of advice. Use E6000 glue. Cause you will make mistakes! Sent from my SM-G781V using Tapatalk1 point
-
Hello and Welcome Brandon. Indeed, aim high and you will find you actually saved a lot of time (and possible, money) in long term with this hobby. The key is "research". We have a lot of useful information here on the forum here you may find useful, thanks to the collective wisdom of FISD members. Have fun and enjoy your build!1 point
-
Here is the forearm fix and build up. I added a thicker backplate and bonded it to the forearm with abs paste. I added a thinner exterior piec of armor scrap of abs to the top. this thinner piece still had the protective plastic. I them seam welded with more abs paste. The added benefit of leaving the exterior plastic was quick cleanup and less paste left over to sand. The paste doesn't bond to the protective sheet. While this wasn't initially planned, I really liked how this accident turned out! It is definitely beefier and should hold up much better for extended durability.1 point
-
As Celebration comes closer every day, I feel like I can do a more or less big update today. I can finally post the first CRL pictures! :-) I hope they are good to work with. The ones that are missing need final strapping which should be done in the next few days. Boots: Spats / Shins: Those parts are glued together as Dan did with his kit. Tricky to get on but everything stays in place :-D Knee plates with gaskets: Thighs: Codpiece: Posterior armor: Abdomen Armor: Detonator:1 point
-
While we can't be 100% certain at this point, if it can be proven that this is FN it should certainly be a case of "Buyer beware", and some more research would be in order for sure. BUT, keep in mind that this person is selling 30 of these kits as one package, which I imagine will end up being individually sold on ebay or the like at some point. While all armorers have unique little nuances in their designs, as seen below this one has it's share as well, and to be honest, I'm not a fan of this kit. Depending on the GML it might be fine for Basic approval and maybe even EI with some work, but not for Centurion if that is what someone is aiming for. Here are a few items that would need some updating for screen accuracy: The ab plate button covers are integrated and not separate pieces. The buttons themselves are not integrated into the design and are separate (like SDS and Maker of Things). The small button plate is way too tall. Reference 1. Separate cod. Not a big deal but should be part of the ab-plate. 2. Oddly shaped ridges on lower thigh rears. 3. Overlap design on all limb joins, not cover strips. 1. 2. 3 1. Zero return edges on limb pieces, posterior plate and kidney. Not ideal for those that like a thicker look to their armor, and could cause kidney/posterior plate overlaps 2. Large center button on TD is convex, not concave. Again, not the biggest of issues, but the buttons look more square than rectangular. Length needs to be reduced (easily done). 1. 2. Reference1 point
-
First, I got to meet the maker! Shawn Thorsson, who cast my helmet. I really liked this Kylo's Kintsugi helmet Next, another badass female character, the Armorer And finally, another photo I considered using for my "official", what do you think?1 point