Tee-Kay Fisto[TK] Posted October 9, 2016 Report Posted October 9, 2016 Hi All I thought it was about time I started putting my very slow TK build out there. I'm running a WIP over on the UK Garrison, but I thought I would put almost the same thing on here too, so here we go with another Anovos TK build, and please be patient with me as it's going to take a while (both the actual build and the WIP).Started off in 1977 with wanting to be a Stormtrooper when I grew up. Here we are 39 years later trying to make that happen.With the dicovery of Anovos I decided to have a crack at doing this and started reading A LOT of stuff here and over on the UK Garrison forums.I pulled the trigger on Feb 9th and placed my order (this was one of their last 300 kits from the original production run). I wish I had done it earlier and saved some money but hey-ho I'm in it for the love of Star Wars so the money is (almost) not important. Also at this point I wish I had been able to see into the future and see that Anovos were going to offer the second run minus the soft goods for 200 bucks less!! I have already replaced my supplied soft good anyway! It was at this point that I decided that if I was going to do this then I was going to go all the way and aim for Centurion level. Ambitious for a new builder I know, but also achievable after seeing how other people have progressed. This decision determined what other lovely things I was going to have to spend my hard earned money on. Can I just say that Americans have it so much easier that us Brits. Getting a lot of things in the UK in near impossible and importing costs an arm and a leg. We have to pay import duty and tax on imports so our costs rise. Big Brown Box arrived Feb 17th and the build started. Big Brown Box 17th Feb 2016 by brian.mcdavid, on Flickr As well as the armour I started ordering (hopefully) everything else I was going to need. Boots from TK Boots TK Boots - Very nice by brian.mcdavid, on Flickr New stronger belt from Rob Kittell on FISDFlexible latex hand guards from TrooperbayBracket system from MrNostripes Belt, Brackets and Hand Guards by brian.mcdavid, on Flickr Helmet pads to replace the terrible Anovos helmet liner.Replacement Brow trim as the one on my bucket was at least 1/2" too short. Helmet Pads and new Brow Trim by brian.mcdavid, on Flickr After reading so many WIP's both here and over on the UKG I also realised I would have to buy some essentials for actually building the armour so more money had to go for the cause. In return for my hard earned I now have lots and lots of strong rare earth magnets, several tubes of the evil smelling E6000 glue and, thanks to a comment by Christopher Pearson in his build thread, many many small clamps. You can never have too many magnets and clamps. Bought loads of elastic in the different sizes and colours I found mentioned in various WIP's Various sizes and colours of elastic by brian.mcdavid, on Flickr Bought new base layers as I wasn't sure at that point how good the Anovos soft goods would be. Turns out that was the correct thing to do. Invested in a few new tools and build consumables as my garage already contained most of what I would need. Also bought a Doopy E11 blaster kit which is built and will crop up later in this build with details of all the extra bits that went into it to make it more accurate. I didn't take build pictures of that as my construction method had absolutely no method to it.... was just making it up as i went along. When I read an interesting post on someones build thread I would think "that's cool, maybe I could do that" and it was all change.Will post more of my painfully slow progress soon in the hope of being able to pick all the woderfull brains out there to stop me making a right pig's ear of this. Thanks for stopping by. Brian Quote
Tee-Kay Fisto[TK] Posted October 9, 2016 Author Report Posted October 9, 2016 Once BBB day came there was a flurry of activity. Firstly because no-one was home to receive the delivery which meant going to the local Fed-Ex depot to collect it and then trying to get this muckle great box into the back of an Audi TT. I honestly thought I was going to have to unpack the box in the car park, but it fitted - just!Opened and checked the contents but decided not to post pictures of it lying all over my sitting room floor as we all know what it looks like.Forwent the obligatory Bucket pic as well, although I wish I had taken one as my bucket has been lying in bits for ages now awaiting repaint and adjustment to get rid of the HUGE gaps around the ears and fit a longer brow trim, as the original was about 1/2" too short. Bucket in bits for improvements by brian.mcdavid, on Flickr Started on the trimming using the score-and-snap method as I'm used to working with a stanley knife (I think many people call it a box cutter) so this seemed the easiest way to go.By the 25th February I had two piles of white ABS, one good - one bad. Trimming finished 25th Feb 2016 by brian.mcdavid, on Flickr Left-overs by brian.mcdavid, on Flickr This was as far as I went for quite some time. Started doing loads more reading as really apprehensive about making a right pigs ear of this. The main WIP's I kept going back to were UKSWRATH's build, Christopher Pearsons WIP's both here and on theUKG, KMan's Adventure Build and Tony 'boneyboy' Lee's build threads. There were many, many more viewed but these were my usual go-to places.As I was going to be doing a lot of this on my own I decided to do the very uncomfortable task of making a duct-tape mannequin for my armour. My very understanding wife had the task of turning me into a hot, sweaty, immobile statue, and fortunately agreed to cut me out of it when we were done. A most unpleasant experience (and I swear that the duct tape stretched out of shape when I was cut out of it as I am never that shape! ) Armour taped onto the mannequin gave me a warm feeling seeing it together (roughly) for the first time on 14th July. Taped onto mannequin by brian.mcdavid, on Flickr First proper assembly was on the forearms. Cut to cover strip width on the front and glued the cover stips to one side of each forearm only using lots of clamps to hold in place. Allowed glue to dry then glued the other half of the forearm in place and allow glue to dry this time with a couple of clamps and lots of magnets to hold. Sorry no photos.Next up was the thighs. Used the same process as with the forearms doing one half to the cover strip with clamps, then doing the second half using clamps, magnets and tape to hold until the glue set. Thigh Outer Halfs with cover strip glued by brian.mcdavid, on Flickr Thighs with front cover strip glued by brian.mcdavid, on Flickr This is where I am up to now. I'm gonna have to get a move on if I ever want to get this finished. My plan was to do one side of all the limbs and then do all my sizing, cutting and glueing of the backs of all the pieces. Thanks for dropping by.All advice gladly acceptedBrian 2 Quote
Tee-Kay Fisto[TK] Posted October 9, 2016 Author Report Posted October 9, 2016 Hi The next task on my list is the dreaded Anovos shins. I know a lot has been said about the mis-labelling of some Anovos kits so I have gone down the route of using the shape of the pieces to decide where they belong.I have tried to get each calf to have the inner and outer pieces follow the muscle. It has been said several places that there should be a longer curve on the outer calf and a shorter curve on the inner calf.This is a picture I found on a thread somewhere. Sorry I can't remember who posted the image, but all credit to them as it is a huge help. Calf shape by brian.mcdavid, on Flickr Please help and advise if I have them correct or need to rearrange them.In the photos I have 1&2 as the right calf and 3&4 as the left calf. Shins 1&2 right leg. 3&4 left leg. by brian.mcdavid, on Flickr Shins 1&2 right. 3&4 left by brian.mcdavid, on Flickr Right shin by brian.mcdavid, on Flickr Left shin by brian.mcdavid, on Flickr Thanks in advance for any help and advice.Brian Quote
Cricket[TK] Posted October 9, 2016 Report Posted October 9, 2016 I think you need more clamps. And more magnets. Great job so far! Keep it up! 1 Quote
Tee-Kay Fisto[TK] Posted October 20, 2016 Author Report Posted October 20, 2016 I think you need more clamps. And more magnets. Great job so far! Keep it up! Thanks for the support Christine. Quote
Tee-Kay Fisto[TK] Posted October 20, 2016 Author Report Posted October 20, 2016 Got a little bit more done to my armour over the past few days. Front cover strips onto the shins and the sniper plate fitted after getting the go ahead from my armourer for position of the pieces. Right shin Right shin front cover strip by brian.mcdavid, on Flickr Left shin Left shin front cover strip by brian.mcdavid, on Flickr Sniper plate Sniper plate by brian.mcdavid, on Flickr Next move is to get one cover strip on the biceps then start sizing the limbs to fit. Probably going to cut and glue some inner cover strips to the shins as I understand there will be a lot of stress on this opening and closing to put them on. Hopefully my next update will not take as long. Brian 1 Quote
Tee-Kay Fisto[TK] Posted October 23, 2016 Author Report Posted October 23, 2016 Coming along nicely, Brian Thanks. Just wish I had more free time to get moving quicker. Sent from my iPhone using Tapatalk Quote
Tee-Kay Fisto[TK] Posted October 30, 2016 Author Report Posted October 30, 2016 Hi All Another update for my glacial build. A bit more done in the past few days. Bicep front cover strip glued on. Aligned the biceps at the bottom edge to allow trimming along the top edge under the shoulder bell. Biceps front cover strip by brian.mcdavid, on Flickr Inner cover strips cut from a sheet of 1.5mm ABS and glued to each shin Left shin inner cover strip by brian.mcdavid, on Flickr Right shin inner cover strip by brian.mcdavid, on Flickr Cut support pads for bracket system (such a time consuming job measuring, drilling, cutting and sanding these little things) Bracket system support pads by brian.mcdavid, on Flickr Glued, screwed and clamped the pads in place front and back Rear bracket support pads glued by brian.mcdavid, on Flickr Front bracket support pads glued by brian.mcdavid, on Flickr Need to wait for more free time to get on it again. Next up will be sizing all the limbs then onto starting on the strapping. Thanks for dropping by and any advice you can give. Cheers Brian 1 Quote
Pretzel Posted October 31, 2016 Report Posted October 31, 2016 Great Progress so far Brian. You are hitting the home stretch! We will see you at the finish line. Quote
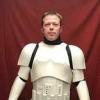
Tee-Kay Fisto[TK] Posted February 13, 2017 Author Report Posted February 13, 2017 Hi All After what seems like an eternity I've actually got some progress to post on this painfully slow build. Seems like I have had so many other things to do keeping me too busy for my armour. Can't complain about it all as I'm turning my garage into more of an extra room/workshop sort of area which gives me a better place to work on this instead of the kitchen table. Trimmed the returns on arms and legs to around 5mm for a starting point when I eventually get round to fitting the parts to me. No photos as it's kinda boring to look at. What isn't boring is my Bucket is now back together and painted Looked at what other people have done with their electronics and interiors and made a start on mine. Making sure that the bucket is secured without using the ear screws so that they can be removed to alter/adjust electronics meant adding more screws and bonding in the nuts for the ear cap screws. Also had to buy even more brow trim as my initial replacement trim was not the correct size so eventually found a supplier for US52 trim. Looks better already. Marked out the areas to be painted and applied the grey paint freehand. Marked areas to paint by brian.mcdavid, on Flickr Extra screw hole positioning by brian.mcdavid, on Flickr On with the grey by brian.mcdavid, on Flickr More grey by brian.mcdavid, on Flickr Used the stencils from Trooperbay for stripes and tube stripes and freehanded the borders. Tears by brian.mcdavid, on Flickr Stripes by brian.mcdavid, on Flickr Outlining 1 by brian.mcdavid, on Flickr Outlining and tube stripes 1 by brian.mcdavid, on Flickr Outlining and tube stripes 2 by brian.mcdavid, on Flickr More stripes by brian.mcdavid, on Flickr Last thing for now was to fit new Hovi tips New Hovi Tips too by brian.mcdavid, on Flickr These are Hovi mic tips from Ukswrath which are the first part of the electronics to go in. More will follow but the Hovi's are seen so had to go on now. I think the painting went well for someone who has not held a paintbrush like this since his Dungeons & Dragons days of his distant youth. Scarily just thought about how long it has actually been New lens on order as the original Anovos one is not the clearest to see through. Will try and post again soon but life always gets in the wasy when I say that Thanks for visiting Brian 1 Quote
Tee-Kay Fisto[TK] Posted April 8, 2017 Author Report Posted April 8, 2017 (edited) Hello There After what seems to be an eternity I've got more on my armour to show. Forearms and thighs have been sized and rear cover strips glued on. Rear cover strips first half by brian.mcdavid, on Flickr Rear cover strips closure by brian.mcdavid, on Flickr Shins have been sized and outer rear cover strip has been glued on. Shin rear outer cover strip by brian.mcdavid, on Flickr I will need to remove more of the upper return on the biceps before sizing them correctly as they were very uncomfortable. Likewise I will need to deal with the peak on the rear of the thighs where the cover strip is mounted as it really digs in when trying to move. Got the bracket system fitted to the torso to get an idea of size and fit. Probably don't need to alter the size any so I'll dismantle it for a finish sand and start on the strapping this weekend. (I hope) Cheers for looking Brian Edited April 8, 2017 by Bri_McD135 1 Quote
Haso[TK] Posted April 8, 2017 Report Posted April 8, 2017 Coming along well Brian. Nice work! Sent from my SM-J100Y using Tapatalk Quote
Tee-Kay Fisto[TK] Posted April 10, 2017 Author Report Posted April 10, 2017 Coming along well Brian. Nice work! Sent from my SM-J100Y using Tapatalk Thanks for the support. Just never find the time but trying to make a big push to get finished for May the 4th Failing that aiming for May 25th Sent from my iPhone using Tapatalk Quote
Haso[TK] Posted April 10, 2017 Report Posted April 10, 2017 Good to see you aiming for Centurion from the start, especially in replacing the belt and strapping. From the Anovos builds I've seen, and helped build, both are pretty rubbish as supplied and best to replace as you have done. Only thing I haven't noticed is if you've also got the s-trim needed for the helmet neck trim, if going for Centurion? It can also be had from Trooperbay if you don't already have it. Quote
Tee-Kay Fisto[TK] Posted April 10, 2017 Author Report Posted April 10, 2017 Luckily Anovos actually fitted s-trim as standard so good to go there. Probably about the only thing I haven't had to replace. Sent from my iPhone using Tapatalk Quote
ritzmike Posted April 12, 2017 Report Posted April 12, 2017 Hello my friend I have a question for you. I've been reading a lot of threads about problems with Anovos customer service and defective helmets and excessive long waits ? Any feedback?maybe another manufacture Sent from my iPhone using Tapatalk Quote
Tee-Kay Fisto[TK] Posted April 12, 2017 Author Report Posted April 12, 2017 I must admit that I have not had any of the problems with customer support. My only issue was when I was missing some of the strapping they took forever to answer due to the fact that they have a known issue with hotmail accounts so I had eventually to use my work email to contact them. Once I did that my issue got dealt with. My armour arrived in the U.K. With no defects but I have heard others talking about the problems they had. As for the long waiting times I was one of the lucky ones. I didn't preorder my armour. At the end of the first run last year Anovos had 300 kits left and put them up for sale. I had my kit about 3 weeks after ordering it. I like my kit and there is a great community of builders doing kits so help is never far away and as a first time builder that is brilliant. I did think about other makers but thought that one box with everything was the way to go. Turns out I have replaced a good many of the bits as I am aiming for centurion. All I can say is read lots before you make your mind up. It's a very personal thing to build your own armour so take your time to decide. If you do decide to go for Anovos then don't buy the kit with soft goods as they are not worth the money and you will replace them with better. Sent from my iPhone using Tapatalk Quote
ritzmike Posted April 12, 2017 Report Posted April 12, 2017 Thank you for the feed back Sent from my iPhone using Tapatalk Quote
Tee-Kay Fisto[TK] Posted April 12, 2017 Author Report Posted April 12, 2017 No problem brother Sent from my iPhone using Tapatalk Quote
Tee-Kay Fisto[TK] Posted April 12, 2017 Author Report Posted April 12, 2017 Hi Again A bit more progress yesterday and today. Stripped the torso and gave all the parts a good smooth finish sanding. Will probably need to remove some more returns at the neck/shoulder area once I get to the point of trying it all on. I'm not sure just how much can be removed around the neck. I'm probably just going to follow what my wife suggests and just go for comfort. Nothing to see for a couple of hours work so no picture. Painted the ab buttons last night and got them glued on today. Got the top returns on the biceps almost totally removed and sized, cut and glued them up. Untitled by brian.mcdavid, on Flickr Next step is to move on to the strapping, but that is for another day Cheers Brian Quote
Tee-Kay Fisto[TK] Posted April 19, 2017 Author Report Posted April 19, 2017 (edited) Hey Troopers More progress to show for a few hours working before my nightshifts this week. Started putting bits of armour together. A greatly satisfying process. Got elastic glued into thighs and shoulder bells Thigh and shouldel bell strapping by brian.mcdavid, on Flickr Snaps fitted to torso where required and bracket and strapping fitted front and rear. Strapping rear by brian.mcdavid, on Flickr Strapping front by brian.mcdavid, on Flickr Split rivets for abdomen to kidney strapping done and elastic strap from kidney to abdomen solo snap done Internal strapping left side by brian.mcdavid, on Flickr Internal strapping right side by brian.mcdavid, on Flickr Chest to back elastic fitted. Glued front and back left hand side and only at the back at the ight hand side. Need to glue in snap plate for right hand side chest fixing. Hopefully get that fitted tomorrow. Chest to back Elastic by brian.mcdavid, on Flickr Now I need some help and advice. I'm struggling to get my shins to close well at the rear. I'll let these photos tell the story Right shin gap by brian.mcdavid, on Flickr Right shin alignment by brian.mcdavid, on Flickr Left shin alignment by brian.mcdavid, on Flickr The left shin is much better than the right with just an alignment issue i.e. the tapering gap. The right shin is a totally different story. The gap is much larger which makes me think I am going to have to reshape the shin. I was planning on using velcro for my closures. Not the anovos stuff but good industrial stuff. Is a hot water bath the way to go with this? Thanks for looking and any advice you can give Cheers Brian Edited April 19, 2017 by Bri_McD135 2 Quote
68Brick[TK] Posted April 19, 2017 Report Posted April 19, 2017 Yup. Hot water bath. The two sides should align without the Velcro. Looking good trooper! Quote
Tee-Kay Fisto[TK] Posted April 20, 2017 Author Report Posted April 20, 2017 Yup. Hot water bath. The two sides should align without the Velcro. Looking good trooper! Thanks Brad. Just needed a little bit of guidance to get closer to finishing. Hopefully be done by the end of the weekend Cheers Brian Quote
Tee-Kay Fisto[TK] Posted April 22, 2017 Author Report Posted April 22, 2017 Hi All I'm back again already. Got stuck in over the past couple of days and got loads done. Started with the belt. As most of you will know the Anovos belt is garbage so replaced it with a Kittle belt (sweet). Removind the rivet covers was a complete clusterf*** due to that pink gunk the were glued on with, much swearing! I wasn't one of the lucky ones and ended up with damage to all 3 rivet holes. Repaired with ABS patches fixed on with ABS cement (not seen so no point in waiting 24 hours for E6000 to set)Once that was done put the new belt together and glued the rivet covers on with E6000 Belt damage by brian.mcdavid, on Flickr Belt repaired by brian.mcdavid, on Flickr Ammo pack fitted by brian.mcdavid, on Flickr Rear view by brian.mcdavid, on Flickr With appropriate accessories by brian.mcdavid, on Flickr I know that I still have to trim the top hole off the holster straps but no rush. After the belt was done and put to the side to allow the E6000 to cure I moved onto strapping. Got the thigh support system finished. Thigh support by brian.mcdavid, on Flickr Made and fitted bicep hooks, again used ABS cement to fix them in then strapped the biceps to forearms. Bicep to forearm by brian.mcdavid, on Flickr Arm strapped with bicep hook by brian.mcdavid, on Flickr Last bit of strapping work was the right hand chest snap plate, again fitted with ABS cement. Chest snap plate by brian.mcdavid, on Flickr After spending ages fixing my shins with a hot water bath got the closure velcro fitted. Velcro closure on shins by brian.mcdavid, on Flickr Next up was to finish the TD. I assembled the detonator not long after I got the kit and it's been lying in a box since then. Drilled and tapped the screw holes and put a little E6000 under the clips for strength. TD front by brian.mcdavid, on Flickr TD clips by brian.mcdavid, on Flickr Notice how Manny is kindly holding my freshly finished belt Removed the screws from the TD and painted them black TD screws painted by brian.mcdavid, on Flickr After all my hard work it was time for the fun to start ..... 2 Quote

Recommended Posts
Join the conversation
You can post now and register later. If you have an account, sign in now to post with your account.