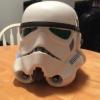
Haso[TK] Posted February 29, 2016 Report Share Posted February 29, 2016 This is the upgraded armour I received...apologies for the bluriness, I've just taken it quick but hopefully you get the idea. 2 Quote Link to comment Share on other sites More sharing options...
Jinsei[TK] Posted February 29, 2016 Author Report Share Posted February 29, 2016 Thanks for the pic, the things you learn afterwards lol. As Coastertk said, at least with this plastic spaceman, you can always buy and replace parts. If I do have to replace the ab bit, it shouldn't take too long to swap everything over (famous last words...) Quote Link to comment Share on other sites More sharing options...
TK 2759[501st] Posted February 29, 2016 Report Share Posted February 29, 2016 By helmet move,met I'm assuming you,mean looking left and right... The bucket does tend to touch the chest armour when doing this, so I don't see an issue... Otherwise you may wish to try a hard hat liner to lift the bucket a little higher as well. 1 Quote Link to comment Share on other sites More sharing options...
Jinsei[TK] Posted February 29, 2016 Author Report Share Posted February 29, 2016 By helmet move,met I'm assuming you,mean looking left and right... The bucket does tend to touch the chest armour when doing this, so I don't see an issue... Otherwise you may wish to try a hard hat liner to lift the bucket a little higher as well. I've already got a hard hat liner in there.... I may need to move it down a bit. Our Garrison CO mentioned as a shorter trooper having the helmet all the way down may not be an option. If I put a piece of foam in between the hard hat liner and the helmet top I can just barely see out of the bottom of the lenses, but the helmet sits better and I can move my head without having to move my whole body. I took some pictures and highlighted the offending ab cut off piece lol. From my understanding this is how I should have cut it (Red is what I cut off, blue is what I should have) Thanks Haso for the picture. Pardon my drawing... This is what my ab/kidney notch alignment look like now. Red is the trimmed bit. With the belt on, the red is all of whats visible of the trimmed ab section. Quote Link to comment Share on other sites More sharing options...
Sentry71[TK] Posted February 29, 2016 Report Share Posted February 29, 2016 Spencer, have you thought about putting in additional strapping from the kidney to the posterior, near the L notches, to pull the posterior inward to align with the kidney? I'm thinking that could be a viable fix, depending on how tight everything is already. 1 Quote Link to comment Share on other sites More sharing options...
TD42115[501st] Posted February 29, 2016 Report Share Posted February 29, 2016 (edited) Spencer, have you thought about putting in additional strapping from the kidney to the posterior, near the L notches, to pull the posterior inward to align with the kidney? I'm thinking that could be a viable fix, depending on how tight everything is already. i had done this on both sides to keep them lined up and tight. No elastic strapping, all thick nylon now & they stay aligned nicely. Edited February 29, 2016 by TD42115 Quote Link to comment Share on other sites More sharing options...
Jinsei[TK] Posted February 29, 2016 Author Report Share Posted February 29, 2016 Yeah the posterior needs to be brought in a bit. I might see if nylon webbing there instead of elastic will be strong enough to suck in the flaring out. I know I could use a heat gun to bend the posterior armor a bit, but I don't wan't to use it for fear of mishaps lol. Quote Link to comment Share on other sites More sharing options...
TK 2759[501st] Posted February 29, 2016 Report Share Posted February 29, 2016 Yeah the posterior needs to be brought in a bit. I might see if nylon webbing there instead of elastic will be strong enough to suck in the flaring out. I know I could use a heat gun to bend the posterior armor a bit, but I don't wan't to use it for fear of mishaps lol. No heat gun! Bad, bad, bad idea! Lol 2 Quote Link to comment Share on other sites More sharing options...
Jinsei[TK] Posted March 1, 2016 Author Report Share Posted March 1, 2016 (edited) lol Dan, when I read that all I could think of was someone yelling at a dog that's in trouble. Well I changed over the elastic edge strapping on the posterior to nylon. It worked like a charm. It sucked in the parts that were flaring out. I also added some foam padding into the biceps, forearms and shortened the elastic connecting the biceps and the forearms. Now that my arm sits in the center of the bicep it doesn't look like I'm wearing the thigh piece on my arm (I still may have to take apart the biceps and do some trimming). Some foam was trimmed and added to the helmet as well (in-between the hard hat liner and the top of the helmet) I can still "see" out of the lenses, but the helmet doesn't rest on the shoulder bridges now, and a bonus effect, I can actually turn my head! I need to re-work my shins a bit, as they are pretty tight. I need probably an additional 1-2 cm of space in the back. I think I can add a inner strip in the back of the strip that's just a bit wider, it will give me enough space and still allow for the outer strip to remain the same size. (Just needs to increase for Velcro coverage.) I need to do a bit of trimming/sanding areas where there are armor bites (there isn't anything too major, probably just a couple quick passes with sandpaper is all that will be needed) . I would post up pictures but apparently the filter at work is now blocking photobucket (it worked two days ago) Edited March 1, 2016 by Jinsei 3 Quote Link to comment Share on other sites More sharing options...
Sentry71[TK] Posted March 1, 2016 Report Share Posted March 1, 2016 Looking forward to the final pics - great work! 1 Quote Link to comment Share on other sites More sharing options...
TK 2759[501st] Posted March 1, 2016 Report Share Posted March 1, 2016 Looking forward to pictures too, and your final approval! Won't be long now! 1 Quote Link to comment Share on other sites More sharing options...
Jinsei[TK] Posted March 2, 2016 Author Report Share Posted March 2, 2016 (edited) So, I've done a few small tweaks to the arms and helmet fitment. I also have reworked my shins a bit. I needed to make them just a tad larger (like 10 mm bigger). All I had to do was move the inner cover strip over a bit and that was enough to make my shins fit much better. The glue is still drying so no pics on that. I vowed never to take a photo like this, but sadly I had no one else around to give a hand lol. I don't know if I should trim the biceps or just leave them this way now. I added a little bit of foam to center my arm in the bicep, and I think it looks better then in the previous pictures, but that's just me. Helmet now raised up a bit, i'm able to see AND move my head. Edited March 2, 2016 by Jinsei 1 Quote Link to comment Share on other sites More sharing options...
Jinsei[TK] Posted March 7, 2016 Author Report Share Posted March 7, 2016 Well, not too much left (other then adjustments here and there) Attached the thigh ammo pouch today. I originally marked to have the edge of the ammo pack at 1/4" on the return edge, however I had to trim alot off the rear of the thighs, and because of this I needed to move the edge of the ammo pack another 1/4" forward. I thought I had taken a picture of the other side, but apparently I didn't upload it. On both of the sides the distances from that rear edge to the edge of the ammo part are the same, or are within 1mm of being equal. The rivet here on the right looks like it's popping up. I've fixed that and it is now much more flush. 2 Quote Link to comment Share on other sites More sharing options...
Coastertk[TK] Posted March 7, 2016 Report Share Posted March 7, 2016 Looking good Spencer. One question. Have you worn the full kit in a walk about situation? It looks like you have a lot of material that can be removed at the back/bottom of the thighs. Do the same at the back/top of the shins and you'll be doing stairs in no time. Quote Link to comment Share on other sites More sharing options...
Jinsei[TK] Posted March 7, 2016 Author Report Share Posted March 7, 2016 Yeah I have worn the full thing walking around the house and it defiantly needs some trimming. However I'm going to wait on that until the next time I'm down in person and have another set of eyes who have done it before. Realistically it would only take a couple minutes to do with a pair lexon scissors. Quote Link to comment Share on other sites More sharing options...
Jinsei[TK] Posted March 8, 2016 Author Report Share Posted March 8, 2016 I just finished attaching the holster, which was the last major "build" bit I needed to do. I've fixed a lot of the small fitment issues. I added some foam in the shins to help keep them in place, and it worked great. I just finished another test fit and walk around with everything on. With the minor things I've changed it looks 100% better (IMO). It is also a lot more comfortable. I really need to cut out some of the shins/thighs in the rear (as mentioned by Coastertk), but I want to get basic approval first. As it stands I think I could get basic approval now. However I need to wait until the tripod I ordered comes in, or until the gf comes over and can help with some pictures within the next week. The second screw may look a bit out of place, however that is due to my photo taking abilities. It actually is the same distances, and looks fine in person. 1 Quote Link to comment Share on other sites More sharing options...
68Brick[TK] Posted March 9, 2016 Report Share Posted March 9, 2016 Looking good. A few recommentations ... heat bend your shoulder straps so they lay flat on you backplate, retain your buttplate with extra strapping and/or velcro, and possibly move your bicep-to-forearm straps to the front of your arm instead of the sides of your arms. It might make the straps a little less visible. You could shorten those straps too, to bring the forearm up a little and away from the hands. Get that girlfirend over and take some pics! 1 Quote Link to comment Share on other sites More sharing options...
Jinsei[TK] Posted March 9, 2016 Author Report Share Posted March 9, 2016 Well ugh, I had all this typed out but was an error with the computer. Thanks for the recommendations. I've actually "fixed" a few of those things already, namely the butt plate and the arms. I added to more straps to the sides of the buttplate/kidney plate and that completely eliminated the flaring out. It looks WAAAAY better. For the arms, I've actually shortened the elastics in the forearms, as well as added a different snap plate in the shoulder bells. With the little foam padding I added to the biceps it pretty much eliminated the visible elastics, the picture I took with the Ipad doesn't really do it justice. I'm going to take a set of pictures (just got a tripod) and see. If it's still a problem I think I will take your advice on putting them on the inner bit. As for the shoulder straps...I'm paranoid of applying heat lol. I've got the tools to do it, going to practice on some scrap first. They actually already bent they just need a little more (garrison mate did them for me at the last armor party ) I think I may play around with some scraps tonight. 2 Quote Link to comment Share on other sites More sharing options...
Pyrates[TK] Posted March 9, 2016 Report Share Posted March 9, 2016 Well ugh, I had all this typed out but was an error with the computer. Thanks for the recommendations. I've actually "fixed" a few of those things already, namely the butt plate and the arms. I added to more straps to the sides of the buttplate/kidney plate and that completely eliminated the flaring out. It looks WAAAAY better. For the arms, I've actually shortened the elastics in the forearms, as well as added a different snap plate in the shoulder bells. With the little foam padding I added to the biceps it pretty much eliminated the visible elastics, the picture I took with the Ipad doesn't really do it justice. I'm going to take a set of pictures (just got a tripod) and see. If it's still a problem I think I will take your advice on putting them on the inner bit. As for the shoulder straps...I'm paranoid of applying heat lol. I've got the tools to do it, going to practice on some scrap first. They actually already bent they just need a little more (garrison mate did them for me at the last armor party ) I think I may play around with some scraps tonight. Use boiling water to slowly bend the shoulder straps in the form you want and it won't melt them. 1 Quote Link to comment Share on other sites More sharing options...
Jinsei[TK] Posted March 9, 2016 Author Report Share Posted March 9, 2016 Yeah thanks for that Aaron, I may try that tonight. It shouldn't take a lot as they are "almost" there. . . .I'm getting all excited lol. There are quite a few things that I want to fix (cutting out behind the knees, armor bite areas, some extra sanding here and there etc) but it's stuff that can be done after approval. Plus it's stuff I want to have others with TK's to see in person before I go cutting. 3 Quote Link to comment Share on other sites More sharing options...
ABS80 Posted March 10, 2016 Report Share Posted March 10, 2016 Avoid heat gun at all cost! many customers ruined parts and helmets ABS as high rubber content, too much heat and will just warp without warning. Mark (AP) 4 Quote Link to comment Share on other sites More sharing options...
Jinsei[TK] Posted March 10, 2016 Author Report Share Posted March 10, 2016 (edited) I don't actually own a heat gun. I did a nice little bath for the very tips of the shoulder bridges and it worked perfectly. Edited March 10, 2016 by Jinsei 2 Quote Link to comment Share on other sites More sharing options...
Pyrates[TK] Posted March 20, 2016 Report Share Posted March 20, 2016 Checking in to see if you got your new ab and if you're 501st yet J - cheers! Quote Link to comment Share on other sites More sharing options...
Jinsei[TK] Posted March 20, 2016 Author Report Share Posted March 20, 2016 (edited) Haha, yeah I've kinda been MIA lately, haven't been home much. I managed to fix a few things, still waiting on the ab plate. I sent pictures off for approval, however needed to fix a couple things. The GML wanted me to fix my td (there was some issues with it, for some reason the angle the screws/sitting on belt I just couldn't get right.) and to make the angle on the knee ammo pouch. I've just done the fixes requested by the GML and resubmitted. So hopefully with a little luck I will pass muster and will have a shiny new TK number soon... Edited March 20, 2016 by Jinsei 1 Quote Link to comment Share on other sites More sharing options...
Pyrates[TK] Posted March 20, 2016 Report Share Posted March 20, 2016 Haha, yeah I've kinda been MIA lately, haven't been home much. I managed to fix a few things, still waiting on the ab plate. I sent pictures off for approval, however needed to fix a couple things. I've just done the fixes requested by the GML and resubmitted. So hopefully with a little luck I will pass muster and will have a shiny new TK number soon... That's freakin fantastic - congrats and can't wait to see that ID! Quote Link to comment Share on other sites More sharing options...

Recommended Posts
Join the conversation
You can post now and register later. If you have an account, sign in now to post with your account.