Jinsei[TK] Posted January 1, 2016 Report Share Posted January 1, 2016 (edited) Hey all Since my AP helmet arrived a few days ago, and the rest of the kit should arrive in the next couple of weeks I figured I would start my build thread here. I've been collecting all the bits and pieces over the past few months, and I'm at the point that once the kit arrives I can get straight to assembly. I started off with getting a Hyperfirm E11 and a Veedox neck seal, both are fantastic. I picked up a pair of boots with the plan to paint them, as at the time I did not know how long the wait list was going to be for Imperial boots or TK boots. I then picked up some of Ukswrath's handy work I ended up painting the boots, and just after I finished I was able to get my order for a pair from Imperial boots. I may just use the pair that I painted for a static display. Not really sure yet. Finished product, they didn't turn out too terribly. And then the Imperial boots arrived, here is a side by side. Some more presents from Trooperbay arrived as well. I ended up making a whole bunch of nylon snap plates as I had time to kill and wanted to get as much of the prep work I could done before the kit arrived. I made a couple of rigs to have even length and centered snap plates. Nothing fancy but it worked nicely. I ended up using this centered snap as a guide, it was about the right size for the soldering iron to fit through and melt the nylon below. Edited January 1, 2016 by Jinsei 1 Quote Link to comment Share on other sites More sharing options...
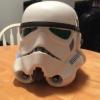
Jinsei[TK] Posted January 1, 2016 Author Report Share Posted January 1, 2016 Had a few more presents arrive in the past couple of weeks. Namely my helmet and an Echo fan system. After opening the box with my helmet I then tore it apart after having it sitting on my table for 30 min. I am planning on changing the lenses, paint, and add all the electronic goodies. I've been looking at a few different ways to attached the lenses. I can't remember where I've seen it but I liked the screw in idea. I found these bases at the local hardware store (the selection is limited as it's a super small town in the middle of nowhere BC) Using a dremel I ground down the sharp bits, as well as trimmed off some of the length on the screws and bases. This is sort of the rough idea of what I am planning Added some paint Now to glue them into place. I decided to go this way as it should (key word is should) make lens replacement/removal and cleaning easy. The paint on the mask side of the helmet has gotten a bit scratched up. I am going to do some touch up when I'm able to get my hands on some flat black humbrol paint. 1 Quote Link to comment Share on other sites More sharing options...
A Master Builder Posted January 1, 2016 Report Share Posted January 1, 2016 Very Nice Work Spencer AP is Awesome! 1 Quote Link to comment Share on other sites More sharing options...
Snaps[TK] Posted January 1, 2016 Report Share Posted January 1, 2016 Great start! Have fun with it! AP is top notch 1 Quote Link to comment Share on other sites More sharing options...
Jinsei[TK] Posted January 1, 2016 Author Report Share Posted January 1, 2016 I'm excited to get the new updated armor. If the helmet is any indication of the rest I'm super happy with deciding to go with AP. I've been seriously looking at purchasing a tk set for a couple of years now, and I was originally looking at AP. I was about to pull the trigger on a set of AP when I found out about the Anovos pre-order I placed an order with them. However I was on the 2nd tier pre-order for the Anovos and with the Canadian dollar exchange rate into USD it brought the Anovos kit into the price range of AP. I mulled it over for a couple of months and since they were both in the same price range I ended up cancelling the Anovos kit and going with AP. There are a number of reasons why I made the switch, mainly though it's because AP is a known entity and the quality of AP's kits are known. From my dealings with Mark I have been SUPER happy with my decision to order through him. 2 Quote Link to comment Share on other sites More sharing options...
Pyrates[TK] Posted January 1, 2016 Report Share Posted January 1, 2016 I'm excited to get the new updated armor. If the helmet is any indication of the rest I'm super happy with deciding to go with AP. I've been seriously looking at purchasing a tk set for a couple of years now, and I was originally looking at AP. I was about to pull the trigger on a set of AP when I found out about the Anovos pre-order I placed an order with them. However I was on the 2nd tier pre-order for the Anovos and with the Canadian dollar exchange rate into USD it brought the Anovos kit into the price range of AP. I mulled it over for a couple of months and since they were both in the same price range I ended up cancelling the Anovos kit and going with AP. There are a number of reasons why I made the switch, mainly though it's because AP is a known entity and the quality of AP's kits are known. From my dealings with Mark I have been SUPER happy with my decision to order through him. Congratulations mate on getting your armor! Following this thread and looking forward to watching it all happen - cheers! 1 Quote Link to comment Share on other sites More sharing options...
Airborne Trooper[501st] Posted January 2, 2016 Report Share Posted January 2, 2016 Congrats and all the goodies. I almost went with AP but couldn't pass up the deal on my MTK at the time. Maybe one day I'll decide to be squeaky clean and do a TK. 1 Quote Link to comment Share on other sites More sharing options...
Jinsei[TK] Posted January 3, 2016 Author Report Share Posted January 3, 2016 Well after attaching the lenses I found out that the glue that was holding the metal brackets on wasn't enough. I ended up making support strips out of some scrap abs I had. In theory the pressure should spread out on the support strips, giveing more strength to where the bracket is. I also repainted the inside of the mask side. I then used some painters tape to mask off the frown area to cut the mesh that would be covering it. The final look. It's not much but it's a start. The new darker lenses and the mesh make it look 1000x better imo. 1 Quote Link to comment Share on other sites More sharing options...
Airborne Trooper[501st] Posted January 4, 2016 Report Share Posted January 4, 2016 Looking good! 1 Quote Link to comment Share on other sites More sharing options...
68Brick[TK] Posted January 4, 2016 Report Share Posted January 4, 2016 Looking Good! I like your idea for mounting the lenses. AP is awesome! 1 Quote Link to comment Share on other sites More sharing options...
THX1978[TK] Posted January 8, 2016 Report Share Posted January 8, 2016 Hi, looking at your icomm system. Are those speakers in the hovi tips? Where did you get them? Sent from my iPhone using Tapatalk Quote Link to comment Share on other sites More sharing options...
TK 2759[501st] Posted January 8, 2016 Report Share Posted January 8, 2016 Hi, looking at your icomm system. Are those speakers in the hovi tips? Where did you get them? Sent from my iPhone using Tapatalk I believe that is Echo's fan kit you are seeing... 1 Quote Link to comment Share on other sites More sharing options...
THX1978[TK] Posted January 9, 2016 Report Share Posted January 9, 2016 I'm looking at post 1 the echo fan kit is pictured in post 2. Unless I'm getting really confused. Sent from my iPhone using Tapatalk 1 Quote Link to comment Share on other sites More sharing options...
Sentry71[TK] Posted January 9, 2016 Report Share Posted January 9, 2016 (edited) I believe in Post 1, second photo, you are referring to the kit from ukswrath (link here to his sales thread). Looks like option 8. I'm hoping to get the same kit, when I can get a bit more together. Edited January 9, 2016 by Sentry71 1 Quote Link to comment Share on other sites More sharing options...
THX1978[TK] Posted January 9, 2016 Report Share Posted January 9, 2016 That's it. Thanks. Sent from my iPhone using Tapatalk Quote Link to comment Share on other sites More sharing options...
Jinsei[TK] Posted January 9, 2016 Author Report Share Posted January 9, 2016 Yeah the Hovi mic tips are from ukswrath. I think they are fantastic haha. Quote Link to comment Share on other sites More sharing options...
Jinsei[TK] Posted January 16, 2016 Author Report Share Posted January 16, 2016 (edited) Well last weekend the "local" garrison had an armor party. I went out to check things out and work on my bucket some more. I wanted to get the Echo fan kit, and the hearing assist in as well. I also previously installed a hard hat liner. With everything in the bucket it's a tight fit putting it on, but once it's on it's pretty comfortable with the liner. I had to do a re-creation of what I did as I didn't take any pictures during the armor party. Here are a couple shots of the hole I drilled for the hearing assist. It took me almost an hour to actually pull the trigger on the drill, I kept putting it off for fear of ruining the bucket. I ended up using a drill gauge a size smaller then the diameter of the microphones, then used a file to widen the hole. When I looked at the installation guide on ukswrath's sale thread I saw them using hot glue. I didn't end up using it as the mic's are such a snug fit they won't move. That and I want everything in the bucket to be easily removable/interchangeable I ended up re-soldering the mic tips to a 90 degree angle so the cable can run along the back of the helmet and so it doesn't stick out/get damaged from my head bumping it. Following the tutorial I also drilled holes into the ear rank bar, I need to go over the rank bar in black paint again as it didn't dry enough before I put my bucket away in it's carrying case (pillow case) and some of the paint rubbed off but even from a short distance you can't really tell the holes are there. When I was showing what I did to the guys from my garrison they ended up asking if I was going to drill holes in the ears. I had to point it out to them that I already had haha. Edited January 16, 2016 by Jinsei 1 Quote Link to comment Share on other sites More sharing options...
Pyrates[TK] Posted January 16, 2016 Report Share Posted January 16, 2016 Did you get a chance to meet Terry - I hear he's a legend. He made his own speeder bike! Quote Link to comment Share on other sites More sharing options...
Jinsei[TK] Posted January 16, 2016 Author Report Share Posted January 16, 2016 Yeah Terry was there for most of the day, he brought presents! Well paid for presents lol There were I think 3 of us that showed up that are waiting on the new AP kits haha. I was really hoping on having the kit by that armor party but not much you can do about the delay. 2 Quote Link to comment Share on other sites More sharing options...
Coastertk[TK] Posted January 16, 2016 Report Share Posted January 16, 2016 Be sure to let us know when your big brown box arrives, and a weekend that works for you, and I will throw another build party. 4 Quote Link to comment Share on other sites More sharing options...
THX1978[TK] Posted January 16, 2016 Report Share Posted January 16, 2016 Nice work on your bucket. It was good meeting you at the party. Now I just have to start saving for all those extra gadgets for mine. Sent from my iPhone using Tapatalk 2 Quote Link to comment Share on other sites More sharing options...
Jinsei[TK] Posted February 3, 2016 Author Report Share Posted February 3, 2016 Thanks Well this happened today! I really have no idea how Mark gets all the pieces to fit. The box wasn't that big. 4 Quote Link to comment Share on other sites More sharing options...
Pyrates[TK] Posted February 3, 2016 Report Share Posted February 3, 2016 Congratulations!!!! Quote Link to comment Share on other sites More sharing options...
TK 2759[501st] Posted February 3, 2016 Report Share Posted February 3, 2016 Got a bit of work ahead, but it's all worth it! 1 Quote Link to comment Share on other sites More sharing options...
Jinsei[TK] Posted February 3, 2016 Author Report Share Posted February 3, 2016 So, since the kit came pre-trimmed I started to size the biceps. I'm just wondering how much space I should have in the biceps/arms. If I got by the pre cut lines, there will be about a 1.5 inch gap. See pic below. This is what it looks like on my duct tape manikin. I made sure to measure my arms and the biceps on the manikin and they are both the same size. I taped up the other bicep, but this time I reduced the size so it is a much more snug fit. I had worn this one and still had "full" range of movement with no pinching. I'm just wondering if that 1.5 inch gap is too much space. 2 Quote Link to comment Share on other sites More sharing options...

Recommended Posts
Join the conversation
You can post now and register later. If you have an account, sign in now to post with your account.