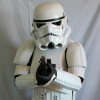
bigironvault Posted July 17, 2012 Report Share Posted July 17, 2012 (edited) This is what I did for my scope if you were interested, it's on the resin kit though and not a Hyperfirm (I wish I could have one!). You might need to do some "reverse" weathering on it to put some black back. The thing you need to be aware of big time is that there's different shades of black and you should test it out first. Also painting on rubber is tough, before painting I would give that section a bit of a wash with warm soapy water to get rid of any potential mould grease. Edited July 17, 2012 by bigironvault Quote Link to comment Share on other sites More sharing options...
LadyInWhite[TK] Posted July 17, 2012 Report Share Posted July 17, 2012 I used a light dusting of steel wool on my hyperfirm scope, though mine was already nicely weathered. Quote Link to comment Share on other sites More sharing options...
Jancelot[TK] Posted August 20, 2012 Author Report Share Posted August 20, 2012 (edited) Slow and steady goes my progress. I finished up cutting and gluing on the legs over this past week. I believe I need to replace the cover strip on the back of the shins or at least re-glue it. I don't have enough surface space on the strip for the velcro. Also, the right opening is a bit wide so I'll do a little work with the heat gun to close it up a bit. And of course I need to glue on the sniper plate, ammo belt and make a thigh garter. The AP suit is certainly challenging due to the amount of alignment work. The thighs and forearms have so far required the most attention. That said I'll have some full test fitting pics up soon! Al..most...there... Thanks for the tips on the blaster weathering. I'll be back to that soon when I have access to a painting space. Edited August 20, 2012 by Jancelot Quote Link to comment Share on other sites More sharing options...
Jancelot[TK] Posted August 23, 2012 Author Report Share Posted August 23, 2012 Initial test fitting tonight. Need foam in biceps and forearms to stop rotation, bicep-to-forearm elastic and thigh garter. It's feeling pretty comfortable already. Most notably the elbow joint where I have always experienced "the pinch." Let me know what you think of progress. Quote Link to comment Share on other sites More sharing options...
HawkTrooper Posted August 23, 2012 Report Share Posted August 23, 2012 You could maybe attach the shoulder bells a little bit closer to the shoulder straps. Overall looking good though! Quote Link to comment Share on other sites More sharing options...
Jancelot[TK] Posted September 11, 2012 Author Report Share Posted September 11, 2012 Initial strapping system is complete! I raised the shoulders (thanks HawkTrooper) and moved them forward. Still have a laundry list of small items to address but the fit feels great. I can't believe how much more comfortable it is than my 7-year old FX suit's setup. That's on my list of mods to make next. Thoughts and suggestions? Even in my test run I managed to capture a Wookiee companion beast: Quote Link to comment Share on other sites More sharing options...
Jancelot[TK] Posted September 14, 2012 Author Report Share Posted September 14, 2012 The sniper plate doesn't seem to conform very closely with the top of the shins. Is this normal? As it is I only have glue on the front shim holding it on. It doesn't give me a feeling of confidence or sturdiness. Shots of my thigh straps. I went simple for my first shot at it. I like using a leather belt as it holds up much better for me than the webbing belt. Brads and a small bit of glue holding the ammo belt on the right thigh: Finally a few shots of my arms. Quote Link to comment Share on other sites More sharing options...
Clamps[TK] Posted September 14, 2012 Report Share Posted September 14, 2012 The AP sniper plate is a wonky thing. You will need to secure the sides for sure. I aligned the sides and just dealt with the front being a bit wonky. Shoot me a reminder pm and I will post photos of mine and how it sits when I get to my computer. Quote Link to comment Share on other sites More sharing options...
Dr.Senf Posted September 14, 2012 Report Share Posted September 14, 2012 You have to bend and glue the hell out of it!!!! Sent from my iPhone using Tapatalk. Damn i love this App!!!! Quote Link to comment Share on other sites More sharing options...
gmrhodes13[Staff] Posted September 14, 2012 Report Share Posted September 14, 2012 Going well, keep up the good work Quote Link to comment Share on other sites More sharing options...
Clamps[TK] Posted September 14, 2012 Report Share Posted September 14, 2012 You have to bend and glue the hell out of it!!!! Sent from my iPhone using Tapatalk. Damn i love this App!!!! Exactly right, I think I used like 1/4 of a tube of E6000 in that d@mn thing. Quote Link to comment Share on other sites More sharing options...
Jancelot[TK] Posted September 14, 2012 Author Report Share Posted September 14, 2012 Ok, thanks all. I'll spend some time with the heat gun. I think I'll just try to bring the sides in a bit and then liberally slap on the E-6000. Quote Link to comment Share on other sites More sharing options...
Clamps[TK] Posted September 14, 2012 Report Share Posted September 14, 2012 good luck, pm sent earlier with how mine sits and how I glued that puppy. Quote Link to comment Share on other sites More sharing options...
Jancelot[TK] Posted September 17, 2012 Author Report Share Posted September 17, 2012 Big thanks Chookaboom! The pics were definitely helpful. Gluing the 40mm side shims: Made a mistake with the split rivets on the ab piece. I failed to look at enough pictures and literally applied the "spread evenly" CRL requirement. The correct placement is to put the top and bottom "close" to the edge and then place the middle one in between them. So now I have extra holes that I will need to fill with some acetone+ABS mixture. Not a huge problem, but certainly annoying. I also had used the "2 inch washer and fasteners" kit from Trooperbay. Turns out the heads on these brads are closer to 13mm instead of the required 8mm so "very close in accuracy" doesn't work for Centurion here. The split rivet kit they offer is a much better choice, IMHO. I have the them ordered so I can comply with the (still be to voted on) upcoming Centurion changes. In the process of redoing the placement of my drop boxes to also comply with the forthcoming update to the Centurion requirements. Pretty simple fix but I need to grab some more white elastic. Below is a shot of the current state: Lastly, initial painting of the ab buttons is complete. I want to make another pass for touch up and round out the shapes a little better: Quote Link to comment Share on other sites More sharing options...
Dr.Senf Posted September 18, 2012 Report Share Posted September 18, 2012 Good luck on the rivet issue! You ve missed some screenshots or threads about it? A lot of rivets in there. Abs paste might be the solution. Tapatalk. Quote Link to comment Share on other sites More sharing options...
Jancelot[TK] Posted January 1, 2013 Author Report Share Posted January 1, 2013 Finally back to my suit after preparing for TK1. Trying to satisfy to the revised Centurion requirements. Sniper plate on this kit is proving to be the most difficult part. It just doesn't fit very well. I'll probably just glue it on for EIB while I figure out how to mount it to correct alignment. I picked up some screen accurate rivets from seantrooper. Filling the old holes is up next. Also finished the belt, have the accurate rivets for the right knee belt. Quote Link to comment Share on other sites More sharing options...
gmrhodes13[Staff] Posted January 1, 2013 Report Share Posted January 1, 2013 (edited) Finally back to my suit after preparing for TK1. Trying to satisfy to the revised Centurion requirements. Sniper plate on this kit is proving to be the most difficult part. It just doesn't fit very well. I'll probably just glue it on for EIB while I figure out how to mount it to correct alignment. Looking good, heat gun was my best friend throughout my build, especially with the sniper plate, would just not sit right so I clamped it where it shold sit and applied a little heat to take the stress out of the abs, worth a try. Just noticed one of your drop boxes back's doesnt seem to be sitting flush, I would try to fix that now before you get picked on later LOL Edited January 1, 2013 by gmrhodes13 Quote Link to comment Share on other sites More sharing options...
Jancelot[TK] Posted January 1, 2013 Author Report Share Posted January 1, 2013 Thanks for the tip! I'll give that a go after the rest is complete. And thanks for pointing out the drop box. Now it's making my eye twitch. Forgot I hadn't added the glue yet so I'll revise to *almost* complete. Quote Link to comment Share on other sites More sharing options...
Rezablad3[TK] Posted January 4, 2013 Report Share Posted January 4, 2013 I had the same issue with my sniper plate. I have an AP as well. What i did was used alot of e6000, used a lot of clamps, small and big and just left it for 3 days. After that, the plate stays there, it aintgoing nowhere... Quote Link to comment Share on other sites More sharing options...
gmrhodes13[Staff] Posted January 4, 2013 Report Share Posted January 4, 2013 After a conversation about AP sniper plates this morning it seems like a common thing, you may be ok, have a look at the thread here http://www.whitearmor.net/forum/topic/22593-tk-8453-requesting-anh-stunt-centurion-status/page__st__20#entry282897 Quote Link to comment Share on other sites More sharing options...
Jancelot[TK] Posted January 5, 2013 Author Report Share Posted January 5, 2013 Interesting. I'm actually on my second plate as I chopped the first one down too much trying to get it to fit. I'll just go with the brute force approach and hope it will be acceptable. Quote Link to comment Share on other sites More sharing options...
gmrhodes13[Staff] Posted January 5, 2013 Report Share Posted January 5, 2013 Interesting. I'm actually on my second plate as I chopped the first one down too much trying to get it to fit. I'll just go with the brute force approach and hope it will be acceptable. A little heat may be needed, brute force can sometimes make them split around the rivet a little down the track Quote Link to comment Share on other sites More sharing options...
Jancelot[TK] Posted January 5, 2013 Author Report Share Posted January 5, 2013 (edited) After 3 cups of coffee I had a full-on "duh" realization of my problem with the sniper plate. The vertical alignment of the front ridge doesn't match up on both sides of my shin. So when I place the plate snug on each side it is askew. However, the back alignment is off just as much but swapped. I'm afraid if I pull apart the shin and attempt to match up the front, the back will be completely out of whack. Perhaps I'm just missing a workable solution here so I'm submitting the photos below to the collective FISD brain. Note: I double-checked that the pieces marked "Left Outer" and "Right Inner" are in the correct place. The other two are copies on the AP kit so placement should not have mattered. Edited January 5, 2013 by Jancelot Quote Link to comment Share on other sites More sharing options...
gmrhodes13[Staff] Posted January 5, 2013 Report Share Posted January 5, 2013 Note: I double-checked that the pieces marked "Left Outer" and "Right Inner" are in the correct place. The other two are copies on the AP kit so placement should not have mattered. Crooked sniper plate does seem a common problem with the AP armor from what I have read, with that being said, the front of your sniper plate does look really crooked and if it was me I would remove it and try again, heat is your friend with stubborn armor. From the rear shot it does look like you could have come up more on that side. I would clamp the rear pieces then apply some heat around the front edges and apply some force to pull the front more to the right. If at first you don't succeed try and try again (very carefully) Quote Link to comment Share on other sites More sharing options...
Jancelot[TK] Posted January 6, 2013 Author Report Share Posted January 6, 2013 Okay, thanks for the tips! I'm starting on the knee now and will update on success/fail. In the meantime I followed SIMpixels' excellent guide on creating bicep hooks. Are these acceptable for Centurion? Quote Link to comment Share on other sites More sharing options...

Recommended Posts
Join the conversation
You can post now and register later. If you have an account, sign in now to post with your account.