Search the Community
Showing results for 'cover strips'.
-
The problem Mark, is that Paul's calf muscles are larger than what the armour was made for so you would have to have one large strip. I tried that at first but it stuck out just as bad. I thought two smaller strips would be better but the problem is still there. I thought maybe some vinyl or leather on the inside to hide the black gap and just have one cover strip on the outside. I thought someone might have had the same kind of problems with their calves and might be able to shed some light on the situation for Paul?
-

AP ANH strips and height inquiries.
pandatrooper replied to PGHtrooper21's topic in Hard Armor (General Discussion)
Hey Andy, in terms of your measurements of the ANH strips, the general consensus is that the for thighs and shins, the ANH strip screen accurate dimensions are 20mm wide. For biceps and forearms, the ANH strips are 15mm wide. What most people do is use these dimensions for the front of the armor, and have wider shims at the back. I don’t know if you’ve already trimmed the back, but most people make the front view of their armor “screen accurate” and if necessary make the back strips wider. Usually, people don’t trim the back until the front is glued, so that they can size the back properly. Then you can cut what you need to and make a cover strip or allow for an overlap closure. Unfortunately, if you’ve already trimmed the backsides of your limbs, and you want to have the smaller screen accurate ANH strip dimensions up front you may either need to add shims in the back and– or go with what you have, which is wider strips front and back. At the end of the day, you should do what fits your body type. It’s OK to sacrifice a little screen accuracy for comfort if your body doesn’t match the actors perfectly. *ps: in regards to your belt, if you do order one now, just make sure that the overlap area at the back has a few inches of extra velcro to accommodate the smaller your waist will be. Then that way, you don't need another smaller belt, you can simply "close it smaller" but however many inches. If you're mega stuck for a custom belt, let me know. I have extra canvas / velcro left from mine and can make a custom one for you. I'm sure the other sellers could too. -
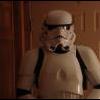
When purchasing my AP armor kit. I did my research amongst other kits. I read almost every thread on this forum and other websites as well about the pro and cons of AP armor. I picked it because of the abs thickness and durability to withstand trooping events. I also know when I decided on AP was the comment of it being a "small kit". In my mind I was confused of a "small kit" being for a thinner body build or a shorter person? I am a semi athletic person. I like to bike ride in the spring and summer. I run 5k and 10k races. I walk allot. But, my problem is my midsection. I am trying to work on that. I would like to get back to a size 34 inch waist. When My armor is finished i will get back on a regular workout schedule. My biggest fear when I was trimming out my armor was, "Is this going to fit? I was not worried too much about my front and kidney section touching. I planned on using "shims" either a "white notebook binder cover", "white plastic garbage can" or the back of a "White yard sign". I got these ideas from reading posts from these forums. My biggest fear was my arms and legs. As a side note should I order my canvas belt now or wait till I lose some inches around my midsection? An idea came to my head the other day when I was doing another round of touch up trimming and sanding. Measure my biceps, forearms, thighs, and calves. When measuring I got these figures. My biceps are between ‘15 3/4' - '16' inches. My forearms are '11 1/2' inches. My Thighs are '23 1/2' inches. My claves are '15 3/4' inches. Also my height is between “5.3 -5.4" feet tall. I am more than "A Little Short For a Stormtrooper?" I used the Velcro that came with the kit for test fitting the parts, so I can get an idea of ANH trim measurements. I put Velcro on the back of the claves and shins and used tape on the insides. This helped to keep the parts stable for measuring. Here are the measurements that I came up with. Biceps 4 1/2 cm Forearms 4 1/2 cm Thighs 4 1/2 cm Shins 4 cm I know from reading different threads that there is no "set in stone" measurement for ANH strips. I want to know if I use these sizes for strips would the strips look too big? Also, by trying on the biceps and forearms, I noticed that I can trim of some more and I would still be able to slide my arms in. I took pictures of a test fit. The thighs and shins are Velcro in the back with tape in the front and wrapped around for keeping in place. I found out with my build and measurements I can fit into AP Bicep, Forearm, Thigh and Shin Armor without shims. I felt good! This inspired me to go and continue on knowing I will be able to fit in AP armor. The bad part, my height is between '5.3 - 5.4' feet tall. When I glue my Thighs and Shins, I will have to trim them to fit my height. I have enclosed photos. I will take pictures of the forearms and biceps and post them later on this weekend. With my height and the shortness of my arms, the armor will cover up and show little black of my Under armor top. Which, is what I want. Also, the bicep is low which helps as well.
-
I think wider cover strips look better than adding shims inside. At least this way the armour looks finished rather than seeing where the original piece finishes and leaves the extensions/shims exposed. The wider cover strips may not be screen accurate, but at least they look part of the armour. Just my personal opinion
-
Looking good Steve. You can overlap the back of the shins or butt seam them and cover them with a finishing strip for the ANH look. I started a thread on the subject, something like "how do you close the back of the shins" or something like that. Try search for it. I ended up butt seaming mine and using strips to cover the back. Based on your kit, the alignment is off just like Stuka's build. Similar to the issues I have (check my build thread). I found I needed to use a heat gun and iron to get things to line up the way I wanted to.
-
Just the thigh pieces. 2 inches on the left leg and about 3 inches on the right at the tops and kind of sloping down. They overlapped at the bottom. I have really big thigh muscles. All that sled pushing from football days. Even buying dress pants is a challenge. As soon as i get the cover strips of ABS glued on I will post a pic. Other than that I just didn't trim the seems as tight as you should but with the strips glued on you can barely tell and I'm really happy with how most of them came out. I'm still baffled how at 6'2" the knees are still pinching. I think my big butt is keeping the thighs from going all the way up. But the fronts dig into my groin area when I bend my knees up. I have a pretty broad chest and shoulders. I think that is where the most trouble is. The chest plate is very close to looking too small especially if the shoulders get out of wack. The shoulder bells are pretty tight too. Thanks for all the feedback. Keep it coming.
-
 I recieved my AP armor kit on the 23rd. I have say that I am very impressed with the kit. I have most of it trimmed, though I wish I had found Stuka's tutorial before I started. I've spent the last two days looking over photos and various tutorials so now come the questions. ESB version armor is largely the same as ANH version and I've seen the threads listing the differences. My two main questions are: 1) Since the ESB and ANH versions of the armor, I assume that means that the calf, thigh and forearm armor use ABS strips to cover the seams. The pieces do not overlap in the front and back but are butted together and shimmed inside and then have ABS strips to cover the seams..........Is that correct? 2) I noticed in Stuka's tutorial that he left a return on his armor. I left a return on most of the armor but did not do it on the chest piece. Is that wrong? and if so, suggestions on how to get a return on the chest piece without a modeling iron. I will post some pics of the chest piece today if I get a chance. Thanks to all who respond.
 -

A.P. Forearms Help!
TK bondservnt replied to PGHtrooper21's topic in Hard Armor (General Discussion)
AP forearms should be Trimmed with NO return. The original parts were designed to overlap on one side with velcro. the top side being butt mated and glued. the finishing strips cover over the seam. hope this helps. my AP kit Build tutorial coming soon. -
Hey Andy, I thought I'd reply in more detail. Here's what i did: 1. Should I line up the pieces from the back or the front? When I do one of the edges stick out. Was this a problem with other troopers who have assembled AP Kits? Line up the forearms at the wrist, don't worry about the elbow. Since you have a heat sealing iron, you can re-shape it and cover the sides with strips. 2. When trimming out the wrist and elbow how far should I go to the edge? I used Stukatrooper build as a reference, but you need to assemble it based on what fits you. If you're going to glue the forearm permanently closed, you need to make sure you can still fit your hand through the opening. This is what i did: - Dremel the wrist opening to whatever return width you want to use - If your forearms are big, I would suggest trimming the butt seam edges bigger, before you need to trim more. What you want to do is make the forearm fit your arm, but still have the wrist hole be big enough to fit your hand / glove through. That's why you need to Dremel the wrist opening / return first. I would suggest trimming the forearms on both edges to about 20mm on each side (that would mean 40mm total) and tape them together and put your arms through. Mine ended up just like Stukas: 12mm on each side and then butt seaming. Some people use 7-8mm per side because that makes the finishing strip look good, but you might not be able to get your hand through - or you need to glue one edge and use a velcro closure on the back side. It's up to you if you want the forearm glued or glued and velcro in the back. 3. I have a Hobby modeling Iron. After trimming. Should I iron the pieces before or after gluing? Do it after gluing, so that you know how much the plastic needs to be manipulated. I'll post a picture up in my build thread (probably start posting it tomorrow) and you'll see. Many parts of mine were way out, and the back of one of my thighs was a perfect example. I glued it, then heat manipulated it, then Dremeled / sanded. Looks great afterwards! 4. Can I use a plastic sign ie, a "Beware of the dog" "For Sale" that you see in stores to cut up small strips to make the "Butseam"? The reason I want to save the trim strips for snaps and front trim. As people suggested, use styrene for snaps and save the trim for the outside. I used slightly thicker styrene (2.0mm). Personally, I used the kit trimmings for making shims that I glued onto the inside of all the legs / arms. My inner shims run the length of the pieces, not just the beginning and end 5. If so which glue would you recomend? E6000, Plastic Weld or abs weld that you find in home improvement stores? I used Plastic weld for the butt join, and E6000 for the inner shims and finishing strips. I used Plastic weld for the snap plates. See my tip in the Tips section on how to rivet snap plates for more surface contact. Works awesome!
-

PT armor build[*PT]
nothingrecorded replied to TK-7980's topic in Build Threads Requireing Maintenance
On the shins, if they don't line up completely, that is ok because you should have the strips of plastic that glues over holding the shins together, that would cover the gap in the plastic. I personally would put a strip of the plastic in both the inside and the outside for extra strength. Just like we have seen Paride (slaveprobe) do in his TM Build. http://forum.whitearmor.net/index.php?showtopic=8067 -

Why mylar strips on O2 cannisters?
troopermatthew replied to bluehickey's topic in Assembly, Mods, and Painting
I think the strips are there to cover the join line caused by the FX TD being two seperate parts. BTW i think that it is a thermal detonator -
Start with the thigh pieces. Begin with just placing them on to see how they will fit and how much material to trim off. The strips of HIPS that I provided you will cover the front seam - some troopers close both sides and merely slip them on. On the rear of the pieces I use industrial strength velcro for ease of taking them on/off. Photos to follow later via personal email - gotta go to work... T
-

Tim's AP Build[*AP]
TrooperTim replied to TrooperTim's topic in Build Threads Requireing Maintenance
GLUE I'll be gluing my pieces together this week and I'm deciding the best glue for me to use. I have E6000 and I've seen several people use that; just sand and score the area to get a better bond. I've seen some use devcon weld, plastic bond, or abs cement. It all does the same thing... hold it together. Just depends on preference and strength I suppose. I'll go with E6000 and see how it works. SEAM STRIPS This week I'm starting to trim the seam pieces for the ANH strips. I hear AP is originated from ROTJ so to make it look more ANH I need to add these. I'll be making an inside and outside strip for each seam. From what I've read and seen, some strips don't completely cover the raised mold line of the armor piece; like the forearms. Is that just a personal preference for better screen accuracy? I've searched through some threads and found measurements for the strips. Just want to make sure and clarify that this is accurate before I cut em up. I don't have much spare ABS. 15mm Forearms Front and Back 15mm Bicepts Front and Back 20mm Thighs Front and Back 20mm Calves Front 25mm Calves Back -
I beg to differ with removing the Hasbro blaster from the elite options. Some hasbro blasters can be modded to make quite a convincing E-11. I do however propose that Hasbro requirements include the following in order for Elite Status 1. Correct barrel modifications: 2 T track strips to cover the row of holes and removal of bottom left factory T track and replaced with a row of holes. Removal of the left side crecent greeblie. Possibly also flipping the right side crecent greeblie 180 degrees to make it correct. 2. Existing greeblie requirements for each movie as currently stated by the Elite Standards (hammers, door catch, ESB Alligator clips D-ring) 3. Must have a proper counter for ANH 4. Must have a proper maghousing installed 5. Must have a proper stock installed (functioning or non functioning - just has to have one) *for a ROTJ blaster I think all the T track should be removed and replaced with the proper U-shaped channel such as provided by Stomper* I am 100% up for being more stringent for the Hasbro blasters but not thier elimination.
-
ok well I know the rubies armor is not up to the 501 standards but i got it cheap and only need it for costume parties and such,so here is a writeup for others that might want to do the same. One thing i noticed is it looks like instead of left arm right arm specific pieces for the hand cover, bicep,forearm,and shoulders it looks like they give you 2 sets of rights <_< also the helmet is large thick and goofy looking like a cartoon so i will probly be replacing it, also they used black velcro on all the arm and leg seams so that should probly be ripped off and replaced with white to better hide the overlaps *if you want to try to do this please read the entire post first so you don't remove or destroy something reused this is only a guide from what i did and some things may not work for you* last nite i tried it on and it fit very poorly, couldn't move at all, loose in some area tight in others just looked sloppy i am 5'9" and about 180 lbs this is a standard size kit, so after reading some threads here watching some videos from here and suggestions from guys (thanks for the help ) I decided to have a go at making it at least fit better so it would look a little nicer, I started with cutting off all the elastic they had holding together the chest /abdomin * leave 2" on the abdomin *, back / butt *leave 2" on the lower back*, hand cover/ forearm/ bicep, since these straps just served no purpose. the hand covers already had velcro to hole em on the gloves so i just stuck em to the gloves easy fix. the forearms i used a verticle horizontle belt sander and removed the lip around the inside at the elbo joint and also shaped that end better so it moves more freely, i then added 2, 1 1/2" wide strips of 1"thick high dsensity foam inside 1 for against the inside of my arm and 1 for the outside of my arm this works extreamly well to keep the forearm in place and is comfortable. *hot glue was used for the foam the biceps, i took the biceps and put them on the positioned the shoulders over them where i thought they looked best and had a friend draw a line with pencil, i then took some of the elastic i cut off ealier and hot glued it inside the bicep and shoulder to hold em together, I glued em inside the ridge that runs up the center of both pieces, when hot gluing the elastic i found it best to have someone else add the glue while I held the piece in place then push the elastic on pressing hard the glue was hot but not enough to burn me, * a note the velcro on the shoulders was installed at the factory facing down not up i pulled it off and flipped it over hot glueing it back in place the abdomen was next, since the belt is permenantly attached i added white industrial velcro on the belt strap that is directly against the lower back so the belt can be cinched tight and will hold the front and back together well, next i took some black suspenders and attached them to the leftover 2" of elastic i left in the abdomen and back pieces *the elastic was folded over to double it up for strength* i also added some white velcro loop to the inside of the belt on the sides in the gap between the font and back to hook the upper legs to since the factory velcro is in the wrong place i may cut the lines on the cod/abdomen and the lowerback /butt later to make it so i can sit and bend moving on to the upper legs i removed the lip inside around the knees since my knee caps kept catching on them and i also raised up the openings at the back of the knees so i can bend my knees back at a 90* angle (mostly for comfort) again I used the belt sander it worked great removing large amounts at first then slowly shaping the lower legs i did nothing yet but i will probly remove the lips inside the openings at the knees and maybe add some 1" padding the padding they factory installed is not enough to do anything i want to do some work on the helmet that was included but it just seems way to big oversized but fit my 6'6" buddie perfect so not sure what i want to do with that the included body suit needs elastic sturrps sewn in for the feet and hands so the suit doesn't bunch while installing the armor, there was plenty left from what i cut off the armor, i still need to do some tweeking but i think it looks and fits much better than out of the box and it was only 2+/- hours of tweekin i also need to buy or make the neck seal, detonater, holster and i plan to modd a hasbro blaster since it is liteweight, boots are stuck in transit for the holiday hope you all enjoy the pics, try not to be too criticle sorry spelled supreme wrong in title and cannot fix it
-
Yep. I cut mine down to about 1/2 inch on both sides then used the strip to cover the seam. know what I mean? I am not 100% sure about the sizes of the strips. I do know that the forearms and biceps are one size and the thighs and calves are another.... Also depends on how big or small you are.
-

TK 6908's AP ARMOR BUILD[*AP]
Darth Voorhees replied to Darth Voorhees's topic in Build Threads Requireing Maintenance
thanks guys! gotta run a few errands this morning and then back to it i go! I think this thread will get more interesting once i start doing the strapping set up. Since now i know what works for me from my experience with the FX kit, i have a good game plan involving very little velcro and the rest all plastic clip buckles and snaps. Im probably just gonna trim as much as i can when i get back, rather than stop to show pieces rough trimmed..it'll get kinda monotonus lol. Im also assembling the thighs, calves and forearms and hopefully the biceps, the way it was done in ANH. Instead of just laying one side over the other on the middle strip, both sides will be trimmed to half the width of that front strip on the calf/thigh, butted together and another strip of ABS will be used as the strip to cover the seam. It will take a little longer, but will look better. Im also planning on reinforcing it further by putting a strip of ABS on the inside as well. just have to see how far i can stretch the ABS strips given with the Kit. I may end up doing the Bi-ceps the regualr way as they are less noticeable than the fronts of the thighs and calves. ANYWHO...off to run errands and get started today....stay tuned! -
No, im not talkin about fileting a fish!.... I know this is basically a straight forward thing, but from what i hear and see, there are sometimes problems that arrise while wearing your armor with a cut cod. We mostly agree its easier to make "pitstops" if the cod is cut, plus it makes it easier to sit down. But ive noticed people mentioning these few things. 1) sometimes the cod will pop out from under the belt, 2) Sometimes the cod can get pulled too far back and make it angled and contribute to the cod popping out from under the belt, and 3) To resolve the forementioned problem some will push the belt down to better cover the cut and end up with tiny trooper crotch. So i decided to do it a little differently. I havent trooped in it yet, so i cant give any field experience reviews yet, but so far it seems it will remedy most of the forementioned problems. I decided i wanted the cut higher up but didnt want to cut the sides of the ab plate to make a straight cut from one end to the other, so i cut it in a diamond shape, like when you see a drawing of a diamond for a jewelry shop or the likes. So it looks like this: I also cut 3 "tabs" out of the ABS i have left over from replacing the belt with a canvas one. These 3 tabs i then riveted onto the ab plate at either end of the cut, and in the center. I figured this is a stress point and cannot be seen with the belt on, so i used rivets. It looks like this: Then i used painters tape and taped the cod back into place. Putting the tape on the outside of the cod. I then flipped it over and glued 2 strips of elastic to hold the cod in place. I used TK 6044's idea of gluing the elastic to the plastic side of industrial stregth velcro that i pre applied to the armor, so it could be removed if need be. I used the plastic welder, but then reinforced it after it cured, with some hot glue. I know its a little messy, but its not going to be seen. It could be done neater im sure lol. So it looks like this: Here it is from the front: Now if everything works as planned, it seems i shouldn't have any of the forementioned problems.