


troopermaster
-
Posts
3,638 -
Joined
-
Last visited
-
Days Won
12
Content Type
Profiles
Forums
Gallery
Articles
Everything posted by troopermaster
-
 Absolutely incredible job on the build, Michael! The whole things looks amazing. Well done
 -
ROTJ reinforcement for Austria & the Empire
troopermaster replied to Maxl's topic in Build Threads Requireing Maintenance
That's what I like to see. Improvise, adapt, overcome! -
ROTJ reinforcement for Austria & the Empire
troopermaster replied to Maxl's topic in Build Threads Requireing Maintenance
What kind of clamps are you using? I use these: One through the eye socket and one on the bottom of the helmet. They can be tricky to fit so I do one side at a time to make it a bit easier. -
TM's Snowtrooper Commander build
troopermaster replied to troopermaster's topic in Build Threads Requireing Maintenance
It's ABS, kind of like a hero version of the standard stunt Snowtrooper which is made from vinyl. I haven't formed that piece as yet. -
TM's Snowtrooper Commander build
troopermaster replied to troopermaster's topic in Build Threads Requireing Maintenance
Yes, I already posted the build on there and I thought I would share it here too since this is the 'other' 501st costume section, so it is perfectly suited here -
So here are the parts I have formed for my Commander build. The face plate mould is not quite ready but I thought I would form the rest of the parts to give me the boost I need to get the mould finished. I will update the thread as and when I have made some progress
-
ROTJ reinforcement for Austria & the Empire
troopermaster replied to Maxl's topic in Build Threads Requireing Maintenance
It's your helmet. If you are happy with the eyes then that's all that matters. -
That is some seriously BAD advise. I have never heard of anyone hacking their shins like that. Seeing the top of the shin behind the knee plate is quite normal.
-
Adder's ANH TK Build Thread [TM]
troopermaster replied to Addertime's topic in Build Threads Requireing Maintenance
Was there no directions on the end caps to heat them before fitting or to bevel the tube? I usually write that on every kit. -
ROTJ reinforcement for Austria & the Empire
troopermaster replied to Maxl's topic in Build Threads Requireing Maintenance
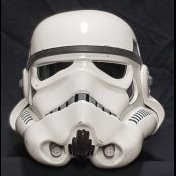
The eyes could do with a bit more trimming. The flashing in the eye sockets is minimal. A quick google search brings up these original helmets. -
What made you hack your shin like that?
-
ROTJ reinforcement for Austria & the Empire
troopermaster replied to Maxl's topic in Build Threads Requireing Maintenance
CRL's are not really much help. That's why I said to check your references (original helmets) to be sure you get everything right. Like I said, not sure if it's a deal breaker or not. Better ask the top brass -
ROTJ reinforcement for Austria & the Empire
troopermaster replied to Maxl's topic in Build Threads Requireing Maintenance
Not sure if gloss is approvable? Or maybe the paint was still wet when you took the photos? -
Nice blaster! Who is the maker?
-
ROTJ reinforcement for Austria & the Empire
troopermaster replied to Maxl's topic in Build Threads Requireing Maintenance
Yes, the black line is just a guide. Check your references before you paint. -
ROTJ reinforcement for Austria & the Empire
troopermaster replied to Maxl's topic in Build Threads Requireing Maintenance
This is how I would trim them. Better to make them smaller at first and you can trim more later but they really should not be overtrimmed. -
ROTJ reinforcement for Austria & the Empire
troopermaster replied to Maxl's topic in Build Threads Requireing Maintenance
Cut less. You seem to be thinking that that the teeth are cut out from large to small which is a mistake. ROTJ teeth are cut small. Do not follow CFO which are cut hugely incorrect. I will show you how to cut them properly tomorrow/today -
Screen accurate ANH stunt strapping system
troopermaster replied to bmth chris's topic in ANH (Stunt and Hero)
The nut size should be an M3 but check with whoever made your strapping kit. You should be able to buy the nuts at any hardware store. -
ROTJ reinforcement for Austria & the Empire
troopermaster replied to Maxl's topic in Build Threads Requireing Maintenance
The holster hangs in line with the butt plate - more or less and is riveted in the middle of the belt. -
Ab to kidney rivets causing cracks in armor
troopermaster replied to DeceptiSean's topic in Hard Armor (General Discussion)
I think I know what they problem is - it looks like you have used webbing instead of elastic to connect the parts together. There is absolutely no give in webbing and it will put excessive stress on the rivets just wearing the armour - nevermind donning and doffing the armour. I cannot stress the importance of using elastic everywhere on armour for your strapping. Webbing is bad. Do not use it! -
ANH and ESB helmets are physically the same so hand paint the details if you are going ANH or use the decals if you are going ESB.
- 1 reply
-
- 2
-

-
ROTJ reinforcement for Austria & the Empire
troopermaster replied to Maxl's topic in Build Threads Requireing Maintenance
The gaps on your knees are fine. The distance will vary from trooper to trooper, so don't think there is a specific size the gap should be. The most important thing is how the thighs feel when walking. If they can be lowered to even up the gaps at the knees and abdomen, then by all means do so but it's not crucial. -
Best in the business according to all these happy customers http://forum.bikerscout.net/index.php?showtopic=13438 http://forum.mepd.net/index.php?/topic/14679-problems-rs-props/ http://thebhg.net/forum/index.php?showtopic=3884&view=getnewpost
-
ANH Tusken Raider build by Christina
troopermaster replied to TKZombie's topic in Build Threads Requireing Maintenance
Fantastic job on the Tusken Raider