

TK-4510
-
Posts
2,991 -
Joined
-
Last visited
-
Days Won
2
Content Type
Profiles
Forums
Gallery
Articles
Everything posted by TK-4510
-

Catwoman costume finished
TK-4510 replied to matt black's topic in Build Threads Requireing Maintenance
AWESOME!!!! -
Good find
-
Looks pretty good. You could fit it more but thats acceptable for sure.
-
The ears should be angled slightly forward..and it needs to come down a small bit..
-
Its mostly water so there shouldnt be any reaction to it at all.
-
New finished TM (Stunt) build by Chriss
TK-4510 replied to chriss's topic in Build Threads Requireing Maintenance
great job on the assembly! -
In the past I have used velcro on many parts and glued the thighs and shins. On my upcoming MTK build I will be aiming for something more like TM's set up.
-
Hmm. No. I shipped it off to the guy that bought it, lol! But I do have pics on my website of my helmet that I used the same technique on.
-
Here's a video I posted on youtube for weathering a Sandtrooper helmet. Although this isnt a Sandtrooper forum you can use the same technique on just about anything. I'd like to dedicate this video to Tom.
-
Thanks Dude!!
-
Thanks man. All I can find locally are 1/2 inch so they will be close enough. I will keep my eyes peeled for 5/16 though
-
Which is more accurate 1/2 inch or 3/8?? 3/8 seems a little big. Do you have any screen shots???
-
Mark, So very sorry for your family. Take care.
-
PM me your address and I will send you a set of trimmed ears
-
That actually help support the cap n back too, me thinks.
-
You dont need to trim that.
-
-
Here is something like what you need to trim on the face
-
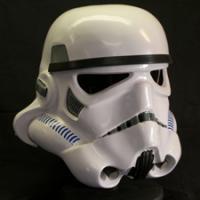
These might help... http://trooperbay.com/videos/videos-2/ and HELMET ASSEMBLY MANUAL If you need any help I can answer your questions too The rear of the cap is pretty much trimmed. The front of the cap has a line that you can follow when cutting but it all depends upon what type of helmet you are doing too. The line is for Stunt TK. The eyes have faint lines INSIDE the faceplate that you can follow The teeth are trimmed from inside ( or at least thats how I do it. ) and once you tirim off enough you can use an exacto knife or jewelers file to get them the way you want them. Dont trim the chin until you have the helmet assembled, so the faceplate will mate up with the ears and cap n back nicely. Follow my video on trimming the ears.
-
animated clone wars commander cody
TK-4510 replied to vecspeed12's topic in Build Threads Requireing Maintenance
Looking Sharp! Is that a KW helmet too? looks different than the others. -
Cool!!!
-
Lukes ANH Hero suit from LFL archives
TK-4510 replied to dashrazor's topic in Build Threads Requireing Maintenance
You know,.. its very obvious to me now that the ab buttons and rivet covers were all negative vacuum formed using female bucks. I wonder if it still smells like trash compactor sludge! After watching the video it looks like the back is still attached as they other armors are, with screws. -
I use an ice pick and frequently have to distort the holes to put the mic tips where I want them. The divots are a guide only. I usually pop the holes and insert the mic tips. I line them up so that they appear straight and then tighten them down snug. The bowls where the mic tips set are not symetrical and there will be differences. Pleasing to the eye of the beholder is the rule here When I do a stunt I try to make them straight. When I do a Sandy I make em wall eyed looking depending upon how f'd up I want the helmet to look, lol...
-
IN use CA "Zap-A-Gap" along with "Zip Kicker". Its thicker than standard CA super glue and the zip kicker makes it set immediately. You can find it at your local hobby store or online.
-
All you need is a couple of drops in the groove of the rubber trim that fits onto the helmet edge. Then a touch of zip kicker and its done in a second. Dont use zip kicker near the lenses or on painted surfaces as it will stain or remove paint. I put a dab on each ear area, chin area and back area.