

11b30b4
-
Posts
390 -
Joined
-
Last visited
-
Days Won
6
Content Type
Profiles
Forums
Gallery
Articles
Everything posted by 11b30b4
-
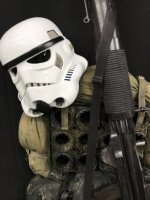
And we are back.... Ok so here is what happens when the site is down for a week. Well Crap! Bad timing on my part. The site has been down since I began this build to I am typing it all up and will post everything I have done once the site is back up. In the words of that Supreme Sith Lord Jar Jar Binks, “Hello Boyos, Mesa Back”. I have decided to do this in a separate thread from my ROTK and keep this thread here on FISD rather than on MEPD for a few reasons. To avoid and confusion and/or misconceptions here are the reasons: #1. I believe, and have always believed that the (as it is now being called) Crystal Patrol Pack is NOT a sandtrooper. The Crystal Patrol Pack is clearly noted in literature from Rogue One that it is a “duty patrol” not a classification. Further, I have read that the “bottom line” is that MEPD gets the “dirty” Stormtroopers. Well, there are numerous pictures of the Crystal Patrol Pack “trooper” that are clean, clean, clean white armor troopers (ex. Celebration Europe pictures). So not all the crystal patrol packs troopers are dirty and to be quite honest, I have a dog in this fight. I do not want to “dirty” my $1,800.00 investment in the ONLY ROTK to be both EIB and Centurion approved. Regardless, this Horse has been beaten to death and it is clear that at least some of the parties who made the decision to give this pack to MEPD are not willing to change their minds at this point. Further, it really does not matter what I and numerous others think, what is done is done. So that is reason #1 why this thread is here first and will eventually be cross posted on MEPD. Please do not respond to this reason by arguing for the “why” the Crystal Patrol Pack is now an MEPD asset, it is not the reason for this thread and I do not wish to get into a “Johnson” measuring contest. #2. All of the research for the ROTK CRLs and the Crystal Patrol Pack were done here on FISD by you guys. Sure many of you are MEPD as well but this discussion was started here and since you all did the heavy lifting, the credit should stay with you here. #3. I do not know the people on MEPD as well as I have come to know you guys. All of you have been instrumental in me accomplishing my TK build and attaining EIB and Centurion. I value your input and suggestions. I do not have any issues with MEPD or the people on that forum but I started out my 501st adventure here on FISD and I just feel more at home here. Like I said, I will cross post this build on MEPD in the future. Anyway here is the link to my ROTK build if you want it. https://www.whitearmor.net/forum/topic/44463-11b30b4’s-rotk-build/ So here is my Crystal Patrol Pack Build… When I ordered all the stuff for my ROTK, I also started to collect all the parts needed for the Crystal Patrol Pack. In a very short time I had everything I needed and just required the time to build this thing. For anyone looking to build this pack or has questions about building this pack there are several build threads here on FISD in the RO section, on MEPD in the RO section, and on the FB page for the pack build. I will link everything relevant here: FISD https://www.whitearmor.net/forum/topic/39073-celebration-europe-2016-rogue-one-stormtrooper-back-pack-build/ https://www.whitearmor.net/forum/topic/38162-rogue-one-stormtrooper-back-pack-part-found/ MEPD http://forum.mepd.net/index.php?/forum/66-crystal-patrol-field-pack/ Face Book https://www.facebook.com/rogueonetkbackpack/ The Build… I am hoping to achieve a very close approximation of the Celebration Europe examples of the packs. It will not be perfect but very close to what we have seen and know about the pack. Ok so for my build the thing that I expect to take the longest is the dyeing of the Alice pack and shoulder straps so I started this first. This is my Large LC-2 Alice Pack and LC-2 Shoulder Straps. Most people who build this pack use the woodland camouflage LC-2 Shoulder Straps but I located the Shoulder Straps in OD so these are what I am using. I posted a link on where to get the OD straps on the Celebration Europe thread on FISD if you are looking for them. The LC-2 Alice Pack comes in three sizes and the pack used for this build is the Large Pack. Most military surplus stores have them and there is information on the previously mentioned Celebration Europe thread to be able to distinguish the differences between the sizes. The Dye I am using is the Rit Black powder dye and the Rit Black DyeMore liquid dye. So I mostly followed the recommendations of the Celebration Europe thread and soaked the pack in1 gallon of boiling water then mixed the powder dye and 1 cup of white vinegar with another gallon of boiling water. I then added the dye water to the pack bucket and stirred everything about every 20 minutes for the first hour then made sure everything was submerged and left it for another 2 hours. Then I pulled everything out and hung it to air dry overnight. While the pack was dying, I knocked out the six 1”x22” bed roll straps. The Celebration Europe thread says to use tan cotton webbing but I used 1” tan polypropylene webbing I had on hand. The weave was the same as the cotton straps used so I figured I can make this work. The key was to paint the webbing but leave the ends tan. For the paint, I used a can of Rust-Oleum Camouflage OD spray paint I had on hand. I did a test and it worked great. I needed the ends to remain tan so I used a Q-tip and some petroleum jelly to mask the ends of the straps about ¼” on both sides, then I tacked the straps to some card board. I spray painted the straps with a very heavy coat and let them dry, then flipped them and did the same on the other side. Next, I took the cam-loc buckles I ordered and spray painted them with the OD paint as well. When the straps were dry I used a paper towel to remove the petroleum jelly and then cleaned the tips again with some rubbing alcohol and a paper towel. Exactly the look I wanting. Next, I stitched the straps to the buckles. The Celebration Europe thread says to do this by hand but I have an industrial sewing machine and some tan thread so I did it with the machine. And that finished the bedroll straps. Next I worked on the Grande box. Following the Celebration Europe thread I disassembled the box. Then I marked and drilled the twelve 5mm back mounting holes. Then I marked and did the twelve 1+” wide hole cut-outs. And that was Day one in a nut shell. Day two… I started by taking the dry Alice Pack and Shoulder Straps upstairs and threw them in the washing machine with no soap for a rinse and spin cycle. Once they were done, I again submerged them in 1 gallon of boiling water. I then Mixed the Rit DyeMore in another gallon of boiling water and added it to the bucket with the pack. Again I stirred the pack every 20 minutes for the first hour then l let everything sit submerged for another two hours. Took everything out and hung it to air dry. While the pack was dying, I started working on the antenna. The Celebration Europe thread had identified the fishing pole used for the antenna was the Avanti Precision X 12ft 3-piece Float Rod; however, that rod is no longer in production. A very close alternative is the NGT Float Master which is rumored to be made in the same factory. I managed to find several for sale for $24.95. I posted the link on the Celebration Europe thread and on MEPD. The only significant difference it that the threads at each eye are silver on the NGT vs red on the Avanti. I will fix that later but for now I wanted to get the antenna mostly done. In this picture you can see the silver threads (yellow circle) and also notice the rod wrapping (green circle) which are exactly the same as the Avanti. For the antenna you only need the top part of the 3 piece rod which is about 50 inches. The very top end of the rod is cut off removing the top eye. The cut should be about 50mm from the top of the second eye. Using my dremel cut off wheel, I chopped off the top. Next I removed all the plastic inner rings in each eye with needle nose plyers and an x-Acto knife. For the tip I got an assortment of vacuum caps from AutoZone and used the smallest one (5/32”) cap but it was still a little big for the rod end. So I added two layers of heat shrink to the end of the rod then added the snug fitting cap. Next I threaded the ¼” rubber surgical tubing I got off amazon through the top three eyes and wrapped is for the area between the third and fourth eyes (counting from the top) then continued the threading for the reminder of the eyes. The Celebration Europe thread calls for a 4mm ID black silicone tubing but I figure my tubing is close enough. The one issue I had was that when wrapped in the spiral, the tubing compressed and looks flat. To fix this, I inserted some black para cord inside the tubing for the area that gets wrapped and this made a big difference. So this finished the antenna with the exception of coloring the threads to red from silver. Next, I made the bed roll. So on the Celebration Europe thread there is no consensus on what was actually used for the bed roll. It looks to me like they used a USGI shelter half which would be consistent with most US military stuff so I snagged a shelter half from a surplus store and cut it in half. One of my concerns with this pack was the weight and how it has the potential to damage my TK armor so I want the weight to be a light as possible. Next I took the half and filled it with some poly fill and rolled it. Presto, bed roll. And that wraps day two… Day three… I started off with taking the now dry pack and shoulder straps and running them through another rinse and spin cycle in the washing machine and then a quick tumble dry in the dryer. While that was happening I painted the threads of the antenna red. For this I used Tamiya clear red (X-27) acrylic paint. I simply applied it with a small brush on the threads and presto red threads that are a damn near perfect match for the Avanti rod. After the pack and shoulder straps were dry, I took the shoulder strap that is worn on the left side and masked it off. I should note that this is actually the right shoulder strap. For some reason they are reversed on the pack but this is the way its done so this is the shoulder strap I used. After masking, I spray painted the shoulder strap with Rust-Oleum OSHA Orange spray paint. This took numerous thick wet coats because the nylon would absorb the paint. The guys on the Celebration thread used a plastic-dip type of paint that avoided the nylon soaking up the paint but I had the Osha Orange on hand so I used it. Eventually the paint began to settle on the top. Once it was sort of dry in the thin areas, I removed the masking. Since I was spraying the paint so thick, it did bleed under the masking tape a little. Once the masking was removed I cleaned up the bleeding a little with a Q-Tip and some acetone. I did leave it somewhat messy though since it needs to have the “used” look. I also smeared some of the wet paint in the two masked off areas inside the rectangle to give the impression that they had once been orange. All this will get more weathering later on but for now, it looks good to me. Next, with a seam ripper, I removed all the straps and back pad that are required to be removed as indicated in the Celebration thread. Next, I took some 1” black polypropylene and the correct brass buckles and made the four buckles that would be added to the pack. Once these were sewn, I sewed them to the pack in the correct spots. Next I stuffed the pack and 3 outer pockets with closed cell foam, then mounted it to the M75 frame. Next, I mounted the grenade box to the M-75 frame with black zip ties. I lined the inside of the grenade box with some black spandex material I had and then mounted the grenade cover. And that wraps day three… Day four (FISD site still not up)… So I only got a few things done today. First I mounted the shoulder straps and the lifeboat hook greeble. Next I mounted the bed roll and antenna. I am thinking I may have too much stuffing in the bed roll but I can fix that later. Overall, I like how the pack looks and all I need to do now is whether it and it will be done. And that is it for the update. Thanks for the interest. Day 5 update… First, I unstitched the end of the bed roll and removed some of the foam. I re-stitched the end and mounted it on the pack. I mounted the antenna and it looks better now. Next, I mixed up some craft paints using several browns, greys, greens, and black to develop about 4 colors of mud for weathering. I applied each color with a small 1” brush using several methods (splatter, dry brush, wash, etc…). One of the colors I sued was a champagne pearl brown, this color added the effect of light glittering that one often sees with actual sand and mud (yellow circle). I am also in the process of adding some black felt to the inside of the frame to help protect my armor from wearing the pack. And that is it. The pack is mostly finished but I need to try it on with the armor and see if any additional protective padding will be needed. I am also curious if I will need to remove my Thermal Detonator to wear the pack. That’s the update so far. Thanks for the interest. Update… and this site outage really sucks since I am not getting any feedback from you guys about this build. Well I put on my kit with the pack and surprisingly everything seems to work well together. No issues with the shoulder straps, Thermal Detonator, or back plate. Walked around a bit in the back yard and I think we are a go for the DragonCon Parade. Here are some pics my wife took. Thanks for the interest.
-
Well I was working on the Jedah Patrol pack and pulled out the laptop to get some reference pictures and noticed that I had a notification on FISD. Soooooooo it is official. I am not the first ever Rogue One TK to be approved for both EI and Centurion. I am very humbled and speechless. Just Wow!
-

Request your Centurion Certificate here:
11b30b4 replied to justjoseph63's topic in Request Centurion Status
Jeffery Rich 20980 Centurion Letter Size Tony http://www.whitearmor.net/eib/certificates/20980-centurion.png -
TK-20980 Requesting ROTK Centurion Status [407]
11b30b4 replied to 11b30b4's topic in Request Centurion Status
Again I am humbled and speechless. Thank you sooooo much. This will not be my last build and I hope to continue to represent FISD, the 501st, My Garrison and myself with such achievements. For the Empire! -
Zsherman, thank you for the support. Update, Well I got my ukswrath’s TK helmet audio system and figured out how to mount all the components. Since most people mount everything behind the chest plate I chose to do the same however, since I coated the inside of my armor with flex seal, Velcro will not stick to it. Since I had the suspenders attached to my abdomen I incorporated a chest rig that would connect to the suspenders. The first one I build was just to rough-out the design. Here is the second version in place. I modified this version but forgot to take pictures of the final design. So what you see here is two elastic strap pockets for the Icon and the Amplifier w/ rechargeable battery. The two strap that run vertical are secured along the top with a 1” square of Velcro. I later changed the top strap on the Amplifier w/ rechargeable battery and used some 1/8” shock cord. I also added two outside edge elastic wire routing loops. The back side of the whole chest rig is a pouch that can hold my money clip or even a cell phone since I have been at a loss for where to carry this stuff when I am in costume. The whole chest rig is held in place with two Velcro straps that wrap around each suspender straps and Velcro to the backside of the chest rig. Inside the helmet, I mounted the two Hovi speakers and routed the cabling with Velcro. I made two elastic loop that will slide along my left arm and hand to hold the PTT cable in place under the armor and secure the button inside my left hand. Sorry no picture, but you get the idea. Once all this was figured out I packed up the TK kit and my Mando kit for DragonCon. 16 days and a wake-up. This is the first time in 10 years that my DragonCon kits were done with time to spare for DragonCon. I hope I didn’t just jinx myself. Well that is everything so far and I am still waiting to hear back on the Centurion status. I hope to start on the Jedah Patrol Pack in the next few days. Thanks for the interest.
-
Request your EIB Certificate here:
11b30b4 replied to justjoseph63's topic in Request Expert Infantry Status
Jeffery Rich 20980 EIB Letter Size Tony Thanks for doing this and feel free to add something about the First Ever Rogue One TK to Achieve EIB My apologies, Jeff, but the space will only allow me to put your name and TK #. However, it is listed under FISD Kudos right above your 2018 Supporter badge. Great work! http://www.whitearmor.net/eib/certificates/20980-eib.png -
TK-20980 Requesting ROTK Centurion Status [407]
11b30b4 replied to 11b30b4's topic in Request Centurion Status
Harbinger and TK-40996, thank you. -
Darthcue, Bulldog44, DEVOLVER and everyone else who has congratulated me, thank you and I appreciate all your comments. So EIB is under my belt and I have submitted my application for Centurion, fingers crossed. https://www.whitearmor.net/forum/topic/45367-tk-20980-requesting-rotk-centurion-status/
-
Name: Jeff Rich TK ID: 20980 FISD Forum Name: 11b30b4 Garrison: Georgia Armor: Jimmiroquai Rogue One Helmet: Jimmiroquai Rogue One Undersuit/ Neck Seal: Rogue One -Jimmiroquai Blaster: HFX Rogue One E-11 Height: 6’1” Weight: 225 lbs Boots: Imperial Boots T-7 Canvas Belt: N/A Hand Plates Type: Rogue One -Jimmiroquai Electronics: N/A Holster: N/A Build Thread: https://www.whitearmor.net/forum/topic/44463-11b30b4’s-rotk-build/ EIB Approval: https://www.whitearmor.net/forum/topic/45329-tk-20980-requesting-rotk-eib-status-846/ 501st Profile: http://501st.com/members/displaymemberdetails.php?userID=28607 Front- Arms at Side Back- Arms at Side Left- Arms Raised Right- Arms Raised Ab/Kidney Attachment N/A Butt/Kidney N/A Hand Plates Shoulder Bridge Back Shoulder Bridge Front Back/ Chest Connection Thigh Pack Attachment Knee Plate Drop Box Back Cod and Butt Plate Attachment Interior Strapping Kidney Plate Notch N/A Wrist Side of Forearms Helmet- Front Helmet- Left Helmet- Right Helmet- Back Helmet- Hovi Mic Tip Detail Helmet- Lens Color (Backlit) Helmet Trim (Simulated) Blaster- Right Blaster- Left Neck Seal Thermal Detonator- Back Holster Attachment N/A
-
TK-20980 Requesting ROTK EIB Status [846]
11b30b4 replied to 11b30b4's topic in Request Expert Infantry Status
Guys thank you. -
KABOOM! And if my head was not inflated enough, there were no recommendations to fix anything or do anything different for Centurion. I am totally speechless since I know and see all the issues with my kit but I guess that is always the case with people who seek to do their best and are never completely happy with the results. Don't get me wrong, I do love my kit and I am very pleased with how it turned out but there are things I would like to fix on it. I also realize that I can get stuck in a cycle of fix this or that and never finish the kit.
-
TK-20980 Requesting ROTK EIB Status [846]
11b30b4 replied to 11b30b4's topic in Request Expert Infantry Status
WOW! I am speechless. Thank you all and I will be pressing for Centurion in the next week or so. Wow. -
Totally understand but since we have not been able to locate a good reference and the Black Series helmet is an approved reproduction, I figure it may be as close to gospel as we will get.
-
Could just be the lighting but they could be. What color are the black series helmets?
-
TK-20980 reporting for duty
11b30b4 replied to 11b30b4's topic in Newly Approved Members - Sound Off!
Thanks guys, I appreciate the welcome. -
ukswrath, no worries. BTW, my package arrived yesterday. thank you.
-
Welllllllll, I posted my request for EIB on Monday and have heard nothing since. Not one post.... I assume the EIB approval guys are either way busy or they just dont know what to do with a ROTK. Anyway, here is the link. https://www.whitearmor.net/forum/topic/45329-tk-20980-requesting-rotk-eib-status/
-
Name: Jeff Rich TK ID: 20980 FISD Forum Name: 11b30b4 Garrison: Georgia Armor: Jimmiroquai Rogue One Helmet: Jimmiroquai Rogue One Undersuit/ Neck Seal: Jimmiroquai Rogue One Blaster: HFX Rogue One E-11 Height: 6’1” Weight: 225 lbs Boots: Imperial Boots T-7 Canvas Belt: N/A Hand Plates: Jimmiroquai Rogue One Electronics: N/A Holster: N/A Build Thread: https://www.whitearmor.net/forum/topic/44463-11b30b4’s-rotk-build/ Front- Arms at Side Back- Arms at Side Left-Arms Raised Right- Arms Raised Right Side Detail- Arms Raised Left Side Detail- Arms Raised Abdomen Details Action Shot Cod and Butt Plate attachment Interior Strapping Helmet Front Helmet Side Helmet Back Helmet Hovi Tip Detail Helmet Lens Color (Backlit) Blaster- Left Blaster- Right Neck Seal Thermal Detonator- Back
-
darthcue, I was not aware that he made more than one version. If you wanted to do the work, I would think you could mill out the front hole with a dremel and then back it with a thin piece of polystyrene. Another option would be to see if who ever makes the rubber hand armor for OTTKs if they do or could make a set of rogue one hand plates for you.
-
Darthcue, thank you for bringing these issues to my attention. I have posted a request for this to be address on the CRL thread. As for the overlap method, Jimmiroquai’s armor is designed to give the look of the butt-joint and cover strip. Since Jimmiroquai is the only armor available, I do not see this being a determining issue for EIB and/ or centurion. Further, the only two parts of armor that address the butt-joint are the bicep and the forearm. From what I can see, it looks like most of the CRLs were copied from another TK and then modified for the ROTK. I think the butt-joint was removed from the leg armor pieces and the arms armor got overlooked. Additionally, the butt-joint requirement is only for level 3 centurion and should not affect EIB. As for the hand plates, the hand plates included in Jimmiroquai’s kit have the indention and are the correct Rogue One hand plates. Please see the picture below. Also, thank you for the suggestion about the velcro on the boots. I will be playing around with that and another idea I had to see if the stop the rotation. Update… So I stated in a previous post that I was making individual bags for each piece of armor. Here is an example of these bags. I purchased several micro fleece blankets from Walmart for 2.50 each. I cut them to fit and uses para-cord to close them off. I have since gone back and replaced the brown para-cord with black para-cord and used black plastic slide locks on the para-cord to close the bags. So this picture is one of the forearms bags and a lower leg bag. Also I do not recall if I mentioned that I did cut down the sides of the abdominal armor but here is a picture where you can see that it no longer protrudes above the side plate. And that is the update. Thank you for the interest.
-
Gentleman, it has come to my attention that there are a few issues the level 2 and 3 CRLs. As I am a newly approved ROTK and new to the 501st. I am unclear where to go expect here to have these issues address and evaluated. I am interested in seeking EIB and Centurion however all of my armor has been assembled using the overlap method rather than the butt-joint and cover strip method. This is the only way to construct this armor since the cover strips are molded into the armor. Currently only Jimmiroquai is producing the ROTK kit and the overlap method used in the construction of his armor. It is designed to give the appearance of the butt-joint and cover strip but it is clearly the overlap method. I do not know about his other kits such as the death and shore troopers but the TK kit is designed this way. The two areas of concern are: Biceps: -Biceps must be constructed using the butt joint and cover strip method. Overlap construction is not allowed. Forearms: -Forearms must be constructed using the butt joint and cover strip method. Overlap construction is not allowed. Please advise me on how to have these issues address or removed from the CRLs.
-
This was test to embed a full size image.
-
TK-20980 reporting for duty
11b30b4 replied to 11b30b4's topic in Newly Approved Members - Sound Off!
wook1138, thank you. -
http://501st.com/members/displaymemberdetails.php?userID=28607 I started my Jimmiroquai Rogue One TK on April 2nd and was approved on July 22nd. I got this kit to celebrate my 50th birthday. This kit is very different from OT TKs in many ways but perhaps the single largest difference (from a construction perspective) is that it is made of flexible fiberglass rather than HIPS. It must be painted and most of the problems I have run into have been centered on paint more than any other aspect. I have been told that my build thread here in FISD is pretty extensive and comprehensive so I will not rehash all the good and bad things that came from the build. I will simply provide a link to the thread and anyone wanting to read through it can do so. https://www.whitearmor.net/forum/topic/44463-11b30b4’s-rotk-build/ I chose the Rogue One TK because of the detail and I loved Rogue One. This is not my first costume. I have been an active member of the Mandalorian Mercs since January 2018 and have been told that my Mando build was equally extensive. So now I will be seeking EIB and Centurion for my ROTK. I am very excited to be an official member of the 501st and I have been blown away with the support of all the members who helped me along the way. I would like to thank the following members for all their help and assistance: 6306 Thumpy~ Support and recommendations on FISD 42114 Bulldog44 Support and recommendations on FISD and making an awesome scope. 3276 zv288bot Support and recommendations on FISD and in GA Garrison ????? LTM Support and recommendations on FISD and in GA Garrison ????? sskunky Support and recommendations on FISD ????? Zeddy Support and recommendations on FISD ????? GilFran007 Support and recommendations on FISD 10911 themaninthesuitcase Support and recommendations on FISD 72822 Dragon_a Support and recommendations on FISD ????? cbrant Support and recommendations on FISD ????? THMAustin Support and recommendations on FISD 8867 sandtrooper Support and recommendations on FISD 76253 TKSnake Support and recommendations on FISD 55550 Ripper_L Support and recommendations on FISD ????? mikebrierly Support and recommendations on FISD ????? Zsherman Support and recommendations on FISD And a very special thanks to the following members for their selfless contributions and most constructive assistance, without your input, I would not have been able to complete this kit. 8198 Ramblin Trooper For all his assistance and hosting Armor Parties 1183 Lonewolf For all his assistance and hosting Armor Parties ????? Big Deal Support and recommendations on FISD 82214 DEVOLVER Support and recommendations on FISD 10116 ukswrath Support and recommendations on FISD 35679 darthcue Support and recommendations on FISD 18545 Azrok (GA Garrison GML) Thanks for approving my kit and your humbling complements.
-
Sskunky, thank you. Zsherman, thank you. Ok guys, I have a question for those of you who have a Rogue One kit. Do you have issues with the lewer leg armor (shin/calf armor) rotating outwards when you walk? Even with the flex seal lining on the inside and the foam under the knee, these pieces keep rotating when I walk. They do not fit loosely, so I have no idea why they are rotating and how to stop it. Update, Well I have masked off and painted the two outer teeth on the helmet. After my last group of photos I noticed that when I removed one of the lower leg armors the Velcro pulled away from the armor and took the paint with it. For whatever reason, the paint did not stick to the primer here. So I masked off the area and repainted it. After 45 minutes, I applied a layer of clear gloss and let it dry. Tomorrow, I will reapply Velcro and it will cover most of the area. And here are the new pics of the helmet. Once FISD decides to update my account to Stormtrooper I will be able to apply for EIB and Centurion. And that is it for the update. Thanks for the interest.
