

shashachu
-
Posts
1,676 -
Joined
-
Last visited
-
Days Won
9
Content Type
Profiles
Forums
Gallery
Articles
Everything posted by shashachu
-
 Hi Jason! In addition to the photos that TKSpartan pointed out, can you please include close up photos of where your shoulder bridges are connected to the chest, as well as the connection between the chest and back armor? This is to check the L2 requirements for the shoulder bridges No visible rivets are allowed. and chest Chest and back shall be connected with a white fabric or preferably elastic strap at the shoulders. Thanks!
 -
Hi Pam! Great to see you getting ready for Centurion. You shouldn't need to do any reshaping of the top of the knee. I did remove all of the bottom return edge on my sniper knee.
-
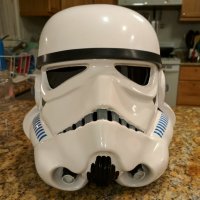
Hi Henry, Thanks again for your application, and especially for being so patient as we worked through the reviews. CRL and EIB Application Requirements All required photos are now in and, after review, we are pleased to welcome you to Expert Infantry rank. On behalf of the DO team and myself, many congratulations! It's clear that you really did your research when building your armor. Other-Armor Fit/Assembly In this area we review observations made by your fellow troopers and the DO team. Some observations may lead to suggestions to improve the overall look of your armor. Note that we consider both text (CRL) and pictures (screen caps/reference images) when reviewing submissions First, a very minor dressing issue - your TD is sitting too high off your belt. When you're getting ready for troops, have a handler double check that it's sitting securely, or it could actually fall off while you're trooping. Reference Image: Another very minor detail is that the TD clips should be square off, not rounded. Not a big deal at all, but worth mentioning for those who want to go the extra mile. If you do decide to tackle this suggestion, be sure that the ends of the clips are still flush with the TD plate. Also, the TD screws tended to be closer to the ends of the clips. Again, a very minor detail, but I thought I'd point it out. Reference Image: Moving along, your butt plate is popping out a bit, but it should sit right below the kidney. We're suggesting you tighten the strapping on the sides, or add some if there isn't any. Additionally, if you look at the reference images, the rear of your belt is sitting too low; it should sit above the kidney/ab split. Reference Image: Centurion Requirements In this section we prepare you for Centurion. More photos may be requested in the future that allow us to make better decisions on possible adjustments. If there are any areas of concern they will be discussed here. Because Centurion photos show much more detail than EIB, items to pertaining to Centurion might be seen there and not here. We try to point out all that we can from what is seen, but the final accuracy is the responsibility of the trooper. Starting from the top, the L3 CRL states: There should be a minimal gap between the shoulder armor and the chest/back plates. From the front your shoulder bells look *perfect* but from the rear there's a significant gap. I'm actually fairly confident that if you relaxed your arms for the rear photo, you could get most of that gap to disappear. If not, you can try rotating the bells back slightly, or making sure there is not bottom return edge on the shoulder bells. Reference Image: Moving along, the L3 CRL states: [Shoulder straps] shall free float in back. While I like the idea of using magnets to hold them in place, the straps should just be free-floating and not held down or attached in any way to the back plate. Continuing on, the L3 CRL states: Back plate shall have no, or minimal overlap of the kidney plate. Your back plate is overlapping the kidney plate: Since I'm quite short, I had to deal with this with my own kit as well. You could try shortening the strapping between the chest and back to bring the back higher, or in my case I heat-bent the rear shoulder tabs some to force the back plate to sit higher. There is also a great tutorial about how one trooper helped bend in the 'wings' on his back, eliminating the overlap: https://www.whitearmor.net/forum/topic/40831-ajs-of-am-20-build/page/10/?tab=comments#comment-656482 Reference Image: Moving on to a couple fitting issues. I can see that you're a slender trooper, and while you've done a fantastic job with your build, your forearms and thighs don't fit you as well as they could. Your forearms are very wide, particularly at the elbow end, and the tops of your thighs are big for you as well, causing overlap between the thighs and butt plate. While forearm and thigh size isn't something stated specifically in the CRL, we do consider reference images when doing application reviews, and we think it will really help you look your best to have them more proportional. Additionally, the thigh overlap can cause painful armor bites and is probably also affecting your mobility. So we'd like you to size down both the forearms and the thighs before applying for Centurion. It won't be simple, but I have the utmost confidence in your skills. This is something that I had to deal with in my own armor build as I am also slender. The forearms can be particularly difficult due to the built in ridges, but I was able to size mine down significantly. You can see how I approached them in my build thread here: https://www.whitearmor.net/forum/topic/42868-sha-shas-wtf-anh-stunt-build-complete/?tab=comments#comment-574130 Reference Image: Reference Image: Finally, a couple pieces that will need replacing when you apply for Centurion (and we hope you will!) The L3 CRL states: Hand guards shall be latex or latex-like, solid white or painted white, and affixed to rubber gloves with no visible strapping or stitching. Since you have plastic handguards, you'll need to get latex ones (there are some forum members who sell them) for your Centurion application. Reference Image: The L3 CRL states: Bapty-style, Hasbro and Rubies blasters are not allowed, even conversions. Unfortunately your Hasbro blaster (which you've done a great job with) will need to be replaced with one that's more accurate. I personally troop with a Hyperfirm rubber E-11. And that's it! Based on the quality of your armor build so far, I have full confidence that you'll be able to tackle these issues. As always, please reach out to us if you need any assistance, and we hope to see you at Centurion. Congratulations again, now get out there and make The Emperor proud!
-
Hi Henry, Very sorry for the delay - real life has been extremely busy so I haven't had a chance to do your review. Rest assured I have not forgotten about you. I appreciate your patience.
-
Requesting EIB TK24037 ANH Stunt (AM) [916]
shashachu replied to Linz's topic in Request Expert Infantry Status
Apologies - I realized I'd accidentally left out the photos from the Centurion Requirements section - updated to add them. Congratulations again. -
Hi Henry, Sorry for the delay - I'll be starting your review. In the meantime, can you post two additional photos: * closeup of where your shoulder bridges connect to the chest piece (to verify there is not rivet) * closeup of the inside of your thigh ammo pack connection (to verify the type of rivet) Thanks!
-
TK-48117 requesting ANH Stunt Centurion status [RWA] [435]
shashachu replied to TKSpartan's topic in Request Centurion Status
Hi Mario, Thanks for your application and the quick turnaround on the forearm return edge fix. CRL and Centurion Application Requirements All required photos are now in and, after review, we are pleased to welcome you to Centurion! On behalf of the DO team and myself, many congratulations! Other-Armor Fit/Assembly In this area we discuss areas that could benefit from additional improvement. Although they did not hold you back from Centurion, they may improved the final look of your armor. Note that we consider both text (CRL) and pictures (screen caps/reference images) when reviewing submissions. You have a bit of extra return edge around your eyes, especially near the nose bridge. A few minutes with a dremel should clean it up nicely. Reference Images: Although it didn't hold you back from Centurion, your belt has a tendency to be a *bit* too low. For ultra-accuracy, it should ideally it should be touching or even slightly overlapping the bottom button in the ab panel. In the close-up photo it looks perfect, but in the full-body photo it's sitting a touch low, as well as leaning a bit to one side. On my own kit I put two small strips of velcro so that I can be sure it stays in place when I'm out trooping. Reference Images And that's it! Congratulations again and welcome to Centurion! Now get out there and make The Empire proud! -
Requesting EIB TK24037 ANH Stunt (AM) [916]
shashachu replied to Linz's topic in Request Expert Infantry Status
Hi Linz, Thanks for your application and thank you for making the corrections as well as posting the additional photos! You've done an incredible job fitting your armor to you (you are over a foot taller than I am!) and it's clear you have done your research. CRL and EIB Application Requirements All required photos are now in and, after review, we are pleased to welcome you to the Expert Infantry rank! On behalf of the DO team and myself, many congratulations! Other-Armor Fit/Assembly In this area we review observations made by your fellow troopers and the DO team. Some observations may lead to suggestions to improve the overall look of your armor. Note that we consider both text (CRL) and pictures (screen caps/reference images) when reviewing submissions Starting from the top, just a few details with your helmet that will make it look like you walked right off the movie set. Your vocoder paint could be sharpened up to better match the screen-used helmets, and there is one area where the paint leaves the raised plastic area, so we're suggesting you clean that up. Additionally, I can see that you've painted the inside of your hovi tips white, but for that extra bit of accuracy, you can put a bit of white paint on the rims as well. Reference Images: Continuing with your helmet, most ANH helmets tended have their ears follow the rear edge of the helmet trap, while yours are sitting a bit too far forward and a bit too vertically. While it's certainly not an easy adjustment, if you're up for the challenge, you could try adjusting their position. Reference Images: Next, the borders of your decals look quite thick when compared to screen-used helmets. We're suggesting you find decals with thinner borders, or for ultimate accuracy, hand paint them. I found the technique in this thread of laying down the black first and then overlaying the grey worked really well. Reference Images: . Finally, a very minor detail is that the tube stripes should lean towards the front of the helmet, not the rear: Reference Image: Moving along, as I mentioned you've done a great job fitting your armor to you. Ideally we want to see minimal black between armor pieces, but for a trooper your size where gaps are inevitable, it does clean up the look to at least even out the gaps. Your forearms are sitting a bit low and nearly touching your hand plates, so you might consider barely shortening the strapping between your biceps and forearms. Additionally, the black between the ab pieces and upper thighs looks great, but it leaves quite a large gap between the thighs and shins, so you could also try dropping the thigh pieces just a half inch or so if it doesn't affect your mobility. Reference Images: Continuing on, just a small nitpick with your belt. I'm not exactly sure how you have the plastic of your belt attached to the cloth, but the plastic seems to want to pull away from the cloth belt. There's no requirements for how it's actually attached, but normally the ends of the plastic are riveted to the cloth, which help keep them close. In your case from the photo of the inside of your belt it doesn't look like that's the case, so you could consider adding some sort of fastener like a rivet, or in my case I prefer Chicago screws so that the belt is easier to disassemble if necessary. Reference Image: Moving to the rear, just pointing out a small dressing issue: your TD is sitting quite high on your belt. Next time you're at a troop, just have a handler take a quick peak to make sure it's sitting securely on your belt. Reference Image: Finally, just the smallest of details: there is a slight gap in the bottom ridge of your left thigh piece. It actually looks like you've already backed most of the gap with a square of ABS, so it looks like you just have to include the return edge. Reference Image: Centurion Requirements In this section we prepare you for Centurion. More photos may be requested in the future that allow us to make better decisions on possible adjustments. If there are any areas of concern they will be discussed here. Because Centurion photos show much more detail than EIB, items to pertaining to Centurion might be seen there and not here. We try to point out all that we can from what is seen, but the final accuracy is the responsibility of the trooper. The L3 CRL states: There should be a minimal gap between the shoulder armor and the chest/back plates. The gap when viewed from the rear actually looks pretty good, but you have a larger gap in the front. Some things you can do are: shorten the elastic connecting the shoulder bells to the white shoulder elastic or even reposition the snap holding them on, making sure there is no return edge on the bottom of the shoulder bells, rotating the bells forward to even out the back/front gap, or even relaxing your posture when your photos are taken. Reference Images: Congratulations again, and we'll see you at Centurion! Get out there and make us proud! -
Requesting EIB TK24037 ANH Stunt (AM) [916]
shashachu replied to Linz's topic in Request Expert Infantry Status
Hi Linz, Apologies for the delayed reply - I somehow missed the notification that this thread had been updated. Teeth look fantastic! I'll be with you shortly. -
TK-48117 requesting ANH Stunt Centurion status [RWA] [435]
shashachu replied to TKSpartan's topic in Request Centurion Status
Hi Mario!! Great to see your Centurion application so soon! Before we can continue, you'll need to make an adjustment to your forearms. The L3 CRL states: No return edge on the inside of the front of the forearm is allowed. You've definitely trimmed the return edge, but there is still quite a bit of visible return edge: Reference Image: A couple minutes trimming off the last bits of return edge should do it. Could you also please post photos of your new Praetorian blaster? Left side, right side, and the D-Ring. You're almost there! -
Requesting EIB TK24037 ANH Stunt (AM) [916]
shashachu replied to Linz's topic in Request Expert Infantry Status
Linz - one more photo when you have a chance - can you post a direct photo of the D-ring on the end of your blaster? I can see it in the side photos, I just need a clearer shot of it. Thanks! -
Hi Henry, Great build! Unfortunately, before we proceed with your review, you'll need to remove your TKID from your blaster. We totally understand why it's there and you're welcome to put it back later, but for the purposes of your application it will need to be removed or covered. Thanks! Sha Sha
-
yaaaay
-
CLOSED - CRL for Force Unleashed Stormtrooper
shashachu replied to mikedwelle94's topic in The Force Unleashed Stormtrooper
Found it! Haha sorry for the noise. -
CLOSED - CRL for Force Unleashed Stormtrooper
shashachu replied to mikedwelle94's topic in The Force Unleashed Stormtrooper
Ah ok. I may have missed it, but are the rivets listed anywhere? -
CLOSED - CRL for Force Unleashed Stormtrooper
shashachu replied to mikedwelle94's topic in The Force Unleashed Stormtrooper
Seems kind of repetitive to mention weathering in every section - can you just say all armor pieces, belt, and boots are scuffed/dirty etc? Also this photo pretty clearly shows Hero-style 4 rivets on the belt. Maybe a higher level approval item? -
Congrats!
-
Requesting EIB TK24037 ANH Stunt (AM) [916]
shashachu replied to Linz's topic in Request Expert Infantry Status
No problem. I'll be here when you're ready. -
Requesting EIB TK24037 ANH Stunt (AM) [916]
shashachu replied to Linz's topic in Request Expert Infantry Status
Hi! Yes before we proceed, you'll need to remove the overspray on the teeth (although I'm not 100% sure it's not just shadow). If you look at the reference photos, you can err on the side of stopping short of the gums. You should be able to clean it up with mineral spirits or paint thinner. Could you also please post close-up photos of: * the inside and outside of the thigh ammo pack rivets (to check rivet type) * Straight on close-up shots of the front and both sides of the sniper knee (to check alignment) Thanks! -
TK-48117 requesting ANH Stunt EIB status [RWA] [913]
shashachu replied to TKSpartan's topic in Request Expert Infantry Status
Woohoo!! Will look forward to receiving your application. -
TK-48117 requesting ANH Stunt EIB status [RWA] [913]
shashachu replied to TKSpartan's topic in Request Expert Infantry Status
Hi Mario, Thanks for your patience, and I appreciate you updating the frown paint. You have a great build, and it's clear you've trooped a lot in it, too! CRL and EIB Application Requirements All required photos are now in and, after review, we are pleased to welcome you to Expert Infantry rank. On behalf of the DO team and myself, many congratulations! Other-Armor Fit/Assembly In this area we review observations made by your fellow troopers and the DO team. Some observations may lead to suggestions to improve the overall look of your armor. Starting at the top, a couple suggestions with your helmet. On the screen-used helmets, the ears tended to be tilted to follow the edge of the trap, while yours are positioned more vertically. It is just a suggestion, but if you'd like to make your helmet really match the screen-used ones, you could try to reposition them. Reference Images: Continuing on, your vocoder paint could be touched up to be a bit more defined. A bit of time with a thin brush and some paint thinner could really clean up the look. Reference Images: Moving down to your limbs, ideally there is minimal black showing between the armor pieces, but if there is black, we suggest making sure the gaps are even. On your arms, dropping the biceps and possibly raising the forearms a bit would even it up, and on your legs, you could try raising your thigh pieces, or even just rotating the thigh pieces inwards would minimize the black showing. Reference Image: It looks like you may have already worked on your ab buttons, but the image link seems to be broken for me, so I'll go ahead and point it out here. The paint size could be reduced a bit, as the paint on the screen-used armor tended to be slightly smaller than the plastic buttons. Reference Image: Centurion Requirements In this section we prepare you for Centurion. More photos may be requested in the future that allow us to make better decisions on possible adjustments. If there are any areas of concern they will be discussed here. Because Centurion photos show much more detail than EIB, items to pertaining to Centurion might be seen there and not here. We try to point out all that we can from what is seen, but the final accuracy is the responsibility of the trooper. The L3 CRL states: There should be a minimal gap between the shoulder armor and the chest/back plates. From the front, your shoulder gap is perfect but there's some gap when viewed from the back. This is likely just a simple issue of rotating the shoulder bells back a bit, or even adjusting the way you're standing when taking the photos from the rear. Reference Image: Moving along, the L3 CRL states: Drop boxes are vertically aligned with the end of the ammo belt with minimal gap between belt and box. Your left side box is hanging just a bit low. This should be a simple fix of shortening the white elastic holding it on. Reference Image: Finally, the L3 CRL states: Hasbro and Rubies blasters are not allowed, even conversions. Since your blaster is a Hasbro, if you decide to apply for Centurion, which we hope you do, you will have to acquire a new blaster. Please reach out to us if you're having issues locating one. I personally use a Hyperfirm rubber blaster. And that's it! It seems that you built your armor with Centurion in mind, so it's just a few minor issues to correct and we hope to see your Centurion application soon! Congratulations again, and welcome to EIB! -
TK-48117 requesting ANH Stunt EIB status [RWA] [913]
shashachu replied to TKSpartan's topic in Request Expert Infantry Status
Great thank you!! -
TK-48117 requesting ANH Stunt EIB status [RWA] [913]
shashachu replied to TKSpartan's topic in Request Expert Infantry Status
Hi Mario, You are sooooo close with the frown paint, but upon closer inspection there is still a bit of extra paint: If you look at the reference images, on the screen-used helmets the paint almost stops short of the ends of the teeth: Just a minor correction and I'll be able to complete your review. Thank you! -
TK-48117 requesting ANH Stunt EIB status [RWA] [913]
shashachu replied to TKSpartan's topic in Request Expert Infantry Status
Hi, Thanks for your submission and thanks for making the frown paint correction. I'll be with you shortly - appreciate your patience. -
Congrats, Peter! I'm not sure why your forum sidebar says you have 2 EIB awards - this is your first, correct? I'll have someone look into it. - Edit: apparently it's a known issue with just the sidebar display. Clicking through to your profile I see the correct information.
