

shashachu
-
Posts
1,676 -
Joined
-
Last visited
-
Days Won
10
Content Type
Profiles
Forums
Gallery
Articles
Everything posted by shashachu
-
 Hi Mario, Thanks for your application, and thank you for the fixes from your EIB application! CRL and Centurion Application Requirements All required photos are now in and, after review, we are pleased to welcome you to Centurion! On behalf of the DO team and myself, many congratulations! Other-Armor Fit/Assembly In this area we discuss areas that could benefit from additional improvement. Note that we consider both text (CRL) and pictures (screen caps/reference images) when reviewing submissions First, although the tube stripes should look hand-painted, you should clean yours up a bit, just to give your helmet a cleaner look. Reference Image: Next, thanks for updating the position of the 5 ab buttons. It looks like they might be separate pieces, though, so it would really streamline your look if you were able to find buttons that were integrated, the way that the buttons in the larger ab panel are. This isn't mentioned either way in the CRL and it's also not clear either way from the game screenshots, so I'm simply leaving it as a suggestion. Reference Image: And that's it! Congratulations on reaching Centurion.
 -
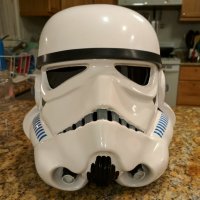
Hola Mario! Sorry for the delay. Could you please post a close-up photo of your helmet hovi tips? I can see the rims are white, but I'm not sure if the interior is white as well. Reference photo: Thank you, my friend!
-
TK 35811 Requesting ANH Stunt EIB Status (ATA) [948]
shashachu replied to echo327's topic in Request Expert Infantry Status
Hi Erick! Thanks so much for your application and for the quick turnaround with the frown paint and cod rivet fixes! You have a beautiful build that fits you really well. CRL and EIB Application Requirements All required photos are now in and, after review, we are pleased to welcome you to Expert Infantry rank. On behalf of the DO team and myself, many congratulations! Other-Armor Fit/Assembly In this area we review observations made by your fellow troopers and the DO team. Some observations may lead to suggestions to improve the overall look of your armor. Note that we consider both text (CRL) and pictures (screen caps/reference images) when reviewing submissions Starting from the top, a very minor suggestion to clip off the end of the brow trim, as it tended to stop before the edge of the trap: Reference Images: Moving along, a suggestion with your shoulder bridges. The screen-used armor had no large tab on the back of the shoulder tabs, so you could consider trimming it off if it wouldn't make your shoulder bridges too short: Reference Images: Next, you have a very slight overlap with your back and kidney plate on the right side. It's so small that it won't block for Centurion, but adjusting the strapping would give you that ultra clean look. I myself have uneven shoulders and had to make some adjustments to minimize the overlap as well. Reference Image: Next, from the front you can see that your kidney plate is just a touch wider than your ab plate. Some gentle heat bending might help them line up better. Reference Image: Finally, as was already pointed out, the TD screws should technically be closer to the ends of the clips. Nothing that will block approval, but worth mentioning for those who want to really match the screen-used armor: Reference Image: Centurion Requirements In this section we prepare you for Centurion. More photos may be requested in the future that allow us to make better decisions on possible adjustments. If there are any areas of concern they will be discussed here. Because Centurion photos show much more detail than EIB, items to pertaining to Centurion might be seen there and not here. We try to point out all that we can from what is seen, but the final accuracy is the responsibility of the trooper. Starting from the top, the L3 CRL states: There should be a minimal gap between the shoulder armor and the chest/back plates. Yours actually doesn't look too bad, but we think the gap can still be reduced. Shortening the strap connecting the shoulder bell to the shoulder elastic should bring the top closer to your chest. I also noticed that the bottom of your shoulder bells still appears to have quite a bit of return edge on them, so trimming that all off should let them sit closer to your chest and back. Reference Images: Next, the L3 CRL states: The top of the ABS ammo belt should sit at or just above the bottom of the central and vertical abdomen button panels. Yours is sitting a bit low so will need to be raised. I added two small strips of velcro to the front of my ab to keep my belt from sagging during troops. Reference Images: Next, the L3 CRL states: Hand guards shall be latex or latex-like, solid white or painted white, and affixed to rubber gloves with no visible strapping or stitching. Yours are ABS, so they'll have to be replaced with latex ones for Centurion. There are a couple folks on the boards who sell them. I had a really hard time getting them to stick to the rubber gloves solidly; you might need to try a few different adhesives. Reference Image: Next, the L3 CRL states: No return edge on the inside of the front of the forearm is allowed. It's a bit hard to see, but it appears you do still have quite a bit of return edge on your forearms. Reference Image: Moving along to the belt, the L3 CRL States: The corners of the plastic ammo belt shall be trimmed at a 45 degree angle that that meets the outer edge of the cloth belt. Yours come in a bit too far. It can be a bit of a tricky dance to get them lined up properly, and I will say we are not generally extremely picky in this area, but you should be able to trim the edge and corners of the belt to get it much closer. Reference Images: Finally, at L3, we do not allow Rubies conversions: Bapty-style, Hasbro and Rubies blasters are not allowed, even conversions. So you'll need to get your hands on another blaster. There are a lot of options for accurate blasters; I troop with a Hyperfirm B-Grade rubber blaster, but unfortunately they're not around anymore. Praetorian makes rubber E-11s if that's the route you'd like to go. And that's it! I have full confidence in your ability to make the few small adjustments for Centurion, especially give the very quick turnaround on the EIB fixes. We'll see you at Centurion soon, but until then, get out there and make Lord Vader proud! -
TK 35811 Requesting ANH Stunt EIB Status (ATA) [948]
shashachu replied to echo327's topic in Request Expert Infantry Status
I honestly did too, which is why it took me so long to get back to you. I had a lot of very confused discussions with present and former DOs. From what I can discern, it used to be an L3 requirement, but I found EIB reviews back to September 2018 quoting them as an EIB requirement, so it must have changed sometime in the last couple of years. To be honest I think it's also somewhat inconsistently enforced at EIB, which probably why it's even more confusing. Thank you for your patience! -
TK 35811 Requesting ANH Stunt EIB Status (ATA) [948]
shashachu replied to echo327's topic in Request Expert Infantry Status
Okay! Apologies again for the delay, but I'll have to ask you for one more change before proceeding. Per the L2 CRL: Gloves shall be rubber or rubber-like chemical gloves, in black. Yours appear to be nomex gloves, so while they look very comfy for trooping, they'll need to be replaced for your EIB application. If you like, you could also take this opportunity to get some latex hand guards, but that is a Centurion requirement, not EIB, so that would only be if you'd like to get a head start on your Centurion application. Apologies for not spotting this the first time around. You're almost there! Please let me know if I can be of further assistance. Thanks, Sha Sha -
TK 35811 Requesting ANH Stunt EIB Status (ATA) [948]
shashachu replied to echo327's topic in Request Expert Infantry Status
Hey Erick, Just popping in to say that I haven't forgotten about you; there's a CRL question I have that I'm trying to get cleared up. I don't want to tell you the wrong thing. Thank you for your patience! -
TK 35811 Requesting ANH Stunt EIB Status (ATA) [948]
shashachu replied to echo327's topic in Request Expert Infantry Status
Nice work, Erick! We'll be with you soon. -
TK 35811 Requesting ANH Stunt EIB Status (ATA) [948]
shashachu replied to echo327's topic in Request Expert Infantry Status
Just add to this post. And no worries - we'll be here when you're ready! -
TK 35811 Requesting ANH Stunt EIB Status (ATA) [948]
shashachu replied to echo327's topic in Request Expert Infantry Status
Hi Erick! Thanks so much for your submission! I'll be doing your review. Like @gmrhodes13 pointed out, there's a couple fixes that will need to be made in order to proceed. First, it looks like some of your frown paint will need to be cleaned up. I zoomed in to mark out an area so that it's a bit clearer what we're after, but take a look at both the upper and lower edges of the teeth to ensure there's no gray paint on the 'gums'. If you look at the reference photos, you'll see that you can even err on the side of underpainting. It should be just a bit of time with some mineral spirits or paint thinner and a q-tip or toothpick to clean up the paint. (Apologies for the sub-par photo; I'm on my phone.) Reference Images: Next, your cod rivet does look quite large. What hardware did you use for it? Generally we try to shy away from exact measurements, but proportionally, yours looks too large. Our available reference photos of that area aren't great, but you can see the rivet is noticeably smaller than the snaps, while on your kit they look the same size. On my own kit I used the same split rivets I used for the left side ab/kidney connection. Reference Image: Finally, you're missing a few required photos: - Sniper knee left/right/front - Shoulder strap connection - Interior strapping You can also reference the attached checklist. Please reach out to me or any other DO if you have any additional questions. You're almost there! -Sha Sha EIB_Centurion Photo Checklist (4).pdf -
TK 41965 Requesting ANH EIB Status AM [947]
shashachu replied to RobH777's topic in Request Expert Infantry Status
Hi Rob, Thanks for your application and for all of the fixes. It may seem nitpicky at times, but we really are trying to help you look your best. You've done a fantastic job fitting the armor to you. CRL and EIB Application Requirements All required photos are now in and, after review, we are pleased to welcome you to Expert Infantry rank. On behalf of the DO team and myself, many congratulations! Other-Armor Fit/Assembly In this area we review observations made by your fellow troopers and the DO team. Some observations may lead to suggestions to improve the overall look of your armor. Note that we consider both text (CRL) and pictures (screen caps/reference images) when reviewing submissions. Starting from the top, just a suggestion with the brow placement. Stunt brows tend to be a bit higher than you have hours (Hero brows are low like yours), so we're suggesting you raise it just a touch. Reference Images: ' Nice job sharpening up the paint around the vocoder, but you may have taken a bit too much paint off, so we're suggesting you add just a bit back to better match the screen used helmets. Reference Image: Next, just a simple dressing issue. Next time you're getting suited up, have a handler take a look and make sure your cover strips are aligned. It's a very small detail but it's the little things that really elevate your look Reference Image: ard Finally, it's a bit hard to tell from the photo, but your cod seems a bit longer than usual, so if you're feeling inspired, you could trim it down some. Reference Image: Centurion Requirements In this section we prepare you for Centurion. More photos may be requested in the future that allow us to make better decisions on possible adjustments. If there are any areas of concern they will be discussed here. Because Centurion photos show much more detail than EIB, items to pertaining to Centurion might be seen there and not here. We try to point out all that we can from what is seen, but the final accuracy is the responsibility of the trooper. Starting with the shoulders, the L3 CRL states: There should be a minimal gap between the shoulder armor and the chest/back plates. Your shoulder bell gap is a little larger than we like to see. Some suggestions are: tightening the strapping holding the bells on, trimming off any remaining lower return edge on the bells, and even just adjusting the way you're holding your arms in your photos. Reference Images: Moving along, the L3 CRL states: Back plate shall have no, or minimal overlap of the kidney plate. I'm not completely sure, but it does look like your back and kidney are overlapping. It's probably just a matter of some minor strapping adjustments. Reference Image: Next, the L3 CRL states: Abdomen armor buttons are integrated and painted directly on the armor. No separate buttons are allowed. It looks like you're using separate buttons, and you appears to be missing the smaller ab button plate, so you'll need to replace both. Reference Image: Finally, I can't clearly see the ab box alignment in your photos, but when you're taking your Centurion photos, make sure they're aligned with the ends of the plastic belt. Many troopers add a drop of glue to the white elastic holding the belt boxes on to ensure they stay in place. Drop boxes are vertically aligned with the end of the ammo belt with minimal gap between belt and box. Reference Image: And that's it! I have total confidence in your ability to make the necessary fixes for Centurion, but in the mean time, get out there and troop and make The Empire proud! -
TK 41965 Requesting ANH EIB Status AM [947]
shashachu replied to RobH777's topic in Request Expert Infantry Status
Hey Rob! Great job on the snap fix, and on the interior paint! Last tiny thing - looks like you painted the hovi tip screens white, but they should stay silver. Once you remove the white paint, we can proceed. You're almost there!!! -Sha Sha -
TK 41965 Requesting ANH EIB Status AM [947]
shashachu replied to RobH777's topic in Request Expert Infantry Status
Super speed! Thanks for the quick fixes. I'll be with you soon. -
TK 41965 Requesting ANH EIB Status AM [947]
shashachu replied to RobH777's topic in Request Expert Infantry Status
Hi Rob! Thanks for all the additional photos. We're going to have you make a couple more fixes before continuing. First, per the L2 CRL: Correct 'Hovi mic' aerator tips are present. Screens used shall be of a wide type mesh, with the rim of the mic and the inside white or painted white. You've done a nice job with the white rims, but it doesn't appear the interior is white. Reference Images: Next, we're requesting a fix on your posterior snaps. AM armor comes with a bit of a tab/extension on the posterior section, maybe to fit larger troopers better. However, that tab wasn't present on the screen-used suits, and although it's not something specifically called out in the CRL text, the DO team discussed it and we're requesting that you trim off the extra tab and move the snaps. Not only will it be more accurate, but we believe it will probably make your armor more comfortable to wear. Reference Image: You can also look a previous AM approvals for reference. Thanks for your patience; you're almost there! Please reach out to me or any of us on the DO team if we can be of assistance. -
TK -16790 requesting ESB Centurion status [AFP] [450]
shashachu replied to Tivy's topic in Request Centurion Status
Hi José, Thanks for your application and the quick turnaround on the corrections. CRL and Centurion Application Requirements All required photos are now in and, after review, we are pleased to welcome you to Centurion! On behalf of the DO team and myself, many congratulations! Other-Armor Fit/Assembly In this area we discuss areas that could benefit from additional improvement. Note that we consider both text (CRL) and pictures (screen caps/reference images) when reviewing submissions One suggestion here with your helmet. Usually Stunt helmets had their brows slightly higher than you have yours. It's personal preference, but if you're looking for ultimate screen accuracy, you should consider raising your brow just a few millimeters. Reference Images: Finally, your cod rivet is a little far in. This isn't a visible area so it's not a blocker, but something to consider. Reference Image: And that's it, my friend! Congratulations again on a beautiful build. -
No worries, Ivan. We'll be here when you're ready.
-
TK -16790 requesting ESB Centurion status [AFP] [450]
shashachu replied to Tivy's topic in Request Centurion Status
Hello José! I'm very sorry for not seeing this earlier, but we'll need you to make one more correction for Centurion. Your 'Han' snap needs to be moved closer to the corner of your ab. We don't require a precise measurement, but this is an area where we'd like troopers to more closely match the reference photos, and yours is too far in. You'll need to drill out the snap, move it, and fill the old hole with ABS paste. Reference Image: You're almost there, my friend, and I have total confidence in you. Please let us know if you need anything from us. -
TK 41965 Requesting ANH EIB Status AM [947]
shashachu replied to RobH777's topic in Request Expert Infantry Status
Hello Rob! Thanks for your application! We'll need you to make a few corrections before we can proceed with your application. First, you'll need to replace and paint your thermal detonator screws. The L2 CRL states: Clips shall be attached with slotted type, flat or dome top style screws, and be black (two per clip). V head screws are not permitted. So almost any slotted screw will work except a v-head. You'll also want to use black screws, or just use a bit of black paint on them. Reference Image: Next, as @SirFalconian said, you'll need to close up that ab/kidney gap a bit. Any gap between the abdomen and kidney armor is no more than 1/2" (12.5mm) wide. Besides being careful when dressing, you can try tightening your belt, and many troopers have good success connecting the left side rivets with nylon instead of elastic. In the meantime, we'll also need some additional photos: * Helmet right side * Close up of hovi tips/vocoder * Close up of shoulder strap connection * Close up of ab buttons * Interior strapping * Sniper knee front, left, and right * Close up of cod and butt connection to show presence of rivet + 2 snaps * Belt interior * Closeup of inside and outside of thigh ammo pack rivet * Rear of blaster (to show D-ring) Thanks! -
Hi Ivan, Thanks for your application! I apologize for the delay in your review; sometimes real time gets in the way. Thanks also for the quick fixes. Let's get started! CRL and EIB Application Requirements All required photos are now in and, after review, we are pleased to welcome you to Expert Infantry rank. On behalf of the DO team and myself, many congratulations! Other-Armor Fit/Assembly In this area we review observations made by your fellow troopers and the DO team. Some observations may lead to suggestions to improve the overall look of your armor. Note that we consider both text (CRL) and pictures (screen caps/reference images) when reviewing submissions Starting from the top, this is totally a matter of personal preference but I'd consider trimming just a bit more out of your helmet eyes. While there's nothing wrong with the way you have them trimmed now, your trooper does have a bit of a sleepy look. Reference Images: Next up, your biceps are pretty uneven, with your left one sitting quite a bit lower than the right. Not only will raising your left bicep give you a bit better arm mobility, but it will also keep your left forearm from running into your handguard. Reference Image: Moving along, we're suggesting you touch up the white paint on your left side ab/kidney rivets. While the scratches probably do actually better match screen-used armor, we tend to lean a bit more towards that idealized 'fresh off the Death Star' look. Reference Image: On the opposite side, your 'Han snap' is sitting a bit low. It's not so off that we'd block for Centurion, but if you're looking for ultimate screen accuracy, you could replace the snap and fill the old hole with ABS paste. Reference Image: Finally, just a dressing issue. When you're getting suited up, it really takes the look of your armor to the next level to have your cover strips aligned. So when you're at your next troop, just have a handler give you a once-over to make sure things are lined up. Reference Image: Centurion Requirements In this section we prepare you for Centurion. More photos may be requested in the future that allow us to make better decisions on possible adjustments. If there are any areas of concern they will be discussed here. Because Centurion photos show much more detail than EIB, items to pertaining to Centurion might be seen there and not here. We try to point out all that we can from what is seen, but the final accuracy is the responsibility of the trooper. The L3 CRL states: There should be a minimal gap between the shoulder armor and the chest/back plates. Your shoulder bell gap is quite wide, especially in the front. You're a bigger trooper so it can be hard to minimize the gap, but some tips include tightening the strapping connecting the shoulder bells, and making sure all the lower return edge of the shoulder bells is trimmed back. You may also want to consider rotating the bells forward so at least the front/rear gap is even. Reference Image: Moving to the rear, the L3 CRL states: Back plate shall have no, or minimal overlap of the kidney plate. The 'wings' of your back plate are overlapping the kidney a decent amount. I actually think that a bit of heat bending to point them out may do the trick. We also noticed that the strapping in the center of the back/kidney connection looks longer, so tightening that may position the back in a better place. Reference Image: Moving along, great job with getting that gap down for your EIB approval; glad the nylon strapping did the trick. For Centurion, however, there should be no gap. Ideally there no gap between the abdomen and kidney armor. Abdominal and Kidney Plate align horizontally at top. A single visible seam line is present. It may again just be a matter of dressing, but you'll need to eliminate that last bit of gap if you apply for Centurion. At worst, you may need to shim your armor some, but just note that for Centurion the shim must be seamless, so you'll have to fill the seam with ABS paste and sand it smooth. Reference Images: Finally, a couple issues with your belt. The L3 CRL states: The top of the ABS ammo belt should sit at or just above the bottom of the central and vertical abdomen button panels. Note in the reference images that the plastic of the belt should touch or even slightly overlap the last ab button. Next, the L3 CRL states: Canvas belt must be firm / sturdy in appearance. No creasing or sagging Your belt seems to be creasing/sagging at the holster connection. I don't have personal experience with Trooperbay belts so I'm not sure if that area is a little thin, or maybe if you just need to flatten out that area? Worst case you may need to replace the canvas belt for Centurion. Reference Image: And that's it! Great job on your build, and congrats again on reaching EIB. We hope to see your Centurion application soon, but until then, get out there and make The Empire proud!
-
TK-12929 Requesting ANH Stunt Centurion Status (AP) [448]
shashachu replied to mlarsen's topic in Request Centurion Status
Hi Matthew, Thanks for your patience as we reviewed your application. CRL and Centurion Application Requirements All required photos are now in and, after review, we are pleased to welcome you to Centurion! On behalf of the DO team and myself, many congratulations! Other-Armor Fit/Assembly In this area we discuss areas that could benefit from additional improvement. Note that we consider both text (CRL) and pictures (screen caps/reference images) when reviewing submissions Your belt is still looking a bit loose, and in these photos, slightly off-kilter. Again, probably mostly a dressing issue, but next time you're at a troop, have a handler make sure the belt is nice and snug. And as was pointed out by your fellow troopers, the belt is a bit long, especially if you were to tighten it more. Reference Image: Finally, great job on recentering the sniper knee. It's still a bit crooked, so if you're finding yourself with nothing to do on a rainy, day, you could give it another go. I know from past applications, that the AP armor is particularly challenging in this area. And that's it! Congrats again on reaching Centurion - now get out there and troop! -
TK -16790 requesting ESB Centurion status [AFP] [450]
shashachu replied to Tivy's topic in Request Centurion Status
Hola José! I love how happy you look in your photos. *Great* job with fixing the teeth on your helmet. A couple small issues before we continue with your Centurion application. First, the L3 CRL states: There should be a minimal gap between the shoulder armor and the chest/back plates. Your shoulder bell gap in the EIB application photos actually looks a lot smaller so it might just be the way you are holding your arms, but the rear photo is showing a pretty big gap: Can you post new photos from the front and back showing minimal shoulder bell gap? Reference Images: . Next, your belt is still a little low. The L3 CRL states: The top of the ABS ammo belt should sit at or just above the bottom of the central and vertical abdomen button panels. If you look at the reference photos, you'll see that the top of the plastic belt should be touching or even slightly overlapping the bottom ab button. . On my own kit, I added a little velcro to my belt to keep it from sagging. You're almost there! Just a couple small fixes. Let me know if you have any questions. -
Thanks Ivan! I'll be with you ASAP. Pass on our thanks to your daughter for helping you out, too!
-
Paint looks great - thanks for the fix. I'll keep an eye out for the other fix. Great work!
-
We'll be here when you're ready!
-
Hi Ivan, The first of photos (the ones Q replied to) I agree look good on the top but I agree there's a bit of paint on the gums on the lower middle teeth. (Apologies for the rough photo; I'm on my phone) Let me know if you're still not sure and I can try to clarify. My intention is definitely not to frustrate you - we're just trying to help you look your best! Hope this helps.
-
Hi Ivan! Thanks so much for your EIB application. There are a couple corrections needed before we move forward with your application. First, your frown paint needs to be cleaned up a bit, as the CRL says Frown is painted gray and does not leave the teeth area. It seems to just be on the upper teeth, but the paint shouldn't be on the 'gum' area. Reference Images As you can see, you can even err on the side of underpainting the teeth. A few minutes with some mineral spirits or paint thinner and a toothpick or cotton swab should do the trick. Next, regarding the ab/kidney gap, the L2 CRL states: Any gap between the abdomen and kidney armor is no more than 1/2" (12.5mm) wide. I think you're very close and it seems to vary a bit from photo to photo, but your ab/kidney gap appears to be too wide, especially on the left. Reference Images: It may just be a matter of tightening the belt or being more careful during dressing (that may be what you meant by missing a snap), but it also appears that your ab and kidney are attached with elastic instead of nylon. Swapping to a nylon strap, maybe even just at the top, should help keep the ab/kidney gap to a minimum. Just a couple small corrections and then we can proceed. Let us know if we can be of assistance! -Sha Sha
