

Jaltrooper
-
Posts
374 -
Joined
-
Last visited
Content Type
Profiles
Forums
Gallery
Articles
Everything posted by Jaltrooper
-
P.S. as "Ryno Hawk" said...may be worth putting a couple of "brackets" in too...I am considering that as well...
-
You bet! Been following along with your build since day one. Really think the AM Family is growing every Month. Also great to see someone aiming for high approval levels. Time to have a few full AM Centurion out here.<br><br> Jon
-

Which single scene in Star Wars defines it for you?
Jaltrooper replied to humperdingle's topic in Off Topic
I would have to say for me, it was the final fight...Luke vs. Vader...Father vs. Son...Light vs. Dark...it embodied the entire OT and gave legitimacy to my years of obsession, collecting the figures and play sets (which my Mother "handed down" to my young brother who destroyed it all...BLASPHEMY!!!) as a young fella. I remember being upset after it thinking "it's over" no more movies...little did I know! -
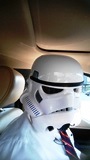
Ok, so all strapping is done, prepared and good to go. I am using 2" white nylon for the shoulder straps (thanks for the tip Joseph!) so I created two "double snap plates" using Tandy Line 24 snaps. Fit and trimmed the chest...so these will glue under the straps. I left 10" on the nylon tag end for fitting and adjustment. Already have the plates (used the .090 ABS sent with kit) made, Also, did the shoulder bell 1" black elastic - cut at 11" Then installed: I "test fit" with the bicep in the bell, marked at where there was some stretch, then used the Zap A Gap / Zip Kicker to install. Took me 5 minutes to install both. Then, I cut 2 1" black x 8" "bell to shoulder strap" pieces: I folded over an inch, glued with the loctite fabric glue / clamped. After an hour, I sewed a size 10 "sew on snap" in the folded over section. Figured the fold would add strength...I am contemplating using nylon...but may just leave it as is. My thinking here is I don't want "stretch" on this connection (for the right fit), but nylon may be more "scratchy" then elastic. Everyone else uses elastic, so why buck the ol system, eh? I'll "fit" these to the shoulder straps once I do the final "arm to shoulder" fitting...i.e. the gluing position will be so the shoulder bell is the right look / distance from the chest / back / straps... Then, cut 2 pieces of 2" black @ 7" for the bicep-to-forearm connection...about to install these. All pieces of nylon and / or elastic, I "sealed" the ends with the soldering iron to prevent fraying of the pieces. Just run it over both sides at an angle, being sure to hit the corners as well: Speaking of the Chest... Found the center of the chest, and marked it on the return edge. ***Reminder - this section of the "Mr. No Stripes bracket" install uses the "larger" brackets to allow for the ab to chest overhang*** Then simply marked the "mounting holes" of the Mr. No Stripes brackets with the bracket centered on the mark. I "adjusted" the mounting holes to be sure the bracket was @ 90 degrees to the return edge like this: Carefully drilled the two holes, then mounted / screwed one side of the bracket, slid the elastic on, then buttoned up the other side. Then measured in 1" from either side of the chest piece curve. marked the outside mounting hole, placed the bracket, measured the other, then drilled (making sure I was dead center of the return edge) / installed both. Here's the finished product: I made sure the screws were tightened right when the "lock nut" engaged, but did not "over tighten". You want the lock in the nut to "catch"...but too tight could cause damage later. Don;t get me wrong, this is for accuracy...and I am sure I may have to do some repairs down the road...but, this is really easy to install, and I read it allows the armor to "move with you"...so...we'll see. VERY impressed so far. By the way, all of the trimming, whittling, etc...hours of it...not once did I not use my "cut proof gloves"...picked up the ab button for a quick trim Got it so bad - 2 stitches. Be careful...and always wear those gloves!!!!!! Anyway, arms done, next post will be the finishing of the shins, working on the mid-section, then thighs, helmet finishing and decision on electronics...then...APPROVAL REQUEST. My "Saturday" try was a little ambitious, but I have a commitment to my fellow Garrison Members...so I am going to push to be done... More to come! Jon
-
Looks great Blooper! As a fellow AM 2.0 builder...great to see the progress! moving right along! Here is what I did with the E-6000 in my shins... Made sure I sanded all contact points with 150 grit sandpaper, applied it to both pieces / sides, and used plenty. Not going to clean the inside...wan to keep all of the adhesive in there. Have put on / taken off several times to fit...and they are solid as a rock. Good luck! Looks great!
-
Thanks Tony! Funny you should mention that... I actually caught the right one was "off" (too far away) last evening. did (another) toothpick scrape...and voila! Here is the "white coat" (helps prevent "blue bleed through" on the templates). So, that makes it 3 paints on that side. Note to self...pay attention on the paint set up for the tube stripes..haha. Left one is right where I need it: So yep...for those of you wondering if I have the patience of Job...well...I didn;t get into this build to get it wrong....haha. On the ab buttons, I posted my "fitting" picture, (before sanding and finishing)...so it could be misleading, I am glad Tony mentioned that before someone else went off my initial pic. I "trimmed" to the inside of my line, and got this: Still have to sand the edges smooth. But, like Tony said, I need to have them "inside the square"...based on the "ANH" pics I looked at before I started. So, with that...I have 9 10 year old girls screaming around the house today (Daughter's 10th B'day so wish me luck there) Also...last thing, I received this in the mail today! Awesome TKittell belt www.imperialissue.com I realized that I now have nothing else to "purchase" for this build...total outlay (excluding bench)...around $1,472...worth EVERY PENNY! I would suspect if I wasn't so "I need to have"...it would have been right at around $1,000 total. And, my next build...I won't have to buy near as much! And, I should mention, I had some tools, but went ahead and bought a lot of stuff that is "build specific"...so it'll be a good long term investment. I plan on sticking around for a while, and can also help any of my Garrison partners moving forward, too. Have a great Saturday! Strapping assembly day today! Shins curing...we are almost at the finish line. Jon
-
Thank you sir.<br><br> Looking forward to getting that garter on and doing my final fit on the thighs! Glad I don't have to make it! Haha!
-
Thanks Chris! Much Appreciated. If I could...I have everything ready to go...but for two trims on the shins. I have done all the possible research on the matter...and I am still wanting to be 100% sure they are right before final assembly. So...to all my fellow troopers, based on the threads and instructions, pictures and comments, the "contour" goes to the inside and the "slight curvature" to the outside, like this: Based on the parts I have, and everything...this is the set up and how they are supposed to go. Thoughts before final assembly? Thanks all! Jon
-
Looking good! I had the same issue. What I decided was that the gaps I had were "acceptable" based off what I saw / see in the screen pics...the Troopers had gaps, why can't I? Haha. What you don;t see on my helmet, and I didn't mention, was that under my "brow trim" between the eyes is a rivet, keeping the brow up off the eyes. The helmet is wonky, so I had to come up with something. What I saw in a lot of the "approvals" I studied was the most important part is the lining up of the traps / tears / eyes on the side...and the brow is (unless it's super off) / has some preference for the individual. I have seen them way far up, and right on the eyes. On the paint, I found these "mini applicators" at a hobby shop, they are great! My hand isn't steady either, thanks to all the Mountain Dew I drink...haha. Anyway, looks great man! I am moving to the thighs and mid-section...and should be done by the end of the weekend. Have my belt on the way (got the TKittell belt). Almost there!
-
Had a minute this morning...so I thought I would share how I am getting the "Ab Buttons" measured and ready / trimmed for the Ab plate. I started with measuring the "mounting area" on the ab plate, edge-to-edge...like this: For the AM, It's 3 5/8" "tall" x 2 1/2" "wide"...so, taking that measurement, and considering I need some "edge" around the button plate, did this: Since the "width" is 2 1/2", look at where the ruler is. I find the "middle" of the 2 1/2" measurement (1 1/4") and that gets placed in the center of the button plate...I then do my "cutting marks" at 0 and 2 1/2". I do the Same for the "height"... That "center is 1 6/8"....so I lined that up to the center of the plate...then marked at 0 and 3 5/8". Notice how the line isn't exactly through the center of my marks in a couple of spots...I used a "speed square" to make sure that the lines were exactly 90 degrees,and used the mark that was the further from the center...so I can trim to fit. As I have seen a lot, always better to trim to leave more material than to cut too much off. Then, I grabbed my cut-proof gloves, and "shaved" to the outside of the lines with my utility blade, like this (this is the smaller button plate): I then did the exact same to the smaller one. This measurement was 7/8" "wide" x 2 3/4" "tall". Notice my "center line" on this one...felt like it helped me keep everything "square" Here is the same "trim box" for the smaller plate: So I "shave" both pieces to about this close to the lines: Then to get a nice, smooth / uniform edge, I just sand it with the dremel sanding drum (slow speed / carefully): Do some double-checks to make sure it looks how I want...and boom...done... I want to do all my install work on the Ab before permanently installing the buttons, just to be sure I don't mar the paint. Also, I haven;t "cleaned up" the button paint yet, so those will be a tad sharper and crisper when done. Gotta get to work! Later everyone! Jon
-
Moving right along. Fit / trimmed the Shoulder bells. The AM bells are fairly big. I found the ""ANH Stunt" standard measurement on them, which is 12" x 5"...that is about the apparent #. So, I took the measuring tape: Holding at center, measured up (staying on the curve, purpose of the tape) to 12". Then marked at the 12" #. I had also checked / fit them. If left where they were, I would have had way too big a bell...so the fit was right about dead-on. Here is the "5" The 12" Then I just used the ol trusty "seam marking tool" on the "armpit" (long) side, Set it at the 12" mark I made, then traced the cut line like this: Made a clean cut (being careful around the "hump"...you can crack the armor here. I used the exacto blade to remove this area, to be safe. The rest was cut with my "exacto" scissors (these): Did a test fit, Ready for assembly. Also went ahead and bent my bicep "hooks". Something I was thinking on these, they will be right on the inside of the arm, so there is a possibility for aggravating that area on a long troop. Not that I have the experience, yet. So, I made sure I removed (lightly) all the square edges. I even rounded off the bottom to be more "unnoticeable" and unobtrusive. Have to think about these things, I guess on pieces that you are putting in those "spots". Here's what I did with the exacto and sandpaper: Just made sure everything was "rounded off" to avoid issues later. Then, sanded the area inside the bicep, sanded the piece where the E-6000 goes, applied to both sides, and clamped. Love those Irwin clamps...they do great! Anyway...sorry for the delays in the thread....I am taking pics...but I am furiously trying to push to finish. But, I am paying attention to detail!!! Remember this? Haha...done and done. Will get the shin pics and build in next...preview... Hint, hint...do your research on AM shins...fit carefully and use E-6000!! (they are the pieces that get stressed the most! More to come! Jon
-
Dremel Bit Cutting Test - Trimming examples
Jaltrooper replied to Jaltrooper's topic in Hard Armor (General Discussion)
Thanks all! Took Joseph's advice and went with the "sanding drum" and it made very light work of a good, clean edge.And did get it done in record time. Also found it useful to run a quick "rough edge" for applying the E-6000 too. Good Stuff! -
Wanted to pass on a great tip from my pal Benton (thanks Brosef!) http://www.renaissancedancewear.com/stormtrooper.html What it is is a "Rennaisance Dancewear" lycra "unitard" undersuit. Looks pretty cool, customizeable, and not too expensive. Just in case anyone is interested in a different winter suit / under garment. Great tip!
-
TK-10488 Requesting ANH Stunt Centurion Status [300]
Jaltrooper replied to bmth chris's topic in Request Centurion Status
A fellow Alabama Garrison member makes Centurion!!! Congrats Chris!!! <br><br> I'll be joining you as soon as I can!<br><br> Awesome build! -
I am 100% on board with that, Tony. Would've saved me some "clean up time" esp since i now have the right "detail brushes"...lesson learned. Anyone wondering if my "toothpick paint removal" system works...voila! Nary a scratch, mar or blemish. Anyway, disaster averted, and I think with the one practice run, I really should nail the re-paint, so no bubbles, no troubles. Have the "hard hat liner" on the way, and will get that installed, the lenses in, and paint the screws on the ears. Really like the helmet. It is solid and feels like it'll last through many great troops. Working on the shoulder bells, bicep hooks and arm strapping now. Have the Ab / mid-section all fitted, taped and ready for install as well. Going to be a fast and furious week. Have to travel for work, but taking my mid-section, drill, rulers, thread, snaps, rivets and some other tools with me so I can work on the mid section at my hotel. Should be amusing to see people's reaction to me carrying my armor into a marriott! Haha. Pushing for completion...getting there. going faster on the armor, and it's cutting into my thread time, but, I'll get it all in. Have a great week all. Jon
-
Hope everyone has had a great Weekend! Had a great visit today from a local Garrison Member, Benton. He helped me get my chest / back / kidney lined up, so I can do some prelim fitting for assembly, much appreciated and got me to thinking about an "intangible" on the "newbie" side of things. And since that is what this post is about...thought I would add it in. Not getting with your local Garrison folks, which I am guilty of not doing as much, is a miss on the part of a newbie. These folks have been there, have assembled armor, and know how to keep an eye on details we newbies may miss. I met Benton at the Rouge One troop...and he was kind enough to reach out to me to offer help. I accepted...and will of course reciprocate whenever I can. I not only gained help and knowledge, but a new friend as well. I am fortunate to have the Alabama Garrison as my home Garrison, and everyone I have met has been great. I tend to be a "doer" and have been focused on my research and build...but this part is what we do this for, so I figured I would add that for my fellow newbies. As Benton's visit reminded me, get out there and get to know your fellow Garrison members...it is an invaluable resource and a lot of fun to be around like-minded people! Everyone wants to help everyone..."Troopers helping Troopers" great thing! So...back to the build. Biceps (except for the "hooks" for the shoulder bell attachment) and Forearms done. As a side note, this is what I did to correct the above issue with my "Zap A Gap" assembly - no more CA glue on the armor...haha: I made sure the armor was covered in painters tape, and I did several "test runs" before attempting assembly with the ZAG again. Honestly, It went very smoothly, no issues. I was very careful and deliberate with where I positioned the pieces, and made sure I got it right the first time. There is about 10 seconds from application to set up / terminal time. So knowing how to position the piece, and then being slow and deliberate, but fast enough is key. This is a personal choice on assembly, and I still recommend the E-6000 / clamp / magnet application, as does everyone else...so that is that. Anyway, on the biceps, once I fitted them to my arms, I didn't see the "offset" or "angles" others have discussed with the bicep. I did a straight fit: Once it fitted, I got the painter's tape, and taped from the inside out. Then I re-fitted, with the shoulder bell and forearm with painter's tape. I also had to leave a little "growth room" as I am gaining my pneumonia weight back...and will fill in some over the next Month. So I did "add" about a 1/2" to the fit. One more test after taping it to "actual fit"...them time to trim. Anyway, easy way to say it, after the taping & measuring, Leaving the tape on, I measured the distance between both "edges" of the individual pieces...finding the middle. I did this on both tops, then both bottoms...again, finding the center. I marked the middle top, then middle bottom, then using the straight edge, drew a pencil line (clamping the ruler) from the top to the bottom "middle" mark. I removed the outer tape, cut the line using my tin snips. When doing this, I always cut the "return edge" first. I also always cut to the outside of the line. I do that on both sides. Then I lay the outside over onto the inner part, and I simply mark that line with a pencil. I make certain that the "fit" is tight before making this mark. What I mean is, I clamp the outside back down on the inner piece, I then put tension on both pieces insuring that I am not "marking wrong" or "marking short". In other words, making sure I trace the second line to the actual fit. If you just rely on the tape...you could be 1/8" off on your fit...so just be sure to pull the part tight before making the mark on the inner piece...and your seam should be perfect. Once I have all the marks made, I installed both inner strips (using the pieces cut from the outer part...and making them thicker for more stability and area to glue on) on the outer piece. I then install the inner piece on both inner strips. Cut outer cover strips @ 15mm, round the edges to fit, then install them right over the middle of the seam. This is the finished product: You can see the thicker inner strip. I really found this makes the fitting of the second piece much easier. I also like having more surface area to glue the piece together on the final inner strip assembly when you are "sealing up" the piece. Works well. I have to do some "finish trimming" around the outer strips...then we'll have these arms ready for strapping and final assembly. Doing the shins as we speak, and will get more picture detail on those. Ordering my "Tkittell" belt this evening now that I have the right measurement on the Ab / kidney thanks to Benton's help! Here they are! On the way...ETA of an approval submission by next Saturday. BOOM!
-
I'm painting them after I am 100% sure I won't be disassembling anytime soon. haha..nice guess. But...I painted the Tube Stripes on the wrong direction. Funny part about that was, being my "careful" self I looked it up, put the right template on the right side of the helmet, but, when I went to apply them, I "180'd" the helmet (turned it around). So, when I put them on, I was grabbing the "right" wrong one. oh, well...easy fix, new template is on the way. One "tip" for my fellow newbies. Using a toothpick on DRY Humbrol paint on this ABS, it works like a charm for removing slight overages and details on the paint. You can work slowly, it doesn't "mar" or scratch the armor and you can get pretty detailed with it. I say that to give everyone a vote of confidence that even if you aren;t exactly "perfect", the paint will come off, and it isn't super difficult. So don;t panic if you "go over a line" a little, you can make the adjustment...just let the paint dry first. Speaking of painting, masked off the Ab buttons...the are painted and drying. Did it with the Tamiya masking tape...like this... Then just painted the buttons. Getting the biceps finished this evening...Will post build tomorrow. Back to work! Happy Saturday everyone!
-
I was sooooooo proud of my paint job...anyone notice anything??? Mhm...oooops.Let's see who catches it. No worries, at least it was caught before submission. Did my preliminary fitting of the arms from shoulder to gloves. Great news is, it all fits, no trimming on the vertical part will be necessary. All I need to do is be sure my elastic from shoulder bell to bicep is as low as I can get it...and it's going to be spot on. Mrs. Trooper asked "why isn't your "underwear" (hahaha) white?" Funny one...thought I would share. Both forearms completed, fitting and trimming biceps, they will be "on the cure this evening. Shins trimmed and fitted, I'll work on getting all that in for thread purposes tomorrow, I am on a roll...and want to keep manufacturing. Also started working on the Ab / kidney / back posterior assembly. The plan...submit by next Saturday...if my belt gets in. Wish me luck...and see who catches the oops above!
-
My First Build - ANH Stunt
Jaltrooper replied to Bloodhound's topic in Build Threads Requireing Maintenance
Great stuff! Following along! -
Ryno...hate auto correct
-
Awesome work Reno! We'll be trooping in no time.
-
Thanks Cricket! That post was done whilst drinking a nice warm cup o cocoa from a certain mug I acquired!
-
Couple more details on the forearm assembly. What I found through reading, was, once your alignment is good, use your painter's tape on the inside. Fit, fit, and re-fit some more. I used a few pieces inside as a "psuedo-inner strip" like this: Then I tested inserting my hand in and out, the look and fit, etc. I trimmed the outside, then just traced the inside cut off the outside. Used an exacto and 220 grit sand paper to get a good, tight seam: Then assembled with inner strips (went a tad thicker than 15mm...to insure a good, solid bond)... Here is the second forearm with clamps and magnets (E-6000...haha): Then, back to trimming and fitting. Forearms complete (outer strips drying curing)
-
Ok....Happy Weekend everyone! Figured I would expand on my last post. So, what I did, first of all, is I didn't follow my own advice from earlier in this post. Reminder...this IS a "newbie" thread haha. what I mean by that is I have seen, over 100 times "use E-6000" (glue) if you are a new builder"...and instead of listening, I figured "I can do the Zap A Gap / Zip Kicker" assembly to speed this up. So I decided to do the ZAG on the "interior strips" of my forearms. It worked...was fast, but I didn't pay attention to the glue on my glove, and got a small (very small) "spot" on my armor. I was able to get it off, but it took me an hour of very carefully using a exacto blade, X-20 thinner and 1500 grit detail sand paper. I then use (small amount) of polishing compound (never leaving the small area to avoid messing up the armor around the area)...and then used Meguilars car paste wax to get the shine back. so...disaster averted...here it is... Other forearm is assembled as well. Lesson learned. So...moving on. Took a step back (advisable when you hit any snag!) and finished all "trimming" and started fitting all parts... This weekend, I'll be assembling and posting progress...today will be the biceps, shins, and I'm starting on the AB / chest / back / kidney / posterior "Mr. No Stripes" assembly. I need to get that done, so I can get my belt on the way. More to come!
-
Let me add a most exclamated retraction from the above post...here we go: IF THIS IS YOUR FIRST BUILD...DO NOT USE "ZAP A GAP" (CA) GLUE...STICK WITH THE E-6000... all I can say at the moment....
