

Jaltrooper
-
Posts
374 -
Joined
-
Last visited
Content Type
Profiles
Forums
Gallery
Articles
Everything posted by Jaltrooper
-
 Thanks Cal and Chris! Let the ASSEMBLY COMMENCE!!!!! Have the first forearm drying / curing...here is what I did: Measured to fit / made sure my hand could get in and out of the wrist opening. Then simply used painters tape to keep it at the correct size. Once I was comfortable with the fit...I taped the inside to make working around the outside easier. Found the "middle" of the overlap on both sides, and drew a line (using the straight edge / clamped...kind of like above with my cover strips). . Then I used my "tin snips" and carefully cut along the outside edge of the line(gives me "sanding / shaving" room) then made sure the edges fit together as tightly and cleanly as I could. ***Tin snip or "shears" tip - When cutting this thicker armor...you do not have to "close" the snips...work in a "open cut" manner, not letting the end of the shears close down...you will avoid any "cracks" or marred sides...just rock them keeping the material in the "crease" and it'll cut smoother / cleaner for you*** Sanded the edges (lightly) with my dremel and sanding drum...lower speed. Just enough to smooth it out. Installing the middle strips first...so I lightly "sanded" (220 grit 3M "silicone" sandpaper - love this stuff!) the edges sot he glue would stick well. Then...I have to admit...I wanted to practice with the "Zap-A-Gap" / and "Zip Kicker" glue over the "E-6000". Full disclaimer...this is NOT suggested. The only reason I did...was I spent several years as a "neon tube bender" and have some experience with "measuring / fitting" 10 times, then having very limited time to put something neatly together (hot, melted glass to a pattern before it cools)...so, I tried it. It worked, and I got a good clean seam. So I did not have to wait for a 24 hour dry time. However, I did use the E-6000 on the outer strip (15mm). Here is the seam: Glued outer strip: Just cut the outer strip to fit right to the edge, sanded the back of it, and a tiny run down the seam...and VOILA. Should be cured when I get home...took some time to do this one...wanted to do all of my process tests on my first piece. Should have all forearms, shins, biceps, thighs done pretty quickly...just depends on how I decide to do it. At the end of the day...the fitting and detail is so important. I am lucky, it is simply about the fitting and trimming this armor right that makes all the difference for my body style. I feel great about the height piece...no shims, etc... But I am trimming a lot off of the thighs, shins, forearms...etc. One thing I am trying to determine...is the shoulder bells...I need to do far more research on the look and fit for accuracy on that one! Should have more "assembly" pics and info soon!!! Anyway...have a great evening! Jon
 -
Had limited time last evening...but, it didn't take much time: I had to trim some off of the "end caps" so they fit the CRL. Centered up the plate, then, used the first E-6000 of the build and adhered both on the Grey pipe. I made sure that the end result was 7 1/2", and the spacing from both sides of the plate are exact (again, centered). I then simply lined the clips up evenly on the end caps (all after a 24 hour cure period for the E-6000), marked and drilled small pilot holes...put the screw closest to the plate in, carefully bent the clip out, put in the "outer screw"... TD completed. Had to travel for work...so am losing 2 days this week...but I suppose I have to pay for this stuff...haha. When I return, time for final fit and armor assembly. Trimming is done, time to get this thing together!!!
-
Hi All, Just a quick "tip" i discovered kind of by accident...but it seems to work. To "remove return edges" on the AM 2.0 Armor...how do we determine "where to cut". Well, I took my construction pencil (have used this 1,000 times) and angled it like this: This is on the "bottom outer bicep". Notice the pencil "falls" right on the curve / edge of the bend. I then simply shave / cut to the inside (away from the outer armor) of the pencil mark...and it is working great. You can "eyeball" it, but why risk going too far. This tends to line up almost perfectly with the "inner edge" on the return. Will post a couple of trimmed pieces when I get home...just thought this may help on the "how do I" front. Jon
-
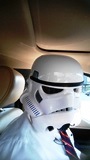
Right there with you, bro. Funny story, I came walking out of the bathroom in my Under-suit...and after the weight loss, the Mrs. made a rather depressing comment. So, to the gym I go! Haha. I am trimming along, as well. Really have gotten good with the exacto blade, utility blade and the exacto scissors I have. Helmet 98% done and painted. See what you think when you get a chance. I have to get a rivet "hidden" in the brow behind the brow trim to get the "brow" lined up right. The thing was a bear...but I got it done. Anyway...good luck and keep the faith! Have fun!
-
So...the bucket paint: I'll just put these up and let you all admire them for a second ... I do want some consensus on this side...go ahead and drill / trim the small "5th hole"? have seen it pictured on the screen buckets with and without...opinions would be appreciated. Just kidding. I am happy with the "hand painted look" across the board. One thing I did wrong, I tried to pull the masking tape off too quickly on the front left tear. My hand slipped and hit the third / fourth stripe and marred those two. Easy fix, I'll just tighten it up with some grey paint, which (because I want a tad better "clean" look) I'll do on a couple of spots to clean up the lines. At the end of the day, the marking and masking I did (above post) really did help. Once I found the right small brush, pictured here: The brush made it a little easier. Just held it like a pencil and gave it all I had. Anyway...I have 3 things left. I am going to get the Mic tips on...install the lenses, and get a "hard hat liner" installed. I'll include those 3 items when I get to them. Paint will be drying today...so back to trimming armor. Plan is to have shins, forearms, biceps and shoulder bells complete today. Also need to get the mid-section secure...really need to get my "TKtttell" belt on the way. Have a great Sunday everyone. Jon
-
Just incase anyone else needs the links to the folks who I have acquired my "accessories"...here they are: Neckseal / Holster - "Darman" FISD: http://www.whitearmor.net/forum/topic/21385-darmans-neck-seals/ TD Clips - "Ukswrath" - FISD (putting Tony's "go to thread" has all kinds of goodies / electronics for your helmet and other great items): http://www.whitearmor.net/forum/topic/35211-ukswraths-go-to-thread/ Centurion Rivets and fasteners / latex hand guards - "Justjoseph63" FISD: http://www.whitearmor.net/forum/topic/35702-fs-latex-and-silicone-hand-guards-for-level-3/ My "Hyperfirm" E-11 Blaster - "Slavefive" - FISD (does "runs" of 5 at a time - needs d-ring): http://www.whitearmor.net/forum/topic/39416-fs-hyperfirm-anh-e-11-b-grades-5x-available/ My awesome "Garter Belt" - "Pencap510" - FISD (holds up the thighs...great quality): http://www.whitearmor.net/forum/topic/29991-thigh-garter-system/ I got my Blaster D-Ring, tube stripe templates and a couple other "trooper" items from: www.trooperbay.com I got my TK boots at - www.tkboots.com My belt will be coming from here: http://www.whitearmor.net/forum/topic/19803-fs-white-canvas-belts/ If I left anyone off, apologies. I'll make sure I go through and see if I did. My thought was, 2 things, I know where these are coming from, they are from fellow troopers, and I am going for EIB-to-Centurion out of the gate...so accuracy was very important. I still have a few things to consider getting. But, if they are on this list, not only was what I received of the best quality, I got what I got with great communication, they did what they said, and I am a happy guy. Should have done this sooner, hope this gives my fellow newbies somewhere to grab all these without having to look and ask around. Jon
-
Sure Jeff...Here is the "Mr. No Stripes" strapping kit for the ab-chest & Back-Kidney-butt plate: http://www.whitearmor.net/forum/topic/20859-accurate-anh-stormtrooper-strapping-brackets-v-20-now-available/ Here is where I got my Centurion Rivets: http://www.whitearmor.net/forum/topic/34902-centurion-level-rivet-sets-for-sale/
-
I am. Based on my initial fitting and sizing...the Mr. No Stripes system is going to work perfectly.<br><br> I also got the centurion rivets set from Joseph on the forums.
-
Just a quick trimming affirmation on the Butt plate: This looks deceiving, but, going with the "1/8" return edge" for comfort on the butt plate, and having seen 100 pics on this...all this extra material goes, right? From all I have seen, some folks leave too much of this on...so I am just verifying that I need to trim on this pencil line, then affix the snaps accordingly. Thanks for any input...99% sure of myself on this one...but not going to trim this till I get a "yea"...haha.
-
Morning all! Early riser here! So, this morning, I did all my "Return edge" and "cover strip" research...as I am about to start armor assembly. Here was what I found regarding cover strips: (2) Shins / Front - 20mm (2 cm) (2) Shins / Rear - 25 mm (2.5 cm) (4) Forearms front / rear - 15 mm (1.5 cm) (4) Biceps front / rear - 15 mm (1.5 cm) (4) Thighs front / rear - 20 mm (2 cm) Cut all pieces the full length of the extra material...should give me plenty of strips for the job. So I got to trimming. The AM 2.0 kit has plenty of spare ABS. So I trimmed all these up. Here's how I did it: First, I do what is known as a "cutting mark" in welding and fabrication. My construction pencil is shaved (with an exacto) to be very thin / pointed. You place the tip of the pencil right on the mark, then "v" off of it. Looks like this when done: I do 3 "v's" same measurement, 2 close to the end, one in the middle. This allows you to simply rest your steel ruler edge right in the v's center. Lines up a perfect straight line. I then take my 2 board clamps...keeping the "shiny" side down on the mat / fabric on my cutting board...and clamp one on each end. I use the clamps, but notice my "cut proof gloves" (please wear them...why risk it)...I firmly press on the center too, to make sure there is no way the Blades "runs under" the ruler. You can see...all 3 line up perfectly. I then simply hold the Utility knife vertically, and do 4 solid "scores" making sure it is on the ruler: It is critical you keep the utility blade at 90 degrees vertical. If you "angle it" it can float away from your line. I make a nice, smooth first pass, pressing down with some force, but not jamming it. the next 2 passes are travelling in the first pass' edge...so they'll run straight. First pass is crucial to accuracy. I then remove the clamps and ruler. This is what I get: Easy channel to rest the utility blade in. I make 2 passes...then simply snap off the pieces. All done. What I am doing is labeling each piece, and setting them with my trimmed pieces. I know this one seems self-explanatory...but I stared at it for a bit...and my first couple the other day didn't go so well...so...I figured I would engineer my own best way to do it...and share it. For the record...all my cover strips are 100% accurate based on what the requirements and most see as the standard...so...I have that licked. Still trimming and working on fitting. I am going to be pretty ready to do joining and strapping. This thing is REALLY coming together. Thanks to all the build threads and info on the site. I feel like all the reading and prep work is about to really pay off. Once the gluing starts...it's going to be Fast and Furious...haha. Have a great weekend! Jon
-
Thanks Chris! I couldn't remember where to look for those pics. I agree, having the indentation kind of has a "cleaner" look...but...if I am going for Centurion...have to be accurate so I'll trim those out. By the looks of these pics, it also looks like the Elbow side doesn't have a return edge, either..drat. I think some RE gives the armor a "thicker / more crisp" look. But, again, if I am going for Centurion, it is what it is. I'll check out the submission / approvals and see. Good stuff, much obliged!
-
Ok, Today, really got to work on some trimming and Bucket detail. For the bucket, this is what I decided to do...100% hand painting, no stickers. This is a flat-out Basic to EIB to Centurion build right out of the gate...so...have to hand paint. I am going to run to the Hobby Shop this evening to get a smaller detail brush, but here is how I "lined up" the helmet in preparation for the vertical stripes: Using 1/4" "Tamiya" masking tape (made for models / enamel), I measured the "stickers" included in my AM kit. While it looks level, it is a slight difference from the left to right, based on the measurements. I put the masking tape down (top and bottom) on the right measurements, then, took a piece and put it directly on the sticker. Took a pencil and marked the center of each vertical line. Once I get the smaller brush, I will use it like a pencil, and just draw the best line I can from top to bottom...and we'll see if I can nail it. Since the screen helmets were hand-painted, as long as I am not messy, I should get a great look. I am going to have to free hand the tears, but looking at it, as long as the length is right, I should be good following the "curvature" in the tears. Yes, those are painted tube stripes also. I did use the "Trooperbay" Hand-Painted template for those. I am decent at painting, but not that darn good. I'll post pictures once the paint has dried and I have used a toothpick to get them where I want them. More pics to come on the close-to-completed bucket. I painted the Mic-tips with my Humbrol #21 black per the above paint chart from Tony ("Ukswrath"). I used some of the mini-masking tape to make sure I didn't get any black in the interior. Speaking of Tony...I got my "TD Clips" today that I ordered from him. I'll give him some props...for the $, you simply can't beat this quality. It would have cost me in gas, buying the aluminum, getting the right screws, time, possible mess-ups., researching the right / exact measurements, etc., etc. While I am a fan of "making my stuff" I highly recommend these clips. So...since all AM 2.0 armor comes without these...that's my tip on em...let Tony do it - worth every dime. Here they are: Also, to hit Centurion, I have to remove the "return edges" from the forearms. So after the helmet work, I went back to trimming: I still have to sand these, and I am also going to research if I am supposed to get rid of the edge up into the "raised part" of the forearm. And find out if the "elbow side" is supposed to have the RE off as well. After getting the return edges on the shins right, then these, I am really getting comfortable with the Utility blade, exacto scissors and exacto knife. With the thickness of this armor, I am essentially "whittling" off the ABS plastic with the above, and each time I do it, I get more and more confident. At the end of the day...being "slim" I will be trimming...not adding (lucky me) so accuracy with the blades will be crucial as I go through. I should also point out, the AM armor "vertically" is hitting the mark. The shin test-fit (will get some pictures in later), puts them RIGHT where I want them ankle-to-knee. It is almost as if they were made for me. So, as I go through this build...most of the stuff should hit vertically...it will be the thickness I have to work through. Which, essentially means...trimming accurately to fit. I have seen it 100 times "measure twice cut once". So, if I do my measuring and fitting as accurately as possible, this should be a relatively smooth build given my new-found confidence in trimming. Hope everyone has a great weekend!!!!
-
Cricket's RS Stunt Build (for the Vertically Challenged)
Jaltrooper replied to Cricket's topic in ANH Build Threads
Hey Cricket! Found your build thread! Great Stuff! Will help me a bunch! The suit looks awesome! Thanks for all the detail and pics... Jon -
Dremel Bit Cutting Test - Trimming examples
Jaltrooper replied to Jaltrooper's topic in Hard Armor (General Discussion)
Thanks GM...I actually have the diamond wheel...for cutting tile...and I am pretty sure that one would be more smooth than the "disc"...I just didn't test that one. I'll add that one in. Looking at the 1st bit you posted, I would see where the "staggered teeth" may allow for a smoother cut as well. I'll grab one. Thanks Melissa! You are most welcome! I found a "dremel bit guide" on Pinterest if that helps you. Happy trimming everyone! -
P.S. Tools for trimming: return edge closeup (not sanded yet):
-
So...when you going to get started with your build, Jon...How about now? Haha. Doing the finishing touches on the helmet tomorrow. Test-fitted the "s-shaped" gasket on the bottom of the helmet. Have been doing some paint clean up. Need to put the stripes in the tears and traps, finish the Mic-Tip painting and do do the tube stripes. So I should have one fully-functional Bucket by tomorrow p.m. I the mean time, I started on the trimming of my shins. Have read a couple of "how to do AM Shins"...appears there was some complications, but frankly, it is cut (no pun intended) and dry. The "taller" of the two pieces, when sitting as pictured, are the "outside" of the shins...with the shorter ones being the interior / calfs. Once I determined that...I just put a piece of painter's tape on the inside of each piece...like this: RO = "Right Outside" - RI = "Right inside". After reading a few builds...the top of the shins really needs to keep the "return edge" on it. It appears the consensus is about 1/8" return edge . So, I did this... This is a "sewing measuring tool" used for marking even widths on fabric. It was about $1.98 at Hobby Lobby. I set it on 1/8", then used a pencil to draw a smooth 1/8" line around the existing return edge for trimming. Used the scissors for the straight parts (Exacto heavy duty lexan shears) then trimmed the corners (wanted a smooth curve) with my Utility Knife and Exacto knife (#2). Here is a "before (left) / after (right) " on the return edges: I have 3 of the 4 trimmed. Then....let the building commence! I'll be getting this build really off the ground tomorrow! More on the way!!!! Thanks all, Jon
-
Hi all, I conducted a little test regarding dremel bits, types, and how they effect my AM 2.0 Armor (.090 ABS). What i wanted to do was be sure there was not a more accurate / faster way to trim using the dremel...will share that conclusion at the end. Figured I would share the results in case anyone was interested. What I did was take a "scrap" drop box I had lying around, and I made a half-square mark on all four sides. I then tested 5 "bits". My "experiment parameters" - Dremel 4000 (variable speed on full / 10) - and a dremel "extension" I use to have more control. Also...SAFETY GLASSES AND GLOVES. Here are the pics for each bit, with a small synopsis: 1. "All Purpose" Cutting bit This one will cut smooth edges...but...I held it VERY firmly...and it still wanted to run away from me. It turns easy (wants to...remember), and will cut a straight line. Even though the pic looks off...I wanted to see how close I could get it to the corner without a crack - no cracking. The struggle is keeping it reigned in...so this one comes with a big warning.Bottom line...it will work...but you had better be 100% focused and HOLD ON! So - Pass - but again...you better hold this one. 2. Bit #9901 "High Speed Cutter / Carbide" This one cuts relatively smoothly...as far as holding / guiding. However...look at the "burrs". These come right off, but...the cuts underneath are rough (can be sanded). And, this build-up, makes it harder to cut a straight line & see where you are going. No cracks on armor. This one also made the "turn" well. Not seeing where you are going due to the buildup of the melting ABS could mean a bad mistake. So - FAIL. 3. Bit #199 - "High Speed Cutter" This one was smooth...the easiest to cut. But...corners take a delicate touch. And this one moves fast on you (but is stable). Look at the top right corner...I ever-so-slightly cut over. Could be bad if you loose it. Essentially, this one is a "mini circular saw". It doesn't crack the armor...and, it is "cutting" rather than "burning". So...PASS...with a disclaimer. Use it for a straight area if needed. 4. Dremel "Cutting Disc" One word - melt. This one simply uses friction to melt the armor. Does it cut, yes, rather easy to cut through...but not worth the risk of melting or cracking. Harder to manipulate to shape. FAIL 5. Dremel #113 (Diamond Detail bit - mostly for engraving) This one "burns" the armor as well. But, it will smoothly cut through...cut is "rough" but will sand out. I had good control with it...but in the end...it isn't "cutting". This one is a great "detail bit" for Bucket frown / teeth. and any really small things. So...PASS but not the best choice. Here is what I cut with each: In the end...a picture is worth a thousand words: I trimmed the 1/8" return edge on my AM 2.0 shin with these. Radio on, carefully measure, and trim slowly. Using the Scissors and trimmers (Stanley sheet metal) on the straight runs, and cleaning it up with the Utility blade and the exacto (rounded turns). "So why did you do all this?"...well I saw a few places where folks were using dremels or wanted to...I had the bits...so I figured I would show the different cuts / results to help if anyone needed it. While taking a break from trimming. Hope it helps someone. Have a great weekend!
-
Almost scary the commonalities...<br><br> I had pneumonia...so it knocked me down, too...literally the day after BBB day. Been there.<br><br> I used the 4 long "pan" (the ones with regular screwdriver heads) screws through the ears...the smaller pan screws, one on each side (also have washers on the inside...to prevent cracking) at the bottom of the ear piece...for accuracy. But, yes, I have (3) 1/8" rivets holding it together...had to to keep everything as together as I could. I put one in the ear under the rank stripes to the front (see the diagram from a fellow trooper) in my build thread) but only after "testing" with a screw / washer / bolt for fit. Once everything was how I needed it...I used the rivets...up to down / side to side.<br><br> I do have some small gaps and have been told to fix them I may need to move the ears down and "twist" the ear piece to close the gap a tad. To be honest...I think my gaps are acceptable and my alignment is spot on...so I may just live with the gaps. Having looked at some pictures...I am pretty sure I am in the "tolerable" range for all approvals I need...and to me...the screen helmets had gaps...so...<br><br> I did not get a frown screen mesh. But would have replaced with my own anyway.I did get both hovi mic screens. I would send a e-mail to TG and have them shipped you one. Supposed to both be in there. I would suspect they will.<br><br> Hope this helps brother. I'm finishing up the helmet details tonight...then moving on to the armor. Anything you need or can help with too...let me know.<br><br> We'll be TK'S in no time!
-
Checking in on you brother! Looking good!<br><br> I have the helmet assembled / paint getting finished up. But really having to work on the gap at tube stripes / ears. <br><br> Looks great man!
-
And believe it or not...both ears measure 1 1/4" from brow to center of the rank stripes...on the nose.
-
Thanks Tony. I was trying to experiment with closing the gaps. The thickness of the helmet is unforgiving side to side. I can fix all but these small gaps.
-
And Thanks Cal...got it. It's a "black" not gloss, semi-gloss, flat...but just "black".
-
Yeah...Just need to lower the left one...actually, the "problem child" looks far better in person than in pics. I'll fix it.
-
P.S. any input on the "flat black" vs. "Humbrol Gloss Black" on the mic tips would be greatly appreciate it! Thanks all!
-
So...fixed it: Secured all bolts...this happened: Too big? Fix it? Or leave it alone? Looks good from the back: From the front: So I am thinking about leaving it. I actually think I nailed the trap / eye / tear alignment...got the look I want on the brow... Now...to the detail fixes on the painting (please ignore...had too many Dews that morning). Plasti-Dip and lenses. Update...gained 5lbs back...on my way. Shins, AB / Kidney / chest / Back (so I can get my belt on the way)...next. This is taxing...but worth every drill bit in the finger (be careful). See ya'll tomorrow! Jon
