

Jaltrooper
-
Posts
374 -
Joined
-
Last visited
Content Type
Profiles
Forums
Gallery
Articles
Everything posted by Jaltrooper
-
 Gentlemen, Attached please find my Centurion application for my AM 2.0 / ANH Stunt Armor. All EIB modifications / recommendations were completed before applying for Centurion. Mandatory Information Armor = AM 2.0 Helmet= AM 2.0 Blaster= Hyper firm / Slavefive - FISD Forums with slight mods http://www.whitearmor.net/forum/topic/40810-tk-12569-jaltrooper-requesting-eib-status-anh-stunt-am-20-693/ EIB Suggestion Modifications: 1. Repainted left tear on helmet for "cleaner" appearance - Picture included 2. Belt raised 1/2" to overlap Ab Buttons - Picture included 3. Shoulder Bell corrected - found the elastic was holding it open, made the adjustment and it sits flush / even with the right SB. Optional Height = 6'2" Weight = 183 Boots = TK Boots Canvas belt = Tkittell / FISD Forums Hand Plates = Latex - Justjoseph / FISD Forums Electronics= Aker M2800 speaker / I-Comm is on order and on the way Neck Seal = Darman / FISD Forums Holster = Darman / FISD Forums Full Body Front Full Body Rear Full Right / Arms Raised Full Left / Arms Raised Right Side Detail Left Side Detail Adjusted Belt Position / Per EIB Application Armor Details Gloves Shoulder Bridge Back Thigh Pack Attachment Thigh Pack Front Sniper Knee Front Sniper Knee Attachment Detail Forearm Return Edge Detail Drop Box Back Crotch / Posterior Detail Helmet Detail Photos Front Rear Right Left Hovi Tip Detail Backlit Visor & Frown Mesh Detail Helmet S-Trim Accessory Details Ammo Belt Neck seal Blaster Left Side Blaster Right Side Blaster Ejection Port Mod Blaster D-Ring TD Back TD Front - With 7 1/2" Measurement show TD Painted Screws Action Shot Optional Interior Strapping Holster Attachment AND....Bucket off...just to scare everyone to death!!! With a side note, this was while I was waiting on the replacement "Thigh ammo pack"...which, as seen above, is now properly attached! Hehe. Here is the link to my build thread showing my detail on the build. http://www.whitearmor.net/forum/topic/39748-jaltroopers-anh-stunt-tall-guy-newbie-am-20-build/ I am happy to answer any questions or provide any further detail as needed. Thanks to everyone for all the help and the encouragement during this build! Many Thanks! Jon
 -
Ladies and Gentlemen...take a look to your left... Out your window, you will see the result of two stitches, a few curse words...and a LOT of fun! Jaltrooper makes Expert Infantry!!!! WOOOOOOOOOOOO HOOOOOOOOOOOOOOO! Up next (after a couple of slight adjustments) I join my boy Chris as the other Centurion TK in the Alabama Garrison! Glorious day it is!!! Do or do not...there is no TRY!!!! - Master Yoda (Rebel Scum)
-
Thanks Tony!!! As always...great advice, and I'll be sure to get hose areas cleaned up. On the tears, I struggled with "getting the hand-painted / rushed look" and a cleaner look...I can easily do some housework on those before submitting for Centurion...will do. On the belt, as I told Joseph above, my intent, frankly is to get a new belt, ammo pack and drop boxes and just start over...I was never 100% satisfied with the positioning, the install or my elastic / drop boxes...so duly noted, will get that cleaned up as well. I planned on changing out the shoulder bell straps with nylon webbing over elastic (unless it will keep me from a Centurion approval) becuase they do move around a lot...and getting a consistent look due to my shoulders is tough. I'll work on the forearms as well...I tried to balance the distance on my gorilla arms to not have too much hand to forearm gap...so I did install them a tad lower than the 1/4" standard. Thanks a bunch for the review...and thanks even more for the new blue badge under my picture!!!! Centurion...HERE I COME!!!!!!!!!! My boy Chris (1st Centurion TK in the Garrison) needs Company at the top! WOOOOOO HOOOOOOOO! Jon
-
You bet Chris! Alabama Garrison IN DA HOUSE!!!!
-
Looking good Brosef!!!!!! Great job! Nothing like a fresh set of AM 2.0 armor to get the heart going! Really, really great build young fella! Go get that approval and get your 501st ID!
-
Welcome aboard A.J.! As a fellow AM 2.0 builder (just submitted for EIB with mine!) I agree with everything you said regarding TG and the armor. I was very impressed not only with the quality of the armor, but he was extremely fast to respond, great with the communication and easy to deal with, generally. I also have to agree with the guys on the boards, the same ones, who helped me with my build, got me the right stuff to work with, and were never short in giving me helpful advice and direction. What a great group to enjoy this hobby with across the board! I look forward to seeing your build and am here having been "baptized by stitches" (two in my right thumb trimming...get some cut-proof gloves) if you need anything! Good luck on your build! I look forward to seeing it come to life! Jon
-
My work area isn't climate controlled either...here's the best tip I can give you on that one: $14.99 at Wally World...have one to my left and one behind me...Hahahaha! Looking good!
-
Thanks man! Don;t think I wasn't peeking in getting tips from you also! I just move fast and have a very understanding wife / kids. they left me to my workbench and my build! Haha!
-
good catch...yes...it is 10mm (1 cm) for the rivet hole. Yes, you got it...measure half the width, then "match that measurement on the horizontal leg...then just put the roll of whatever on the lines, trace and cut. I installed that side first (the left, looking at the armor)...then just clamped the right side and drilled it to fit. Really impressed a the build! You are really doing awesome! Jon
-
Hi everyone...wanted to add in a couple of "tips" on what I did in a couple of spots to help some things work. On my right side Kidney-to-ab section, I took a 3/4" x 4" piece of my scrap ABS and sewed it (hand sewn...while watching ANH!) into a piece of 2" elastic: Of course I used my soldering iron and made sure the ends were "fray proof"... I lined up the sewn piece exactly even with the top of the armor...then measured the snap centers, trying to keep it as "centered" as I could...installed the female snaps...and there you have it. I made the holes with my trusty soldering iron...it worked out pretty well. This picture is with just the one on the top. I have since installed the one towards the bottom, about 1" up from the bottom on the kidney piece and level with the snap plate on the ab. It really holds this side in place and not only keeps a good even gap on that side, but it prevents it from "bunching" and overlapping when the belt is pulled tight. Hope this helps someone. May be a little "overkill"...but when I did my first test fit with the nylon strap, I was not happy with how it bunched up and wasn't held in place properly. So I did this to cure that. Jon
-
Looking great Brother Blooper!!!! I hope I am not too late with a tip...be careful on trimming the "thigh ammo belt" prior to fitting. I ended up having to re-order one myself because when I cut it to the above measurements on the AM armor...it didn't fit / was too short. Hope that helps you avoid the $30 mistake I made (had to order another one). If you have the one I had (kind of "blocky" curve), then fit / clamp it to have the middle pack centered, mark your edge on the left side (looking at the belt), then install at the 6 cm by 6 cm measurement for the rivet, I rounded off the edges like this: Measured to the center of the vertical length / mark...measure the same over from the edge...then used a roll of electrical tape and put it on the marks, traced to it, then cut on the line...left me with a nice even / properly rounded bottom edge. Hope this helps! Looks awesome!!!
-
P.S. Who would I get with to have the "AM 2.0" added to my Thread submission post on the board? I feel that I have let my AM 2.0 brothers down by not having our armor brand out there...there are not many on the forum list...YET! Done and done thanks to the Admins!
-
Thanks Joseph! I had some great help from a lot of folks! When it came to my build..."Troopers helping Troopers" was in full effect! My intent is to, actually, buy another belt, Ammo pack, and drop boxes and re-do the entire ensemble prior to my Centurion app. But, if you look, there are small "patches" I put in and used loctite "flexible fabric glue" to shore everything up. It's transparent, so you can;t see it, but I was never happy with my install on the belt, so I am going to be re-doing it from scratch. I didn't want to disassemble the rivets to get the elastic off and start over, for fear of ruining it. Also, the right side snap placement is a tad "bunched", so it is a bear to get it snapped to the ab. The good news on that one is, once it is snapped, it isn't going anywhere! Haha. Great idea on the TD clips...will do! I was also trying to come up with an inconspicuous way to "feel" if someone tried to grab it off my belt during a troop...more to come on that! You can't see it, but I have a 1" x 4" piece of ABS sewn into the right ab/kidney elastic "snap connection"...kind of like how the belt is reinforced...and that "holds" my gap on the right nicely. Going to put another snap connection on the bottom to keep my gaps tight. And those rivets! Couldn't have had the connection without my rivets! Again, thanks for the advice, rest assured, that'll be solid and fixed before any Centurion application.
-
Thanks Guys! I have been so excited, I haven't put my thigh build in yet...
-
Gentlemen, Here is my formal EIB application for your review / approval. I look forward to any review and / or adjustments as needed. Many Thanks, Jon Basic Information Name: Jon Lubin / Jaltrooper Legion ID: TK 12569 Garrison: Alabama Garrison Mandatory Information Armor = AM 2.0 Helmet= AM 2.0 Blaster= Hyperfirm E-11 9 (Slavefive...some mods) Optional Height = 6'2" Weight = 175 Boots = TK Boots Canvas belt = Tkittell Hand Plates = ANH Stunt - Latex (justjoseph - FISD Forums) Electronics= Aker amp (will be upgrading to mic tip / internal I-Comm set-up) Neck Seal = ANH Stunt - (Darman / FISD Forums) Holster = ANH Stunt - (Darman FISD Forums) Full Body Front Full Body Back Full Arms Lifted Right Full Arms Lifted Left Right Side Detail Left Side Detail Cod attachment: Helmet Detail Photos Front Left Side Right Side Back Hovi Mic Tip Detail Lens Color / Backlit Helmet "S-Trim" Accessory Photos: Ammo Belt Holster Attachment Belt-to-Ab attachment side Belt rear detail Right: Rivets are 1/8" - covered with elastic to avoid scratching armor Belt Attachments / Ab: Neck Seal \ Blaster - Right Blaster - Left Blaster - Rear D-Ring Thermal Detonator Back Thermal Detonator Front / measurement Thermal detonator full front (screws painted) Action Shot! (will send in another with better background!) Interior Strapping Interior Strapping Front Left Side Connection Ab Button Detail Please let me know what else is needed and any adjustments that need to be made. Thanks again for the consideration! Jon
-
Thanks to all the great folks in the FISD for all the help, the guidance and the support! Will work to make everyone proud!!! Thanks! Jon
-
Thanks Brother Ryno! Super excited!
-
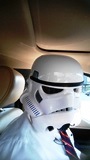
I case anyone is curious...haha! The Plinker The Thinker... AAAAND...The STINKER!!! Photos taken by my 10 year old little girl...who set up her "studio" and thinks her Father is near insane dressing up in shiny plastic! Haha! Thanks again for all the help and support everyone!
-
Man! Went in to do my EIB application...forgot I have to get the "special clearance" to do so........GRRRRRRRR.
-
Cheap Lycra Blaclava on E-Bay!
Jaltrooper replied to Jaltrooper's topic in Boots, Soft Parts, and other Accessories
Cheapest one I found locally was $13.99...so...man...what a savings! -
Thanks Cal!
-
Cheap Lycra Blaclava on E-Bay!
Jaltrooper posted a topic in Boots, Soft Parts, and other Accessories
Hi fellow troopers! Cheapskate TK again! I found these Lycra Black Balaclavas on e-bay...less than $2 each...with free shipping??? Can't beat that with a stick!!!! Bought 4! ----------- -
TK 12569 Requesting Access to all Death Star, Empire and Rebel Scum destroying materials available... http://www.501st.com/members/displaymemberdetails.php?userID=23814
-
Thanks Brick!!
-
Thank you Cricket!!! Exciting day over here in Alabama!
