cjdesign
-
Posts
704 -
Joined
-
Last visited
-
Days Won
2
Content Type
Profiles
Forums
Gallery
Articles
Everything posted by cjdesign
-

What are the Pros Cons and Qualitys of AM 2.0
cjdesign replied to 7w1n9m4n7's topic in Hard Armor (General Discussion)
check this site out... http://www.mytkarmor.com/ -
What are the Pros Cons and Qualitys of AM 2.0
cjdesign replied to 7w1n9m4n7's topic in Hard Armor (General Discussion)
there are tons of am 2.0 builds on this site. pics, tutorials etc - check um out. I choose the am 2.0 because I discovered it fit my body type better and in the 2.0 run they redesigned each piece of armor to be more accurate. A big plus is that it comes trimmed but to each his own. It's all subjective. -
Hey Terry, How did you ultimately affix the dropboxes to the belt? are the loops just loose or are they riveted?
-
Great Job Terry!! I was able to get a grasp via your am 2.0 thread. I'm almost finished with mine... days away. thanks again...
-
cjdesign's AM 2.0 Build
cjdesign replied to cjdesign's topic in Build Threads Requireing Maintenance
Kidney/butt plate alignment: first make sure the kidney plate is positioned the correct way. the center trim should be the same height as the butt center trim. Correct alignment: Wrong alignment: Cut the 22mm x 22mm square notch out of the kidney. I lined up and taped the butt and kidney plate together and continued the 22mm cut vertically down the butt plate - so everything lined up. The final 45 degree cut was made to complete the butt plate. -
cjdesign's AM 2.0 Build
cjdesign replied to cjdesign's topic in Build Threads Requireing Maintenance
Last snap in place... -
cjdesign's AM 2.0 Build
cjdesign replied to cjdesign's topic in Build Threads Requireing Maintenance
Posterior Plate Snap Positions: Placement for these two snaps are up to the builder. mine are 20mm apart. 15mm from the back return edge. The AM posterior has a flat flap that should be cut off and rivets should be placed on the curve. This is the correct am2.0 placement for the snaps. -
Yes. Another question: Cod and butt snaps
cjdesign replied to kevnaminute's topic in Assembly, Mods, and Painting
-
cjdesign's AM 2.0 Build
cjdesign replied to cjdesign's topic in Build Threads Requireing Maintenance
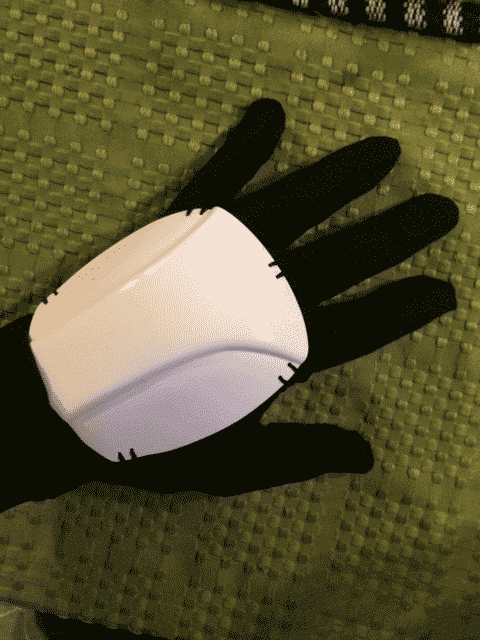
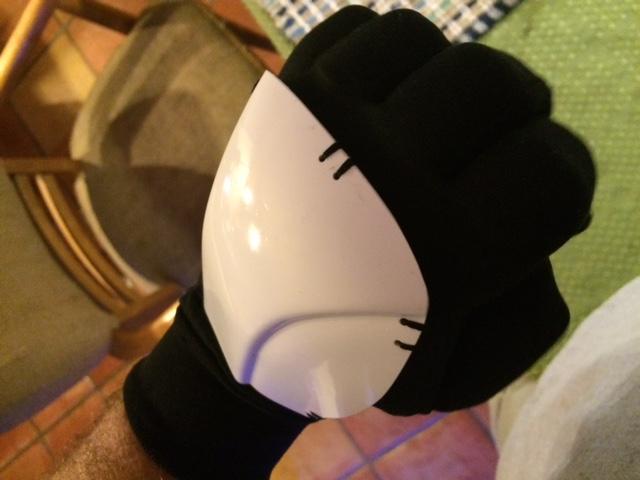
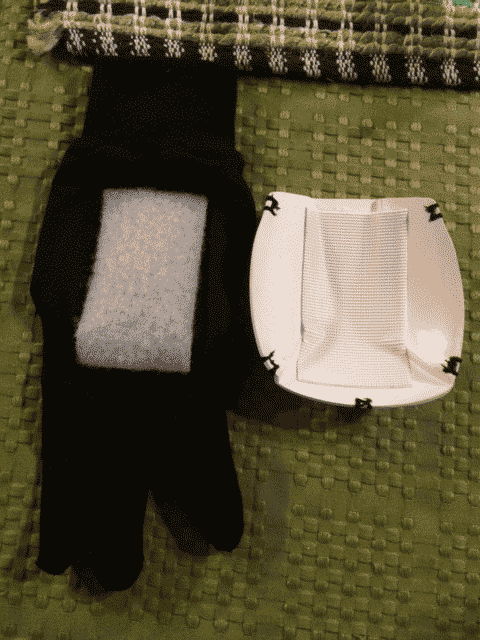
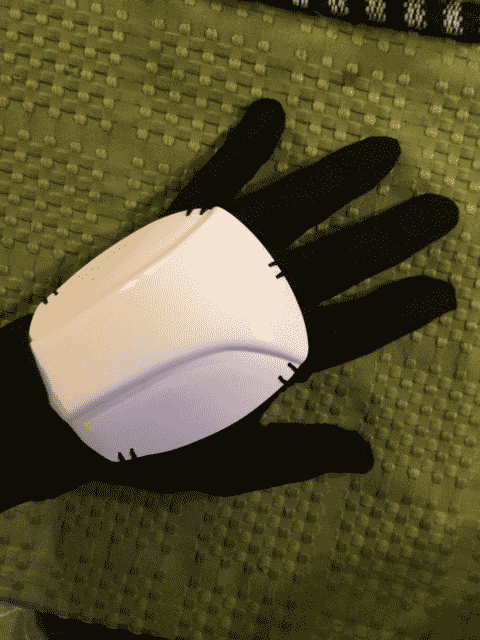
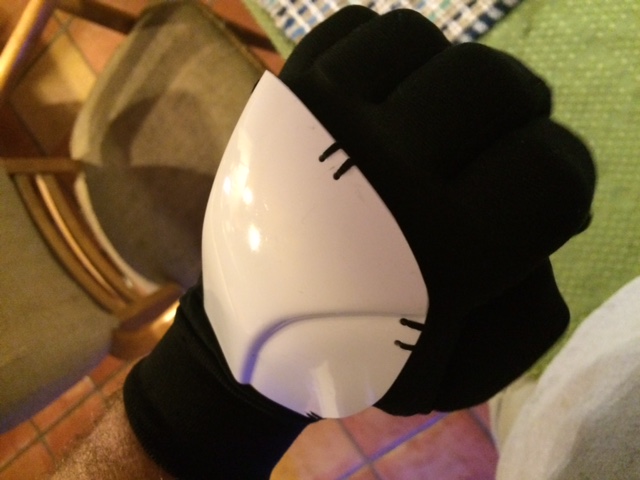
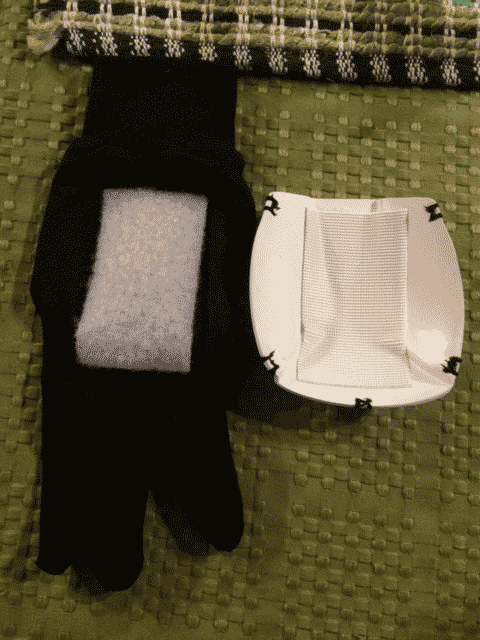
The gloves and hand covers: After trimming the cover to fit my hand better After drilling the holes (5mm from edge and 7mm apart) I stitched the 5 points of hand cover independently and Velcroed to the glove. Stitching the velcro to the glove is a lot easier then stitching each hole to the glove in my option. The silk/lycra gloves can rip at the seem fairly easy so switching out another pair is a breeze. -
Yes. Another question: Cod and butt snaps
cjdesign replied to kevnaminute's topic in Assembly, Mods, and Painting
yes I did without seeing this thread. most of the photos I researched had the snaps visible from the back and placed on the base of the curve - so that's where i placed it - the red line in the example was the starting point of the 15mm measurement. -
Yes. Another question: Cod and butt snaps
cjdesign replied to kevnaminute's topic in Assembly, Mods, and Painting
Ok I eye balled it... and what looked good was 20mm apart and 15mm from front edge on the am 2.0 kit. -
Yes. Another question: Cod and butt snaps
cjdesign replied to kevnaminute's topic in Assembly, Mods, and Painting
Really!? Wow! Every step of the way has been 10mm this and 25mm that and now we are eyeballing things. LOL. Thanks Mathias. -
Yes. Another question: Cod and butt snaps
cjdesign replied to kevnaminute's topic in Assembly, Mods, and Painting
what are the measurements for the positioning of the 2 butt snaps and 1 crotch rivets. thanks! -
Strapping and elastic specifics with snaps
cjdesign replied to Curanthir's topic in Assembly, Mods, and Painting
nylon webbing!! very easy to attach and remove if you need to change positions. I agree ABS Plates look cleaner but are less forgiving. Besides, you don't see the snaps once the straps are in place anyway. -
Creating the ESB greeblies/rail for the DVH kit
cjdesign replied to Darth Voorhees's topic in ESB BlasTech E11
Is it possibly to get some dimensions of the scope pieces? -
Positioning For Top Right Ab Snap
cjdesign replied to cjdesign's topic in Hard Armor (General Discussion)
Thanks Mark! -
Looking for placement measurements? can anybody help?
-
The am 2.0 anh decals are top notch in color and quality. They are printed with two solid pms colors (black and grey) which yields better color saturation. The TB decals are muddy and dark and have a CMYK dot matrix pattern within the gray. So disappointed.
-
cjdesign's AM 2.0 Build
cjdesign replied to cjdesign's topic in Build Threads Requireing Maintenance
not necessary for esb. the biceps are lower thus not needed them. -
cjdesign's AM 2.0 Build
cjdesign replied to cjdesign's topic in Build Threads Requireing Maintenance
Gluing on the shoulder straps The e6000 needs to cure a very long time (48 hours +) or the strap will lift from the front. Even thought I filled the underside gaps with pieces of extra pvc, the air trapped inside the ribs can keep the glue from curing. Be patient. Looked at many references of shoulder strap placements and determined that at least 5-6 ribs are visible on the front chest plate before the gap. [/url] -
ok for centurion? Edit: I guess so??
-
The drilled my holes 5mm from the edge and 7mm apart.
-
The glove I'm using is a Terramar Adult Silk/Spandex Glove Liner: http://www.essentialapparel.com/p/terramar-adult-silk-spandex-glove-liner?gclid=Cj0KEQjw2KyxBRCi2rK11NCDw6UBEiQAO-tljTqftqX8KrMLYKTx76Fwtw7veCYObcM39gJ-GO52i7UaAgFd8P8HAQ#95600
-
The hand cover was sculpted to my hand and for the most lays flat. When I make a fist, the gap between the glove and front of cover is minimal. I guess it depends on how much Velcro you use but in my application it works great. Make sure it's industrial Velcro.
-
Here's my test sample using industrial velco...works great!! ok for centurion? Now I can put my gloves on first and then affix the cover to hand