


justjoseph63
-
Posts
12,745 -
Joined
-
Last visited
-
Days Won
326
Content Type
Profiles
Forums
Gallery
Articles
Everything posted by justjoseph63
-
 You should be good to go now, LJ, so post away!
 -
Which OT TK did you go with and why?
justjoseph63 replied to TwistedZen's topic in Hard Armor (General Discussion)
I was 13 when ANH came out, and I distinctly remember sitting in the theater seeing those TKs bursting into the Tantive IV and thinking "coolest... thing... EVER"! -
TK-16473 Requesting EIB ANH Stunt (870)
justjoseph63 replied to DT_FETT_TROOPER's topic in Request Expert Infantry Status
GREAT to hear, Darren!! On a side note, (and this will not affect approval), you may want to bend the kegs of your split rivets out. There are two reasons.. it will help keep them securely in place, as well as keep them from potentially snagging your undersuit. My buddy Jeff (wingnut65) has a nice tutorial for this. You could probably just use a hammer to gently flatten them out once you get them opened up. -
TK-16473 Requesting EIB ANH Stunt (870)
justjoseph63 replied to DT_FETT_TROOPER's topic in Request Expert Infantry Status
Really nice overall build, Darren, and GREAT job on the tear, trap and frown paint! Unfortunately the CRL for level 2 requires that the gap between the kidney and ab plates be no more than 12.5 mm wide. To proceed with your application, you will need to add some shims on the left and right of the kidney. For EI, there can be a seam at the shim/kidney, but for Centurion (which I hope you will be aiming for) the seam must not be apparent. This is accomplished with the use of ABS paste, and we can help you out with that project when the time comes. Here is a list of threads that may help, (compiled by @Rat) https://www.whitearmor.net/forum/topic/37319-how-to-anovos-kidney-plate-shims/https://www.whitearmor.net/forum/topic/32266-side-shims-and-rivets/https://www.whitearmor.net/forum/topic/30226-side-shims-on-abkidney-help/https://www.whitearmor.net/forum/topic/29077-adding-the-kidney-shim-not-bad-but/ ABS paste how to:https://www.whitearmor.net/forum/topic/42866-how-to-make-abs-paste/ Referece image -
Congrats on starting your build, Robert, and glad to have you aboard! Here at the FISD you can count on as much helpful, courteous and correct advice as you need. We have a fantastic group of folks who are here to assist you in any way required, so as Daniel said, "Lean away"! There is a lot of information here to sift through, but if there is a particular area or thread here you need to find just ask. It would also help to list what location you are in, as in many places we have Imperial Attaches that can assist you on a local level. If you haven't done so already I would also sign up on your local Garrison's site and introduce yourself, (we can help with that as well). Take your time, ask as many questions as you like, and it would also help to sign up with an photo sharing site like imgur so that you can post pics of your build or any issues you have.
-
HOW to: assembling ATA ABS helmet #1
justjoseph63 replied to pandatrooper's topic in Tutorials, Tips and HOWTOs
I would definitely glue the brow trim down, Ron. It could stand to be lowered a bit as well. Reference image -
Anovos TK Centurion Build
justjoseph63 replied to A-Game's topic in Build Threads Requireing Maintenance
I would definitely remove all the return edges from the bottoms of the shoulder bells and move the tops closer to the shoulder bridge, Asjha. As Luc mentioned, this will allow them to sit closer to the biceps and reduce that gap. Note the lack of return edge in the screen used ones below. Can you post a few close-up pics of the tops of your forearms? This will help us get that restrictive issue figured out. Reference images ** -
You are the MAN!
-
TK-34221 Requesting ANH EIB status (RWA) (864)
justjoseph63 replied to HansVader's topic in Request Expert Infantry Status
Hi Paul , thank you for your patience for your EI application! CRL and EIB Application Requirements: All required submission photos have been posted, and I am very pleased to announce your armor displays all the necessary elements to qualify for Expert Infantry. On behalf of the D.O. Staff, congratulations! Other-Armor Fit/Assembly: In this section we review observations made by your fellow troopers and ourselves. Some observations may lead to suggestions to improve the overall look of your armor. Always great to see another Trooper join the ranks of EI here in the FLG, Paul! Just a few suggestions to make your armor look even better, sir. 1. The paint job overall (especially the vocoder) is really nice. The only areas I can see that could use some attention are the traps above the ears, where the paint should extend all the way to the edges of the indentation. Reference image 2. The paint on your tube stripes could really stand to be re-done. The number of stripes is good, but the edges are not as clean and crisp as they should be. 3. Not a deal breaker, but your ears could stand to be moved back a bit. Note in the reference image that the top ear screw sits just below the back of the trap/brow trim and the other two follow the angle of the rear of the trap. 4. You have a definite gap between your wrists and hand guards. I would drop your biceps (especially the left one) a bit and drop the forearms down an inch or so, which would really give you a much better overall look. Reference image 5. For a more screen accurate appearance, your ABS belt could come up about 3/4 inch to cover the bottom of the ab-button plates. Reference image 6. Nice trim job on your large ab button plate, but the smaller one could use some Dremel love. Note squared corners. Reference image 7. Your posterior plate looks great, but it seems that the left side wants to ride out and up for some reason. I would check the strapping to see if both sides are the same. Reference image 8. Your canvas belt could use a haircut. There may have been some that were a bit frayed towards the end of filming ANH, but not quite this much, lol. 2 minutes with a sharp pair of scissors would make a world of difference! Centurion Suggestions: Because Centurion photos show much more detail than EIB, items pertaining to Centurion might be seen there and not here. We try to point out all we can from what is seen but the final accuracy is the responsibility of the trooper. 1. As per the CRL for level 3 (which I hope you will be aiming for) the back plate "...Shall have no or minimal overlap of the kidney". A strapping adjustment should take care of this. Reference image 2. The CRL states that the shoulder straps need to be "...held down in the back via a white elastic band ...". You probably have them already, but unfortunately they are not apparent in the photos. Reference image 3. The outside edge of your drop boxes will need to be aligned with the end of the ABS belt. This is a super easy fix... just move them into the correct position and add some E-6000 (or even CA glue) to the inside of the strap on the back. Reference image Great job overall, Paul, now get out there and make the TBS, FLG and Empire proud as the newest EI! Hope to see your Centurion submission soon.. -
That list is for those who make complete armor kits, brother, but you will ALWAYS be a "Highly Recommended Seller" as far as I am concerned. I (and hundreds of others) have had nothing but positive transactions with you, and would not hesitate for a moment to entrust you with any order.
-
TK-34221 Requesting ANH EIB status (RWA) (864)
justjoseph63 replied to HansVader's topic in Request Expert Infantry Status
My apologies, Paul, but I am working on your submission and forgot to ask for the close-up of the ab details (required). No need to get suited up... Thanks! -
I was thinking the exact same thing (for ESB). The current photos should definitely be updated, as there are a few fitment issues and we are phasing out the models holding weapons. This is one awesome looking set of armor!
-
TK-34221 Requesting ANH EIB status (RWA) (864)
justjoseph63 replied to HansVader's topic in Request Expert Infantry Status
Nice work, Paul! One of us will be with you shortly, but before proceeding can you post up detail shots of your left side detail (arms raised) and right side detail (arms raised) as these are required. Thanks!! Joseph -
Hi Arthur , thank you for your patience for your ESB EI application. CRL and EIB Application Requirements: All required submission photos have been posted, and I am very pleased to announce your armor displays all the necessary elements to qualify for Expert Infantry. On behalf of the D.O. Staff, congratulations! Other-Armor Fit/Assembly: In this section we review observations made by your fellow troopers and ourselves. Some observations may lead to suggestions to improve the overall look of your armor. Wow, Arthur! Yet another spectacular build from you, sir... your attention to detail is absolutely amazing, and you are setting the bar really high for all those in in the HK Garrison! Thanks for taking care of the belt, tube stripes and frown. Great job! Just a few minor things here to make you look even better, sir. 1. The ear on your right side is not symmetrical to the one on the left, and could stand to be brought forward at the top just a bit and the bottom brought back just a touch. The one on your left is spot-on! Reference image 2. If you sharpened up the tops of your vocoder paint lines it would make this helmet look even more screen accurate. Reference image 3. Lastly, the paint on your ab button plates is a bit wide. Note on the reference image that there is still a bit of the buttons that is not painted around the edge Centurion Suggestions: In this section we prepare you the best we can for Centurion. If there are any areas of concern they will be discussed here. Nothing to add here, Trooper. Now it's time to get that level 3 submission in for your THIRD Centurion award! Well done!
-
OOps. I would never blast anyone for being correct, Eric, and good call! I blame it on being 6 a.m. and out of Mountain Dew, lol.
-
If you would like to see a spectacular ESB build, here is one that is about to be approved for EI and will be a shoe-in for Centurion. Note the details. https://www.whitearmor.net/forum/topic/45680-tk-39093-requesting-esb-eib-status-tm-under-review/
-
There are a few differences in the ESB and ANH helmets, Jake. The frown/teeth are painted black, (photo 1) as opposed to gray in ANH. Also, for Centurion the tube stripes must be decals as opposed to painted. The tears/traps must also be decals and not have the "hand painted" look as seen in ANH. 2 or 3 ear bumps must be painted black as opposed to one for ANH. The hand guards are also different, (photo 2) For ESB, the holster is worn on the right side and is held on via 2 black loops instead of being on the left side attached by rivets/screws.
-
Perfect!
-
Nice job. Stuart! One of us will be with you shortly, brother, but in the meantime could you post up 2 pics for us? One of the exterior of the cod snap and a close-up of the ab-button plates. (At least you don't have to get suited up for these)! Thanks!!
-
Hi Giles, welcome and thank you for your EIB application. Let's have a look, sir! CRL and EIB Application Requirements: All the required submission photos have been posted., your armour displays all necessary element as set out in the level 2 CRL, Congratulations on a job well done!. Other-Armor Fit/Assembly: In this section we review observations made by your fellow troopers and ourselves. Some observations may lead to suggestions to improve the overall look of your armor. If any suggestions affects any application, it will be listed below. Incredible job on this armor, sir! You have obviously been studying some of the better build threads here, and your attention to detail quite evident. Just a few notes to make this armor look even better! 1. Starting at the top, the opening on the top inside of your eyes could use a bit of trimming. A round needle file would work perfectly to do this. Reference image 2. Your hovi-mic tips could use some white paint on the inside, and a little on the outside rims to give you a more screen accurate look. Reference image 3. Nice work on the shoulder bell positioning, but you might want to make sure your undersuit isn't peeking out on the left side. It should match the one on your right side. Reference image 4. Not a deal breaker by any means, but tightening up the strapping on the left side of your back/kidney connection would give you a sharper look. Reference image Kudos: The best set of ab plate buttons I've seen in a long time. Outstanding job on the trimming, positioning and paint! Centurion Suggestions: Because Centurion photos show much more detail than EIB, items pertaining to Centurion might be seen there and not here. We try to point out all we can from what is seen but the final accuracy is the responsibility of the trooper. 1. The lower ear screws on your bucket will need to be changed out for the countersunk flathead type to match the ones above them. 2. Looks as if you have a small gap on the bottom of your right kidney/ab connection. You may want to shorten the strapping or canvas belt to tighten this up, but if you choose the belt option be sure that it doesn't cause the top of the posterior plate to stick out. Reference image Again... a fantastic, clean build Giles. Just a few small issues to work on and then I hope to see your Centurion submission!
-
Hola, Tomas, welcome and thank you for your EIB application. Let's have a look, brother.. CRL and EIB Application Requirements: All the required submission photos have been posted., your armour displays all necessary element as set out in the level 2 CRL, Congratulations on a job well done!. Other-Armor Fit/Assembly: In this section we review observations made by your fellow troopers and ourselves. Some observations may lead to suggestions to improve the overall look of your armor. If any suggestions affects any application, it will be listed below. Let's start from the top, mi hermano.. 1. As mentioned by Glen, the paint on your frown should come down more at the corners. Reference image 2. Your brow is sitting really high and should come down to just above the eyes. Yes, some of the screen used helmets were higher, but the vast majority sat much lower. Reference images 3. The black outline around your ears should be more distinct, and there should be no gray paint outside of the black line. Reference image 4. Your left forearm needs to be lowered to match the right one for symmetry. I would suggest lengthening the stap just a bit and you will be in good shape. Reference image 5. I would suggest making the strapping for your back/kidney connection a little longer. Right now it overlaps a bit. Reference image 6. The cover strips on the tops of the thighs could use a little "Dremel love" and be trimmed down, especially the right one. This should make it easier to walk as well! Reference image 7. Your TD is sitting too high, and should be lowered to where the top of the clips are touching the top of your belt. Reference image 8. Your top of your posterior plate needs to adjusted to where it does not overlap the bottom of the kidney plate. 9. Your large ab-button plate looks GREAT, but the smaller 4 button one could use some trimming for screen accuracy/ 10. The D-ring on your blaster needs to be painted black. 11. The magazine on your E-11 is facing the wrong way. The curve needs to face forward, making the hourglass indentation on the side (circled in blue) face toward the rear. Reference image Centurion Suggestions:In this section we prepare you the best we can for Centurion. If there are any areas of concern they will be discussed here. 1. The gap between the shoulder bells and shoulder strap will have to be tightened up, which will bring them closer to your chest/back plates. I noticed that you still have some return edge on the bottoms of the shoulder bells which can be completely removed. This will help as well. As per the CRL for Centurion, "There should be a minimal gap between the shoulder armor and the chest/back plates". Reference image 2. Your left ab/kidney connection is PERFECT, but you will need to tighten up the one on your right. Reference image 3. The screws on your TD are of the round-head type, and will need to be changed out to the flat "pan-head" style/ 4. As listed in the CRL for level 3, you will need to add one "rank stripe" to your ear bar. Front, back or middle... it's your choice! Reference image You have a little work in front of you, but I feel confident that you can get these issues taken care of so that we will be seeing your Centurion submission in the near future!
-
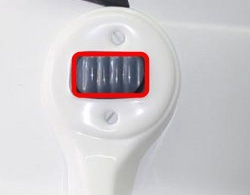
I'm afraid those are indeed dome head screws, Miguel, as seen on the right in the diagram below (b), so you will need the pan-head ones shown on the left (a) which are screen accurate. I realize this is a small issue, but the advanced levels require them. You may want to speak with some of your fellow Garrison friends who have made it to Centurion to ask where they got theirs from.
-
ANOVOS ammo belt replacement kit
justjoseph63 replied to Bad Droid's topic in Boots, Soft Parts, and other Accessories
The Anovos kit will automatically come with all those items, and I believe the whole belt will be pre-built. (I may be mistaken on the pre-built part, though). The only thing you should need for it are some pop rivets to attach the new canvas belt. You can use their existing Chicago screws The drop boxes may need to be assembled (easy). For screen accuracy, I would also trim down the top and bottom of it (to the point just above and below the boxes as seen below) and then add new 45 degree angles on the corners. Screen used belt-
- 1
-

-
Hi Tom, and welcome to the FISD! I have some good news for you... First, I did the same thing by ordering from Makerofthings before I knew about the FISD and 501st. After finding out about this site and that it was a recast, I went ahead and built it for the practice and ended up selling it on eBay as a "Halloween costume" for more than I paid! I then purchased a set of AM armor and never looked back. We try to steer folks clear of recasters like MOT, as they profit from someone else's hard work. Creating original, accurate molds for armor is no easy (or cheap) task, BUT... MOT armor is approvable. We recently had someone actually get to level 2 with it, so all is not lost. I did find that their helmet was WAY oversized, though, and I believe that the applicant had to replace it because of that and other issues. Once you start your build thread we will be able answer any questions, help in any way we can, and best of luck on your white armor journey!
-
Supply list for your OT TK build....
justjoseph63 replied to justjoseph63's topic in Getting Started - Read this First!
You won't need to order the split rivets, as Anovos includes those. All you will need are the hand guards, TD screws, and you can use the split rivets they supply for the thigh ammo pack (they are approved at Centurion). The cap rivets are screen accurate, but not a requirement. Since you only need 2 ear screw sets I will throw those in for free. Just PM me before you order and I will make you a package deal!