

Barcoder
-
Posts
405 -
Joined
-
Last visited
-
Days Won
3
Content Type
Profiles
Forums
Gallery
Articles
Everything posted by Barcoder
-
James' MTK TK Armor Build
Barcoder replied to Jim13csulb's topic in Build Threads Requireing Maintenance
Congrats TK-51410!! Awesome feeling huh? I just got approved on Monday. -
Thank you all for the congratulations! Man, that was a lot of time & effort...but SO worth it! Next stop, EIB & then Centurion! (I best be starting on my blaster soon...)
-
ACHIEVEMENT UNLOCKED - 501st approved! TK-12175 reporting for duty.
-
WooHoo! TK 12175 requesting 501st access. http://www.501st.com/members/displaymemberdetails.php?userID=16656 Thank you so much.
-
Thanks buddy! My fingers are crossed. Thank you very much; I am quite proud! (Personally, I think I did an amazing job with what I had to work with. lol) But yes, I understand what you mean, completely. My next set will NOT be re-cast...can't wait to get my hands on "real" armour.
-
Good job on closing those gaps! You should be proud.
-
HAHA! I knew I'd be called out on those two things. (Not to worry, they were both done right after I posted those pics.)
-
Thanks guys for your complements on the ears. I ain't gonna say I was close to tears...(well, maybe a tiny bit. lol) That was the hardest part of the whole build. Well, here's is the progress I made since the ears... In the end, I decided to use decals for the tube stripes... I just don't have the time to paint them right now; I will before my EIB submission. With that said, I do believe it's time to submit my application for the 501st! I now understand that your armour will never be "finished" but I am confidant I am ready for basic approval.
-
Thank you Gaz. I truly appreciate your comment. Agreed! Kids are the ones to see right up into the helmet.
-
YAY! I finished the ears! Phew, I though for sure I had screwed up the right one.....I was fretting about it at work, all day. Thanks to a post in another build thread (Thanks Diana) I was able to look at the right ear from a fresh perspective and get 'er done. lol I am a very happy future trooper. <breathes a huge sigh of relief>
-
Diana's RS Props Build- ANH Stunt
Barcoder replied to AsBlondeAsLuke's topic in Build Threads Requireing Maintenance
Diana; Just wanted to say that this bit of info was extremely helpful to me today. I have spent the last few days fighting with my ears. I was convinced I screwed up the right one...this saved me & my right ear. So thank you for sharing, very much!!! Great build by the way, I look forward to your progress. Looks like you guys are having a blast! -
Big brown box has arrived!
Barcoder replied to Rawgee's topic in Build Threads Requireing Maintenance
Good job Martin! Your neckseal turned out awesome; looks great. So glad I was able to help. -
WOW. People were not kidding about the ears being the hardest part... I had to take a time-out last night. Seriously. lol Anyway, this is what I managed to accomplish last night & this evening. (I have thrown in the towel for the evening...) Here you can see just how thick the ABS is on this section. It's hard to get things to lay flat.... ...and here is the test fitting....after HOURS of tweaking. This is the test fitting on the back..... ..and this is the result after screwing it all together.... Thankfully the front ended up nice & flush... (Yes, I will be countersinking the bottom screw.) I may attempt to fix the back of this ear, but not tonight. My patience has run out... lol ..and that was just one ear. I still have to deal with the right one.
-
Big brown box has arrived!
Barcoder replied to Rawgee's topic in Build Threads Requireing Maintenance
Yay! Sewing days are always fun. lol I can't wait to see the result... -
WooHoo! Congrats on finally having a build thread; I'm very happy for you. I too shall be watching this. My kit arrived a few weeks ago & I'm itching to start it... Best of luck Tim!
-
Agreed, they do look like claws...which I kinda like. I wasn't sure if the vents were open to a little personal interpretation or not... Thank you for the nudge; I will be sure to get them straightened out.
-
YAY. More painting.... Here is my 1st & second attempt at free-handing tube stripes. (More practice is in order...lol) I think I am using too much paint, as it's pooling at the edge of the masked area. I will try thinner coats... The insides are now all pretty & matte black... The ears are ready for the rank bar... 1st & 2nd coats on the traps...just need the vents on the back. 2nd coat on the teeth, left tear & vocoder. (...and more polishing!) (I often refer to this helmet as "Chip". You may notice the gouge above the eye-a fight with my Dremel that I did not win.) I have decided to keep it; adds a bit of history.
-
Thank you very much.
-
emile1138's Stormie WIP
Barcoder replied to emile1138's topic in Build Threads Requireing Maintenance
I can't really say about approval, but yes, it would suck to have to do a whole new helmet... I have never tried ABS paste, but maybe that can be used to fill in the holes? Maybe with a piece of ABS behind the holes to create a base to fill in? I'm not sure, maybe a more experienced trooper can chime in on this? -
Big brown box has arrived!
Barcoder replied to Rawgee's topic in Build Threads Requireing Maintenance
I think you did pretty good job as well! Well done! (But as suggested, maybe a bit more sanding?) -
Today has been spent painting.... (Which I enjoy doing.) Started with the first coat on the teeth... (and a bit of polishing with Meguiar's ultimate compound.) Then the tears & traps... The the ear bars... (I used adhesive vinyl to block the area.) A few minor touch ups & good to go.... ...and the first coat on the vocoder. I will leave them all to dry over night before applying the second coats. I plan on free-handing the tube stripes (I have a steady hand) but will be practicing on spare ABS first to get the technique down.
-
Thanks for the compliment! I will have to give Novus a try, stuff I have isn't doing the trick... The reason for painting the inside black is purely cosmetic. I think it makes the inside a little more "polished" & "real" looking... I think when showing kids/fans the inside, it will just look cooler all decked out. (Maybe it's just something us North Americans do? lol)
-
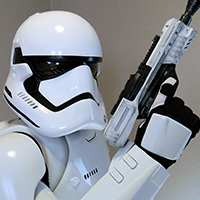
The work on the helmet has begun... and it started off on a sour note... I had left my neckseal sitting on top of the cap, as I though it was a good place to store it while I worked in the disaster that currently is my office. Nope. bad idea. Whatever material I used for the ribs stained the top of the helmet. I had a nice little ring of dark purple... FML. ...after MUCH sanding & swearing, I was able to get most of it out. There is a stain by the left trap that refuses to come out completely...but I can live with it. Needless to say, I am left with a very dull cap that needs shining up... Anyway... I managed to get the teeth cut out & files nicely. Bit of a pain but I think they look good. Mounting the back & cap on the faceplate was a stressful as I anticipated. Thank God I did the armour first; I am sure I would have messed the helmet up. (despite the confidence I gained from the armour build, I still had butterflies in my tummy as I drilled the holes...) My first attempt at attaching the faceplate failed. My traps were off slightly (yes, there was more swearing.)...and that would have driven me mad. So I had to drill another hole on the right side. In the end, this is what I have ended up with.. (I have opted for a very low brow....cuz it looks super-cool.) Tomorrow the inside of the helmet gets a coat of matte black...
-
Starting ATA build & have questions
Barcoder replied to chadder's topic in Build Threads Requireing Maintenance
Use semi-gloss on the mic tips. -
emile1138's Stormie WIP
Barcoder replied to emile1138's topic in Build Threads Requireing Maintenance
Agreed on bringing the shoulder bells in more, and the belt being too low. Also, (maybe I'm wrong) but doesn't basic approval require only 8 teeth to be cut out? I think the top of the ab & kidney plate will align better once you have the strap to the cod piece on? It's hard to tell with baggy jeans on where the lower section is actually sitting... The kidney & ab section look a little too high?