


gmrhodes13
-
Posts
31,206 -
Joined
-
Last visited
-
Days Won
1,069
Content Type
Profiles
Forums
Gallery
Articles
Everything posted by gmrhodes13
-
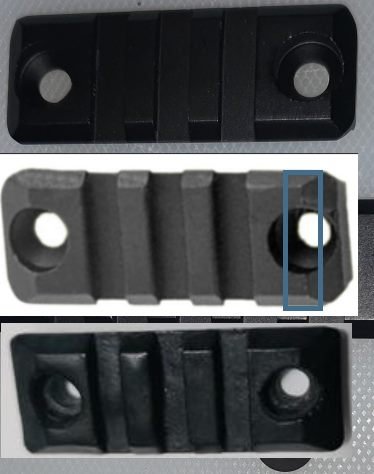
Nice work, slow and steady
-
Very very similar, they are just a little off how much hole the angle cut extends acriss, not that I think it would get picked by your GML "that guy, what would he know"
.jpg.c9ee7197318e45ed246bfbd506016142.jpg)
-

Hi there from Canada, I'm excited to be here!
gmrhodes13 replied to MandyColours's topic in New Member Introductions
For Tie Pilot info head over to JRS forum, home of everything Tie Pilot ^^^^^ -
Unit GMLs will still be able to approve costumes on current members, though. This is an important distinction. Per the OP, members have until the start of voting to reconcile their Detachment roster affiliation. Please be reminded that a valid costume AND an active detachment-members-only forum account are required to participate in Legion Detachment elections. Please contact your respective Detachment Leaders for any issues with your membership (prior to elections), and do not wait until last minute.
-
You already have501st & TK access If you have a problem with "detachment affiliation" please read here
-
You need to add a link to your legion membership profile, please read the first post of this thread for instructions Debe agregar un enlace a su perfil de membresía de Legion; lea la primera publicación de este hilo para obtener instrucciones.
-
Hi there from Canada, I'm excited to be here!
gmrhodes13 replied to MandyColours's topic in New Member Introductions
Hello and welcome to the forum, a great thread full of information for the first time builder -
Reminder to stay "active" you must log into the forums at least once a year (election to election) or the automated system will not pick you may no longer have detachment affiliation. Also NOTE: *NOTE: Make sure you log into the forum at least once through a website and NOT through TapaTalk, as sometimes it does not register the login as a true login.
-
Either purchase from the kit supplier or do an online search for rubber suppliers close to you, or trooperbay https://trooperbay.com/?s=brow+trim.
-
Ranger's BF2 Heavy Stormtrooper Build
gmrhodes13 replied to TheLoneRanger's topic in Hard Armor (General Discussion)
Going for extra detail as the CRL model is a good idea, especially when others may follow and what to obtain L2 or L3. . Sheevs emporium do a lot of custom sewing, may be an option. -
Good luck with the research, a great thread full of information which may be helpful on your journey
-
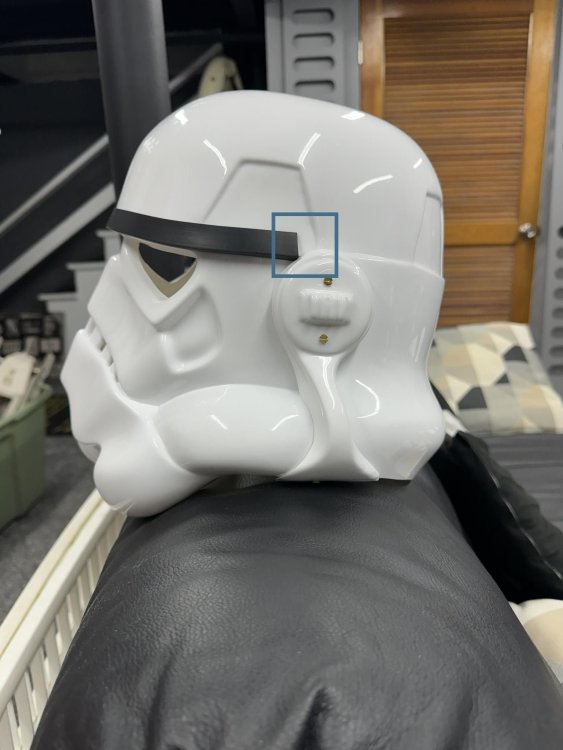
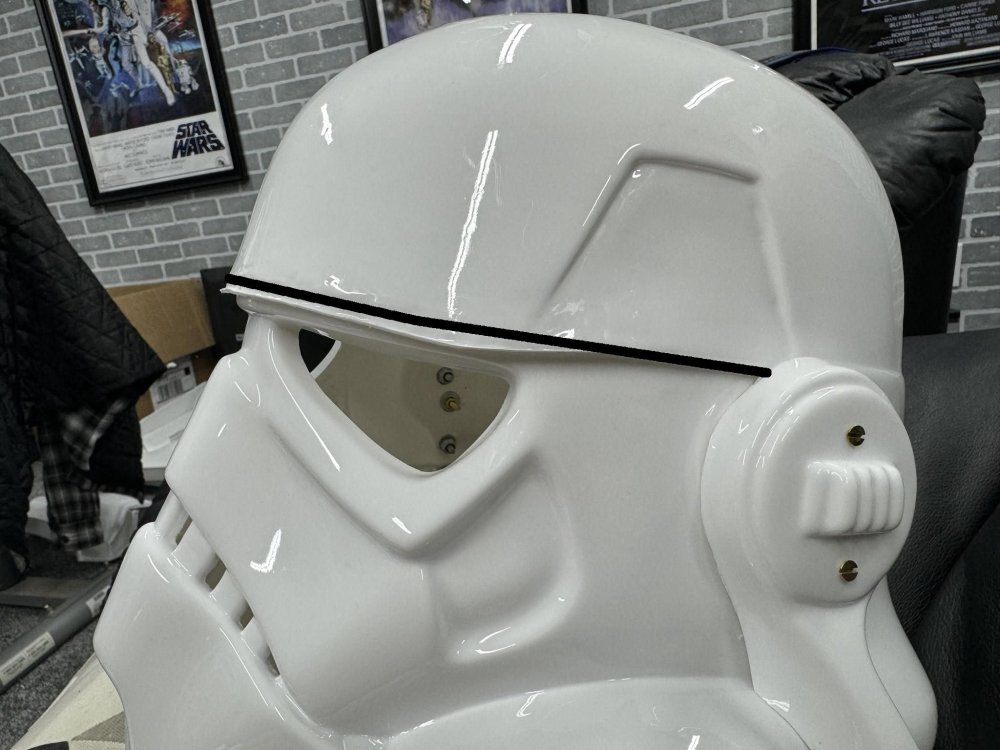
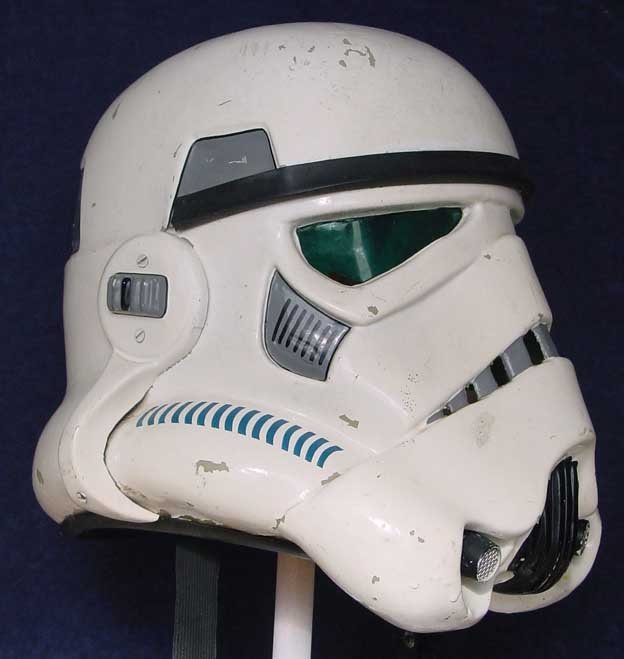
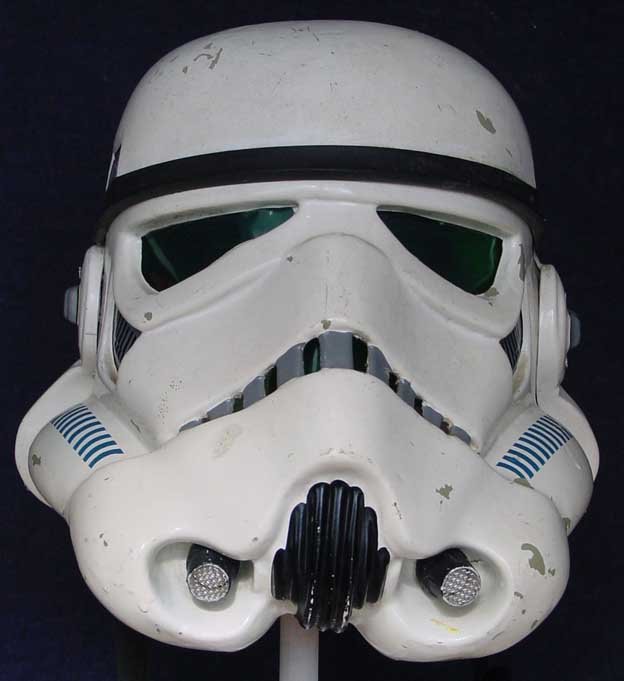
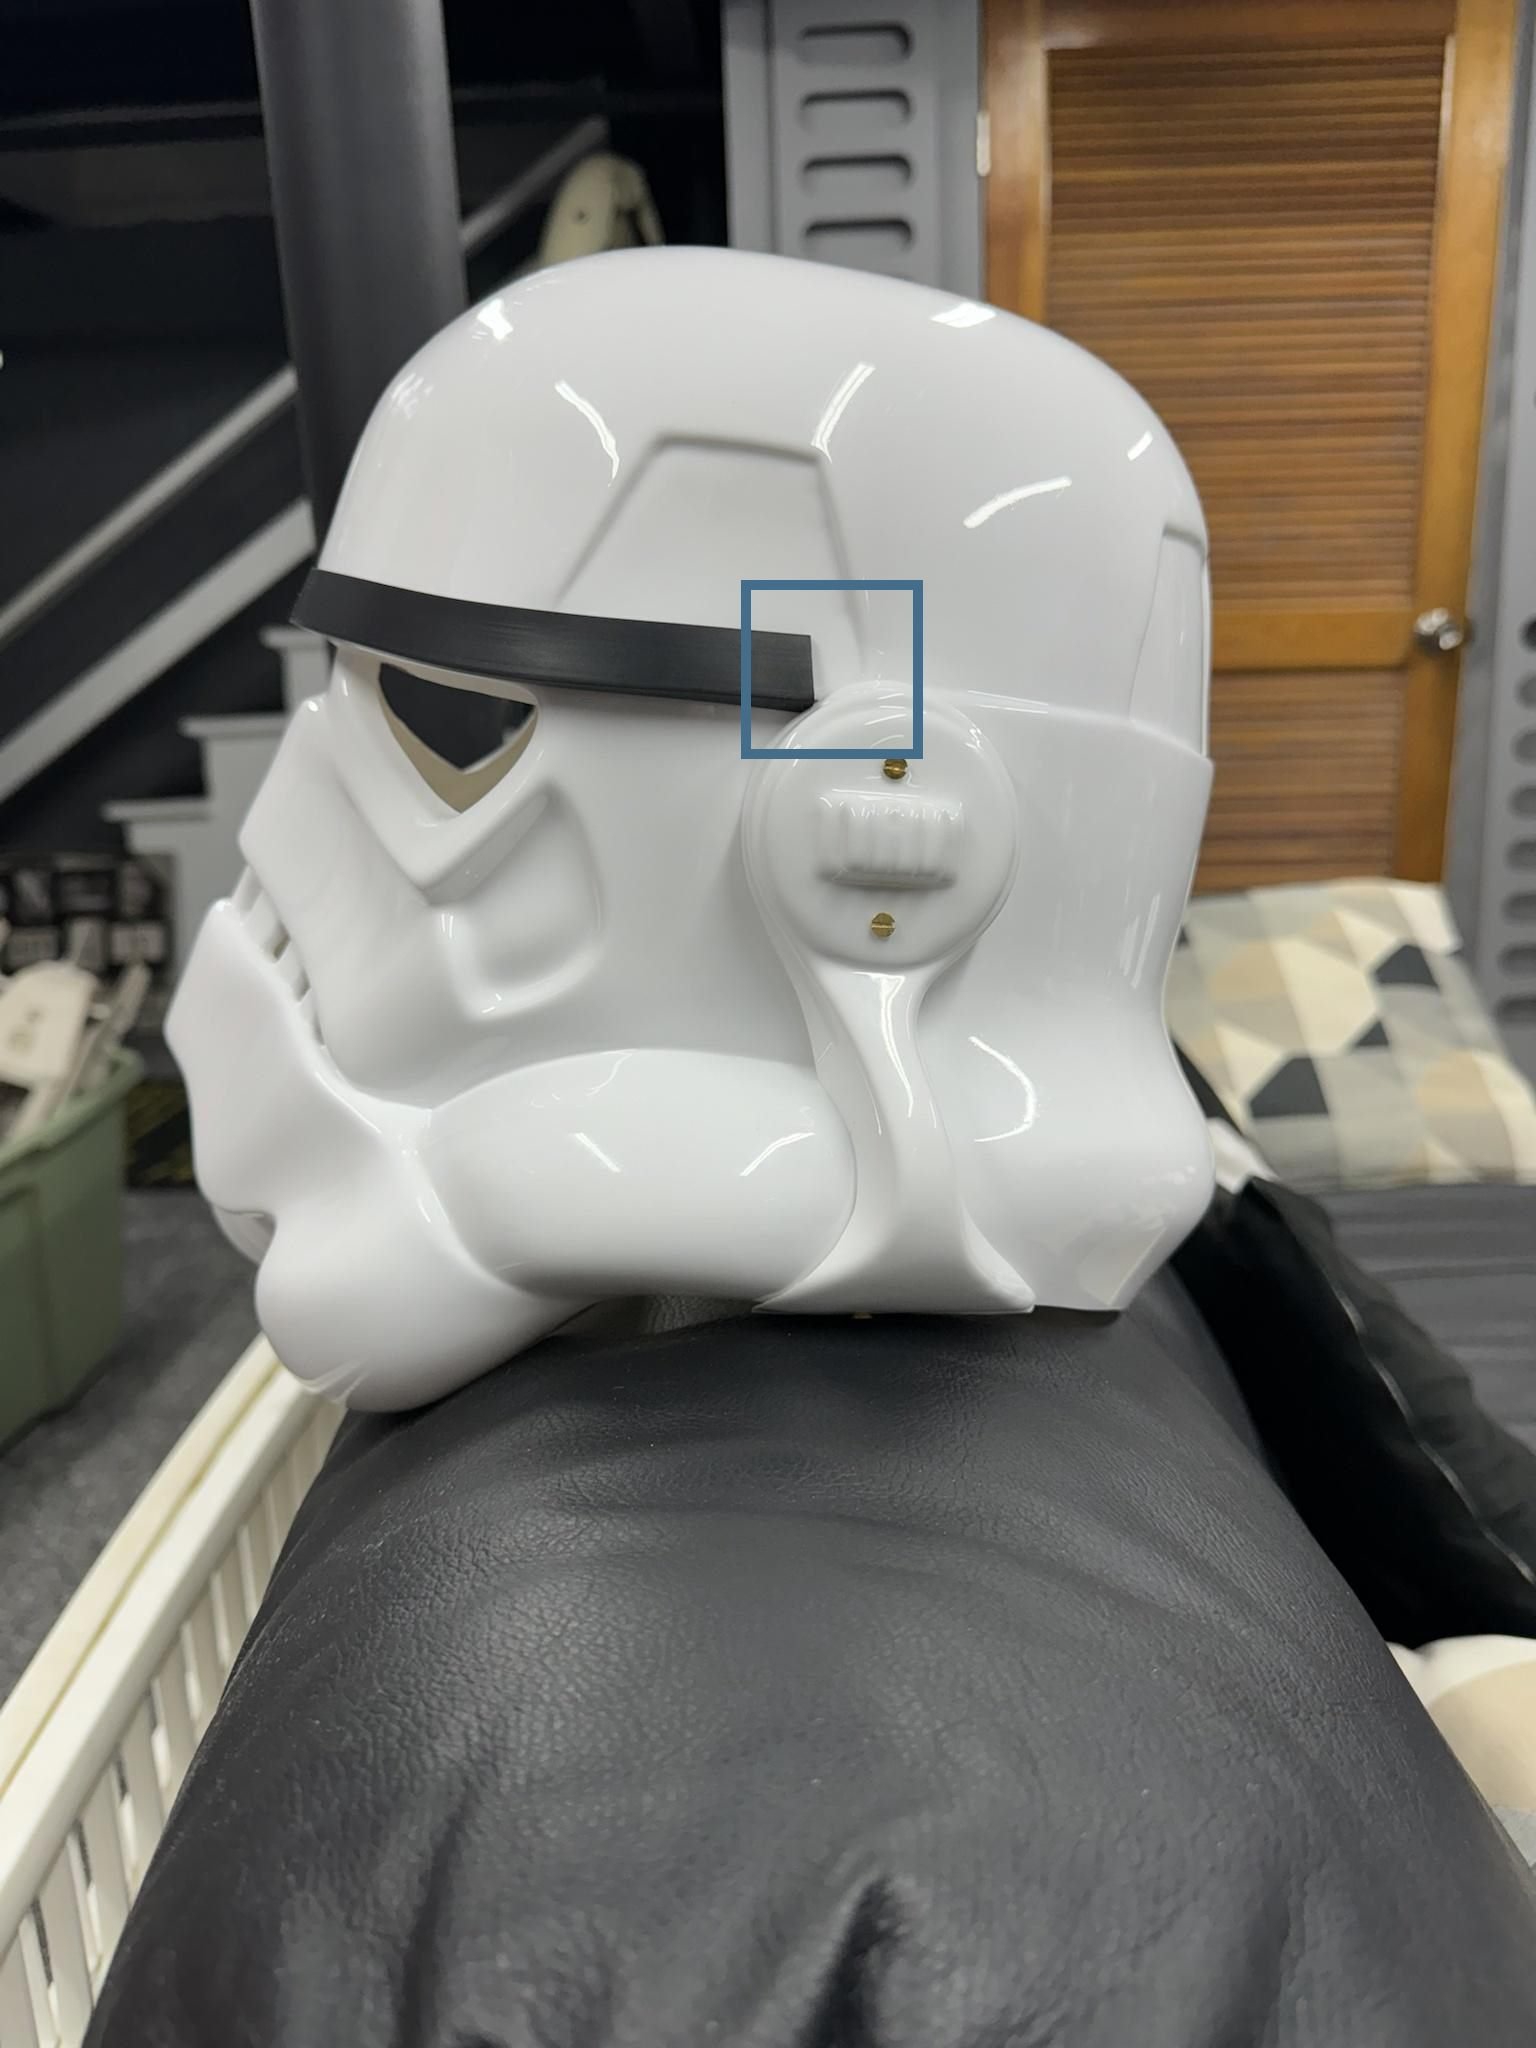
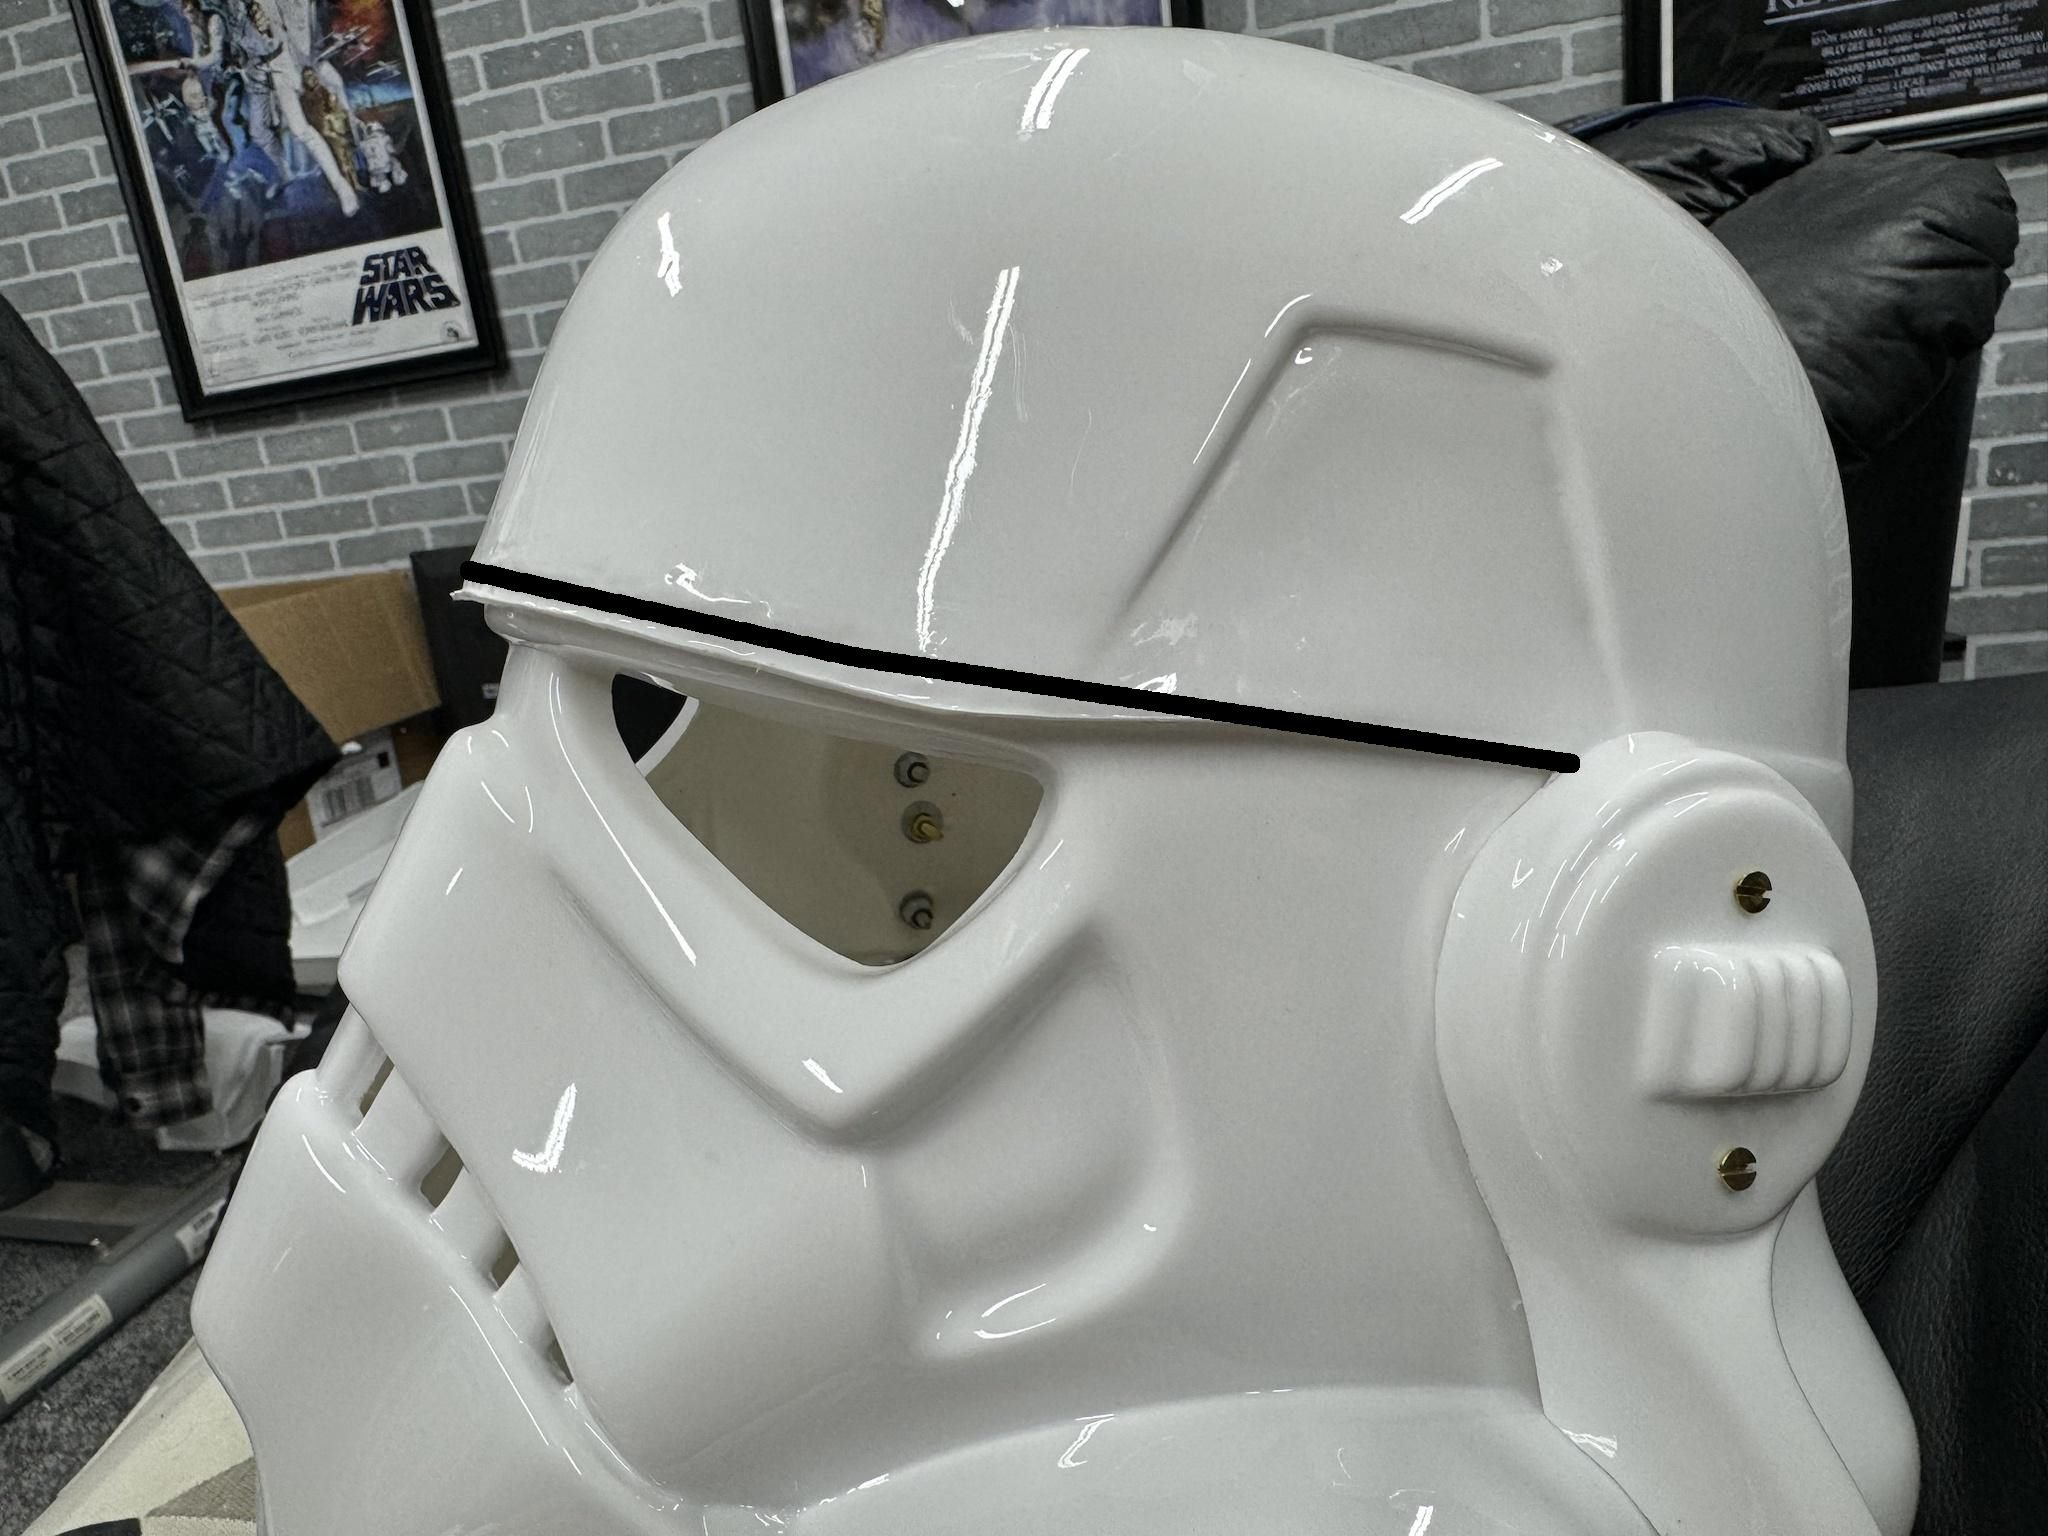
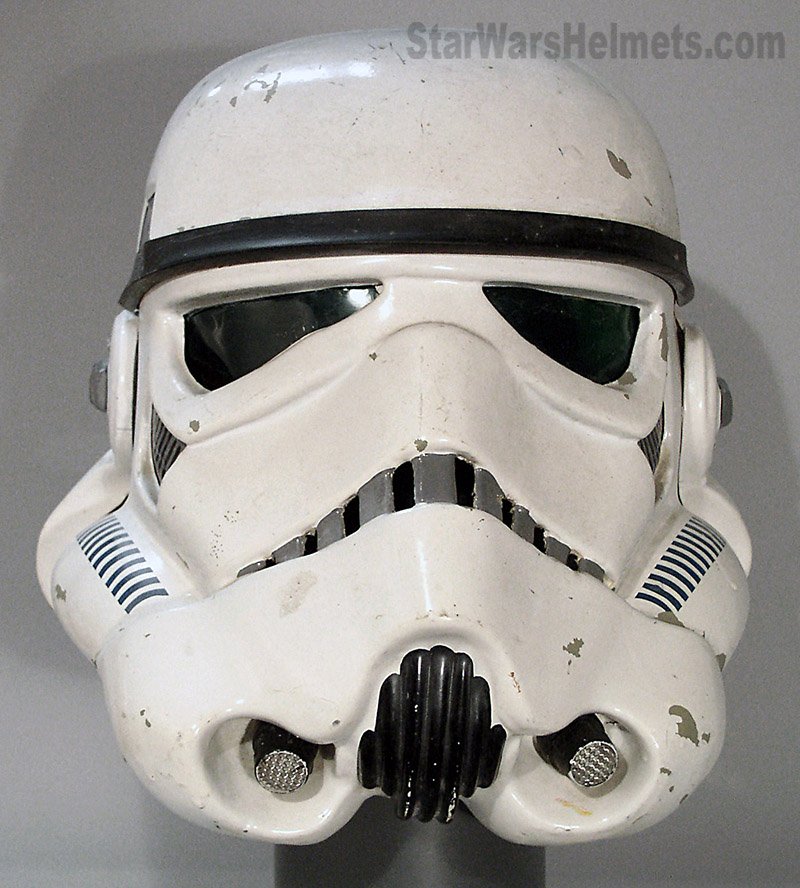
The only issue may be your brow trim length, it's a little short and this may change again by trimming the brow area Note the brow trim is just in the corner on top of your ear, compare with these images
-
I just use E6000 glue, make sure you rough up the surface first on the drop box to help the glue adhere to it. Rivets were screen accurate but can pull through the elastic, using washers helps
-
Ranger's BF2 Heavy Stormtrooper Build
gmrhodes13 replied to TheLoneRanger's topic in Hard Armor (General Discussion)
Definitely a mix of old and new. Lines running down from the neck is a little weird. -
Two things can adjust the brow, undoing side screws and tilting the faceplate downwards (but this makes the hole smaller to fit your head through) or as you stated, trimming the brow plastic a little more. Paints are:
-
Very similar (if not the same ) as ROTK, with just a color change, I've not seen a good inside palms image
-
Ranger's BF2 Heavy Stormtrooper Build
gmrhodes13 replied to TheLoneRanger's topic in Hard Armor (General Discussion)
Ribbed undersuit, shoulders, elbows, neck and between backplate and kidney. -
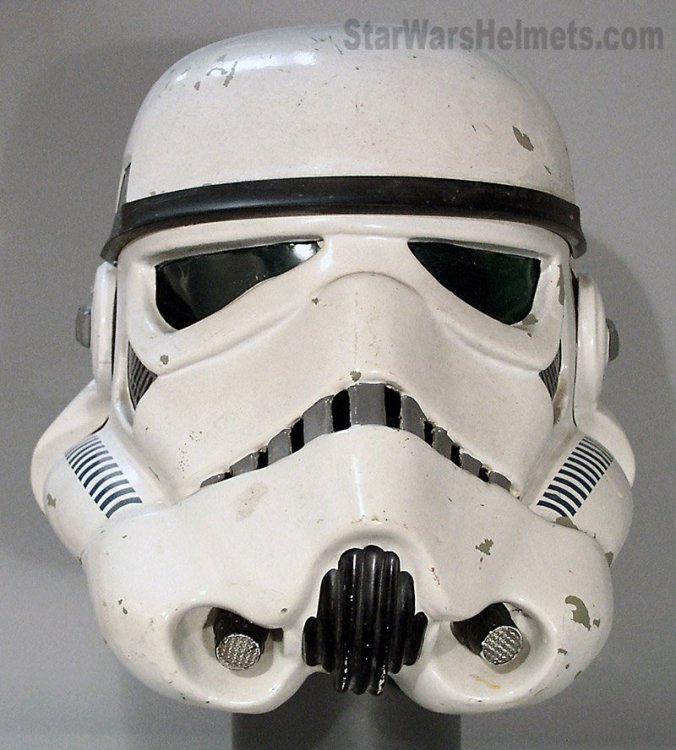
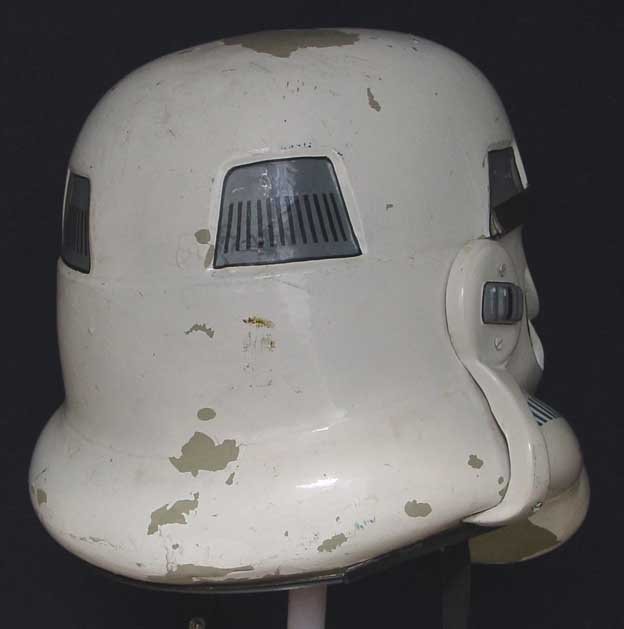
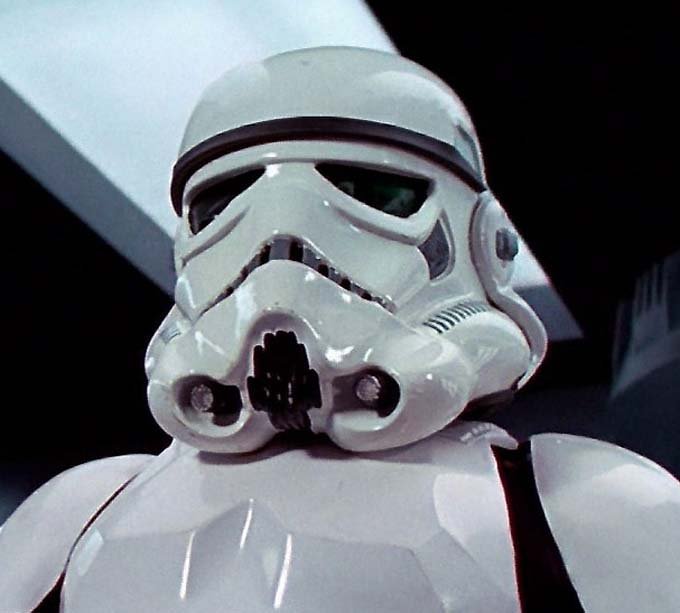
In the Imgur link I posted previously it gives you a way to do it in the mobile version, some just click, copy and paste. The angles aren't too bad but it's the width which are a little wide. You can also make the screws sit a bit lower by slowly rotating a bigger drill bit by hand to make a recess. This is the ideal angle: Note: Top ear screws should ideally be located directly below the rear of the trap. Also check your brow trim height: In looking at the images below, please notice that the ANH-Stunt brow generally sits higher above the eye openings, while the Hero brow typically tends to sit lower. ANH Stunt
-
Those stickers are acceptable for L3. I used a permanent marker to straighten some of lines, made life a lot easier. Take note of the length of some lines and spacing if you hand paint. If using humbrol paint you may need 2 or 3 coats, better thin as the paint can wrinkle when drying if it's applied too thick. The fall of the blue tube stripes is important, hence the photo reference, also make sure placing is a pencil width from the sides.
-
Try and use the "direct link", this thread may be of help Your thread is right in the place it's needed Helmet ears look a touch wide Dave M decals are the hand made look Some helmet info: ears Some references of screen helmets, many had gaps
-
G'day there - new TK recruit from down under
gmrhodes13 replied to Slouch's topic in New Member Introductions
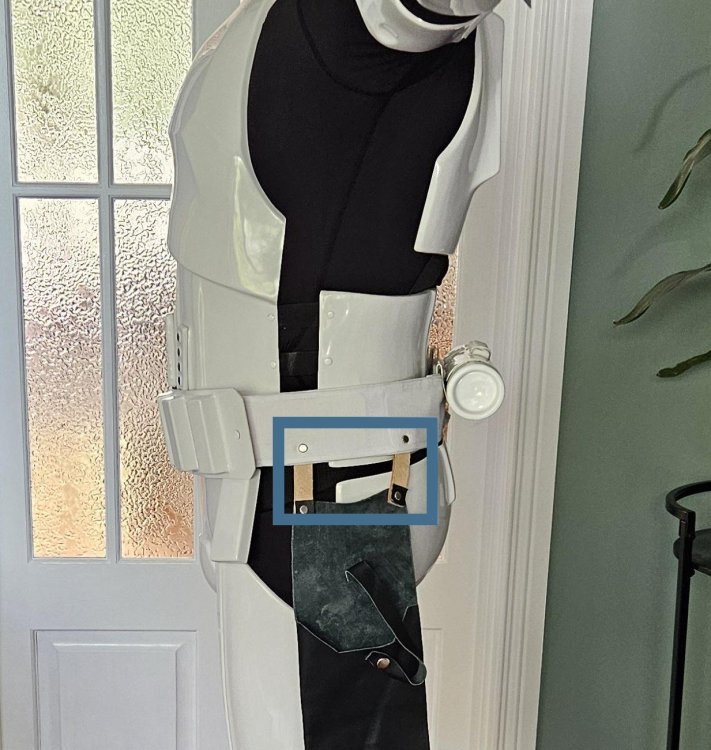
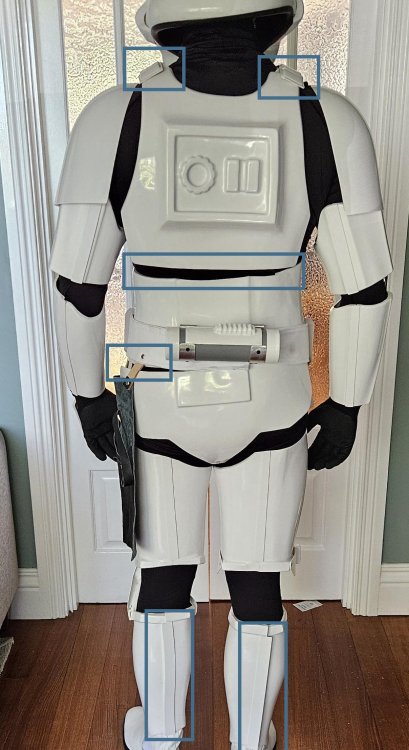
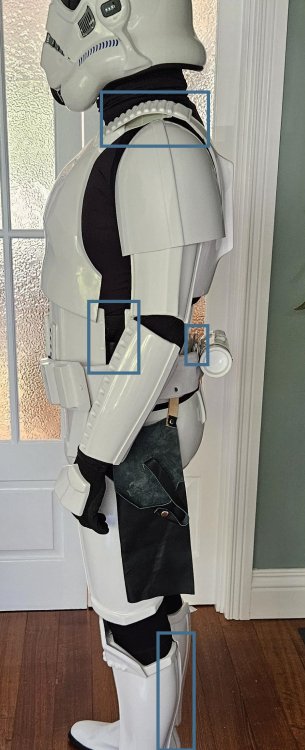
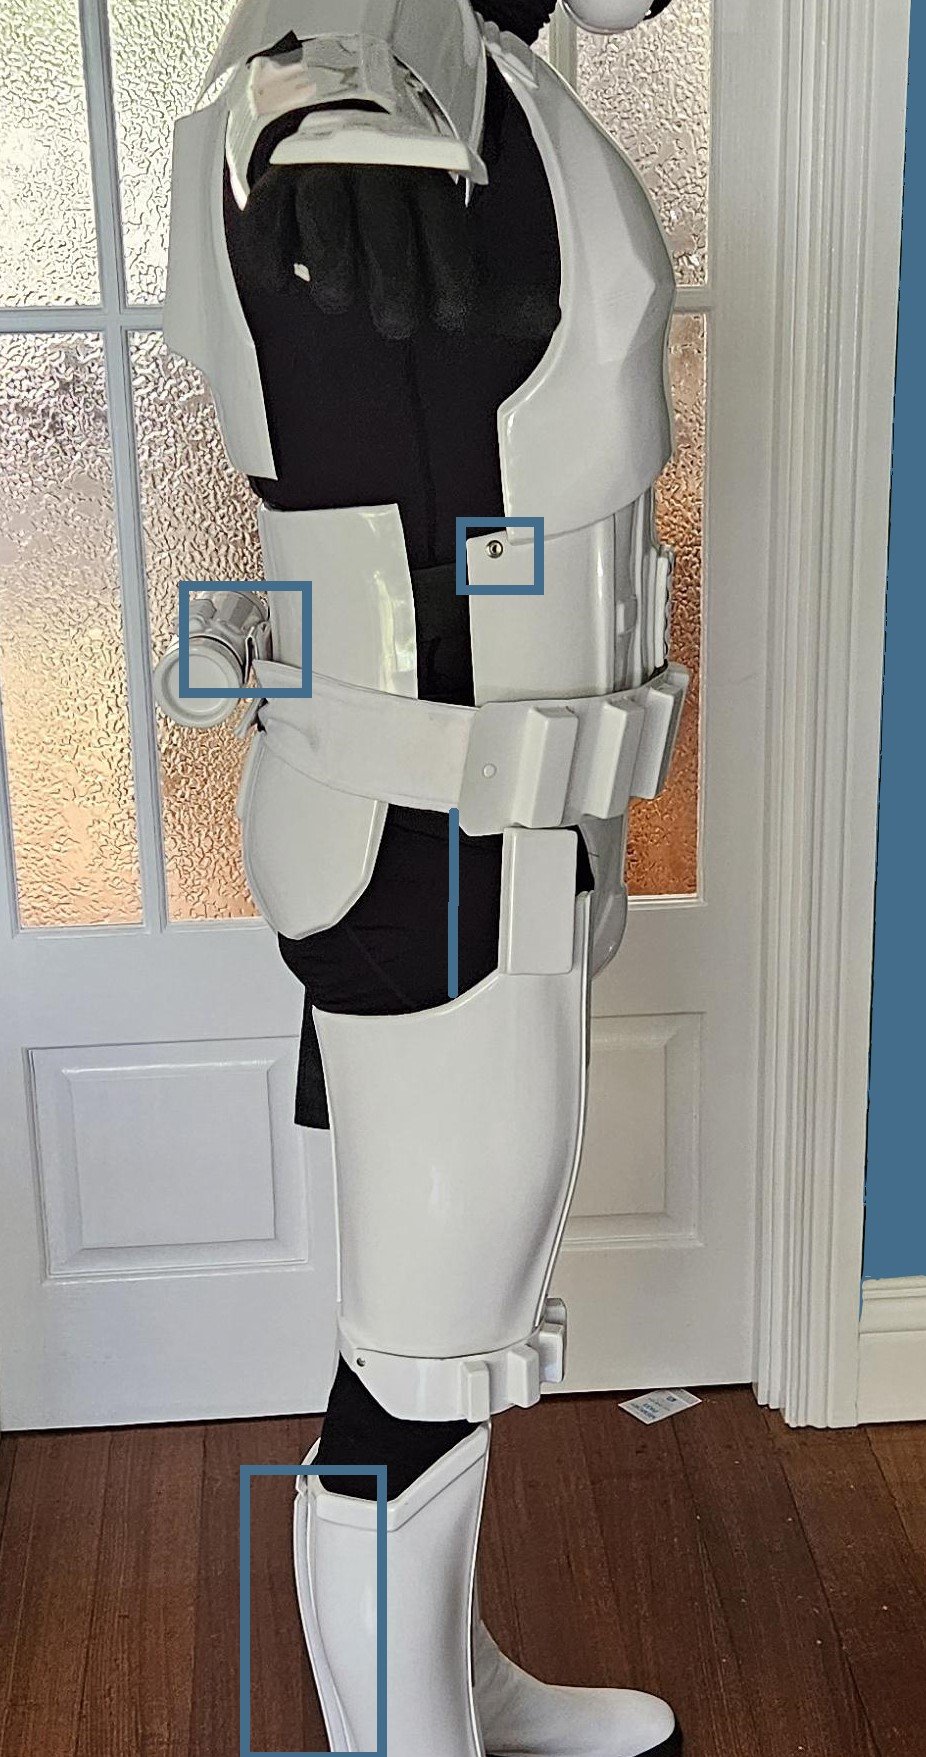
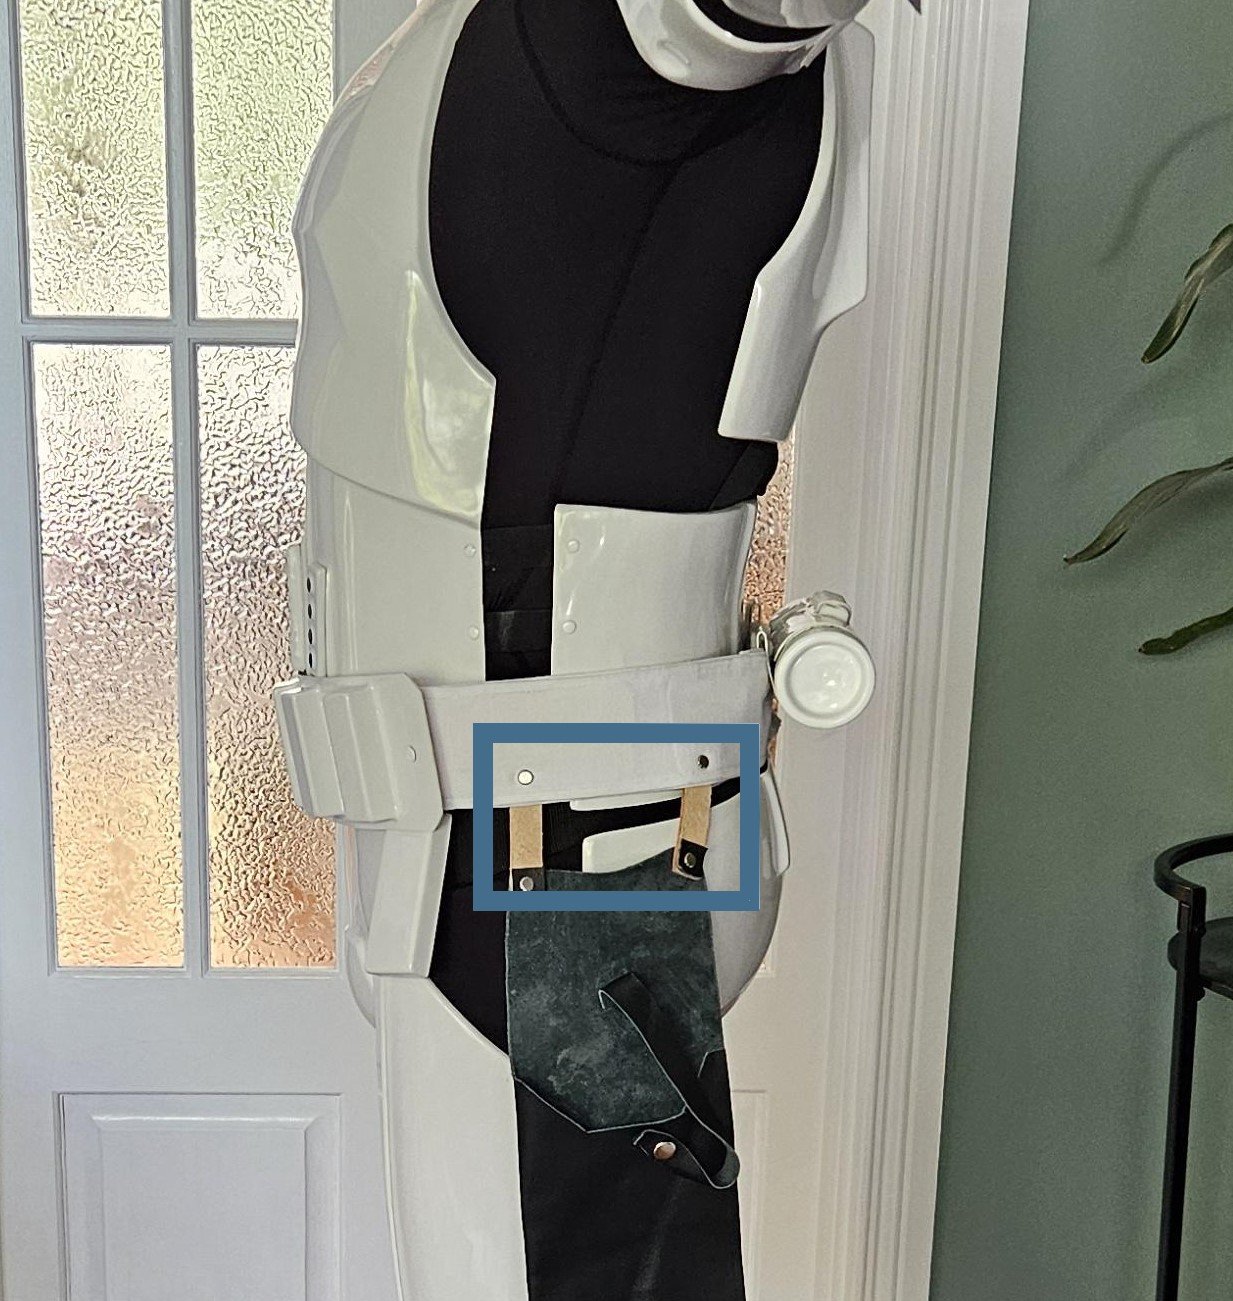
Also Drop boxes should align with the end of the plastic belt section. Han snap not quite in the right spot. Belt attachment points look wider than the holster straps, may just be the image though. Shoulder straps not central to backplate. Gap between backplate and kidney. Gap between kidney and posterior on left) White shoulder strap being pulled sideways, can happen, try doubling over the elastic so it holds a little tighter Most of these are just adjustments and some may be seen ok by GML so check with him/her/them/they Good luck with approval, hope to see you in the ranks soon
.thumb.jpg.1ee62051534708d9167363a8bd10c300.jpg)
-
G'day there - new TK recruit from down under
gmrhodes13 replied to Slouch's topic in New Member Introductions
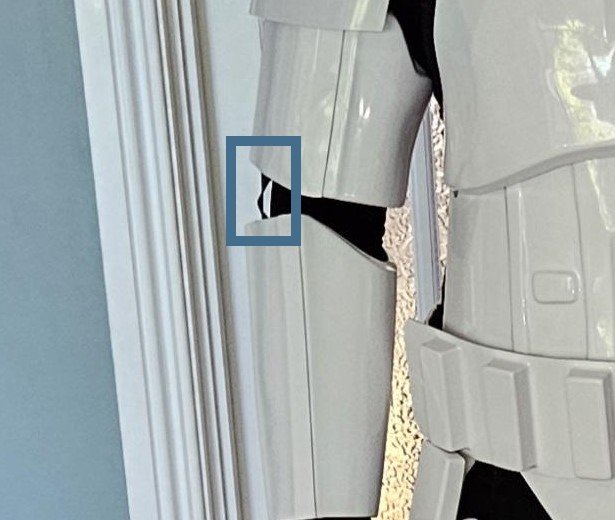
Hello and welcome to the forum from the West. First off your GML (garrison membership liaison) has final say on your costume. One thing that stands out is your bicep cover strips and raised ridges, generally we try to keep any front sizing as close to screen used, the raised ridges should be just outside the cover strips, yours have a big gap. Larger cover strips may be used on the rear to achieve a larger size if needed. Back of shins should close outside over the inside, this is so the don't appear open from the sides, yours are opposite. Cold also rotate your detonator so the O can be seen Left Right Small ab plate could be trimmed flat, should not have excess material on sides. Large ab plate is missing a base, it's been overtrimmed. You could also apply some heat to the belt (hot water bath) to help it conform to your armor better, your arms will catch the belt as they are. Elastic on your bicep to forearm appears on the sides (right arm) should be on the inner top Right arm You helmet sits a little high, could try reducing the padding. Detonator clips not completely down on belt. Shoulder elastic appears it may be a little loose, straps only just reaching the backplate. You may also want to add side shims to reduce the black seen between the abdomen and kidney (although this is for higher levels) OPTIONAL Level two certification (if applicable): Any gap between the abdomen and kidney armor is no more than 1/2" (12.5mm) wide. Any shims used to achieve this effect are of a similar material and color as the abdomen and kidney armor. Shims fit flush and seams are allowed..thumb.jpg.e41fc1b8fc87426b9f0455438f73c697.jpg)
-
New Member Costume Approval Info - Legion Elections 2024
gmrhodes13 replied to gmrhodes13's topic in Announcements
Legion costume database is now in lockdown for new member applications, January 29th to February 19th -
Ranger's BF2 Heavy Stormtrooper Build
gmrhodes13 replied to TheLoneRanger's topic in Hard Armor (General Discussion)
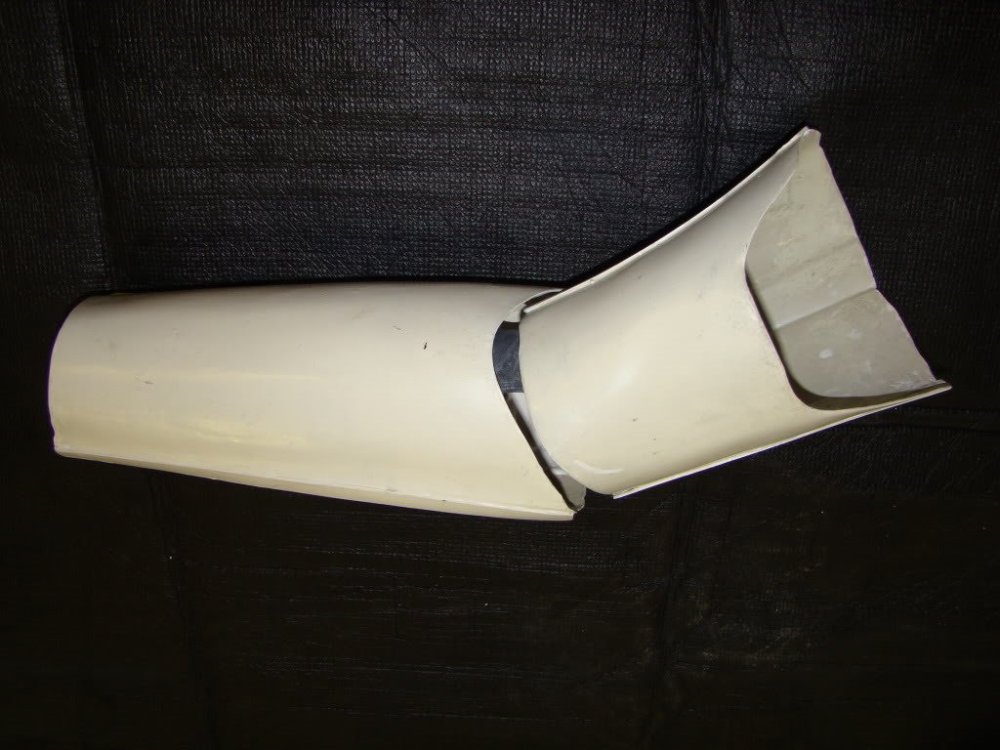
Yes just like this one A lot of game version CRL's are also missing some information and correct images and some are not consistent with other game CRL's, when researching I'd highly recommend comparing with the other CRL's. I think you will find quite a few items which will no doubt be different from a base ANH, I'd probably head straight for a BF2 build from the start, but entirely up to you if you want to do the conversions. The thigh ammo strip is also mounted higher like other game CRL's, unlike the other CRL's it still has a rivet in each corner which other game versions do not. If you study the image above you may also note the overlap construction (which is ROTJ style), not butt joined and coverstrip. Belt ends are a little bit longer and the rivet is set more towards the ends of the belt. Also drop boxes are centered to the last belt box NOT to the ends of the belt TKC Also note the rounded look to the posterior and fused kindey/posterior same as other game versions. This costume had been discussed previously and you can find some more reference here if you haven't already seen them -
Troopacoola's Steel and resin ROTJ E-11
gmrhodes13 replied to Troopacoola's topic in ROTJ BlasTech E11


.jpg.405ea26173f30e39016517f6a33d5a99.jpg)
.jpg.1d977a66f92ef4c0660023c5141fe61e.jpg)

