riveting
-
Posts
826 -
Joined
-
Last visited
Content Type
Profiles
Forums
Gallery
Articles
Everything posted by riveting
-
here you go Bill http://www.starwarshelmets.com/ happy to help
-
the lowfi version of the forum is great with the PSP on the move
-
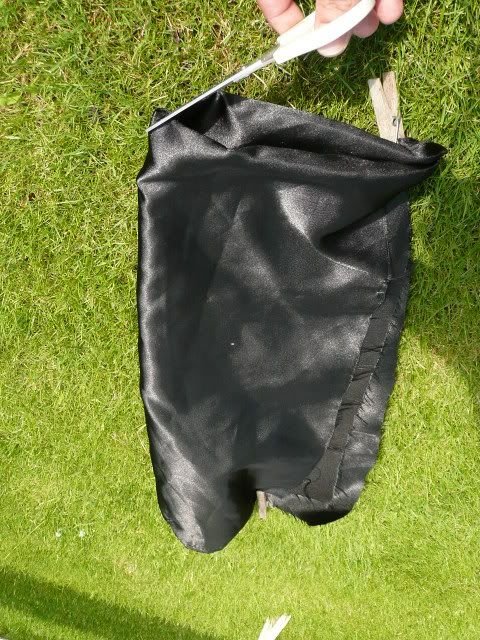
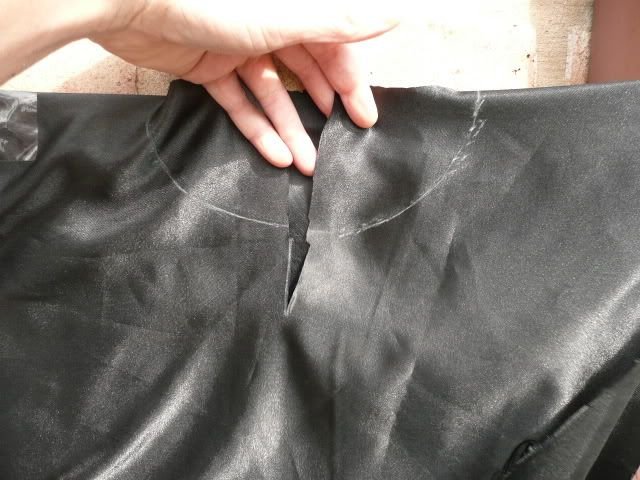
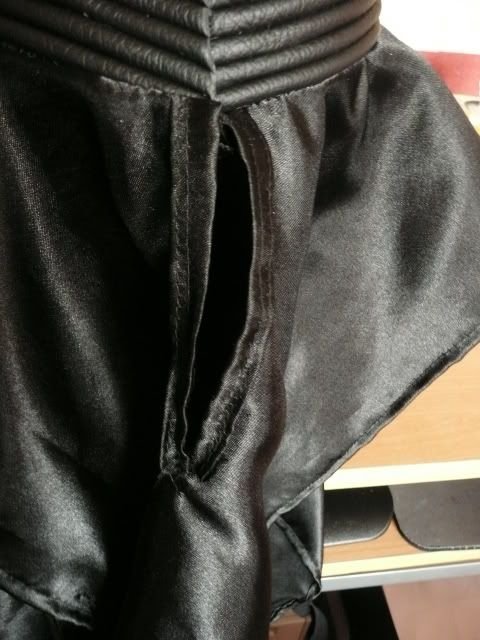
Due to poor weather conditions there was a brief pause in transmission over the weekend but we resume... I also made a fatal error by moving on the process without taking pic's, so I've cut a new bib again with what should come nxt. Fold the bib length ways & once again width ways, make a small nick in the centre corner. Measure the bottom length of your premade collar from tip to tip not including the velcro, basically where the two side will meet at the back. With this measurement Take a compass & draw a circle in diameter equal to the width of the base collar. Make four cut's running from the centre of the bib running out toward but short of the drawn circle. Descide wich side will be the back of the bib & cut a couple of inch down. Before attaching the bib & collar together you might want to sew a fold seam on the back of the bib, this will prevent fraying from your head poking in & out of it
-
Many thanks Guy's I hope the threads of use to someone & if you do make your own, don't forget to post a thread inc pic's & if you make an improved version then pls share BTW this Tutorial was'nt actually finished yet But seeing as ppl want it to be over I'l edit my last previous post & stick the last pic's in there, over the nxt day or two. ps I'd luv a cuppa right now more T
-
Depending on the Climate your living in I would agree with the Guy's, that padding may get a Trooper tad warm. This may be minimalistic but I find it work's well for me. A chin strap is compulsory though, to prevent the dreaded dashboard bobble
-
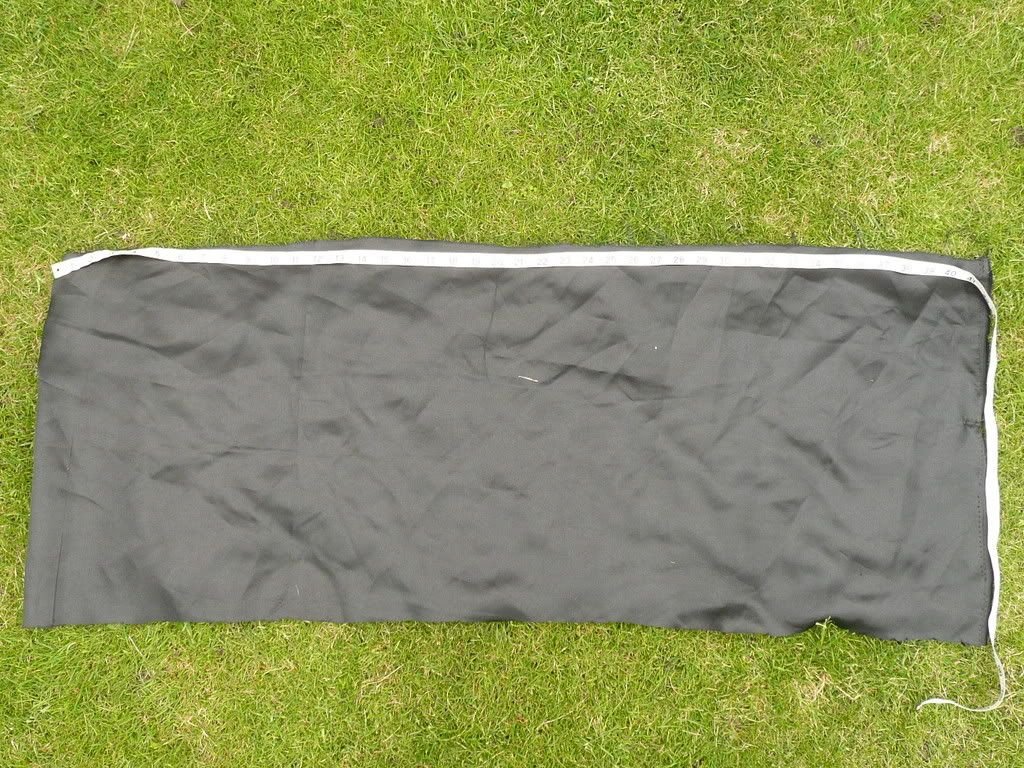
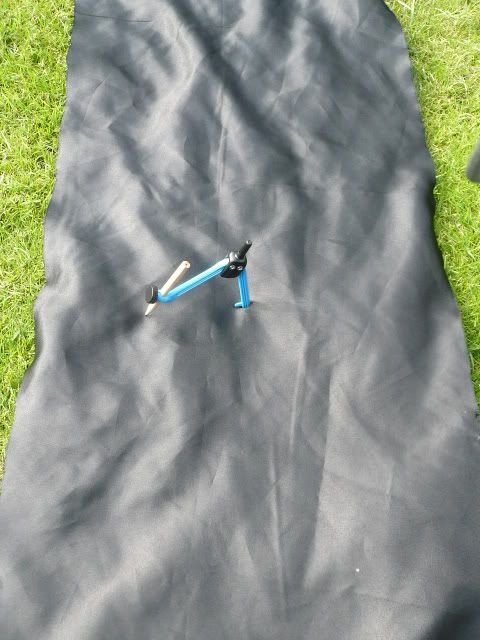
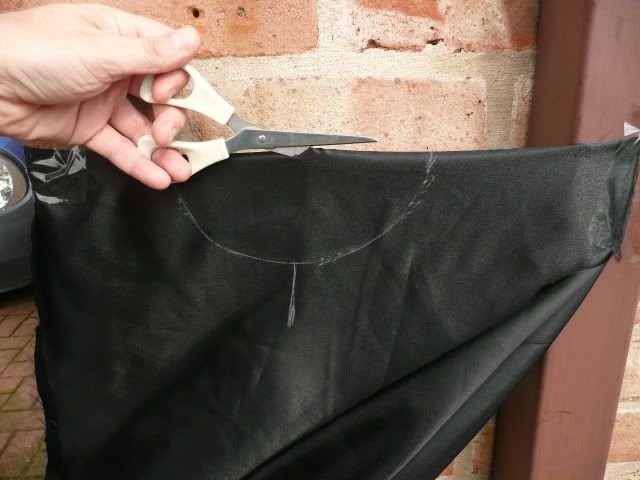
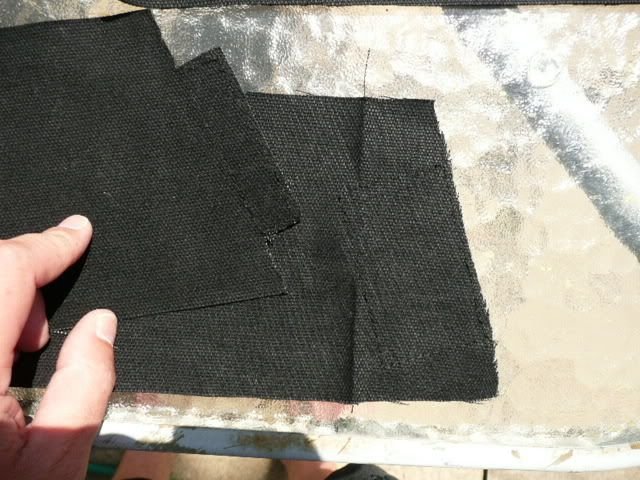
So today we need to put the collar down & step away from the glue. because the bib, apron, pinny (thanks Billy) <_< needs making. Cut a rectangle from whatever material you like matt or shiny 41" by 16" you will also need four length's of the tie's material, black ribbon or tape each 1" wide by about 20" long will do. now to make an enduring bib you'l need to Sew a hem on all four side's of the bib. This can be done by hand of course but will take a couple of hour's longer. The use of safety helmet is advisable but by no means necessary. While your at the hem you might use this as an opportunity to attach the four tie's, a few inch up from the bottom works for me


-
There's pic's in Luis thread, hope he don't mind me posting it ----------- from the looks of it you can use the S type Trim, if you have a sharp Knife hope this Help's reading through the fourms does pay dividends
-
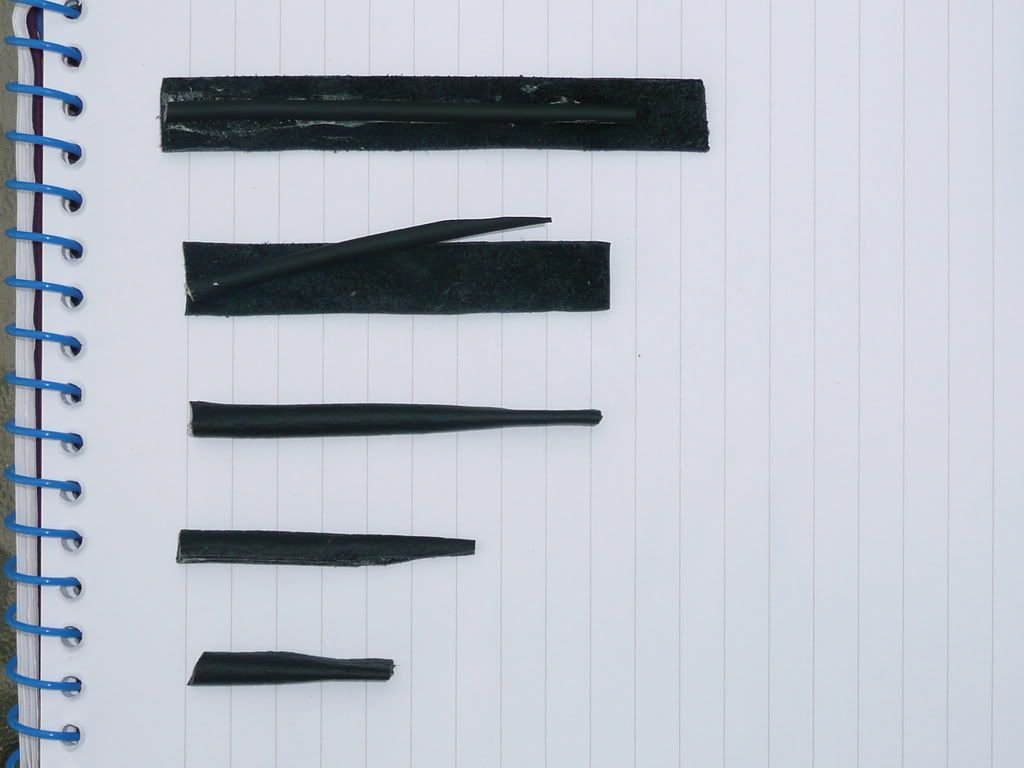
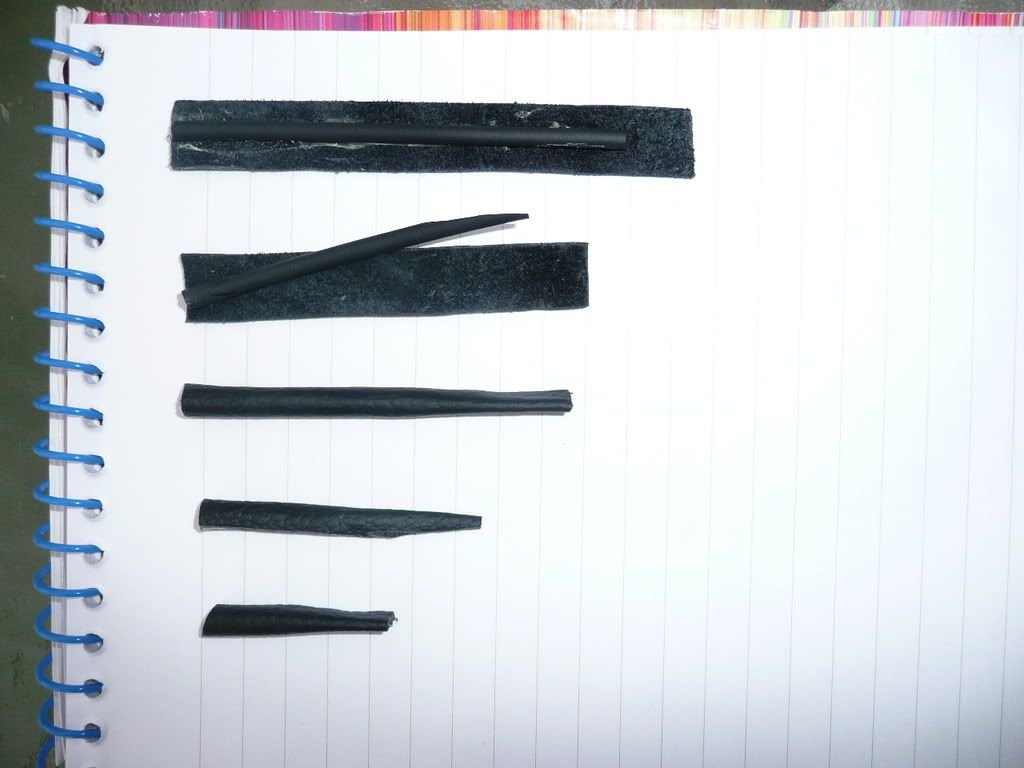
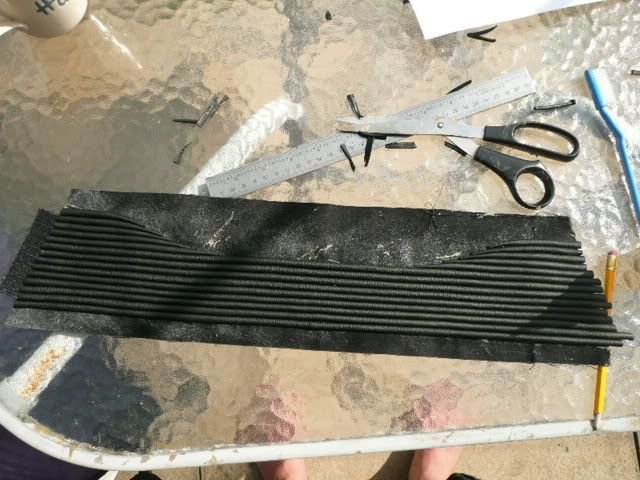
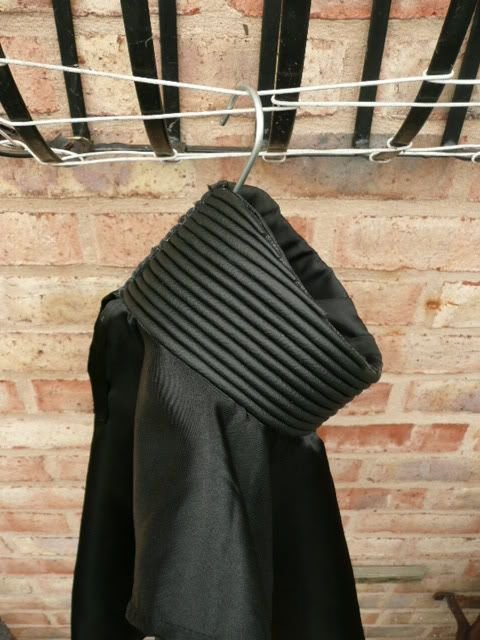
OK, time to cut the little rib's here's a step by step approach of each stage of the rib assembly. Starting Top Down After screaming more light Aziz for long enough this morning, I got a fraction more. So: 1 cut the neoprene about 10mm shy short of the length of leather. 2 cut the neoprene into a V point on one end 3 glue as the rib's mentioned before & turn over (it should resemble a spear) 4 Cut into the leather at the same end of the rib thats pointed, taper the cut on the underside 5 trim the butt end of the rib on an angle at the same pitch as the base canvas (this applies only to the rib's that will be on the left side of the neckseal) Easy bit: glue the rib's to the canvas using the contact adhesive & applicator. my appologies for anyone on dial up, when the threads finished I'l edit the entire thing depending on the questions I recieve (if any) & I'll kill some pic's in the process too.


-
Just a quick note for folk's with the MRCE lid wanting necktrim, if you get the S shaped trim from seals direct you will still, somehow have to negotiate the acute curves around the vocoder area! There is a thread aound here somewhere of the very same issue, Appologies but I can't find it at the mo
-
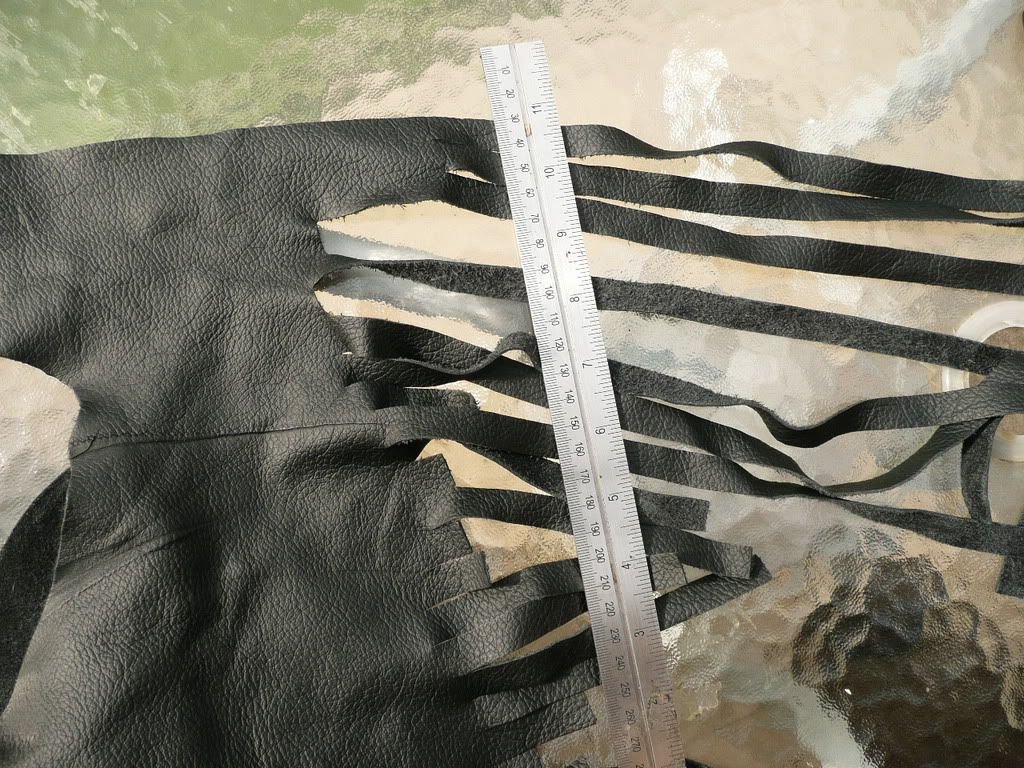
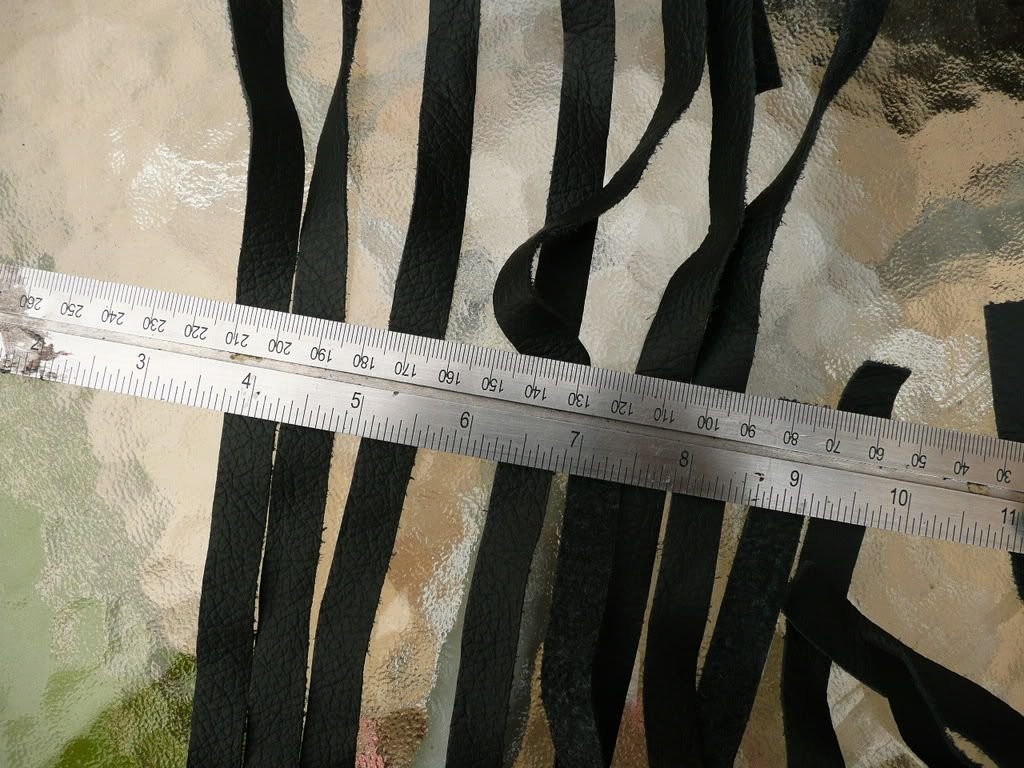
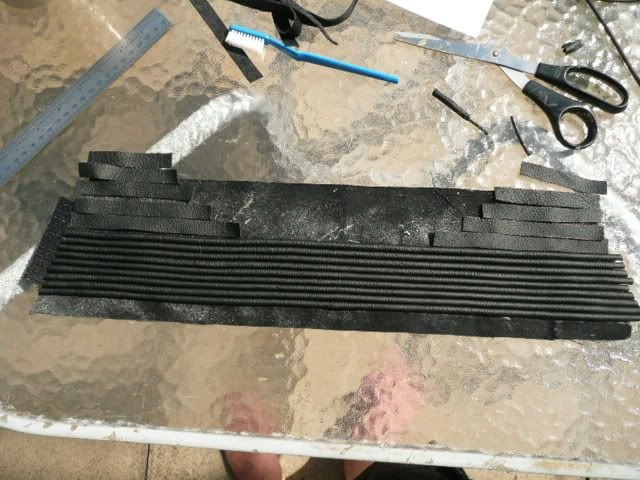
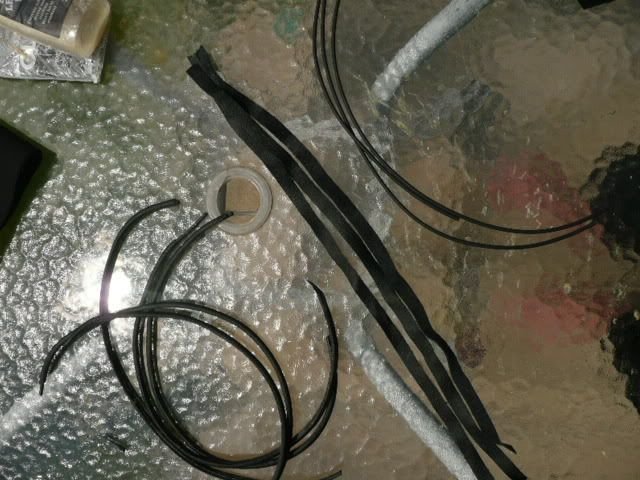
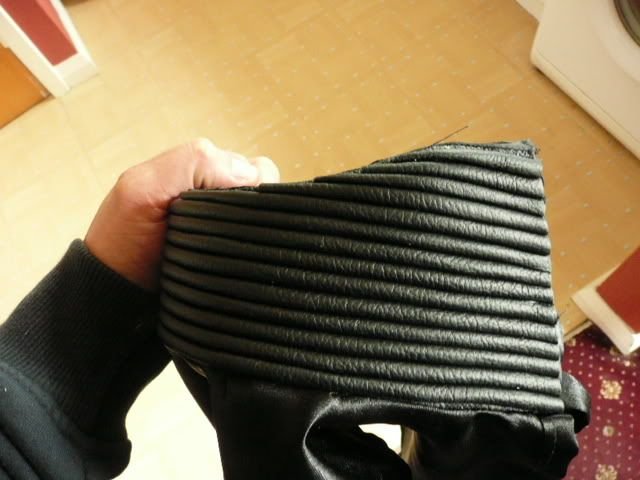
Now check for length, in comparison with the base canvas. Cut the right hand side of the rib down if needed, then when happy repeat the taper on the right side underside, the profile gets trimmed ltr. test fit When satisfied, glue the rib onto the canvas with the contact adhesive. Repeat this process about nine time's or how many time's it is untill your happy with the overall look of the base rib's. as show above cut more lengths of ever smaller lengths of leather strip's, your own judgement is invaluable here to get a nice esthetic.
-
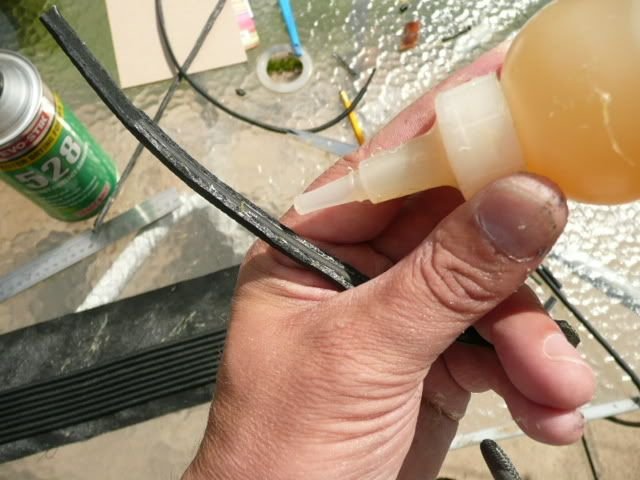
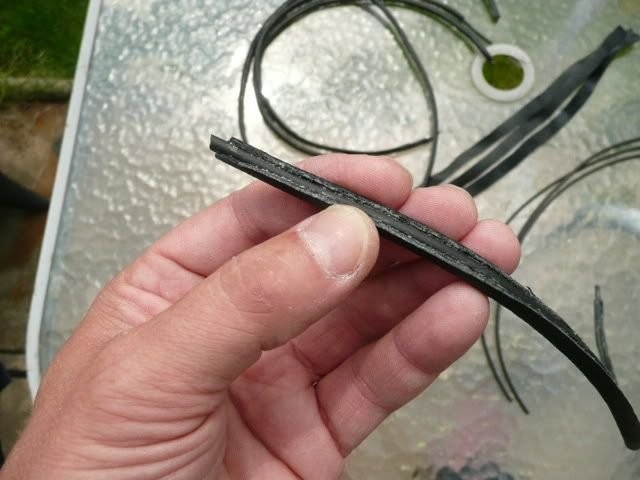
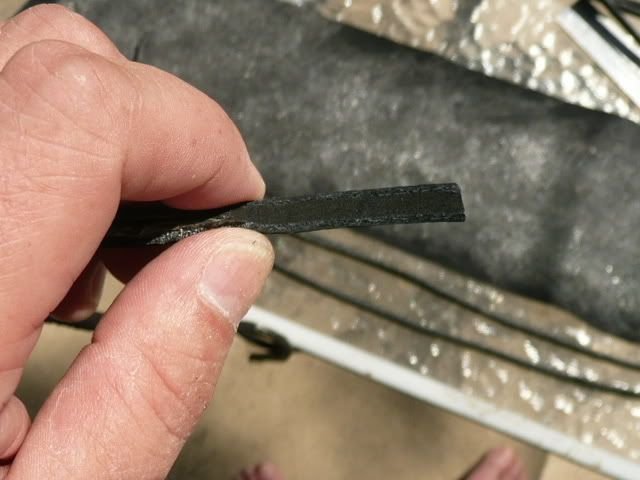
Ok so run a bead of glue down the leather strip & a bead of glue also down the neoprene cord, wait a few moments & marry the two together. squeeze the two item's together to expel any excess glue, with a little practice with the applicator there won't be any. after these two have dried, you should end up with something resembling this. A rib! Now trim one end, I tend to trim the left side first. Taper the edge in profile with the base canvas, & taper the underside of the rib in by about 20-30mm.
-
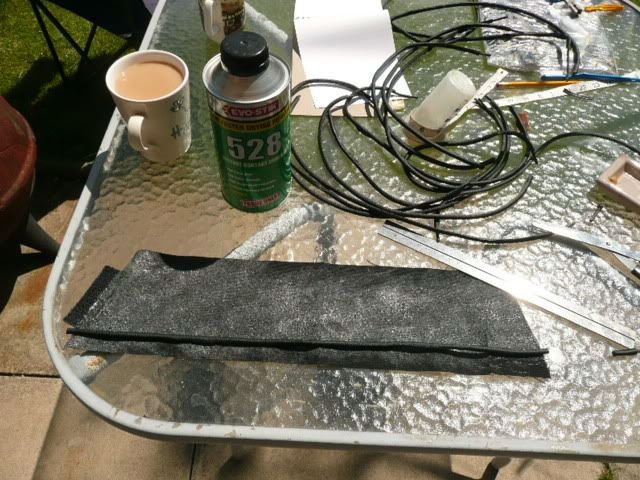
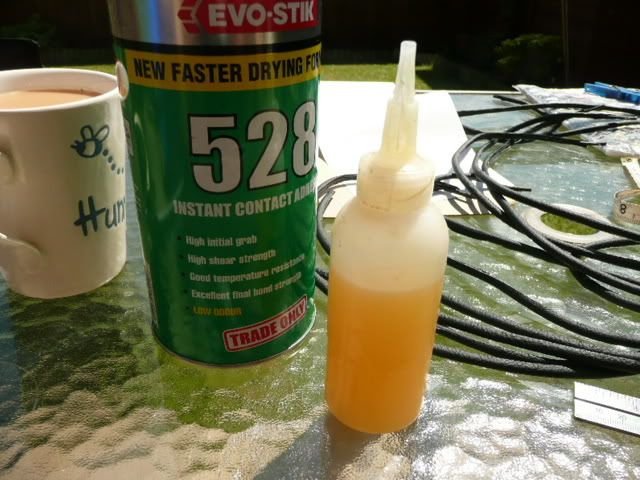
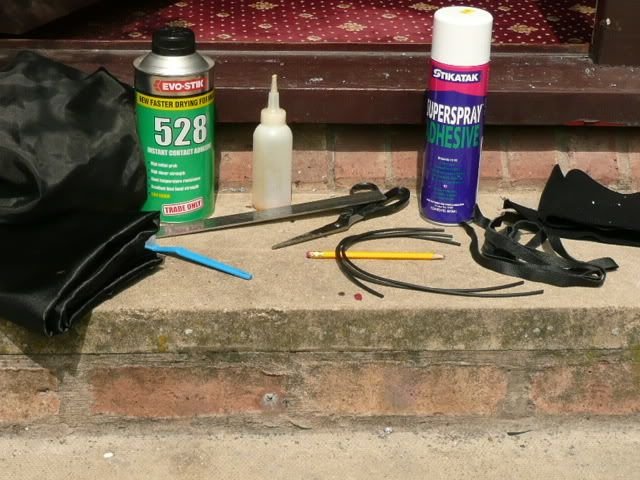
Now come's the fun bit, To reduce how needlessly sticky thing's get a small investment in one of these is essential, plus the amount of glue that's saved from spillage & wastage is unreal. I think it's a hair product thingymajig, I was given it as the family was complaining about the amount of glue I was going through & the amount of money I was spending it cut's down on fumes too <_<
-
OK now we can leave the base fot a short while & start cutting the leather. just cut the leather into quarter inch wide strip's, I tend to cut them long initially as it's easier to reduce the length ltr when needed, So about 26" long to be safe. & now it's time to cut the neoprene cord, again same length as before. Sorry for the varying degree's in quality of pic's but everything's black & not that easy to photo


-
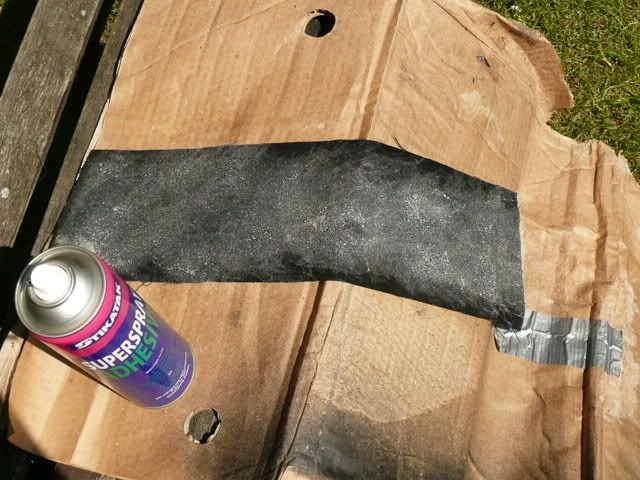
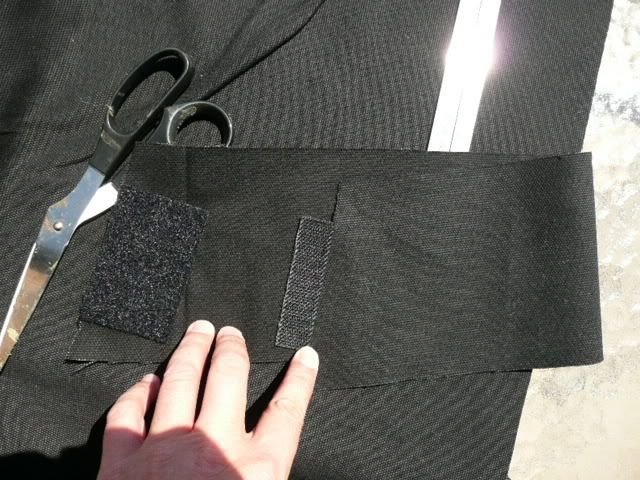
if you used non self adhesive velcro? now would be a good time to run a stich over them. once those are held in place get the carpet (spray) glue & adhere a nice even, liberal layer of glue onto the rough side of the canvas. this should the same side as the hook Velcro is facing out from & the opposite side that the furry Velcro is on. the reason for using this type of glue at this stage is that it sits on the material & doesn't get absorbed by it thus leaving the neck seal quite flexible for ltr on.
-
I'm not surprised your Happy, with wheels like that you damn well should be
-
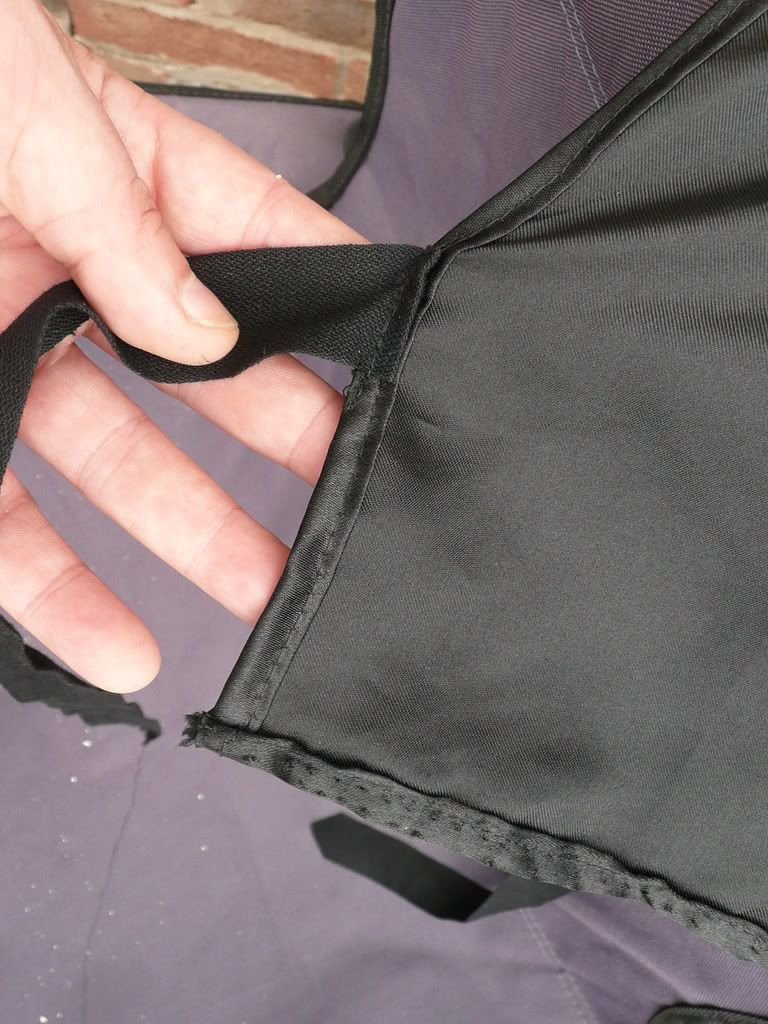
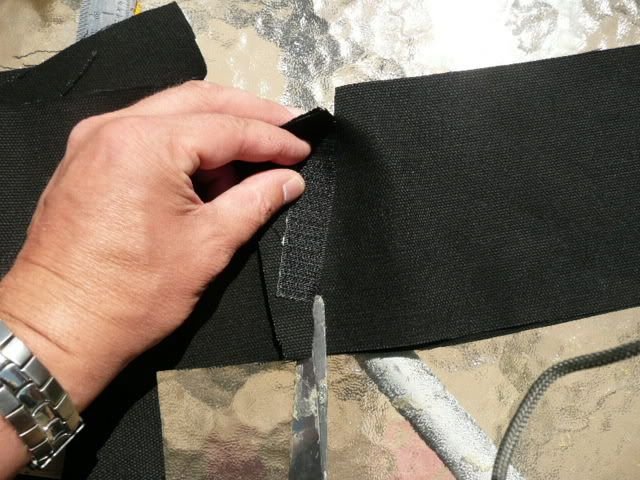
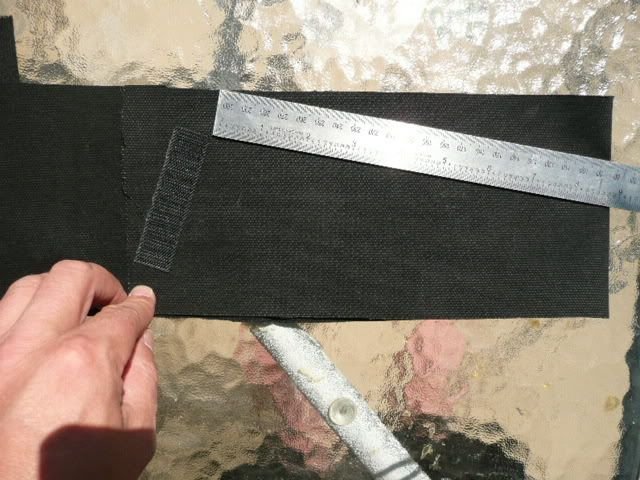
Next with the scissors make a short nick into where the pencil line is line is on the folded canvas. make sure the cut goes through the top & bottom parts of the folded canvas now open the canvas & where the freshly cut nick's are on the bottom edge, with pencil & ruler mark out a straight line & cut tidy up (trim the edge's of the one inch velcro- canvas bit) now pop the 2 inch furry velcro into the inside edge of the canvas ( if you use self adhesive velcro) it may make it a tad easier at this stage.
-
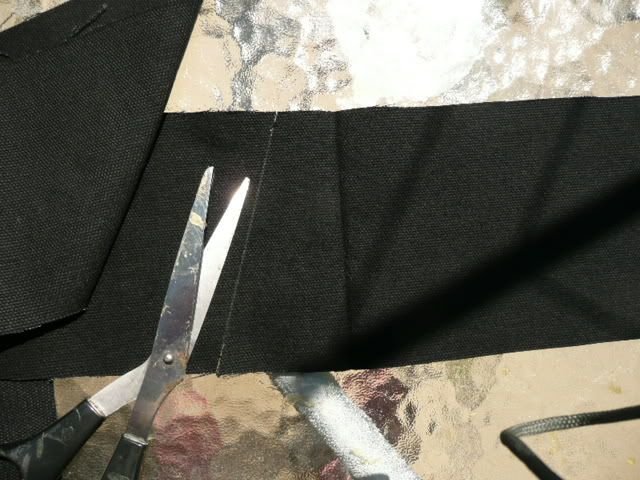
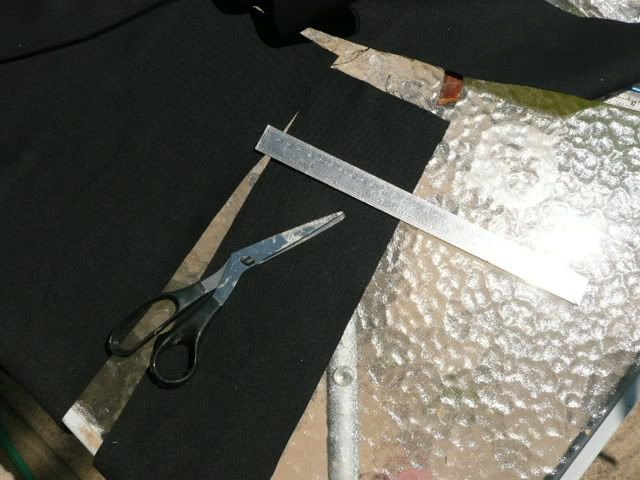
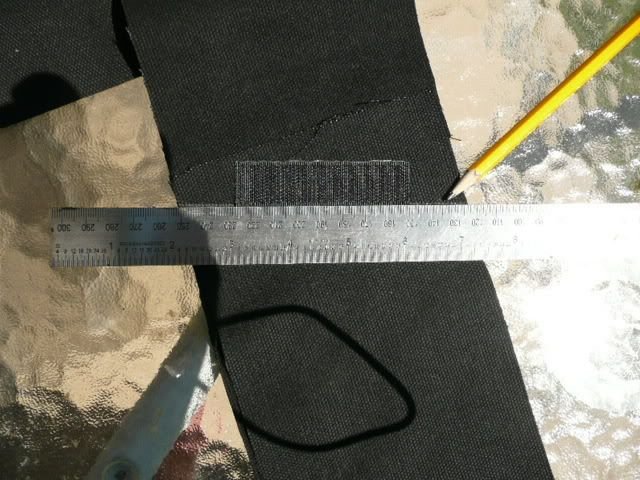
OK roughly cut the canvas type material into a rectangle 5 & half inch wide by 20+? inch long. Fold the canvas in half by it's length (rough side facing out) & pop the hook type, 1 inch velcro down (on an angle) one end. Ok there is lot's of info in these few pic's So I'l do what I can to explain without killing the thread with too many pic's. The half measurement is dependant on your own collar size!!!. As seen I take my collar measurement on an angle from the top, where the velcro is pitching down toward the centre of the neckseal. the neckseal in the pic is for a 17-17 half'ish collar. Take the pencil & with the ruler in hand, mark out a straight edge, in line with the velcro
-
You will need. Black Leather (Soft Leather) no more than 1mm thick ideally Strong contact adhesive & a well ventilated area Strong spray on adhesive (carpet glue) Black canvas type material Black cotton black Suit liner type material (anything slinky) Black Matt material & or silk. Black neoprene cord Black 2" Velcro 7 (furry side) black 1" velcro (Hook Side) Ruler, scissors, pencil, needle, Old Tooth brush, Contact glue applicator I'l edit this post with all the individual dimensions as soon as I've measured them all up
-
Well A couple of folk's asked me to pop this up a while ago & now I have a little time here it is. My, how to: make one of these I was hopeing to knock this out all in one day & post it all up, in one fell swoop but sadly the UK Summer is as reliable as ever So to help me keep track of it, I will post a few pic's every couple of day's with an update. I would greatly appreciate any questions in either a pm or at the end of the thread if thats OK just to keep the topic nice & tight.
-

Rubies Armor - first look
riveting replied to journeymanprotector's topic in Hard Armor (General Discussion)
Wow thats a shiny lid, even the rubber trim's shiny I think they nailed, the getting squashed in the trash compactor look, down to perfection though -
Fell upon this Today while mooching around. Mark Interviews 1970+ "When we were wearing the stormtrooper uniforms, you couldn't sit down," Mark recalls. "They put us in piece-by-piece. They built saw horses to sit on. That's the most we could rest all day. It was terrible. Plus you get panicky inside those helmets because it's not like a mask which is fitted against your face. You can see inside the helmet and it's all sickly green. Plus you've got wax in your ears because of the explosions. You feel eerie because with the helmet on you feel that you're in your own little world because nobody's talking to you. I freaked out only once and said, 'Get me outa here!' It was really uncomfortable." Or is he just refering to the colour of the HDPE? Here's the link --------------------- Problem solved! or does the quest for truth continue???? Whilst OT what is the best material to make bubble lenses out off?
-
So after nocking up a couple more holsters today I underwent some intensive testing with them <_< Here's the holster Based on TM's original pattern, with the strap's twisted in on them selves. front & centre side view & here's one with the straps just bunched together front & centre The leather is about three mil thick & is a half split hide, very very supple but strong as girders thanks for all the help guy's, I can put this to bed now, it's appears to be down to the suppleness of the leather used, go figure!! Here's another thread I started a while back that may benifit from some similar input? I edited the first post (highlighted in blue of why I started the thread) don't want to bupm it in case I've bored folk's to tears it would be awesome if this matter was resolved too, if thats cool? --------
-
Thanks Guy's on this new evidance I will cogitate. thats (mock up another new ANH holster tomorrow & test these different theories, then post my finding's) should've done that in the first place perhaps No prob's Pete, I've got absolutly heaps of leather lying around, to ruin on my little projects
-
Those are some great looking outfit's, very
-
newly discovered screen-used helmet!
riveting replied to TK1491's topic in Hard Armor (General Discussion)
I got really excited from the title but it did'nt last long