

NastyNoah
-
Posts
324 -
Joined
-
Last visited
Content Type
Profiles
Forums
Gallery
Articles
Everything posted by NastyNoah
-
On the thighs I have a piece of elastic on each one going to my cod piece. My belt I just have some velcro in the front, I will put some velcro in the back or add a snap once I finish my TD. Here are a few pictures from our Easter egg hunt. It was too hot for the neck seal plus no one there would notice I was not wearing it.
-

Should I trim my butt plate?
NastyNoah replied to NastyNoah's topic in Hard Armor (General Discussion)
If it doesn't overlap the butt hangs to far down and my thighs hit it when I walk. -
Should I trim my butt plate?
NastyNoah replied to NastyNoah's topic in Hard Armor (General Discussion)
Strapping is elastic, I will try both raising my kidney and lengthening the straps first. -
After pouring over numerous Centurion acceptance photos over the last hour I noticed that most but not all of them had butT plates that butted up to the kidney. While my butt plate slips under my kidney plate about a half inch. Is this something I should try to trim and then create a return edge on or is it OK the way I have it now? This photo is showing how the kidney plate overlaps the butt I reversed it here just to show the amount I am thinking might need to be trimmed. This is what it looks like when wearing it. If I do trim should I trim it to where it butts up to the kidney or slips under it just a bit?
-
That is some awesome armor and I bet it is much more comfortable than a TK.
-
Let's play "What's Wrong with TK-6818"
NastyNoah replied to LadyInWhite's topic in Build Threads Requireing Maintenance
Something about the left thigh does look strange. Could you add some more pictures? -
I knew my belt was sagging. I think I am going to add a snap in the back to prevent this in the future. How do I keep the thighs from rotating? Should I trim them up a bit to decrease the circumference? I think they are tad to large as is right now.
-
Thanks Bud !!!! i wouldn't recommend posing with a prized or vintage guitar, I noticed afterwards that my 45 degree belt corners had dug into the back of my axe. I'm just glad it wasn't my Les Paul.
-
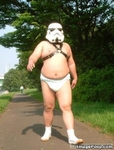
I did my first full test fit tonight and had my wife take some photos with my old 2 megapixel camera to find out she is a horrible photographer. Out of about 25 pictures these are the best and as you can see below they are not very good. Any ways tell me what you think and please be brutal. I wont to keep working on this project and have a fine suit of armor that will astonish people and make me proud. So please let me know what needs to be changed, fixed, etc... I can take it. See what I mean by the bad picture quality. I will have to get someone else to take some pictures of me Saturday, maybe with a higher resolution camera too. If you see anything that needs work pleas, please, please point it out !!!!!!
-
I can not get the left side of my back piece to set correctly. Is it acceptable to add a strap from the chest to the back to keep it down? For some strange reason the right always fits perfect. I think this piece is just a bit asymmetrical.
-
Thanks Jim, I couldn't have done it with out every one here.
-
I bought the Starter brand from Wal-mart for about the same price and it is kind of itchy and everything seems to snag on it. Not sure how long it will last once I start Trooping. I will definitely consider this for my next undersuit. Thanks for the review
-
So I haven't updated this in a few days, but here is a list of things I have finished. Painted the ab buttons Added the ab buttons Glued the ribbed shoulder straps to the chest piece Drilled out the rivet and installed the 3rd screw in my RT helmet Put the drop boxes on the belt Painted the rivets and now I am making adjustments to the elastic. I should have everything but the TD finished in time for Easter. If you don't have to add the third screw I wouldn't. I ended up melting a hole through my helmet and pulling the rivet through. I fixed this by using a slightly larger screw and a washer. I went with Testors for the buttons since it is easier to acquire and only $1.50 a bottle. Detailed pics of the belt and accessories. I slapped a piece of hook sided Velcro to the front of my ab plate to keep the belt in place. WARNING !!!!!! If I had this to do over again I would use the loop side of the Velcro because when getting dressed you reach across your armor and it never fails I get my under suit snagged on the Velcro. When I re-do this I will probably go with snaps. Its a bit hard to see in this picture but I applied the loop side directly to the belt after peeling off the backing and exposing the adhesive. I reinforced this bond with some E-6000. I looped 1" white elastic over the belt then riveted it to the drop boxes. You can attach them many other ways but I wanted to get some use out of the rivet gun I bought. Sorry about the picture quality here, just showing how my ESB holster loops over the belt.
-
I was nervous about trimming parts too, but after I did a few pieces it was no problem.
-
100 Stormtroopers needed to do a BIG LFL event!
NastyNoah replied to RogueTrooper's topic in Off Topic
I just signed up too. Thanks ! -
Mopar McNeer's ANH Hero Build Log [*RT]
NastyNoah replied to Mopar McNeer's topic in Build Threads Requireing Maintenance
GRAND TOTAL TO DATE: $1289.14 previous + $327.91 = $1617.05 I am so glad I didn't keep track of my spending. -
After seeing what you did with the Hasbro blaster and your funnybikeshow video we all know you are crazy. I say go with the Rubies !!!!!
-
Oh Snap... I ran out them again. My build process is slowing to a crawl it seems. Tonight I planned on doing so much while my wife and son are gone but wouldn't you know it I am out of snaps again. I plan on hitting the local Tandy Leather in the morning and hopefully I can keep this build moving. Things that I know I still need to do. Put support straps in thighs Make, or buy some TD clips Strap chest and back Install buttons on abdomen Repaint the split rivets and do more research. If any one notices something I left off please point it out. Now for pictures of tonight's progress Installing suspenders. I used an old pair we had lying around, cut off the clips and installed female snaps. Cheap, quick, and easy just the way I like most everything. Here is a picture of the snap I put in the shoulder bells to prove I still made some progress tonight. I have updated this post to show more clearly how I am strapping the other pieces. This is how I did the chest and back connections using EIB approved white 1" elastic They float in back but I have a bit of velcro to secure them once fitted. Only do this if you are going for ESB or ROTJ Glued in the front Elastic strap that I run across my back to connect the shoulder bells the strapping of the bells to the biceps You can see how the strap runs across my back if you look very closely. I should have wore a white shirt to show this a bit better.
-
I can't wait to meet up with you guys !
-
I got them off of eBay. Here is a link http://www.ebay.com/itm/130498261658
-
It's all in the details... Finally felt confident enough to start adding little details to the suit tonight. Accurate split rivets on the left side of the ab and kidney Right side male snap on the upper left corner of the ab plate. Functional male snap in the crotch. And the split rivet in the crotch. How gansta is that ?!?!?! Tomorrow I am going to install a suspender system and attach the thighs then I am moving up the body to the chest and back.
-
Well Troopers not much progress was made tonight. I rushed on my plastic snap plates and didn't notice that on more than half of them the rivet head did not mushroom out enough. Tonight when I was doing my first test fit the buttons began to pop. I now know I need to put a washer inside of the snap or flatten the rivet head out a bit more with my snap setting tool. You win some you lose some... Oh well at least I learned a valuable lesson that I won't repeat. I have since put some of the webbing snaps in place and I am letting them cure. I think I can still do a test fit this weekend and that will give me a whole week to tweak everything before Easter. I did go ahead and add the two male snaps to the crotch of the butt plate. Thanks everyone for the kind words and support !
-
Thanks Jens, the thigh ammo and the sniper plate were difficult to get attached but I am grateful I took the extra time to do it and do it right.
-
Trooping at conventions/hot places
NastyNoah replied to bigironvault's topic in Hard Armor (General Discussion)
Wal-Mart carries the Starter brand which is very similar just half the price of UA. -
Tuesday night update ! Took the clamps off of my thigh ammo belt and everything is looking good. Was able to add the split rivets and I am very happy with the way it looks. I would like to think everyone that commented and helped me out with this. Made a ton of plastic snap plates tonight. First i drilled a hole all the way through each plate just large enough for a 1/8" rivet to go through. I then used a 1/4" bit to to make a counter sunk recess for the head of the rivet to sit in. I was able to rivet the male fasteners to the snap plate and it went a lot faster using the rivet gun over the snap setter tool. Using this method I can get more of the snap plate connecting with the glue and the armor pieces. I should have taken some more pictures of this but I think everyone will understand. I added the two male snaps to the but plate bu have not permanently fixed them to it yet. Let me know if this is correct before I make anything permanent. The rest of my night was spent attaching snap plates to the armor. Maybe I will be able to do a test fit by Friday.