

SolderMaster
-
Posts
686 -
Joined
-
Last visited
-
Days Won
1
Content Type
Profiles
Forums
Gallery
Articles
Everything posted by SolderMaster
-
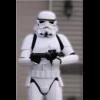
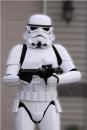
SolderMaster's RT-MOD Build[*RT]
SolderMaster replied to SolderMaster's topic in Build Threads Requireing Maintenance
Just got back from visiting grandparents in Inverness, Florida... Back to finishing that armor! -
SolderMaster's RT-MOD Build[*RT]
SolderMaster replied to SolderMaster's topic in Build Threads Requireing Maintenance
From Eric: I found that poking an awl through and then slowly drilling the other side made the cleanest holes, but maybe you have a better way? I used a soldering iron to poke the hole in my ABS tabs then a drill to drill them to size. Worked well for me. I was going to use a garter but I have added snaps to my cod and thighs. I just need to make the straps to fit. I'm a little worried about the thighs being too heavy for the snaps. I'll have to experiment a little and see what works best for me. Thanks for that template for the chin. I will look at that when I'm ready to paint. And painting the ab buttons is next on my list to do. Thanks for your advice and thoughts guys!!!! -
Thanks Paul and everyone! Painting will commence in 3.....2....1..... Oh, please check out my build thread for updated pics...I need some constructive critisizm. -----
-
Question about helmet opening
SolderMaster replied to lunarlord's topic in Hard Armor (General Discussion)
I also have to turn the lid sideways to get it on and off. I wear a 6 1/2 hat size...is that big? lol -
Question about helmet opening
SolderMaster replied to lunarlord's topic in Hard Armor (General Discussion)
It varies per bucket maker...Mine is an RT-MOD lid with an opening of 9 inches from ear to ear and 6.5 inches from chin to back. -
SolderMaster's RT-MOD Build[*RT]
SolderMaster replied to SolderMaster's topic in Build Threads Requireing Maintenance
UPDATE TIME! Ok, here's my first real test fit. Things I know I need: * Find another way to keep my thighs up. I have an elastic garter...I think I'll make a new one that is NOT elastic. They both slip down as you will see in the pics. * Add drop boxes to belt...easy one. * Add holster to left side using 2 rivets, snaps, or Chicago screws...more than likely rivets. * Helmet needs the bottom screw on both ears for ANH....the RT lid comes with 2 screws and a rivet under the seal. I will have to drill a hole in the lower part of each ear and use one of those screws for a light switch cover and paint white if needed. * Helmet needs the frown painted. RT lid comes with all decals. I also want to paint the chin, but may get some help with that... * Trim the thighs on the top for a smoothe look. * I MAY end up using a double snap system. Most of my parts are single snapped...meaning one snap per end of strapping...so 4 snap straps hold the cod and ab together 2 front 2 back...but you knew what I meant...lol * Left thigh bottom needs a little trim. * Sew the gloves so NO skin shows. * Sharpe the logos on the diveskin undersuit. * Add padding to forearms and shins so they dont moved around. * Paint rivets on ab white. What else would you folks suggest? -
Ok, so painting a 7/16th" circle with the appropriate color on the appropriate button will do? Or should it be an actual button either glued or drilled into it?
-
SolderMaster's RT-MOD Build[*RT]
SolderMaster replied to SolderMaster's topic in Build Threads Requireing Maintenance
Ok... I decided to use some velcro along with the snaps to hold the ABS belt to my canvas one. Seems to work ok. I tried on everything today and walked outside for a test run. I think I'll have to add some snaps to my cod and ab for better connection. I had it pop off twice just walking around. I also need to atach my holster. But as I walked around I got a few cars to honk at me! It was funny! Of course, having my glasses off, walking around was a little interesting. My specs wont fit in my bucket so I made an appointment for contacts. When I get some other little things done, I'll take some more pics and post em. -
Pandatrooper's AM build thread[*AM]
SolderMaster replied to pandatrooper's topic in Build Threads Requireing Maintenance
That's awesome! I need to get over to my build thread and give an update, too. Sounds like you're a busy guy. Keep having fun! -
Pandatrooper's AM build thread[*AM]
SolderMaster replied to pandatrooper's topic in Build Threads Requireing Maintenance
Hey Terry, how 'bout an update?! -
Here's my ab buttons:
-
PayPal sent! Happy to help!
-
Ok, I have the colors...I just need to know how big to make the buttons...On the RT Ab, There is no "plate", it's molded on the Ab. The face of the buttons is 1/2". Should I paint the entire 1/2"? I'll post a pic if needed.
-
Matt, when you get back on here, I'd like to donate some cash to help with the re-armor. Sorry about your TK! Heck, I don't think 20 bucks is too much for helping a fellow trooper! What do ya say fellas/gals? Can we help? ...And I haven't even trooped yet! Matt, PM me your Paypal and I'll get the ball rolling! Hang in there!
-
Helmet & Ab paint detail reference guide
SolderMaster replied to Billhag's topic in Assembly, Mods, and Painting
Ok, I have the colors...I just need to know how big to make the buttons...On the RT Ab, There is no "plate", it's molded on the Ab. The face of the buttons is 1/2". Should I paint the entire 1/2"? I'll post a pic if needed. -
SolderMaster's RT-MOD Build[*RT]
SolderMaster replied to SolderMaster's topic in Build Threads Requireing Maintenance
Ok, Thanks Terry19D! That was the other route I was going to go. Either that, or glueing the ABS belt to the canvas one. I think I'll go the snap route for the cleanliness. -
SolderMaster's RT-MOD Build[*RT]
SolderMaster replied to SolderMaster's topic in Build Threads Requireing Maintenance
I see most belts have pre-drilled holes or indents to rivet the belt to a canvas belt. My RT kit doesn't have these pre marked areas. I just have molded covers... If you look at the pic, where should I place the rivets? I was thinking just inside the cover moldings...if you know what I mean. -
SolderMaster's RT-MOD Build[*RT]
SolderMaster replied to SolderMaster's topic in Build Threads Requireing Maintenance
Heh, I will be posting a "HOWTO" for that shortly. First, I must finish my TK! -
Here's an AP build from Stukatrooper: and one from TK300: http://www.tonybarnett.plus.com/tutorial.html I have used these two as well as many pics found right here on the FISD. Great stuff!
-
My wanting to join stems from a lifelong love of Star Wars. If I had known about the 501st sooner, I would have joined sooner. Although, I am not an approved member...YET! Not only do you get to dress up like a Stormtrooper more then one time a year (Halloween), you get to put your passion of Star Wars to a positive use. Raising money for charity was the icing on the cake for me. Meeting awesome people who have the same passion and interests is great too. I think the correct question would be, "Why NOT become a member of the 501st?"
-
TK 4625 Requesting ESB EIB status[AP][APPROVED] 3rd
SolderMaster replied to TK-J's topic in Request Expert Infantry Status
I hope that fly under his right ab button isn't a new requirement I missed!!?? Great looking TK!! -
And you won't. Most of the accurate armor makers are right here. I would suggest you and your brother read this thread: ------------ Looks like Terry beat me to it! lol Quick draw McGraw!
-
Hi Katie! Welcome to the FISD. There are some tall trooper in here who can answer that honestly, but from what I have been told, either AM or RT-MOD are larger trooper friendly... 6'4" huh...sounds like the perfect height for a nice Darth Vader!
-
SolderMaster's RT-MOD Build[*RT]
SolderMaster replied to SolderMaster's topic in Build Threads Requireing Maintenance
Sweet, thanks, Eric! I'll be grabbing a few 10 packs...that should be enough for extras. -
SolderMaster's RT-MOD Build[*RT]
SolderMaster replied to SolderMaster's topic in Build Threads Requireing Maintenance
Ya know, I was just there today and when I brought them up to the counter, I asked her if this was the standard size...She asked what they were being used for...I said they will be going through elastic and plastic. She said these are made for leather, they wont work for elastic and plastic....SHEESH! So, I put them back. I'm going back tomorrow to grab some. Once I get my TK finished, I should go back there and arrest her for obstruction and disorderly conduct toward an Imperial Trooper! lol