Leaderboard


Popular Content
Showing content with the highest reputation on 02/02/2022 in Posts
-
So I managed to make clear lenses for the scope. Bought 1/16” acrylic 5x7” sheets for photo frames and used a circle template to draw 1/2” and 1” circles onto the blue painters tape. Used a hobby table scroll saw to cut them. Used 1” clear round Avery labels to print the reticle and then stick it onto the lens. I don’t think it will show very well when the scope is assembled and dark inside but I like that it is there.3 points
-
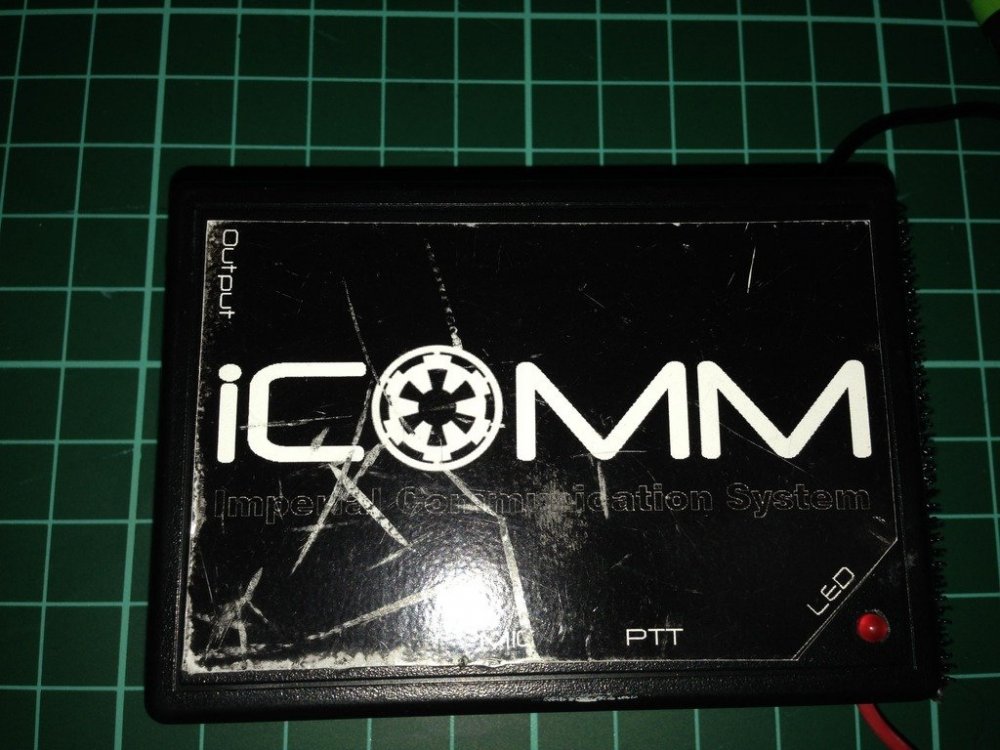
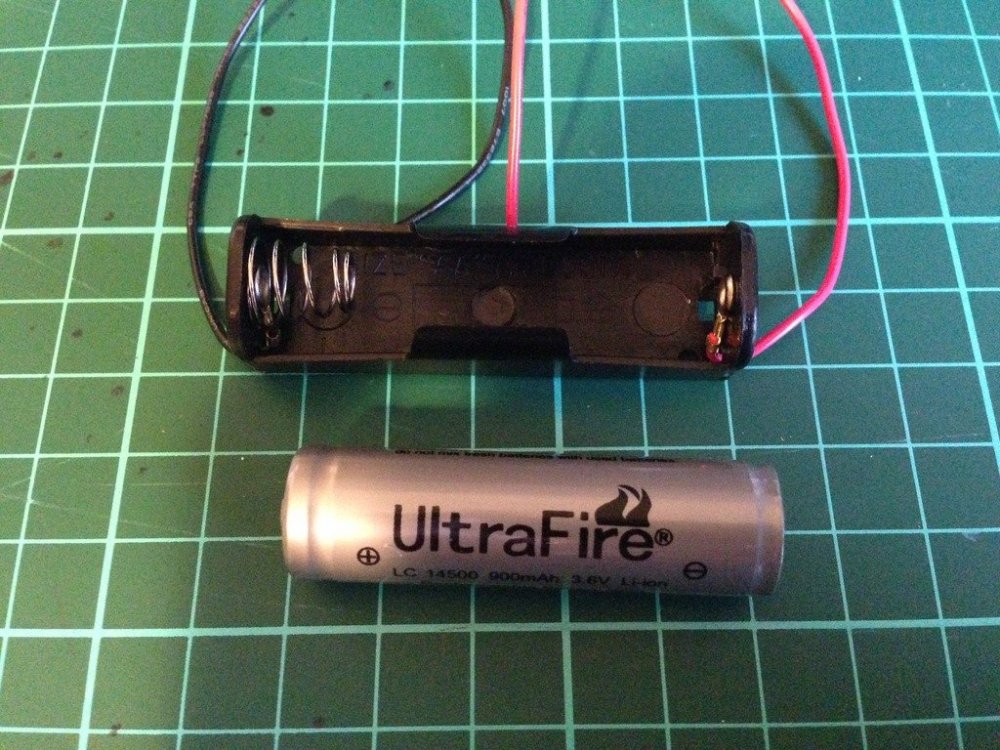
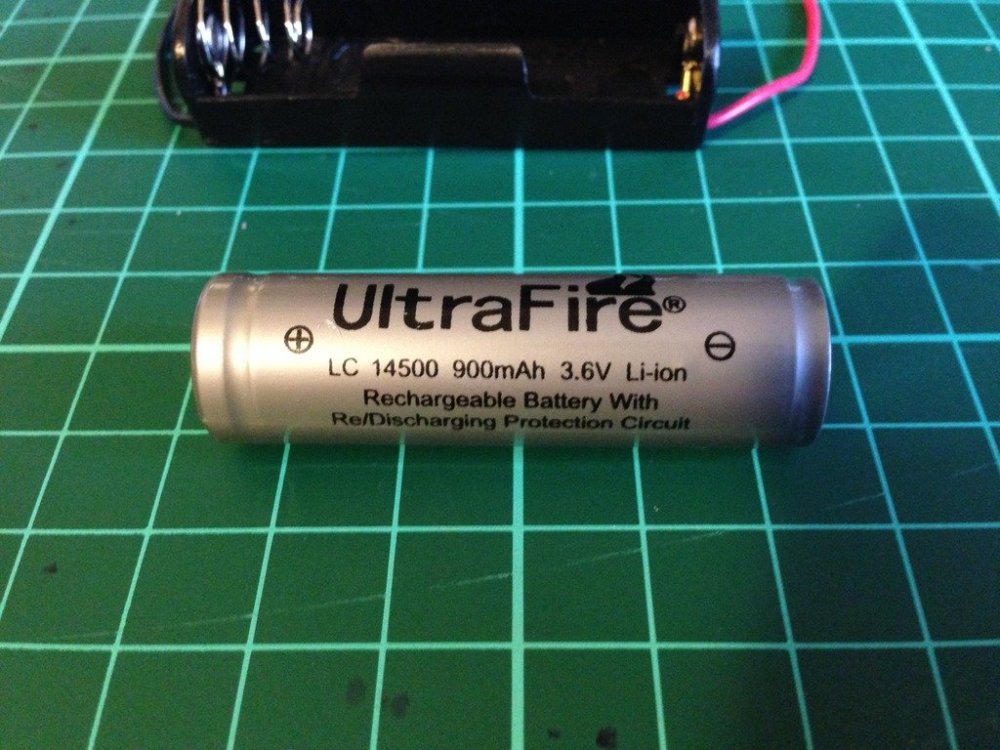
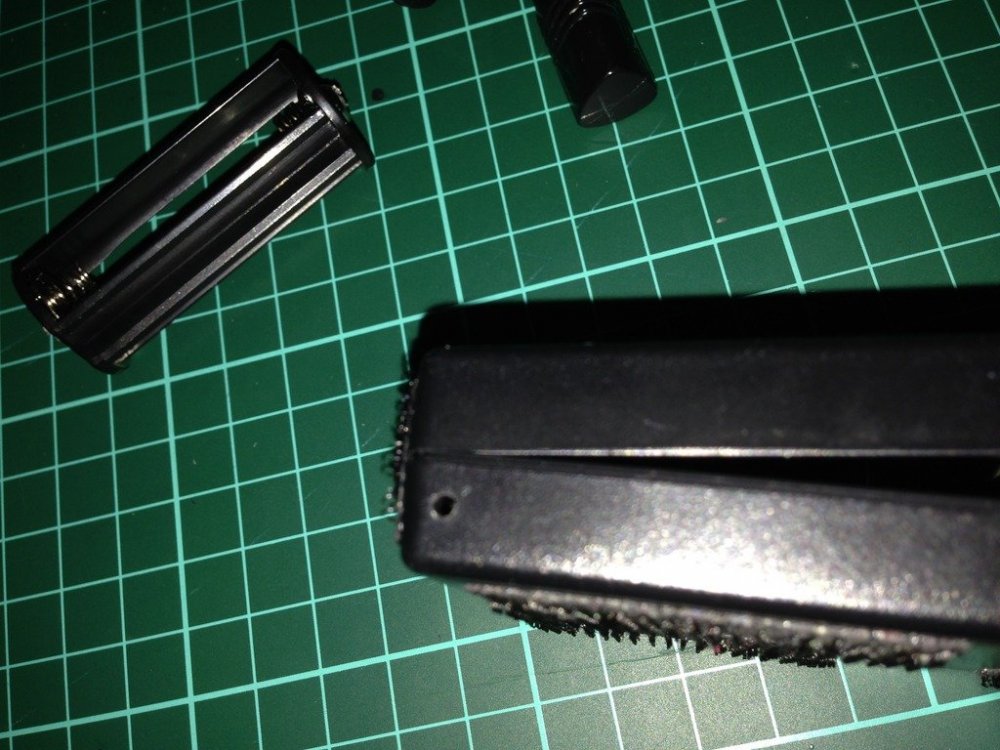
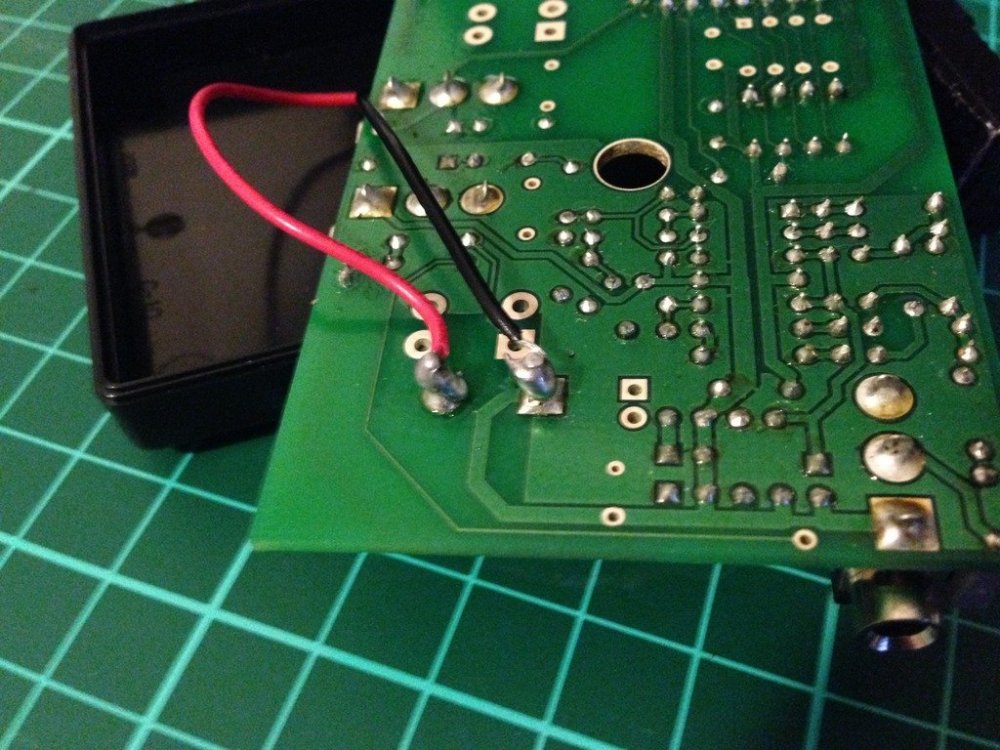
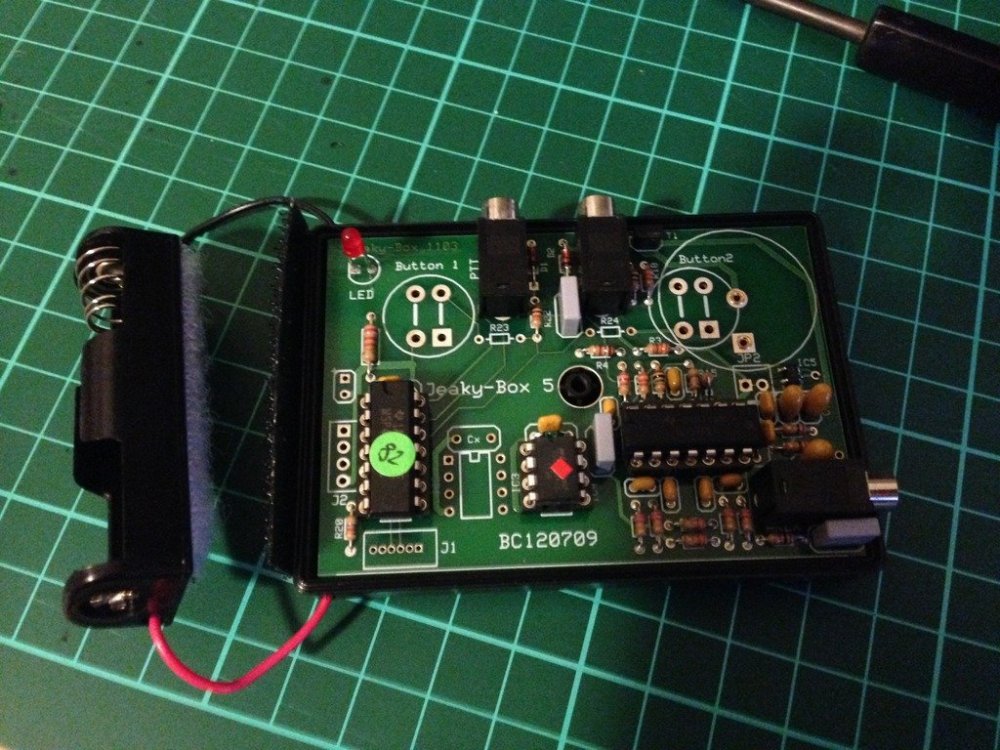
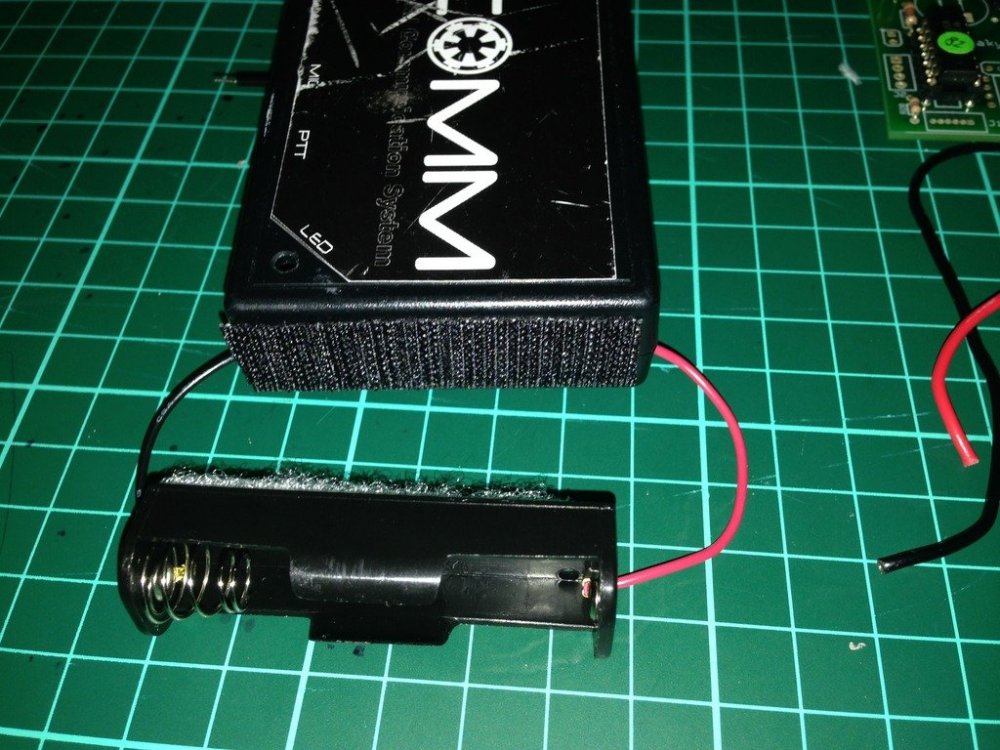
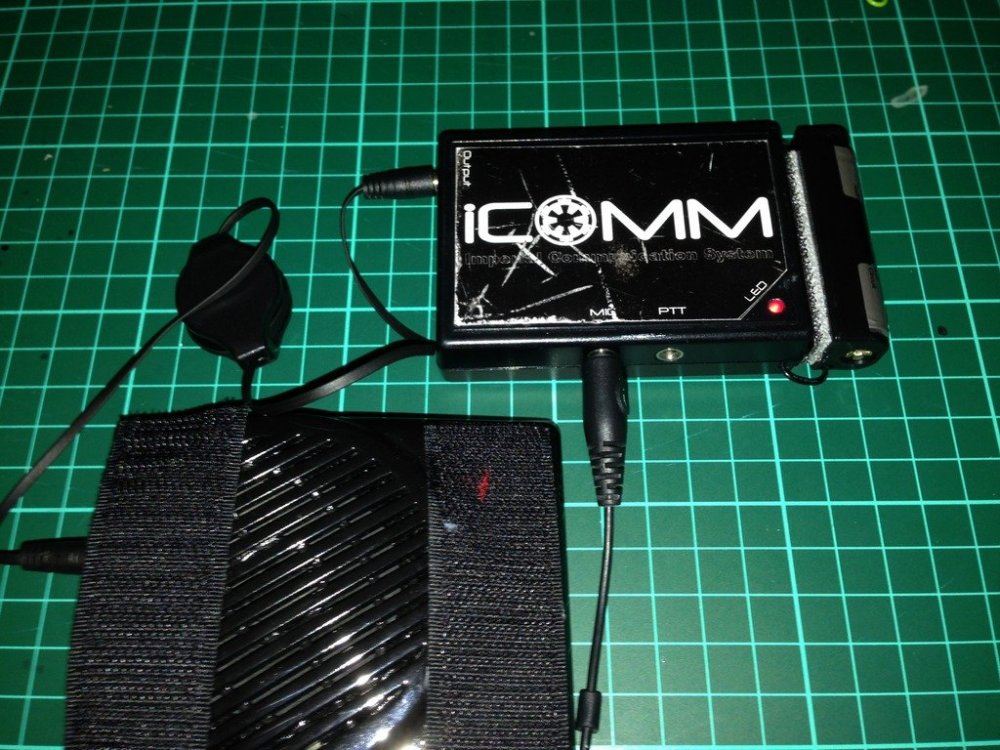
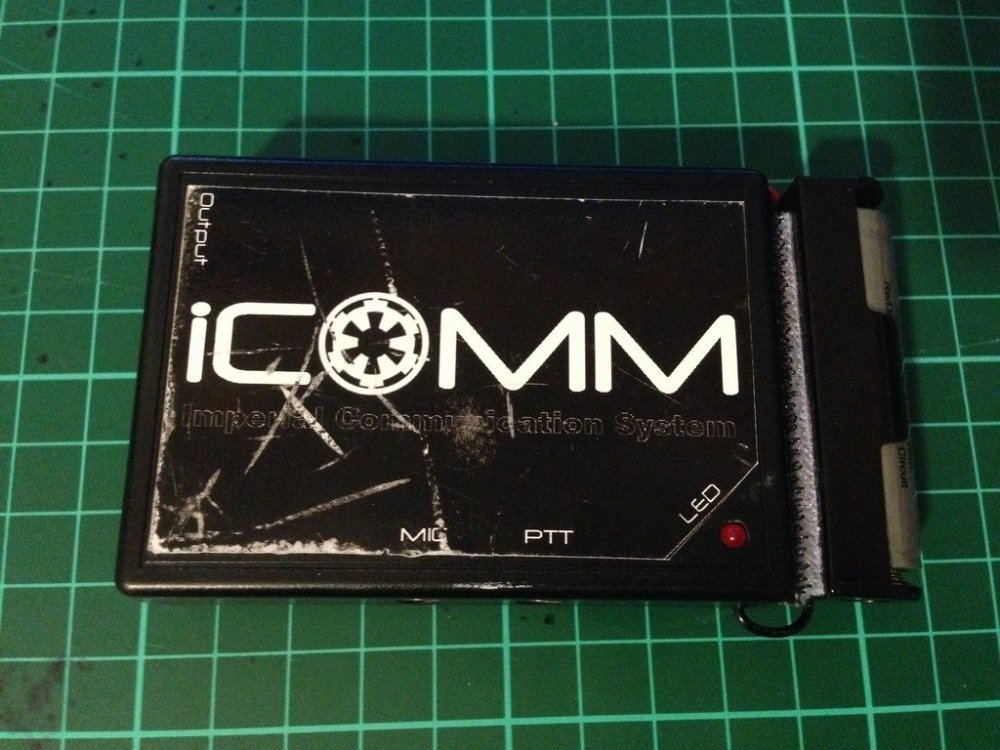
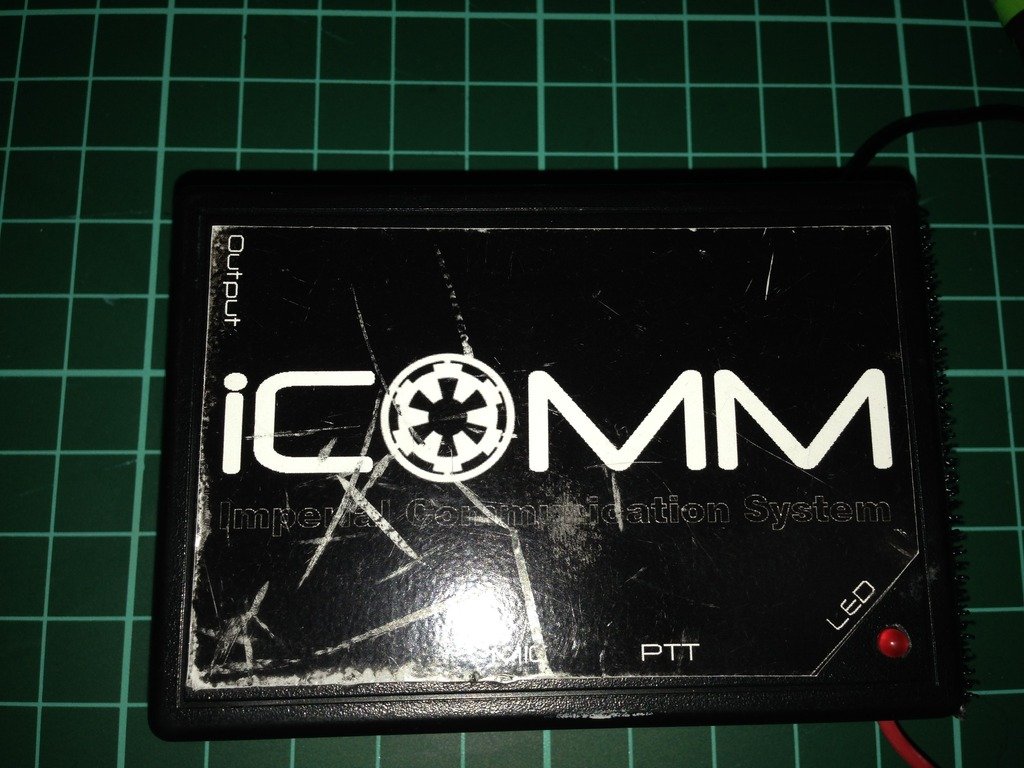
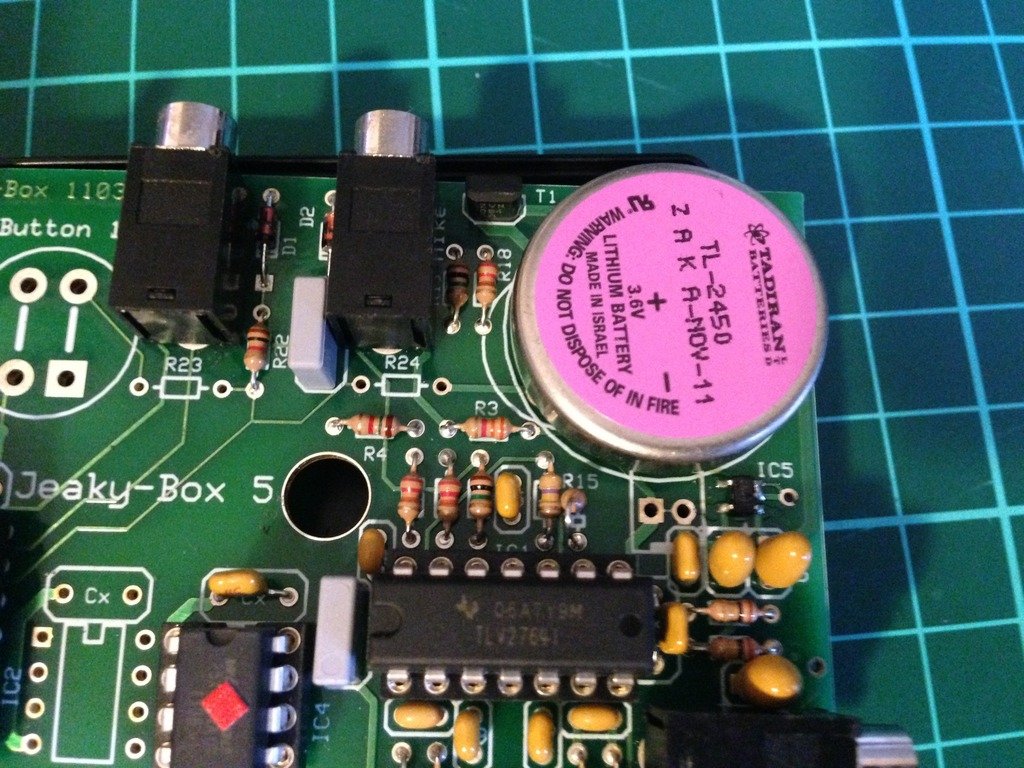
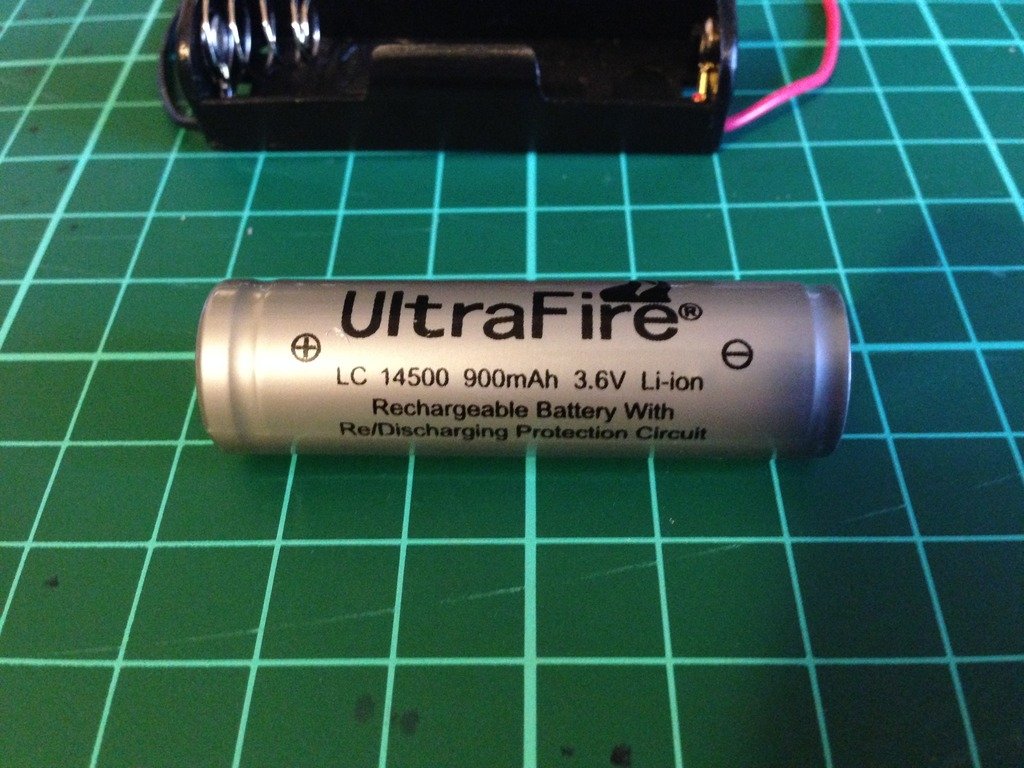
The humble iCOMM, works well while the internal battery is good, but after a year or so..........they stop working. How to tell, its the iCOMM battery. If the little red light no longer comes on and the static burst is not sounding, there is a good chance it is just a flat battery. Image has been scaled down 42% (600x450). Click this bar to view original image (1024x768). Click image to open in new window. Internal iCOMM battery Image has been scaled down 42% (600x450). Click this bar to view original image (1024x768). Click image to open in new window. Freight is expensive to get the very specific battery that is inside. Genuine replacement batt $5 US, freight, $25 US. Whattt!!! $30 US.... for a battery.....at least that's what I said. (approx $38.40 AUS) So I decided to do a little research, and come up with a reasonably simple and inexpensive mod, approx $12-$15 Aus. A simple AA battery holder and a rechargeable Lithium ion battery. Image has been scaled down 42% (600x450). Click this bar to view original image (1024x768). Click image to open in new window. Not just any kind of rechargeable battery can be used. The iCOMM is sensitive to voltage, so a 3.6 volt battery is required. The milliamp hour rating, or how much draw per hour on the battery, is only 560mAh, not bad for its small size, but I have replaced it with a 900mAh, so almost twice the capacity, and rechargeable. Approximate lifespan......Years and years. I chose to go with a battery with an internal protection circuit, as Li-ion batteries are finicky with charging. (have been known to EXPLODE). A digital battery charger, designed to suit 3.6-3.7 volts is perfect. Available on evilbay for as cheap as $5 shipped from China Image has been scaled down 42% (600x450). Click this bar to view original image (1024x768). Click image to open in new window. As I discovered during the research phase, the internal battery is easily removed. Image has been scaled down 42% (600x800). Click this bar to view original image (1024x1365). Click image to open in new window. First I added some adhesive Velcro to the back of the battery holder. Image has been scaled down 42% (600x450). Click this bar to view original image (1024x768). Click image to open in new window. Then I drilled a couple of small holes, one in either side of the bottom half of the iCOMM casing. Image has been scaled down 42% (600x450). Click this bar to view original image (1024x768). Click image to open in new window. Thread the red +, and black - ,wires through the holes of the casing.(From outside through to inside) When you flip the circuit board of the iCOMM over you can solder the wires to the corresponding posts. The outer most post is the positive (+) and the inner post the negative(-). Image has been scaled down 42% (600x450). Click this bar to view original image (1024x768). Click image to open in new window. Flip the circuit board back over and fit back into the case. Please note, you will actually have to fit the circuit board back into the top part of the case as it is the half that has all the plug holes and LED hole. Image has been scaled down 42% (600x450). Click this bar to view original image (1024x768). Click image to open in new window. Place the two halves together, put the screw back in, and add the opposite half of the adhesive Velcro to the end of the iCOMM. Feed the wires in through the holes to keep the excess out of the way. Image has been scaled down 42% (600x450). Click this bar to view original image (1024x768). Click image to open in new window. Tested for success, my iCOMM is again fully operational. Image has been scaled down 42% (600x450). Click this bar to view original image (1024x768). Click image to open in new window. As you can see, the overall size hasn't changed too much. iCOMM 8cm long, iCOMM with external battery adaption, 10cm long. The weight has increased by only 20 grams. Image has been scaled down 42% (600x450). Click this bar to view original image (1024x768). Click image to open in new window. Parts List and cost Battery Holder AA size $1.00 UltraFire Li-ion battery $6.00 (Protected circuit) Digital battery charger $5.00 miscellaneous bits $3.00 Battery holder from Jaycar, all other parts from ebay. Please note: These prices were in Australian $, so would be cheaper again in US$


 1 point
 -
Sorry for the late. On the 5v systems I installed a filler to help reduce pwm noise caused by most battery chargers and cooling fans that may be added to the same power bank.. The filter reduced or eliminated the noise depending on the battery manufacturer. There were a couple battery manufacturers I could sell or recommend to customers that would eliminate the noiseeven further however, with manufacturers constantly changing their designs or quit making batteries all together I grew tired of chasing the rabbit, so I stopped offering the 5v version. A hard decision though necessary. That said, though the filter helps to reduce the noise you need a specific battery to eliminate it completely. These batteries have a feature and are designed to be powered on and remain on regardless there's a device plugged into it or not. Most batteries are not like this, most shut off after 30-60 seconds of not charging or if the device being powered falls under a 30mAh draw. The SHA draws 15mAh. If you have further questions please let me know.1 point
-
All main parts have now arrived!1 point
-
Show progress for life reasons thee last several weeks have kind of sucked… But, it finally got the front snap points attached. I am considering options for strengthening the bridges. I know some glue more plastic in there, but I’m thinking of other options with a bit more flex. We will see…1 point
-
Sometimes the D.O.s get a little sidetracked with things (like real life and such) but I can assure you we are always here. If we fail to comment or respond on your build thread it doesn't mean that we don't care, it's just that we haven't had the chance. All are welcome (and encouraged) to contact any one of us at any time with questions or concerns, or you can PM us all at one time here: https://www.whitearmor.net/forum/profile/39088-deployment-officer-team/ and we will be more than happy to address your concerns or queries on a personal basis1 point
-
1 point
-
1 point
-
I've been asked by more than one Imperial Cadet recently if I would make a post that details the steps involved in becoming a Stormtrooper. Here it is, and here are the steps: 1. Find the First Imperial Stormtrooper Detachment website/forums at www.whitearmor.net. You are reading this so, CONGRATULATIONS! You are well on your way! 2. Begin researching the available armor kits in the Getting Started section so that you can make an informed purchase, research is your best friend throughout this process: http://www.whitearmor.net/forum/forum/38-getting-started-read-this-first/ 3. Contact your chosen armor vendor and begin waiting patiently for Big Brown Box Day. 4. While you're waiting, begin collecting your accessories for the build, and additionally required items like an E-11, boots, canvas belt, tools, snaps, etc. There is plenty more, but remember step #2. 5. Big Brown Box Day! (take pictures, this will be a day long remembered!) 6. Start your build thread at FISD here: http://www.whitearmor.net/forum/forum/31-costuming-and-builds-501st/. Take pictures, take a deep breath, measure twice, cut once, ask questions before you do something you'll be unhappy about later, all mistakes (within reason) are fixable. 7. Complete the build of your High Quality Imperial Stormtrooper costume, and rejoice. It's about to get technical. 8. Ensure that you are 18 years old, and visit the 501st Legion website's Join Us page: http://www.501st.com/members/join_how.php 9. You will need to make a decision about what you'd like your TKID to be. You'll have to list five choices in your order of preference. Available numbers can be found here: http://www.501st.com/members/search_avail_ids.php 10. Fill out and submit the application found here: http://www.501st.com/members/join_form.php 11. Take your submission pictures and submit them to your Garrison Membership Liaison (GML). A list of the Garrisons can be found here: http://www.501st.com/members/displayUnits.phpIf you don't know who your GML is/or how to contact him or her, this list will assist you with that process. Photo's required: Full length, Front, Side, Back, Side, Action and Helmet off. 12. After you submit your pictures to the GML, he or she will contact you (be patient) to let you know if your costume is accepted, if you need to make alterations, or whether you need to re-take any photos. 13. If you need to make alterations or re-take pictures, submit them in the same manner in which you submitted the first ones. 14. When your costume is accepted by the GML, he or she will forward your pictures to the Legion Membership Office for approval and assignment of your TKID. When your costume is accepted, all you can do is wait for an email from the 501st Legion to arrive, confirming your TKID assignment. Congratulations, and welcome to the 501st Legion, and again, be patient. 15. When you have received your assigned TKID, you have one more important step to complete, and that is to request Legion Access here at the FISD. You do that using this thread: http://www.whitearmor.net/forum/topic/16-501st-trooper-status-requests-include-link-to-your-501st-profile-in-your-request/In your request post, include your newly assigned TKID, and a link to your Legion profile page.1 point


.thumb.jpg.6d328112c293e966a129e9e62a88b910.jpg)