Leaderboard


Popular Content
Showing content with the highest reputation on 06/24/2021 in Posts
-
Thanks so much both of you for the assistance, it’s greatly appreciated!2 points
-
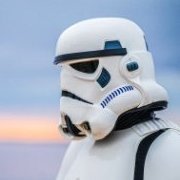
The hair dryer worked great! As per a bunch of suggestions on Facebook and a video from Trooperbay, I sprayed the decal (which I’d removed) and the bucket with a solution of water and a squirt of dish detergent, and floated it into position, then gently rubbed/dabbed it with tissue until while holding it in place until the water was gone. Once the water/soap was gone it stuck pretty well, but still had bubbles, and wasn’t sitting great, so I used the hair dryer and gently worked it to fit. I did rub a little too vigorously trying to remove the air bubbles and rubbed a little of the ink off, but it’s barely noticeable, and my fault for using a tissue instead of a soft cloth, and it looks pretty darn good if I say so myself. After some cleanup on the paint, and adding the tube stripes with the soap and water trick as well, I’d say it’s done. There are some scratches on the right lens which I need to buff out, but I’m pretty stoked with how it turned out! It’s been a long time in progress! Next up: helmet padding, and fixing holes in the abdominal and kidney plates.1 point
-
Hi Pierce, welcome to FISD. Great info received here. You can also open your own build thread and post photos or your advances, make questions and receive tips and suggestions. Remember." Measure twice, Cut once" Good luck and we are here to help.1 point
-
Hello and welcome aboard from the other side of down under. You will find a lot of the builds will mention the maker in the titles, you can find them here https://www.whitearmor.net/forum/forum/82-esb-build-threads/ Another great info thread https://www.whitearmor.net/forum/topic/49412-all-in-one-tk-anh-stunt-index-of-resources-by-maskedvengeance/ For photos check out the gallery section https://www.whitearmor.net/forum/gallery/category/25-esb-tk-reference/ Good luck with the build1 point
-
Welcome to FISD Piers!! plenty of solid troopers that will help you out in Knightfall garrison. As to build threads, check out the ESB, link below https://www.whitearmor.net/forum/forum/82-esb-build-threads/ Most armour trims up the same way, it is more about trimming it to fit your size/shape. Check out any of the ANH build threads as well (same armour with only a few differences, so just refer to the appropriate CRL for that. https://databank.501st.com/databank/Costuming:TK_esb Also take a look at our higher levels of accuracy. These are purely voluntary but it is always easier to start with the top level in mind, rather than to have to pull things apart to attempt mods later on. https://www.whitearmor.net/forum/forum/95-expert-infantryman-program/ https://www.whitearmor.net/forum/forum/66-fisd-centurion-program/ Good luck with your build, and we look forward to your build thread.1 point
-
Here are some images of my Helmet. It's a lot more asymmetrical than I ever expected. Paint seems ok to me. I knew they are, but wow. Maybe need to adjust the brow a little? definitely need to work on the inside. and I'm going to clean up the eyes a bit. The overly sloppy cutting bugs me. (this is for up close public viewing not movie background)1 point
-
And then, it was painting time. I started with the bolt. I taped off the general shape, using the edges that were already molded on the gun as a guide. Then, I painted the area using the gun metal acrylic paint (with help from the Mrs. lol). I rounded out the bottom left corner to match how it should look. It came out pretty well (I forgot to take an after picture, so this one was done post weathering) Next comes the weathering. I used a dry brush method, which basically consists of dipping the brush in paint, then getting almost all of the paint off the brush, then very lightly brushing the edges and corners of the gun to get a natural looking weathered effect. There are guides online to look up how to do this properly, which is what I did. I started using the metallic silver paint to do everything but the scope, t-tracks, and grip. The t-tracks and grip are not supposed to be metal, so they would have no metal weathering. The scope is covered below. I did the same method for the scope, but instead I used metallic copper, since the original guns scopes were made of brass. I went more subtle on the scope, as I felt like i went a little overboard on the silver. It was looking so good I got carried away a bit. If I had to do it again I may have done a little less, but I still like how it came out. The only thing left to do was to coat it with the matte clear to protect the paint. And that's it, finally done! I'm very happy with how everything turned out. I know I could have done more to be more accurate, but I didn't want this build to take too much time. I plan on doing another, more accurate build in the future, but I'm very satisfied with this gun until then. From afar, it looks great. If anyone has any questions on how I did anything, just ask.1 point