Leaderboard


Popular Content
Showing content with the highest reputation on 03/07/2021 in Posts
-
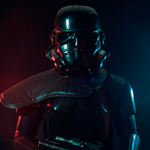
Hello there Thought it was about time to start another 'with some modifications' - thread. As most people here, I simply love our Classic Stormtroopers: Since starting my research back in 2012, I also came across some very interesting variants from video games, comics and so on: (photos taken from the 501st CRLs) While each alteration and/or addition helped giving the armor a special appearance, the idea of being unbound and free of any CRL always appealed to me. With this MOC - helmet I will try to combine multiple modifications into a single helmet. Recently I got a suitable kit for this project and collected a few add-ons, so let's see what this turns into... Like with every other kit, my first step was a rough cut, before washing and drying it. Was not sure at all, if I could ever add such a big and symmetrical 3D-printed item (made from sturdy PETG) onto a wonky classic helmet. However, the top ends of the ears perfectly meet the Blast Shield with little gaps that I will later take care of. List of modifications so far: 1 - Blast Shield 2 - Black Interior Thank you for reading and stay tuned for the next updates.1 point
-
Thx for the advice, it took me a while until i discovered how to post images here.1 point
-
Perfect! I have plenty of scrap ABS and this looks like a pretty elegant and simple solution.1 point
-
Hello and welcome, looking forward to seeing your build progress. Looks like a few images are missing from your post, make sure you use the "direct link" option to copy in the address from imgur, a helpful thread is here1 point
-
Thank you, apparently there just had to give me permission to ask question. Sent from my iPhone using Tapatalk1 point
-
Awesome Jim !! I'll be with you shortly sir.1 point
-
9) right-side Ab plate overlapping issue addressed. 10) TD re-worked. Length cut down to 180mm / metal clips trimmed on both ends so the control face-plate now rolled to face the outside more 11) I think the "weathering" on the E-11 Blaster in the last set of photos are actually high-lights from the surrounding. Anyway I went back and re-touched the areas with a new coat of semi-gloss black, Please let me know if additional issue arises. Thank you very much.1 point
-
The story goes like this, there were a series of Disney events to promote The Last Jedi back then, and we were asked to perform some moves on stage (dancing), the straps were added to minimize the shifting of the shoulder bells. I think about 8 - 10 troopers in our Garrison received the modification.1 point
-
The aurebesh came out great! If you are looking for a more worn look I guess you could do a little chipping to the letters, but I like it as it is. The hose idea is another cool mod for this helmet. I think this helmet needs a full set or armor and backpack to go with it.1 point
-
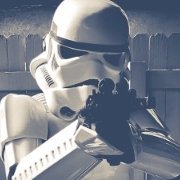
Thank you very much Glen @gmrhodes13 and Mario @TKSpartan Before continuing with today‘s update I just have to mention three minor corrections to this build. Daniel @CableGuy has collected some very good information about ANH helmet building and painting in some of his YouTube videos. Watched these just recently and then found flaws on the eyes and the paint job on vocoder and the HOVIs. See the following photos for the corrective actions: Okay, now to the update. Looking at the helmets from TIE-pilots and Magma Troopers, I found tubes or hoses to somehow look pretty cool. But adding them means they have to end somewhere. On a full costume you can run them to a chest box or a back pack. In this case it is just a helmet – with a classic RS Prop Masters helmet stand. So I started figuring, if just one tube could be fitted somehow… In this place it looks like supplying the flashlights or some other hidden electronics. By the way, that painfully reminds me of an aiming device I had planned for the right eye, just below the blast shield. Would be nice but unfortunately I did not manage to find anything suitable for this. Okay back to topic. It was time to run the other ends of tube and cable somewhere. The cable was easy, I just tape-glued it to the inside of the helmet. But that tube, oh boy … The diameters of tube and that chromish metal piece exactly matched. Would have been nicer to see one fitting into the other. However, I am pretty glad it still looks good this way. The next topic is ‚helmet personalization‘. Seems like there is a long tradition of individual drawings on various military vehicles and equipment. Even customized helmets seem common and can be spotted in the Star Wars Universe, too. Found different colors and sloppy lines to look more real than having everything perfectly lined up with just one color. While doing this, I thought about something like a slogan or motto from that trooper, hand-paint onto the helmet. But not with the letters of our alphabet, with letters in Aurebesh… Thought an officially looking military marking (white on NATO green) would be a good addition to this. Instead of sloppy lines, I now needed something that looked like being made with a stencil or template – in Aurebesh of course… The last photo shows the TK-ID is a bit crooked and the black slogan has an offset. First I was a little frustrated, then found it to look more real because such inaccuracies can happen with hand-made things. Anyway, it‘s the rear side which soon can‘t be seen in the display case. List of modifications so far: 1 - Blast Shield 2 - Black Interior 3 - Two-tone paint job 4 - Antenna and radio 5 - Utility belt 6 - Universal supply box 7 - Bacta canister 8 - Helmet flashlights 9 - Breathing tube 10 - Kill marks 11 - Aurebesh letterings Two updates to come - next one in a week.1 point
-
In the last update the brown MUJI box got added to the 'utility belt' and I thought about what it could be for. A red cross came in my mind but we all know there is no 'First Aid' in the Star Wars Universe – there is Bacta. That made me think of something else - and that belt looked so empty with nothing else attached to it… Looks okay, maybe I change it later because the canister wobbles a little and the wires can be seen... In the opening post I mentioned gaps between face plate and blast shield. These needed to get filled. Did that with some black foam - plus something to hide the foam… The original plan was to have cable ties also on the rear ends of the flashlights. But they perfectly fit between the ear caps and the blast shield, additional cable ties aren't needed for that display piece. List of modifications so far: 1 - Blast Shield 2 - Black Interior 3 - Two-tone paint job 4 - Antenna and radio 5 - Utility belt 6 - Universal supply box 7 - Bacta canister 8 - Helmet flashlights Next update comes in one week. Thank you for reading.1 point
-
More work done, here is the progress. And then things got weird... Next update probably comes next Friday. List of modifications so far: 1 - Blast Shield 2 - Black Interior 3 - Two-tone paint job 4 - Antenna and radio 5 - Utility belt 6 - Universal supply box Have a nice weekend.1 point
-
Okay, today we will finally see the color on that last unpainted piece of the helmet. But first to the teeth... Before painting the teeth, I first had to do the lower face. The two-toned paint job on this helmet helps to make it look like the lower section is a removable part that can be changed if damaged. I wanted this to have a metal-like appearance to give the impression of a new unpainted part and that these helmets are being made from Durasteel. A simple silver paint was not sufficient, so I checked my cans of Humbrol Metal Cote but 27001 was too bright and the rest was too dark. More weathering (later) will help to darken the silver. Hard to see on these photos but the brush strokes and the 2 layers of polished Humbrol Metal Cote really worked good. List of modifications so far: 1 - Blast Shield 2 - Black Interior 3 - Two-tone paint job Have a nice weekend Troopers and Cadets1 point
-
I hope so, Brian... Meanwhile the work continued: The last photo got posted to discuss the best color option for the ear screws. They could be painted in matte black, NATO green, Humbrol grey or I could leave them brass as they are now. What do you think? Thank you for reading and commenting.1 point
-
Okay, the paint work is not yet completed, but at least I made some progress. Started with the Blast Shield and unlike the Mimban Trooper, I wanted it to have a different color. Had a weird idea for this... I was pretty happy with the result but now had to make a plan for the rest of the helmet. So I closely inspected the 501st registered costumes above. A classic white base seemed best but raised the question for a contrasting color. Blue and red are allocated to the Commander and the Incinerator. Would a dark orange work? Or would that look like a Stormtrooper version of Clone Commander Cody? Next I thought of green, which immediately brought up the idea for camouflage. Although not being very common in the Star Wars Universe, there are some examples for it: Kashyyyk Trooper, ARF Trooper, ARF Trooper Waxer, ARF Trooper Boil or the 41st Scout Battalion The idea behind this helmet is to turn the look a bit more towards a special soldier, equipped with many infrequent extras for his secret missions. A camouflage paint job would surely fit to that, so I researched the different types and considered, what I was able to do with the options I had. Okay, that test piece simply looked poor. Sorry, no camouflage here. Sticking to the special soldier theme, I then considered to go with NATO green only. The planned additions for this helmet will add a bit more colors later anyway. But I really liked how a different color on the mouth piece (see Incinerator Trooper and Sky Trooper) cause the impression of this being a separate and removable part. So I masked this area before spraying. The helmet appears a bit dark on the last photos because of the lighting. Thank you for reading.1 point
-
I only posted this a few months ago, which is why you may not have seen it. The best diagram I have is from Jeff (wingnut65) of the Tampa Bay Squad (below). The only difference in mine is that I use 2 snaps on the shoulder bell to shoulder bridge connection.1 point