
All Activity
- Past hour
-
Welcome to FISD, Victor! You have found the right place for information and help to start building your own Stormtrooper armour. Have you thought about the type of Stormtrooper you'd like to build? There is many variations.
- Today
-
Hello and welcome aboard, some information for you to get you started
-
I’m new to this world. I want to build my own stormtrooper armor but I don’t know where to start
-

[7]- TK-98752 Troop Log
stormztrooper1 replied to stormztrooper1's topic in Field Training Exercises
7. STEM Night Richard Riordan Primary Center and French DL School in LA, CA-4/26/24 https://imgur.com/gallery/IsFDovD -
 First post updated.
 - Yesterday
-
 That's not the right link, that link is to your legion forum profile, have a read of the first post in this thread as it explains how to find your membership profile
 -
Only difference I find between painted and non painted is the after care, I have soft pouches for all my armor so they don't get chipped or scratched in transport. The occasional crack can happen with painted and non painted but sometimes the painted can chip which is a little harder to fix. There is also some of the details which need work, forearms, yoke to back and abdomen, all need either filling with automotive filler then painted or filled with ABS paste sanded and compound polish. All the first runs of the ANOVOS FOTK's where painted as they also needed joining in quite a few places. Some have built their DN suits with ABS paste and I've seen a few fully painted, there are really pros and cons for both so it's entirely up to each individual how they want to build and finish.
-
Hey guys! Quick question. DN just started their May 4 sale, which is 10% off, plus free shipping. Im also able to apply my other 10% off code from the email list, giving me 20% off, which is crazy, so I think I'm pulling the trigger tonight. From what I can tell, the standard ABS they provide is plenty glossy, especially with a proper polish. I have seen, however, some really wonderful glossy automotive finishes, and am wondering what you all would recommend? I am fairly experienced when it comes to using automotive paints. I have a HVLP setup, and have been painting Mando armor for a number of years now. What I'm really wondering however is if it is worth the time and energy needed to paint it, or if the standard ABS is fine? Really, which is more screen accurate? Any guidance is appreciated!
-
Troop 12, also listed in Fire Team Sousa Troop Log (Hong Kong Garrison) Event: Hot Toys The Power of the Dark Side Media Event Location: Cityplaza, Hong Kong Date: 27th April 2024
-
 IamMeRightNow joined the community
 -
Another pic exiting the museum last Sunday.
-

Introduction from Southern California
chrioboy replied to chrioboy's topic in New Member Introductions
I’ve been putting some thought into it and poking around other detachments. The only other trooper which caught my eye over the past several years has been the Death trooper. Since I still have the same build as I did twenty years ago, 5”10 150lbs, a lot of the newer suits are build around larger folks and it shows in the chest plate. Ideally if I built an RO or DT it would have to be build around something lineage rather than completely new sculpt. I think this might be possible if I piece together parts from a couple kits. I put together a spread sheet of the cost including hardware, gaskets, boots, gloves and helmet. Price it to around the upper end of my budget but I believe if I put considerable amount of work into my next armor I will be happier with the outcome. Thanks for the advice and thorough responses I appreciate it. -
 annalynlrtns01 joined the community
 -
 Victor joined the community
 -
[7]- TK-98752 Troop Log
stormztrooper1 replied to stormztrooper1's topic in Field Training Exercises
6. La Habra Performing Arts Center Band Concert in La Habra, CA-4/25/24 https://imgur.com/gallery/RYrl3py -
 TK 36910 requesting access. https://www.501st.com/forum/memberlist.php?mode=viewprofile&u=25790
 -
Legs: Thigh front and back 20mm Shin front 20mm, rear 25mm
-
 Hi, can you allow me 501st access? Thanks https://www.501st.com/members/displaymemberdetails.php?userID=39822 francois
 -
Handy thing that with the nylon plates, and yeah that one was a little rounder than I would've liked, so I'll be sure to mark them out for later ones. Speaking of cover strips are the strips for the legs thicker or are they the same width as the arm strips?
-

[14] TK-77751's Troop Log - Permission to Share
bpieroni replied to bpieroni's topic in Field Training Exercises
14 - St. Baldricks Franklin Park - Last week
-

TK ANH Stunt by CloseTheBlastDoor
CloseTheBlastDoor replied to CloseTheBlastDoor's topic in ANH Build Threads
Oh shoot, I saw that post before and totally forgot about it! -
I use these for snap plate holders, especially when using nylon snap plates, clamp one piece on either side Just watch trimming the ends of the cover strips I noticed this one looked a little round, screen where just trimmed angled
-
TK ANH Stunt by CloseTheBlastDoor
gmrhodes13 replied to CloseTheBlastDoor's topic in ANH Build Threads
This is my trick for stubborn snap posts A block of wood with sandpaper wrapped around can help when sanding parts to get straight lines/cuts. -

TheRascalKing's Denuo Novo First Order TK Build Thread
TheRascalKing replied to TheRascalKing's topic in TLJ Build Threads
These have been over in the Pre-Approval forum for a bit, but I suppose I should post my photos now that I have been approved! I do intend to get back to updating this thread, as I'm feeling much more confident in sharing my build now that it is complete. I also am helping a few squadmates with their builds, which will afford me opportunities to take more photos of my process on subsequent go-arounds. I think it came out well enough and hope this thread has been helpful to others even in its current state, and I'll do my best to finish it out in the future. -
[53] TK-62257 - Mathew Deliso Troop Log
MDeliso replied to MDeliso's topic in Field Training Exercises
Troop number - 53 Date - 4/25/24 Event - FBI NY Office Family Day Location - 26 Federal Plaza, New York, NY Hours - 2 Costume - TK - Shocktrooper -
Event: # 20 Event Name: FBI's NY Office Bring Your Child to Work Day Celebration Location: 26 Federal Plaza NY NY Date: April 25, 2024
-
TK ANH Stunt by CloseTheBlastDoor
CloseTheBlastDoor replied to CloseTheBlastDoor's topic in ANH Build Threads
I took the smallest amount off the sides of the butt plate and was careful to round into the inside corner of the notch. I think it looks pretty good! I’ll probably end up hitting it again later with a file or other fine tool. I also got a few of the snap plates in, and added a few straps. It feels good to see this all coming together! A few snaps, I found very difficult to get in. But it might be because the posts inside the snaps are not all the way down, and are bumping into each other when attempting to push male and female pieces together. With the hand pain I’m having these days, this might become an issue. I’ve not set snaps before, and I’m using this crimp-like tool to do it (no hammer). This tool looked great, but it does not perform too well. It has these tiny magnets that are set inside the die, but are not glued in. When I was pressing one of the snaps, there was a big spark! It turned out that one of the tiny magnets had come out and wedged itself between the tool and the underside of the die, and completely shattered! That was thrilling. Starting tomorrow, I’ll be on vacation for a few weeks, meaning no progress on this, but maybe my hands will recover. See ya soon! -
Today I'm not gonna have too much time to work on but I'm happy with what I did get done. Yesterday I took the clamps & magnets off the bicep and forearm, both turned out well and I started gluing another cover strip on the bicep, and cleaned up the forearm with a rag. The right forearm is all glued now so woo. As for today I managed to trim all of the right leg, so very woo. Although I do now have a bunch of leftover ABS chunks that I'm not entirely sure what to do with, I may just use my dremel to grind them all down into bits for paste/slurry. Anyway that's all for today, I'm gonna have some lunch.


-
Albums
-
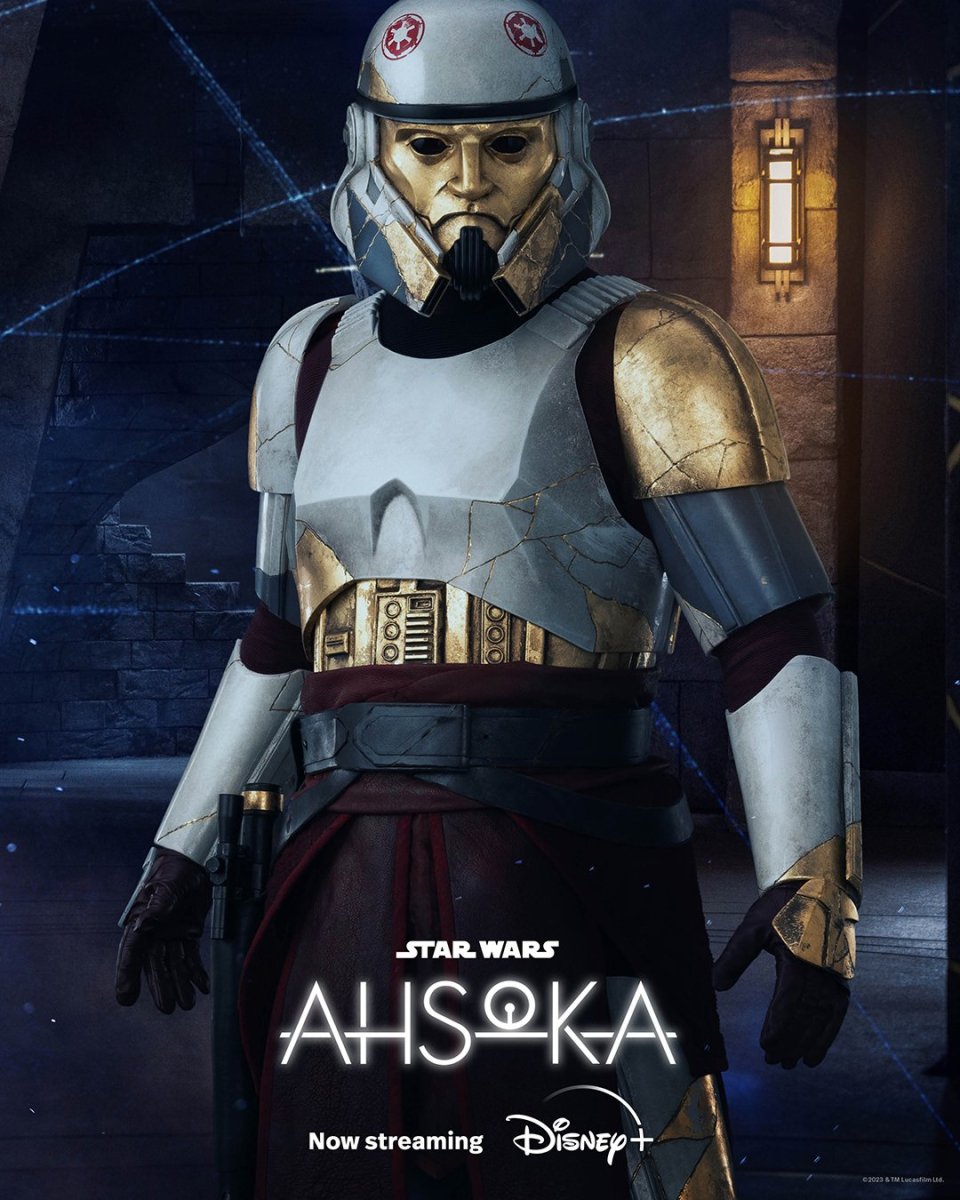
Captain Enoch (Ahsoka)
- By themaninthesuitcase,
- 0
- 0
- 2
-
Promo pictures & others
- By Locitus,
- 0
- 35
-
.jpg.da3b75dcced28b94590e16b06907ce49.jpg.d3465bdfa251d57f1217de22fbf5842f.jpg)
Publicity Blaster - Nambu Type 99 LMG
- By gmrhodes13,
- 0
- 0
- 4
-

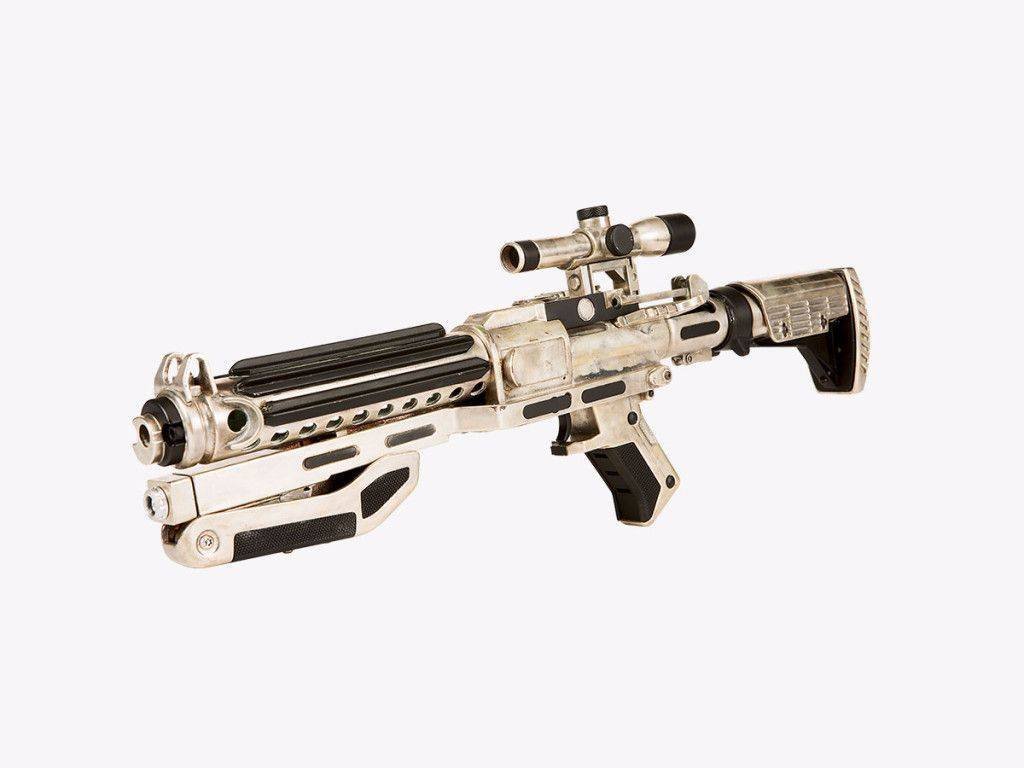
TFA F-11D Blasters
- By gmrhodes13,
- 0
- 0
- 13
-
Captain Phasma TFA References
- By gmrhodes13,
- 0
- 0
- 59
-