
All Activity
- Past hour
-
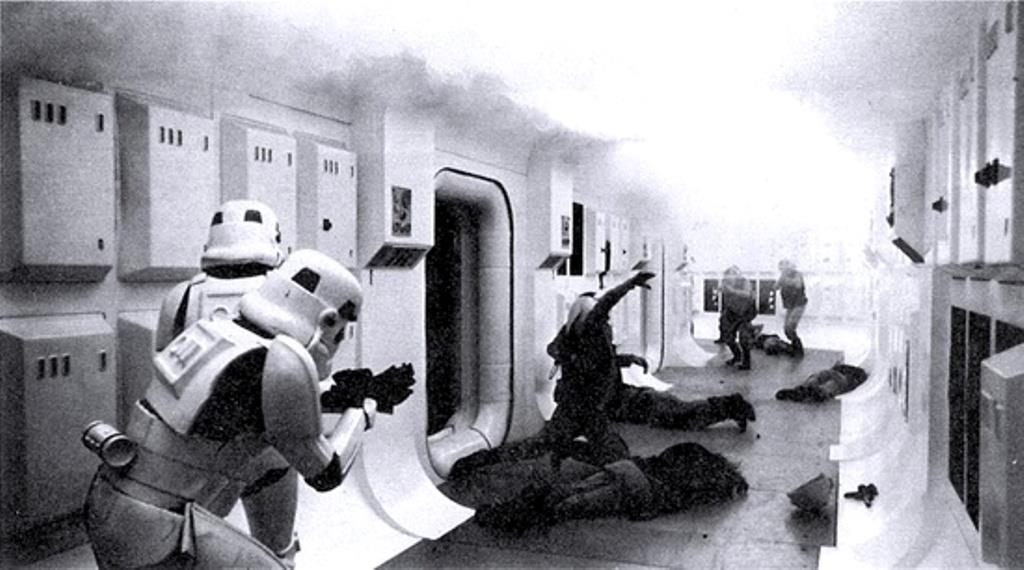
I've finished building my E11 blaster rifle - painted and weathered (to the best of my ability at least!) pics for inspection: does this all look ok for trooping?
- Today
-

Painting Black ABS To Match White ABS
MaskedVengeance replied to Dubfunkstar's topic in ANH (Stunt and Hero)
There is no single answer as “white” plastic can be any manner of shades of white. The temperature of white plastic varies by maker, and sometimes even by batch that a maker produces. You might try buying some smaller cans of white to test out and compare. Alternately, bring in some scrap abs plastic to an automotive paint shop and have them produce a color match. Or just paint all your armor, both black and white, with your white paint. Sent from my iPhone using Tapatalk- 1 reply
-
- 1
-

-
What is a good paint to match white ABS? I have black ABS I need to match my white armor. Sent from my iPhone using Tapatalk
-

TK ANH Stunt by CloseTheBlastDoor
ukswrath replied to CloseTheBlastDoor's topic in ANH Build Threads
Nice work! -
TK-91213 Requesting ANH Stunt EIB Status (WTF) (1075)
Chemi replied to JBar's topic in Request Expert Infantry Status
Congratulations #1075 -

TK ANH Stunt by CloseTheBlastDoor
CloseTheBlastDoor replied to CloseTheBlastDoor's topic in ANH Build Threads
Thanks guys! In getting this far, it’s easy to get caught up in what needs to be done next, but I have to say that it’s a special feeling to see things coming together like in the photo from my previous post. I grew up in Los Angeles, and as a little kid was one of the fortunate ones to wait in a line circling the entire block at Mann’s Chinese Theater to see ANH. I must have seen it maybe 40 or 50 times in the theater! My dream from then on was to be a stormtrooper, and that’s why I’m here! So, yes, I’m definitely motivated! You all have been fantastic! I did a loose fit of the TD, and it definitely sticks out of the bottom of the belt: Time to trim that, and get the clips straightened out a bit too. Looking at the shoulder strapping, I think they are overall too long. Maybe that’s my real problem. I cinched them up, and it looks like the straps might go over better. So I’ll redo the straps, approximately 1” to 1.25” shorter than they are, and see whether it’s good. I’ll be sure to have the water bath ready. Then I can get those ¼” elastics over the backs. For holding up the thighs, I like the idea of having them separately supported rather than putting yet more weight on the torso, which to me seems a bit heavy already. So I’ll opt for the leather belt and 2” wide elastic loops. For the ABS paste, I saw a post about Sugru that looks like it would fit the bill. For the cod, I trimmed the split rivet down, drilled a 9/64” hole, and got that in with a bit of hammering. It seems like what snap goes on the inside doesn’t matter, since it’s not required to be functional, and I’ve seen comments about either using the female line 24, or the male “Levi’s-type” small stud, or what I did here, the line 24 male. From the hammering I might have left a small mark on the outer part of the cod, but not too noticeable. For the two butt snaps, I drilled two 5/32” holes. One was ⅝” in from the end, and the other 1-⅜” in, per ukswrath’s build here: I’ll want to be careful about setting those in! Not done yet. Oh yeah, and time for The Acolyte!!!!! -

TK-91213 Requesting ANH Stunt EIB Status (WTF) (1075)
Doggydoc replied to JBar's topic in Request Expert Infantry Status
Yes -
Congrats sir, and welcome to EI! Sent from my iPhone using Tapatalk
-

Request your EIB Certificate here:
JBar replied to justjoseph63's topic in Request Expert Infantry Status
John Barlow 91213 EIB letter size Gerald -
TK-91213 Requesting ANH Stunt EIB Status (WTF) (1075)
JBar replied to JBar's topic in Request Expert Infantry Status
Thanks again. Just to make sure I should list you (Gerald) as the DO correct? -
TK-91213 Requesting ANH Stunt EIB Status (WTF) (1075)
Doggydoc replied to JBar's topic in Request Expert Infantry Status
No problem at all John. Congratulations again. Make sure to request your EIB certificate. https://www.whitearmor.net/forum/topic/40769-request-your-eib-certificate-here/ -
TK-91213 Requesting ANH Stunt EIB Status (WTF) (1075)
JBar replied to JBar's topic in Request Expert Infantry Status
Thanks so much @Doggydoc for the whole EIB process and especially for the Centurion critiques. It's something I definitely want to do and I'll start planning on the changes right away. This has been so much fun fleshing out all the details and learning so much more about this hobby -
TK-91213 Requesting ANH Stunt EIB Status (WTF) (1075)
Doggydoc replied to JBar's topic in Request Expert Infantry Status
Hi John, great job on making the requested fixes. CRL and EIB Application Requirements: All required photos have been submitted, and on behalf of the entire D.O. staff we are pleased to welcome you to the rank of Expert Infantry. Congratulations! Other-Armor Fit/Assembly; In this area we review observations made by your fellow troopers and the DO team. Some observations may lead to suggestions to improve the overall look of your armor, and please keep in mind that we consider both text (CRL) and pictures (screen caps/reference images) when reviewing submissions. Your helmet is sitting a bit too high. By removing some of the padding on top of your head, it will bring the helmet closer to your shoulders, giving you a better overall appearance and will usually give you improved sight as well. Reference Images Along the same lines, for a better overall look, you could bring your forearms down slightly to make the gaps at the wrists and elbows the same. Alternatively, you could bring the biceps up to increase the gap at the elbow so it matches the wrist. Reference Images *************************************************** Centurion Requirements: In this section we prepare you for our highest tier of approval. Because Centurion photos must show more detail than EIB, items pertaining to Level 3 might be seen there and not here and additional photos may be required. We try to point out all that we can from what we are able to clearly see, but the final accuracy is the responsibility of the trooper. Your belt needs to come up slightly. This may be achieved by using a bit of Velcro between the canvas and the abdomen armour CRL L3: The top of the ABS ammo belt should sit at or just above the bottom of the central and vertical abdomen button panels Reference Images Also with respect to the belt, Your drop boxes should align with the edge of the ABS belt. You can secure them in place with a drop of E6000. On the back of your belt, the Velcro is showing on the right side of the thermal detonator. For Centurion, you will need to trim back the excess so it doesn't show. We consider this to be a "patch" as per the CRL CRL L3: Canvas belt can not contain patches of any sort. Reference Images CRL L3: Drop boxes are vertically aligned with the end of the ammo belt with minimal gap between belt and box. Reference Images Your shoulder straps will need to have a small piece of elastic added to hold them down in the back. Although not required, removing the large tab in the back will give a better overall look. CRL L3: The plastic shoulder straps need to be held down in the back via a white elastic band to the white fabric that connects/bridges the chest and back piece. Reference Images For your shoulder position, the left shoulder should sit a bit closer to the shoulder strap. This may just be a dressing issue or you may need to adjust the snap / elastic placement. CRL L3: There should be a minimal gap between the shoulder armor and the chest/back plates. Reference Images You will need to trim all of the return edge from your forearms. CRL L3: No return edge on the inside of the front of the forearm is allowed. Reference Images Your hand plates will need to be changed to latex or a latex like material for Centurion approval. CRL L3: Hand guards shall be latex or latex-like, solid white or painted white, and affixed to rubber gloves with no visible strapping or stitching Reference Images Your Abdomen Armour will need to have the rivets installed as you have already mentioned. Here is a guideline for their placement. CRL L3: Three rivets, approximately 5/16"(8mm) diameter, are present on the left side of the abdomen armor. Note: The original rivets used for the TK armor were bifurcated rivets or split rivets. Rivets are equally spaced along the depth of the armor and about 10mm from the edge. The heads are rounded or domed. Note: Paperclip brads are not considered to have a domed head. Rivets are painted white. Reference Images Similarly, as you already mentioned, you will need to add the "Han Snap" on the right side of the abdomen CRL L3: A single male snap on the top right corner of the ab plate is present. Reference Images Your Ab plate detail could also use a little trimming - hopefully this was applied with E600 and not CA glue. Although the smaller one meets CRL requirements, a slight trim will make it look more screen acurate. CRL L3: Plate does not overlap the edges of this area and shall show a definite straight cut edge around all sides Reference Images Your ab and kidney plates are offset at the top slightly. Your Left side looks okay, your right ab plate is sitting a bit high however. This is likely just a dressing issue but may require some strapping adjustments . CRL L3: Ideally there no gap between the abdomen and kidney armor. Abdominal and Kidney Plate align horizontally at top Reference Images As with the ab armour, the kidney armour will need rivets on the left side as well. CRL L3: Three rivets, approximately 5/16"(8mm) diameter, are present on the left side of the kidney plate. Note: The original rivets used for the TK armor were bifurcated rivets or split rivets. Rivets are equally spaced along the depth of the armor and about 10mm from the edge. The heads are rounded or domed. Note: Paperclip brads are not considered to have a domed head. Rivets are painted white. Reference Images For Centurion, the gaps in the back of the lower portion of the thigh need to be filled. This may be done with ABS paste or Sugru CRL L3: Lower thigh ridge joins (front and rear) shall butt-up flush against each other. Any gaps must be backed with ABS or filled as not to be noticeable. Reference Images -
 Brodrick joined the community
 -
 Jax0527 joined the community
 - Yesterday
-

Hello from South Carolina
themaninthesuitcase replied to ggrant001's topic in New Member Introductions
Welcome to FISD -

TK-707 reporting for duty
Sly11 replied to streetjudge79's topic in Newly Approved Members - Sound Off!
Welcome to FISD Steve! -
Welcome to FISD!
-

TK ANH Stunt by CloseTheBlastDoor
gmrhodes13 replied to CloseTheBlastDoor's topic in ANH Build Threads
For the thermal detonator, I still need to bend the clips on the back side. But having followed ukswrath’s guide, I’m finding that the part that goes under the belt is 4” long, which seems too long. Even after the bend, they seem too long. Not sure whether I should trim them so they don’t stick out from underneath the belt (as stated in the CRL). Normally they are trimmed so they don't stick out under the belt Fit the shoulder bridges. I’m still having trouble with this. I don’t have the right curve yet, and with the armor on, I will need to have a second person help me with fitting and reshaping. I used a box and draped the armor over so I could get a good fit with the shoulder bridges, a little heat helps Attach elastic to the shoulder straps to hold down the backs of the shoulder bridges. Ideally this strap should be 1/4 inch (5 mm) wide, and connect over the tab at the top of the back armor. The bridge should also lay flush against the back. Figure out how to hold up the thighs. I’ve seen several posts on this. I’ve also seen something about ‘X’-style suspenders, but I’m not sure if those are meant to hold up the thighs, the torso, or both. A belt with elastic looped over can be enough, you only really want to see one strap on the front, X type Having braces can also stop them drooping Make some ABS paste and clean up the back bottom of the right thigh. Having trouble finding such a small amount of acetone, since they sell them in quarts/liters at my hardware store. Some nail varnish removes work -
Hurray!!! I need more coffee before I respond to posts in the morning. I skipped right over that part.
-

TK ANH Stunt by CloseTheBlastDoor
TKSpartan replied to CloseTheBlastDoor's topic in ANH Build Threads
For the thermal detonator, I still need to bend the clips on the back side. But having followed ukswrath’s guide, I’m finding that the part that goes under the belt is 4” long, which seems too long. Even after the bend, they seem too long. Not sure whether I should trim them so they don’t stick out from underneath the belt (as stated in the CRL). Once you have asembled the TD, you can be sure where and haw much to trim. Fit the shoulder bridges. I’m still having trouble with this. I don’t have the right curve yet, and with the armor on, I will need to have a second person help me with fitting and reshaping. A hot water bath could be helpful to reshape the shoulder bridges Figure out how to hold up the thighs. I’ve seen several posts on this. I’ve also seen something about ‘X’-style suspenders, but I’m not sure if those are meant to hold up the thighs, the torso, or both. Bellow thread shows both systems. Keep up the great work -
Hello and welcome to the forum trooper, looking forward to seeing a build from you soon
-
TK-707 reporting for duty
themaninthesuitcase replied to streetjudge79's topic in Newly Approved Members - Sound Off!
Welcome to FISD Steve. -
Reporting in from Portugal
themaninthesuitcase replied to xcunhax's topic in New Member Introductions
Welcome to FISD and congratulations on your new Incinerator. Make sure you request your 501st Stormtrooper access -
Hello. Thank you for the response and for the welcome. Regarding the trooper, it is already done and approved. Hola. I have roots in Aveiro. Northern Portugal is indeed a fantastic area. I have been to the TDs in Seville and Córdoba. I usually participate in some missions here with my friends from Huelva, since it's just a little over an hour from where I live. I will try to go to Madrid as the TD are always special events and I have great memories of those two I went to.
-
 Please enable me for access
 -
TK-707 reporting for duty
Chemi replied to streetjudge79's topic in Newly Approved Members - Sound Off!
Hello Steve, and welcome to the FISD.


-
Who's Online (See full list)
-
Albums
-
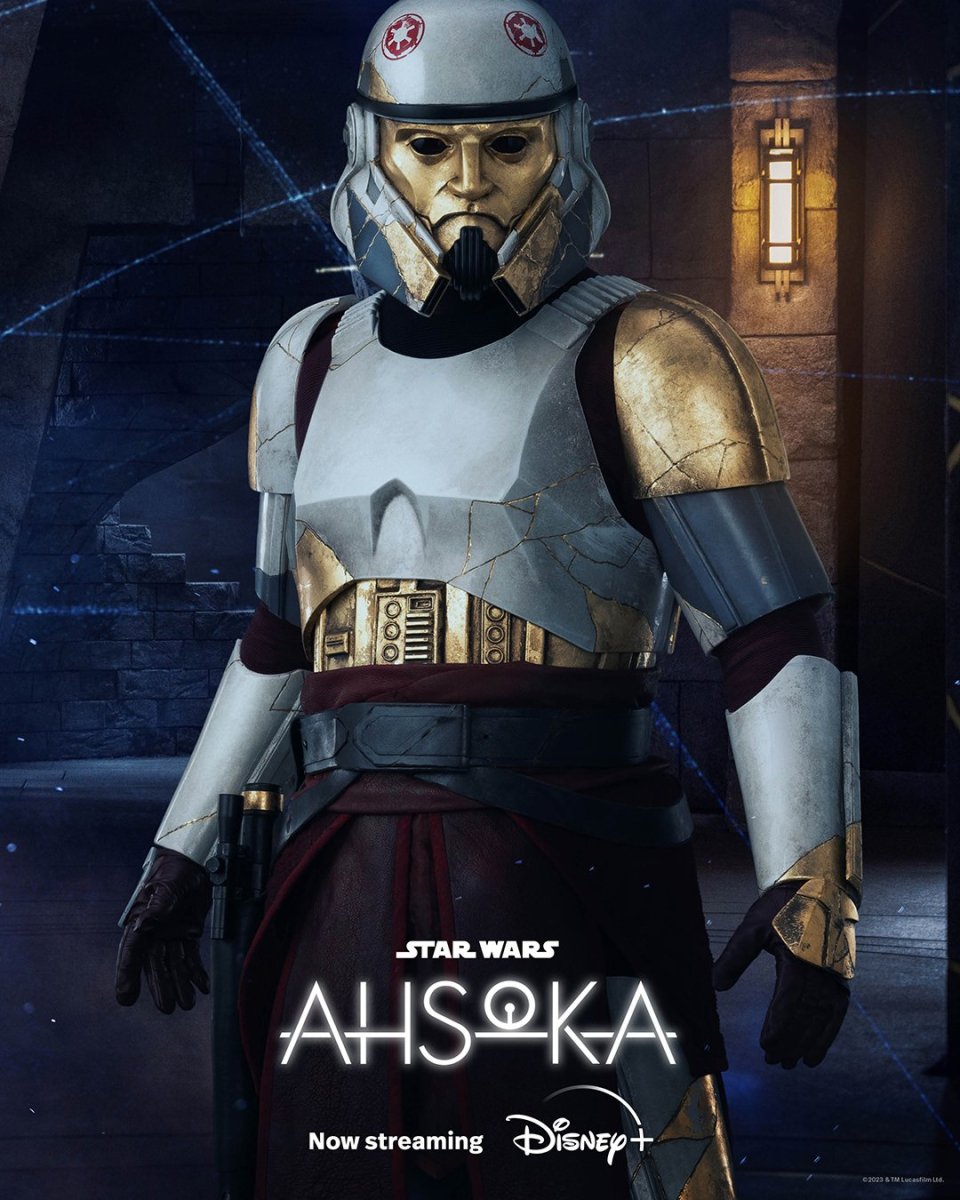
Captain Enoch (Ahsoka)
- By themaninthesuitcase,
- 0
- 0
- 2
-
Promo pictures & others
- By Locitus,
- 0
- 35
-
.jpg.da3b75dcced28b94590e16b06907ce49.jpg.d3465bdfa251d57f1217de22fbf5842f.jpg)
Publicity Blaster - Nambu Type 99 LMG
- By gmrhodes13,
- 0
- 0
- 4
-

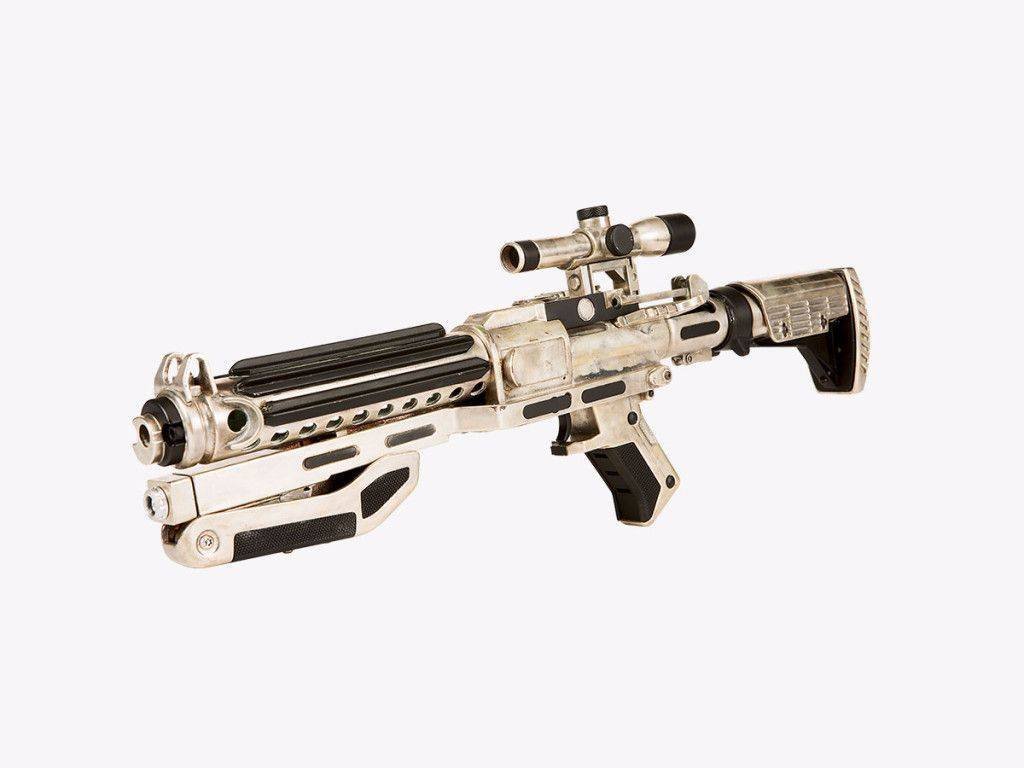
TFA F-11D Blasters
- By gmrhodes13,
- 0
- 0
- 13
-
Captain Phasma TFA References
- By gmrhodes13,
- 0
- 0
- 59
-