lucnak[TK] Posted February 27, 2018 Report Posted February 27, 2018 Yes, you'll need to adjust the ridge size in accordance with your cover strip size. Definitely use the butt-join method vice the overlap method. If you need to make the thighs smaller, cut material out of the back. 1 Quote
Copper[TK] Posted February 27, 2018 Author Report Posted February 27, 2018 The overlap was just for sizing and the photo. Everything I've done so far has been butt-jointed (hoping for Centurion down the road). Thanks for the feedback. Sent from my iPhone using Tapatalk 2 Quote
68Brick[TK] Posted February 27, 2018 Report Posted February 27, 2018 Thanks for posting the pic. Lucnak has it right. Trim the back of the thighs for size, keep the ridges on the front. Leave some room for muscle flex. Quote
Copper[TK] Posted February 28, 2018 Author Report Posted February 28, 2018 I went to the hardware store today to get the split rivets, "Chicago" rivets, and TD screws. Research has told me 5/16 split rivets. The only thing they had were 1/8" x 5/16", and the heads looked very small compared to everyone's photos. Can somebody tell me the proper head diameter, or is that the 5/16 measurement? The Chicago rivets and TD screws are good to go. Thanks.Sent from my iPhone using Tapatalk Quote
Copper[TK] Posted March 2, 2018 Author Report Posted March 2, 2018 Making some progress. Snaps and elastic strapping are coming along. I found the answer to my rivet question (should be 5/16 diameter head). I'll need to order those on Trooperbay. Drilled the holes for the belt snaps. Luckily TM has the location marked. It's still nerve-wracking drilling into the armor though. Sent from my iPhone using Tapatalk Quote
Copper[TK] Posted March 6, 2018 Author Report Posted March 6, 2018 A little more progress:Boots ordered from Imperial BootsRivets and flexible hand guards ordered from justjosephNeck seal and holster ordered from DarmanTorso is all strapped and this is my first fitting with straps and not tape. Thighs should be ready to go tomorrow:Can anybody suggest something to get better alignment on the side seams? Maybe just tighter elastic where there's a gap? Not so many potato chips? The return edges aren't 90 degrees, so it doesn't seem like I can just line them up and pull them tight together. Bucket has been stripped of straps, lens, and foam and prepped for black lining. Still deciding which route to go for that. Any suggestions are welcome! I've read that Plastidip is not good for breathing in confined spaces. Rustoleum spray paint? Thin, dark foam layers glued in? Not sure yet. ThanksSent from my iPhone using Tapatalk Quote
lucnak[TK] Posted March 7, 2018 Report Posted March 7, 2018 (edited) I used plastidip in my bucket. The ab and kidney should have the return removed where they butt up. Should be easier to line up after that. Edited March 8, 2018 by lucnak typo Quote
Copper[TK] Posted March 7, 2018 Author Report Posted March 7, 2018 Another question - since I'm taller than the average TK, the space between the chest plate and back plate at the shoulders is more than the average. The shoulder straps/bridges cover the gap, but only with a couple bumps on either end. Is it allowable to glue the elastic to the under side of the shoulder bridges? The shape doesn't match the elastic so the elastic will be easily visible and the CRL requires white elastic. I know they need to be free-floating over the back plate, which I can still do. Thanks for the advice. Quote
troopermaster Posted March 8, 2018 Report Posted March 8, 2018 Your strapping is too tight which is causing the overlap on your waist. The back section is butted up too tightly as well. The parts want to be loose so the armour can move as you move. I like to leave a small gap between the parts. Regarding the shoulder bridges, glue 3 or 4 of the thin strips onto your chest plate to allow more coverage onto the back plate. I have built armour for people 6' 6" before so it can be done 1 Quote
Copper[TK] Posted March 8, 2018 Author Report Posted March 8, 2018 Thanks, Paul. I added some room between the back plate and the kidney with slightly longer straps. I still have the issue with the sides not lining up, but I think it's a size issue. I'll try adjusting the straps and "sucking it in" a little bit. Once I get that sorted, I'll get the shoulder bridges in place and post some pictures. Quote
WodiQuix[TK] Posted March 8, 2018 Report Posted March 8, 2018 Looking good! I'm just getting my under suit from Kohl's, and then I'll be ready to begin. Quote
troopermaster Posted March 8, 2018 Report Posted March 8, 2018 2 hours ago, Copper said: I still have the issue with the sides not lining up What do the sides look like when you're not wearing the armour? Hang the armour on a coat hanger and the sides should just meet, same with the rest of the parts. The elastic just keeps it all together - there shouldn't really be any tension on the straps. Quote
Copper[TK] Posted March 9, 2018 Author Report Posted March 9, 2018 Here are the left and right sides as the armor is hanging. Not bad for gaps and alignment. My back side pushes out the butt and kidney, so the gap increases at the bottom of the ab-kidney joint and decreases and overlaps at the top of that joint. Like I mentioned, probably time for fewer chips. With the kit on:Sent from my iPhone using Tapatalk Quote
troopermaster Posted March 9, 2018 Report Posted March 9, 2018 I wouldn't worry about the sides. There isn't a gap at the top that will be shown so no problem. Put your belt on and there will be no visible gap. Quote
Copper[TK] Posted March 9, 2018 Author Report Posted March 9, 2018 Good point about the belt. I'm concerned about passing EIB or Centurion, and I've seen others' submission photos where they line up perfectly, and that's what I was shooting for. I'll get everything put together and see how it looks. Thanks again! Quote
Copper[TK] Posted March 15, 2018 Author Report Posted March 15, 2018 A few little updates:My rivets and silicone hand guards arrived from justjoseph (thanks!). Does anybody have a good way to get rid of the smell of the black rubber gloves?The rivets are installed in the torso and ammo pack:The ab buttons need some trimming for size and will then be ready to glue on:I have the shoulder bells, biceps, and forearms all linked up and ready to connect to the shoulder straps:My neck seal and holster from Darman are scheduled to be delivered today. I'll try to suit up later and have some photos posted for feedback. I still need a belt, so I'll be digging into the sales area to find a good one later too. Sent from my iPhone using Tapatalk Quote
Copper[TK] Posted March 17, 2018 Author Report Posted March 17, 2018 Feedback please!Here's what I have so far:I'm waiting on my boots so no shins yet. I picked up duck canvas to try my luck at a belt. Shoulder bridges will go on if I get a green light from the group. TD is on the schedule for next week. Please let me know what you think. Thanks!Sent from my iPhone using Tapatalk Quote
TheSwede[TK] Posted March 17, 2018 Report Posted March 17, 2018 10 hours ago, Copper said: if I get a green light from the Group Looks great 1st green light - check Quote
Copper[TK] Posted March 22, 2018 Author Report Posted March 22, 2018 Ran into an issue tonight. As I was fitting the belt together to mark for rivets, it didn't lay flat against the ab. Turns out the snap hit the back of the ABS, not one of the voids behind the belt. Looks like I'll need to relocate both the male and female end of the snap and plug a hole in the ab. Bummer. Sent from my iPhone using Tapatalk Quote
TheSwede[TK] Posted March 22, 2018 Report Posted March 22, 2018 Perhaps not, from the looks of it the snap just touches the corner of the bump as you can see here on the RS belt Put the canvas over the plastic belt like so and place it so the snaps resembles this Picture OR other way around and by pushing on the plastic belt find were the snaps "click right" then mark the center hole and fasten it, place the belt on the ab (snap it on) and mark the outer ones. (you can find this better explaned with pics on TM:s FB Look for hero-build) Quote
Copper[TK] Posted March 22, 2018 Author Report Posted March 22, 2018 I followed the post you referred to on TM's FB Hero build. I had the canvas belt snapped to the torso, lined up the plastic belt, and marked the middle. I riveted the center, wrapped around the left side, and riveted the left side. I failed to check both sides for alignment before riveting the center and left side. Since the extra hole in the canvas and the hole in the ab will be covered, I guess it's not that bad of a hiccup. Sent from my iPhone using Tapatalk Quote
Copper[TK] Posted March 22, 2018 Author Report Posted March 22, 2018 While I'm on the belt: how much overlap do others have in the back? I've seen as high as 9" of velcro. Sent from my iPhone using Tapatalk Quote
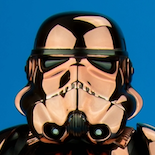
Copper[TK] Posted March 28, 2018 Author Report Posted March 28, 2018 A few more things to check on the to-do list:My boots arrived from Imperial Boots. Shipping from Hong Kong to Wisconsin was less than a week! They feel great and now I can size the shins. Front strips are drying now. Shoulder bridges are on. I can't remember whose tip it was, but gluing the extra ABS under the first, large bumps made a big impact on surface area to glue to the chest plate. Canvas belt is assembled, including plastic inside to prevent dropping at the holster, and drop boxes and holster installed. Gloves, TD, and helmet interior coming soon. Sent from my iPhone using Tapatalk Quote
WodiQuix[TK] Posted March 28, 2018 Report Posted March 28, 2018 Looks good! I'm working on my torso as well. Good idea for the shoulder straps. I heard that they're prone to breaking. I was going to order my boots from IB, too. Where did you order your neck seal from? Quote

Recommended Posts
Join the conversation
You can post now and register later. If you have an account, sign in now to post with your account.