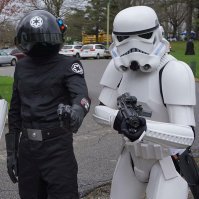
wreakHavoc309[TK] Posted February 28, 2016 Report Posted February 28, 2016 Hey all, So I jumped on the forums awhile back last year on recommendation from another Hudson Valley Garrison member and cadet. I had pre-ordered an ANOVOS kit way back in May and sure enough, it finally came in. I'm a cadet at West Point and so I've been having to work around building this kit in between classes and athletics, working out of what little I have in my room and having to make sure I have everything stashed for morning inspections. It's been a challenge, but a fun one at that. I have a few years experience building armor- made a Havoc Trooper about two years ago now and finished up a custom Mando merc, which got me into the MMCC over the summer- so I was really looking forward to doing my first real movie accurate armor. I'm about 8 days into the build with only the thighs and shins to be finished, but I documented the work along the way, so I'll try and upload the different phases of the projects as soon as I can. Please feel free to critique, make suggestions or comment on my work. I am always looking for assistance on my work so I can make it the best that it can be. My experience with Stormtroopers is limited, so any advice is helpful. So far, my main reference has been from ukswrath's build, which looks pretty amazing. I'm hoping to bring mine up to Centurion one day, but I'll take that one step at a time. Anyway, so here's a picture from the initial unboxing: (More will come when I can figure out how to post more pictures haha) 2 Quote
dobbiest1 Posted February 29, 2016 Report Posted February 29, 2016 I'm new to building ( my 1st kit ) but I am really handy with tools, I'm try to find the list of tools but having problems finding it. ( if u can point me in the right direction I it will great ) and I'm keep and eye on your building so that I can pick all pointers. Thanx Sent from my SM-G900V using Tapatalk Quote
wreakHavoc309[TK] Posted March 2, 2016 Author Report Posted March 2, 2016 (edited) dobbiest1, the bare minimum for tools, which is what I'm working with seeing as I'm working out of the academy barracks (not recommended) is:<br> -Exacto knife with spare blades<br> -sand paper (I use 100 grit)<br> -glue (E6000 is recommend but I prefer using MEK, a plastic solvent)<br> And then you'll need some type of drill for the holes for rivets and snaps (I borrowed a Lieutenant Colonel's from the Civil and Medhanical Engineering department)<br> Also some form of snap tool and a hammer.<br> I also suggest a cutting board or something like that and a file. Lots of clamps too.<br><br> That's about all I've used and I'm nearly done, I just have to,post up the pictures, but right now the academy internet considers pages like photobucket insecure... Edited March 2, 2016 by wreakHavoc309 Quote
wreakHavoc309[TK] Posted March 3, 2016 Author Report Posted March 3, 2016 Alright, so, finally found a way to upload some pictures. Anyway, the first few days after I got the ANOVOS kit I went to work on trimming some of the smaller pieces, just to familiarize myself with the properties of the material, so that way I wouldn't do something catastrophically stupid on a larger piece that could result in my bending, cracking or just ruining a piece in general. So, the first pieces I cut were the hand guards, followed by the hard shoulder straps before I moved on to the chest and back. I then quickly knocked out the shoulders and started assembling the inner strap work for these pieces (mainly to update my profile picture, but that's beside the point). By the end of the night I had most of the upper body completed. For tools, I used an Exacto knife and some 100 grit sandpaper. I've had to cut and sand all the parts by hand (my roommates haven't entirely approved of all the dust and noise, but they're tolerating it- shoutout to them). Assembly has been pretty easy and quick. And fortunately, the new PT uniform is all black, so I'll be using that as a makeshift undersuit until the ANOVOS one arrives. Kenobi said that stormtroopers are precise, not accurate- I learned the difference in Physics class. 2 Quote
Airborne Trooper[501st] Posted March 4, 2016 Report Posted March 4, 2016 Cool that they are letting you build your kit there. I thought that West Pointers were under strict rules during their stay. Quote
Mutter Posted March 4, 2016 Report Posted March 4, 2016 Looking good so far, Austin. Will be following your build. Let me know if you have any questions, I'd be happy to help. I'm new to building ( my 1st kit ) but I am really handy with tools, I'm try to find the list of tools but having problems finding it. ( if u can point me in the right direction I it will great ) and I'm keep and eye on your building so that I can pick all pointers. ThanxSent from my SM-G900V using Tapatalk Here's one of many lists of tools: http://www.whitearmor.net/forum/topic/28527-tk-build-tool-kit-list/ Quote
wreakHavoc309[TK] Posted March 4, 2016 Author Report Posted March 4, 2016 Cool that they are letting you build your kit there. I thought that West Pointers were under strict rules during their stay. Haha, yeah, no, it's true. This build is being conducted on the down low. There aren't any regulations that directly prohibit it, but as long as it doesn't interfere with my studies and the mess is cleaned up before morning inspections I should be fine. So far my company commander is a big fan of my work and has been supporting it, as has my platoon sergeant, so it looks like I'm covered should higher start cracking down on something like this. It's also funny, because I'm not the only TK at USMA. There's actually another cadet here who is an approved member of the Hudson Valley Garrison. He'll be graduating this year, so it looks like I'm going to be filling his place. Guess there can't be more than two here at a time. "Kenobi said that stormtroopers are precise, not accurate- I learned the difference in Physics class." Quote
Airborne Trooper[501st] Posted March 4, 2016 Report Posted March 4, 2016 Nice! Well if you get stationed at Fort Drum after receiving your commission, you'll be in my garrison. Albeit, on the complete opposite side of the state. Quote
wreakHavoc309[TK] Posted March 4, 2016 Author Report Posted March 4, 2016 Today's update. Got the ab, kidney and butt cleaned up, sanded and rigged with the included Velcro in the kit. It's extremely helpful that ANOVOS included all of the needed materials for this kit because it's made this build go much faster than any other kit I've worked on before. Now, at first, I was skeptical about the Velcro system. I used Velcro on my Mandalorian armor and had some bad experiences, so I was considering ignoring the Velcro in place of snaps. However, the Velcro that ANOVOS has supplied isn't anything like what I'm used to. I was expecting the stuff to peal apart or slip pretty easily on me, but it doesn't. My only real concern is making sure that the adhesive backed loop part stays stuck to the armor. To better increase the adhesion, I made sure I scrubbed the armor to get rid of any dirt or oil that could prevent proper adhesion. I'd definitely recommend this if your are going to stick with the supplied adhesive Velcro. I also have been using MEK instead of the usual E6000 and it's been working better than ever. I tried assembling one bicep with E6000 and one with MEK and I like the results from the MEK build better. E6000 takes longer to set and if you're sloppy it can really mess up the finish on the plastic. MEK can mess up the finish, but it's less noticeable. Just be careful when you work with it as the stuff- don't breathe it in. So, I finished the biceps and got the button panels trimmed on placed on the abs. Also glued up the detonator- I used E6000 on the button panel for the detonator as the MEK wouldn't bond with the pipe too well. I had to heat up the end caps in the sink with hot water to get them fitted on the detonator too. Overall, I'm very pleased with current progress. "Kenobi said that stormtroopers are precise, not accurate- I learned the difference in Physics class." 1 Quote
tk4703 Posted March 5, 2016 Report Posted March 5, 2016 Look great! I'm looking forward to trooping with you! Quote
Stormy320 Posted March 5, 2016 Report Posted March 5, 2016 Looking good. Well done on West Point. Keep up the hard work! Quote
wreakHavoc309[TK] Posted March 5, 2016 Author Report Posted March 5, 2016 Thanks guys! Definitely looking forward to trooping with y'all. Anyway, it's the weekend, and that means maximum productivity in the Imperial armory... Friday, immediately following my last hour class I got cranking on the arms. The biceps were pretty well finished so I went to work on the forearms. I made sure to trim down the outside so I could get the finishing strip to fit near perfectly. Unfortunately, I don't have any magnets that I've seen so often used on other builds to hold the two halves together, and my supply of clamps is pretty limited (I have about 9 in total, 5 of which are really small), so I had to put this together carefully using my hands as clamps for the most part. It's a time consuming process, but a little extra time now is worth it in the future. I let the forearms glue overnight and then I put the Velcro on them this morning and strapped it all together. I'm liking it so far. And of course, a mandatory fitting with the rest of the finished pieces of armor: And also, quick question for you guys out there with finished kits: What is the mobility in the armor like? From what I have so far, it seems like I have 80% mobility in the arms, which is pretty nice, but how about the legs or the abs? Can I do stairs with this? And what parts are most likely to fail on me? I'd like to know so I can reinforce them early on. Thanks! "Kenobi said that stormtroopers are precise, not accurate- I learned the difference in Physics class." 1 Quote
Airborne Trooper[501st] Posted March 7, 2016 Report Posted March 7, 2016 Mobility differs from person to person. Some guys can sit/lay down and be fine. Ideally, nothing will fail but depends on how you build your kit. Quote
Mutter Posted March 7, 2016 Report Posted March 7, 2016 Your armor is looking good! You'll generaly have more mobility on your arms. The legs will depend on how they are trimmed and there are area to trim it to help improve mobility. 1 Quote
dejango[TK] Posted March 7, 2016 Report Posted March 7, 2016 How tall are you? I've been thinking of modifying my back plate to fit my height (6'1") because otherwise it seems like it won't fit correctly without having a large gap Sent from my iPhone using Tapatalk Quote
wreakHavoc309[TK] Posted March 8, 2016 Author Report Posted March 8, 2016 Okay, yeah that is very helpful. I'm thinking of notching the shins and thighs, so I'll probably do that. I was just afraid of all the plastic clanking going on when I walk in the kit... But I guess it's all good. I have a list of modifications I have to make while I'm on spring leave next week. In the meantime though, I pretty much finished the armor in a basic, wearable state. Still needs work of course though, but for the untrained eye, it looks legit. Legit enough that I took it through Central Area on the weekend and walked some hours with some cadets doing tours. I made ArmyWTFMomemnts on Facebook haha. I had more pictures but they were lost when my iPad dumped it's memory yesterday... And dejango, I am 5'11" and the backplate seems to fit fine with the current setup. No complaints here. Possibly space of the extra distance you need between the butt, kidney and back gaps and use the belt to cover the butt and kidney gap? That's all I got. Sent from my iPad using Tapatalk 3 Quote
Airborne Trooper[501st] Posted March 8, 2016 Report Posted March 8, 2016 At least you're not wearing a Rubies kit and getting arrested by the MPs like the guy at Drum. I don't think Nikes are imperial issued though. Just promise all us old crusty NCOs that you will protect your soldiers from getting blasted on US Army WTF Moments. And please study land nav so we don't have to find you! Quote
wreakHavoc309[TK] Posted March 8, 2016 Author Report Posted March 8, 2016 The Fort Drum trooper was a Rubies? Wow. I've seen the story about his arrest. Interesting. But anyway, I appreciate the advice, I'll make sure I'm good with Land Nav... And yeah, the Nikes were from PE117 Military Movement class (essentially gymnastics). I was waiting for some TK boots to come back in stock. But I'm on the back order list, so I should be getting some shortly. I'm not submitting for approval just yet, just having a little fun to boost the moral around this gray, gray, gray institution haha. Sent from my iPad using Tapatalk 1 Quote
wreakHavoc309[TK] Posted March 12, 2016 Author Report Posted March 12, 2016 Alright, so, I have a little down time between guard shifts. Here are some pictures of the work I did on the rest of the armor to get it wearable for the central area shenanigans. Still a few tweaks need to be done, but here are some more pictures recovered from my iPads memory. First up, this is how I managed to clamp the thigh armor when I was gluing the two halves together. I used MEK to chemically weld the two haves together with some strips of ABS holding it together inside along with the cover strip on the outside. I'll get more pictures of the insides later once I trim them up and sand them down. I'm going to add a little bit of padding to the thighs too. MTF on that. Now, if you're wondering how I store the armor away for inspection, here's a fun little shot of the armor broken up into sections and into plastic bags that I have stashed in the compartment under my bed. Nothing too special, just a fun shot. Finally, here are some shots of the current state of the armor. Now, I know there are a few flaws in these images. I had haphazardly thrown the armor on for a photo and so I noticed the improper overlap of some of the chest, kidney and ab armor, however, other than that, what do you guys think of the armor? Still gotta get the boots and paint the ab buttons. Should be getting that done in a few short days: Sent from my iPad using Tapatalk 1 Quote
Redforce[TK] Posted March 12, 2016 Report Posted March 12, 2016 (edited) Great job on your build Austin! Add some boots ( although the nikes match lol ) and maybe a couple of queeks and you'll be out with us out on the frontlines! Edited March 12, 2016 by Redforce Quote
wreakHavoc309[TK] Posted March 12, 2016 Author Report Posted March 12, 2016 I ordered some TK boots. The Nikes are just standing in for now because they're all I have here at the Point. I had them for Military Movement class, but once my good boots come in, I'll be applying for membership. Sent from my iPad using Tapatalk 1 Quote
SupRsloth[TK] Posted March 13, 2016 Report Posted March 13, 2016 Okay, yeah that is very helpful. I'm thinking of notching the shins and thighs, so I'll probably do that. I was just afraid of all the plastic clanking going on when I walk in the kit... But I guess it's all good. I have a list of modifications I have to make while I'm on spring leave next week. In the meantime though, I pretty much finished the armor in a basic, wearable state. Still needs work of course though, but for the untrained eye, it looks legit. Legit enough that I took it through Central Area on the weekend and walked some hours with some cadets doing tours. I made ArmyWTFMomemnts on Facebook haha. I had more pictures but they were lost when my iPad dumped it's memory yesterday... And dejango, I am 5'11" and the backplate seems to fit fine with the current setup. No complaints here. Possibly space of the extra distance you need between the butt, kidney and back gaps and use the belt to cover the butt and kidney gap? That's all I got. Sent from my iPad using Tapatalk Awesome pictures! Sent from my SM-G900V using Tapatalk Quote
wreakHavoc309[TK] Posted March 14, 2016 Author Report Posted March 14, 2016 Spring Leave!!! You know what that means? Access to an actual workshop!! So, I started going to work solving some of the problems I sorted out when I tested out the suit at West Point. The major issues I started with had to do with reinforcing the ab and kidney plates, and then I also started on the shins. First things first, got my TK boots and man are these amazing! I was hesitant at first to drop $100 on these because I wasn't expecting the kind of quality I got. These are very good, sturdy, solid and extremely comfortable- I've been wearing them around the house they're that great. To anyone on the fence, I'd highly recommend them. So, to help with the ab and kidney- the major issue I have is that I'm a decently skinny guy, and the two plates like to overlap and grind each other's return edges. At some point, something is going to tear, so I figured I'd solve that by getting them on the same plane so they can't overlap or grind. To do that, I've devised a kind of tab and slot system. The kidney plate will have four black tabs mounted in the edges that will plug into corresponding slots on the ab. It's looking good so far. Only issues are that I'm concerned that I'm using polystyrene for the tab system versus ABS on the armor as I don't have any scraps left to build tabs or slots etc. it's working so far though. After talking with a friend who helped build another ANOVOS kit, he marked that the should straps were thin. So, I built these up a bit too, adding a layer of plastic to the underside to reinforce them: And finally, I notched the shins and the thighs to give me some more mobility. I'm liking it so far. Should hopefully allow me to get up stairs now: More to follow. Let me know what you all think. Sent from my iPad using Tapatalk 2 Quote
wreakHavoc309[TK] Posted March 16, 2016 Author Report Posted March 16, 2016 Today's update: Got a little bit done, most of the stuff is drying though, so it's a lot of wait time. Anyway, things I did: - finished the chest and back shoulder modifications - finished the left leg, including thigh armor and internal padding So, for the chest to back shoulder connections (the webbing, not the plastic) I wanted to upgrade the look to hopefully get this kit to EIB status, or hopefully Centurion someday. As such, the black stuff had to somehow become white. I can't just reset the Velcro strapping they gave me (I mean I could, but that would be more complex), so my solution was to get some white strapping and sandwich the original black webbing between it. I like the look, and I think that covers the white strapping requirement, right? Have a look for yourselves: Alright, so, I also added a little touch for accuracy- got some quarter inch elastic and made some loops to hold down the plastic straps on the back armor. Not a big fan of the look (though I think they came out cleanly) but I'm doing it for accuracy and to hopefully keep my plastic straps centered when trooping. Alright, then I finally sanded and cleaned up the thighs. The left thigh us the only one I was able to finish today, but I'm liking it. I took off all the sharp edges and added some foam padding. It's much more comfortable now, and after a test fit, I can bend the leg to a 90 degree angle allowing me to sit, climb stairs, or kneel (not sure how wearing the ab plate will affect that motion though, but for now I'm hopeful). And that should fo it for today's update. Hopefully tomorrow the ab and kidney system will be done, as well as the right leg. Sent from my iPad using Tapatalk 2 Quote
Airborne Trooper[501st] Posted March 17, 2016 Report Posted March 17, 2016 Make sure you sign up for Empire City Garrison's forum so you can get in contact with your GML. Quote

Recommended Posts
Join the conversation
You can post now and register later. If you have an account, sign in now to post with your account.