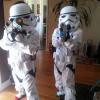
Order-66[TK] Posted January 22, 2016 Report Posted January 22, 2016 Here is my attempt at an E-11 build. While waiting for the BBB day, I thought I would give it a try. I have reviewed countless E-11 build threads and thought that the rubies blaster was something I could try and would not lose out on much ca$h if I completely ruined it. I know it is a ‘rubies’ but please check it out and please give some input to help hone the building skills. I used the builds from Astyanax, Hupspring, SIMpizels, the FISD E-11 Blaster Reference, Zaphod’s simple orange tip idea, and various links of TK Bondservnt 2392 . Again, stick around and tell me your thoughts on the end product… Quote
Order-66[TK] Posted January 22, 2016 Author Report Posted January 22, 2016 (edited) 1. Drilling I drilled out the muzzle, rear site holes, folding stock rivets, and then the barrel holes. The templates for the barrel holes are already on the blaster. I used a regular drill with a small drill bit and progressed in size. I didn’t want to break the blaster so soon. The Dremel sander helps. The plastic melts easily, but can be peeled off with little effort. Edited January 22, 2016 by Order 66 Quote
Order-66[TK] Posted January 22, 2016 Author Report Posted January 22, 2016 (edited) 2. Separating the blaster / Inner Barrel and Spring / Charging Handle Taking out screws, normally elementary task… Except half of mine were stripped and just continued to spin. I was able to pry open the area around the trigger guard but the area around the scope was glued. I used a razor blade to cut through. I just scored, and scored it until it finally cut through. The dremel cut-off wheel will leave a big gap. (I don’t recommend using it on separating the blaster) The counter was factory glued and did not have the two screws I saw in other builds. I followed Astyanax, & Hupspring build and placed a ¾ PVC pipe in the barrel. Drilling holes in PVC to accommodate the screw connections. I decided I wanted to have the recoil spring and charging handle. I drilled a hole near the end cap and one near the bolt. I drew a line from drill hole to drill hole. Then, with the dremel on a low speed I slowly scored the line from one hole to the next. I cut the opening with the dremel cut-off wheel. Again, slowly. (The hole closest to the end cap is to be bigger than the cut line). I wrapped a PVC pipe with wire. Because of the counter box, the PVC has to be split otherwise the blaster will not close up. I also had to bend the wire into the split PVC in order for the two halves to close. (black primer on PVC) For Charging Handle I used the hook end of a plastic hanger (No wire hangers Mommie Dearest!). Cut and trimmed a base. I drilled a hole in the bottom, inserted a small wire post, drilled a post hole in the PVC that the wire is wrapped around, and glued. (Charging handle pic to follow later) Edited January 22, 2016 by Order 66 2 Quote
Order-66[TK] Posted January 22, 2016 Author Report Posted January 22, 2016 3. Close up blaster I glued the seams with E6000 and closed up the blaster. Screw holes need some E6000 as well. I used black caulking to fill the screw holes and gaps. *Caulking was not the best idea. It shrinks when dried. I recommend a plastic epoxy or bondo. After drying, I sanded the blaster and the logo. Sorry no file of the charging handle sequence, but here is one before the handle was installed. This is pre caulking. Quote
Order-66[TK] Posted January 22, 2016 Author Report Posted January 22, 2016 4. Scope Rail To cut out the plastic underneath the scope rail, drill a hole in each end and then use the cut-off wheel. It looks nicer with this plastic removed. (Inspired by Hupspring) Quote
Order-66[TK] Posted January 22, 2016 Author Report Posted January 22, 2016 5. D-ring On this particular blaster there is a molded D-ring. I chose to cut it off and install a metal D-ring. Quote
Order-66[TK] Posted January 22, 2016 Author Report Posted January 22, 2016 6. Rear site / Housing There is just a little nub on the scope rail. Just file this off and I used a bookshelf support for the site. It just needs to be trimmed/sanded and needs to have a hole drilled in the middle. I also cut notches on the rear site housing. Quote
Order-66[TK] Posted January 22, 2016 Author Report Posted January 22, 2016 I am having issues posting pictures on the thread. My upload sizes keep getting smaller and smaller with each picture I post. Also, when I am creating the post, it shows my pictures and when I do a preview post, I see them. Once I add the reply the thread only gives the jpg name. I will look into this, but has anyone had this same issues? Quote
Mcott65[TK] Posted January 22, 2016 Report Posted January 22, 2016 (edited) Looking good just one thing I notice is you could do with reducing the angle of the clearing strip on the bolt . To look more accurate the top of your mark is spot on but the bottom could do with being in the bottom quarter of the curve. Nice work .<br> You need to use a photo sharing site like photo bucket Edited January 22, 2016 by Mcott65 Quote
justjoseph63[Staff] Posted January 22, 2016 Report Posted January 22, 2016 Looking at your build so far, looks like you are on track to reach EIB, Tahitoa! As for Centurion, I am not sure even when modified that it would be acceptable even with those fantastic mods. (It IS addicting, isn't it)?! Not sure if you have checked out the CRL's, but below is a copy if it helps. Great to hear that you are shooting for Centurion, but you may end up having to purchase a Doopydoos or similar, and judging from the work so far, I think it would be a piece of cake for you! Great job! For level two certification (if applicable): Folding stock (does not need to function). A real or replica ammo counter - based off of a Hengstler counter - shall be present. D-ring mounted on the rear. Sterling based blasters have the correct M-38 or M-19 style scope. Two power cylinders on the magazine housing. Scratch-built, resin cast, Hyperfirm rubber cast blasters shall have a total of 6 T-tracks on blaster (leaving the lowest row on the magazine housing side uncovered). If using the Hasbro E11 toy blaster, it is modified to have the correct number of T-tracks (6 total), with a lower row of open vent holes on the magazine housing side. This is accomplished by covering the pre-existing rows of holes with T-tracks, then grinding off the lower integrated T-track on the magazine housing side, and drilling a new row of holes in its place. No ESB/ROTJ greeblies are allowed on the blaster. For level three certification (if applicable): Hasbro blasters are not allowed, even conversions. Quote
I'm Batman[501st] Posted January 22, 2016 Report Posted January 22, 2016 (edited) Looking at your build so far, looks like you are on track to reach EIB, Not sure why (apart from the bendy T-tracks), but the current Deployment Officers won't allow the Rubies blaster. See below thread http://www.whitearmor.net/forum/topic/33994-rubies-e-11-conversion-for-eib/ Edited January 22, 2016 by Sith Lord Quote
justjoseph63[Staff] Posted January 22, 2016 Report Posted January 22, 2016 (edited) Centurion level aims to have the highest degree of accuracy, and with Rubies, and other similar toy blasters, there is simply too many things that are inaccurate as it comes from the factory.. No hex-screws on the front of the muzzle, grip has no texture/markings, no power cylinders or mount for them, no end cap clip, no selector switch, inaccurate front sight, magazine/housing, and Hengstler counter, no screws on the front of the scope, multiple holes in the body, bendy T-tracks, no separate scope rail, etc. Of course many of these can be remedied, especially with T-Jays finishing kit, (which I highly recommend). I'm in no way saying that people shouldn't go for the Hasbro/Rubies conversion, (my first build was a Hasbro/doopydoos mod). It's a great way to get started trooping without spending a ton, and is a constructive (and addicting) way to spend your time while waiting for your armor, but in order to reach the highest level, you gotta go the extra mile. Please note, this is only my humble opinion. Edited January 22, 2016 by justjoseph63 Quote
welshchris77[TK] Posted January 22, 2016 Report Posted January 22, 2016 Your off to a great start! Quote
Order-66[TK] Posted January 22, 2016 Author Report Posted January 22, 2016 Looking good just one thing I notice is you could do with reducing the angle of the clearing strip on the bolt . To look more accurate the top of your mark is spot on but the bottom could do with being in the bottom quarter of the curve. Nice work .<br> You need to use a photo sharing site like photo bucket Thanks. I will work on the bolt stripe. Currently trying to use the photo bucket to get these pictures squared away. thx again. 1 Quote
Order-66[TK] Posted January 22, 2016 Author Report Posted January 22, 2016 opperation photobucket complete... I think. Quote
Order-66[TK] Posted January 22, 2016 Author Report Posted January 22, 2016 7. Front Muzzle / Front Sight / Front Sight Guard I noticed on the muzzle that there are two circles where the hex bolts are suppose to be attached. I drilled them out with a small drill bit and gradually went bigger until it was the correct size of my bolts. One side is easy but the other requires more finesse because the blaster is a bit uneven due to the design of the muzzle. I inserted two hex bolts (m5 bolts). Front Sight I used the bookshelf supports and shaved it down, drilled a hole in the blaster, E6000ed it. Since I am in the front I drilled out the sides on the front sight guard. I had to be carful here because the plastic will snap. I drilled little holes all over the area I wanted to remove and then used the dremel sander to file away the unwanted plastic. Quote
Order-66[TK] Posted January 22, 2016 Author Report Posted January 22, 2016 8. Power Cells These were pretty simple. I took a smooth wooden dowel, cut them to size. Placed finishing caps on the ends. Drilled screws with a nut into the ends, cut off the screw head and voila. I used a plastic square from the packaging form my children’s toys, cutting it and using it’s right angle to make the cell base housing. I used smaller dowels for the resistors. Primed and painted. 1 Quote
justjoseph63[Staff] Posted January 22, 2016 Report Posted January 22, 2016 Holy cow, Tahitoa, this is looking fantastic!!! Nice attention to detail sir! Quote
Order-66[TK] Posted January 23, 2016 Author Report Posted January 23, 2016 Holy cow, Tahitoa, this is looking fantastic!!! Nice attention to detail sir! Thank you Joseph. Quote
Order-66[TK] Posted January 23, 2016 Author Report Posted January 23, 2016 9. Paint I did The body of the blaster, hammered black. Counter and T-Tracks satin black Handle gloss black Quote
Order-66[TK] Posted January 23, 2016 Author Report Posted January 23, 2016 10. Bolt I masked it off. Laid down the paint. Once dry, I drew in the stripe by masking off a stripe, score a stripe top and bottom lines with a razor blade, gently took 220 sand paper to the stripe leaving the masking tape on sides to ensure I did not sand the out sides. I then used the fine sharpe to accent the top and bottom line. Working on the angle… Quote
Order-66[TK] Posted January 23, 2016 Author Report Posted January 23, 2016 11. Decals / Counter Window I used the decals from Astyanax (scope) and SIMpixels (counter numbers). I used the plastic casing from a disposable razor for the counter window. I just needed to cut it in half horizontally, trim and glue. Quote
Order-66[TK] Posted January 23, 2016 Author Report Posted January 23, 2016 12. Orange Safety Tip I used Zaphod’s orange tip idea by placing an orange earplug in the front barrel. These are the earplugs that are soft foam that you smush with your fingers before inserting in your ear and it will slowly expand to shape. 1 Quote
Order-66[TK] Posted January 23, 2016 Author Report Posted January 23, 2016 13. The End… so I thought At first, I was happy with the results, but notice that it did not look like the ‘real thing’. It still had a SW Rebels look due to the cartoon T-tracks. Also, the black caulking was looking messy. Sooo… Quote
Order-66[TK] Posted January 23, 2016 Author Report Posted January 23, 2016 14. Back to the garage. I sanded the T-tracks nice and low. I was looking at the FISD E-11 Blaster Reference thread and decided go even further… Quote

Recommended Posts
Join the conversation
You can post now and register later. If you have an account, sign in now to post with your account.