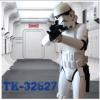
JLight[TK] Posted June 13, 2014 Report Posted June 13, 2014 Name: Jonathan Lighty TK ID: 32627 FISD Forum Name: Lighty2627 Garrison: Garrison Tyranus Armor Maker: NE Helmet Maker: ATA Blaster: Resin kit bought from TD-8266 off boards Height: 6'0" Weight: 175 Boots: Amsterdams I painted white Canvas Belt: TKittell Handplates: Sonnenschein/Karin Neckseal: Veedox Holster: Darman Bucket Off Full Front Full Back Left Arm Raised Left Side Detail (Showing split rivets evenly spaced and 10mm from edge) Right Arm Raised (Showing Male Snap) Right Side Detail Action Shot (Before Hengstler counter was attached) Helmet Front (6 Teeth, Bubble Lenses) Helmet Left (3 Bumps on ears, 2 screws) Helmet Right (3 Bumps on ear, 2 screws) Helmet Back S Trim Bubble Lenses Lens Color Hovi Tips Neckseal (Hero Version) Neckseal (Hero Version) Shoulder Bridges (Attached in front, elastic underneath) Shoulder Bridges (Elastic in back) Ab Details Interior Strapping (Kidney/Butt is joined) Cod/Butt Plate (2 Male Snaps/1 Rivet) Arms Wrists (No return edge) Gloves/Handguards TD TD Belt Front (Holster attached with 4 screws) Belt Back (Holster attached with 4 screws) Right Side Thigh Ammo Pack Left Side Ammo Pack Sniper Plate Right Side Sniper Plate Front Side Sniper Plate Left Side Boots Blaster Left Side Blaster Right Side D Ring Thank you for your consideration! Quote
HawkFan24 Posted June 13, 2014 Report Posted June 13, 2014 Armour looks great, nice job on those boots! Quote
JLight[TK] Posted June 13, 2014 Author Report Posted June 13, 2014 you look great. good luck! Thanks, Anthony! I looked a ton at your build threads and EIB/Centurion threads. Not alot of NE out there, but it is growing. Armour looks great, nice job on those boots! Thank you, sir! They are cracked a bit and will continue to do so, but that is more screen accurate anyways. Eventually will have to re-paint. Quote
Vader’s Wingman[501st] Posted June 13, 2014 Report Posted June 13, 2014 (edited) Awesome build Jonathan! Looks great! Really the only thing I notice that might be an issue is the paint job on your frown/teeth. They should be filled in all the way to the edges. And your belt may need to come down to cover the gap between your kidney and butt plate. Also the opening/gap on the right side of your ab/kidney looks a bit wide. Other than that it looks fantastic! Well done! As always, please don't make any changes until instructed to do so by the DL. Best wishes and good luck! Edited June 13, 2014 by Zixx Quote
JLight[TK] Posted June 14, 2014 Author Report Posted June 14, 2014 Thanks for the feedback. As far as the belt, I have been having issues trying to keep it up in the front to touch the bottom of the an buttons but low enough in the back to come near butt plate. If anyone has suggestions, please let me know. I thought the weight of the holster/blaster and TD would help, but it slides up in the back. As far as helmet frown. I used this hero as a guide... As far as gap, I can always resubmit. I think the belt could have been tighter to close in the gap and plus I could always let out a little on left side because I have a slight overlap. Either way, thank you for the feedback. I have been looking forward to your remarks as I have read many that you have left recently and you have a very good eye. Sent from my iPhone using Tapatalk Quote
Vader’s Wingman[501st] Posted June 14, 2014 Report Posted June 14, 2014 (edited) . I have been looking forward to your remarks as I have read many that you have left recently and you have a very good eye. Sent from my iPhone using Tapatalk Thank for the compliment sir! I really enjoy looking at everyone's armor and builds and offering my feedback. I still think maybe you could extend your frown paint a bit. Here is a pic from the Whitearmor archives. . I do see where you are being mindful of the bits of white gap at the bottom and top but I think you've left a little too much. I could be entirely wrong though! So we'll wait and see what Steve has to say. As far as the belt, it may not even be an issue so I wouldn't worry about it too much unless you're told to correct it. Edited June 14, 2014 by Zixx Quote
JLight[TK] Posted June 14, 2014 Author Report Posted June 14, 2014 Yeah after looking more closely, it appears the teeth cut outs were slightly smaller. Meaning they don't go all the way to the top and bottom of frown. And so I believe my painting of the frown is spot on, but have cut my teeth too long and so the gray paint and teeth aren't flush across frown. Sent from my iPhone using Tapatalk Quote
Vader Rocks Posted June 14, 2014 Report Posted June 14, 2014 Nice looking build trooper. Good luck. Quote
gazmosis[501st] Posted June 16, 2014 Report Posted June 16, 2014 Hey Jonathan! Thank you for your application for EIB. Nice work choosing the Hero approach. Well done massaging out those extra teeth from the ATA face plate. Let's take a look at your armor! CRL and EIB Application Requirements: All required submission photos (and then some) posted. Your armor meets all the requirements for EIB. With that I would like to congratulate and welcome you to EIB!!!!!! Other-Armor Fit/Assembly: there are few things here to discuss which is GREAT!!! there is only one minor adjustment that I'd like to see you make if possible. Here is a screen used thermal detonator:I can't put my finger on it, but it might be a combination of enthusiatic trimming of the control panel, the detonator pipe being a little too long and your clips lacking a liitle width. The clips should be 1-1 1/8" wide. As in this pic, the side gaps between the end caps and the control panel should be about 1/2 inch.but the change I 'd like to see if you can do is to take the rounded curve off the top of the clips. These clips were flat across the top at the control panel. Look at you installing soft velcro on the clips to protect your armor. Nice!!! There was some discussion regarding your frown. After jumping back and forth a number of times between your helmet and reference shots, I think it is fine like it is. I don't see the angle you left at the wrist of the left forearm too often. It's nott distracting or in anyway affects the appearance of your armor so it's fine. Centurion Suggestions: Make sure you include all shots on the checklist. Also, make sure to re-take the shot of your right side with your belt tightened up. Pull that seam shut as much as you can. Congratulations again!!!! Quote
JLight[TK] Posted June 17, 2014 Author Report Posted June 17, 2014 Thank you so much for the feedback! Look forward to serving soon as centurion! Sent from my iPhone using Tapatalk Quote
Vader’s Wingman[501st] Posted June 17, 2014 Report Posted June 17, 2014 (edited) Congrats Jonathan! Welcome to EIB!!! Edited June 17, 2014 by Zixx Quote

Recommended Posts
Join the conversation
You can post now and register later. If you have an account, sign in now to post with your account.