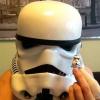
Psych007 Posted February 23, 2013 Report Share Posted February 23, 2013 Hi there, have been doing alot of mods on my Rubies the last month. Unfortunately I work away from home between the weekends so my only time to work on the armor is friday-sunday. This is the progress so far tho, really appreciate some advice to get it better. First of all a crappy pic straight from the box. The gloves didnt work to well with my smartphone which shows in the blurry picture. The fit was just awful and I almost lost my hope straight away. Could hardly move. I know I need to replace the boots which is in progress and a helmet from CFO is due about next week along with some white stripes for the bigger pieces of the armor. Since I didn't have any spare abs-plastic i used a thicker fabric for the snap-plates. The snaps in the bottom didn't need to be used since I fixed the long elastic over the shoulders. The belt didn't feel good at all so I did a new one after a tutorial here. As you can see I replaced the elastics for the dropboxes and made an inner one for em. Theyr'e not pretty but they work for their purpose.. Raw assembly. Some abs-paste and sanding later. Tada! The AB-buttons aren't right for the ROTJ-armor so that need to be flipped. Easier said than done! Before a bit of sanding. It doesn't look to bad on this photo but in close-up at the joint you can easily see that something has been made to it. I'm having some problem with bubbles. I've painted the buttons twice with different colors but it seems i have to do it once again because the last time alot of the paint got peeled of when i removed the tape I had making the circles. Any tips on how to do it better and any 'correct' colors to use? Beside alot of trimming and cutting and sanding that is most of the mods that have been made. I have alot more to work on but I'm starting to see the light in the tunnel.. Here's some picture on the armor in it's current state. The shoulder straps are off so I can abs-paste the holes from the rivets and put it in the right position after getting the chest and back right. Sorry for the quality of the pictures, not easy when your'e alone.. I'm having problem with the fit between ab/kidney and back, any solutions, padding foam in the top-back or cutting some off? Should I try to lower the back a bit to be closer to the bottomplate? The straps from the bells are going to be replaced underneath the shoulder-snap-straps. Is the height of the chest/back ok? Shins. There you go, the progress so far.. Now I need to run, got an car-inspection in 20 min! Yikes! Take care all! Quote Link to comment Share on other sites More sharing options...
Locitus[Admin] Posted February 23, 2013 Report Share Posted February 23, 2013 Make sure to strap the back and kidney together. That should lessen the gap. And try to get that white rubber trim around edges of the armour. CFO sells it if you can't find it locally. Biltema might have it. It's mostly used for boats. I'm not sure how it will look on top of the moulded "fake" trim the armour has, but there's usually ways around that stuff. Keep up the good work. Quote Link to comment Share on other sites More sharing options...
Psych007 Posted February 23, 2013 Author Report Share Posted February 23, 2013 Hey man! Yeah that should get the two pieces together better. Originally there's velcro from the back to chest and I'n going to switch that for wider elastics and snaps as soon as I know How to do it best. Actually I ordered some trim at the same time I ordered the helmet from CFO so I'll have it during next week I hope. The moulded fake have to go I would say, try to cut a bit and maybe heat it straight. Quote Link to comment Share on other sites More sharing options...
Locitus[Admin] Posted February 23, 2013 Report Share Posted February 23, 2013 Sounds like you have things under control then. Quote Link to comment Share on other sites More sharing options...
Psych007 Posted February 23, 2013 Author Report Share Posted February 23, 2013 I wouldn't go so far to say that but I like to think one step ahead.. Quote Link to comment Share on other sites More sharing options...
Psych007 Posted February 23, 2013 Author Report Share Posted February 23, 2013 Another question, would you know of a site that sell the fabric needed for this neck seal? www.whitearmor.net/forum/topic/8402-howto-create-a-neckseal/page__hl__+howto +neck#entry250208 I've checked the local textile-stores around and they don't have it. Preferable in Sweden but as long as I can get my hands on some I would appreciate wherever it comes from.. Quote Link to comment Share on other sites More sharing options...
Locitus[Admin] Posted February 23, 2013 Report Share Posted February 23, 2013 I guess any shiny fabric works for the outside. I've seen people use T-shirts they cut up before as well. Quote Link to comment Share on other sites More sharing options...
gmrhodes13[Staff] Posted February 23, 2013 Report Share Posted February 23, 2013 Some of the cheap kids costumes has nice thin shinny material, I have made a neck seal out of it. You are doing a nice job keep up the great work Quote Link to comment Share on other sites More sharing options...
Kessel Run[TK] Posted February 23, 2013 Report Share Posted February 23, 2013 your on the right track. as for fabric, maybe you could check a second hand store for an old womans top in the texture you are looking for, Quote Link to comment Share on other sites More sharing options...
SolderMaster Posted February 23, 2013 Report Share Posted February 23, 2013 FYI, you have the sniper plate and the thigh ammo box on the wrong legs. Quote Link to comment Share on other sites More sharing options...
Psych007 Posted February 23, 2013 Author Report Share Posted February 23, 2013 SolderMaster: The pictures are taken by myself in a mirror, therefore the illusion of stuff being on wrong sides. Was thinking that maybe the jumpsuit that came with the armor might be close enough fabric. Have to check that when I come home, right now I'm at the hospital because I almost cut one of my knuckles off. ;P Be carefull with übersharp knifes and blades! Quote Link to comment Share on other sites More sharing options...
Locitus[Admin] Posted February 23, 2013 Report Share Posted February 23, 2013 Have to check that when I come home, right now I'm at the hospital because I almost cut one of my knuckles off. ;P Be carefull with übersharp knifes and blades! Indeed. I think there's no piece of my armour that hasn't had my blood on it at least once during the build. Be careful! Quote Link to comment Share on other sites More sharing options...
Psych007 Posted February 23, 2013 Author Report Share Posted February 23, 2013 After 3,5 hours in the hospital i got home with a note that I shouldn't work for two weeks. Sheesh this is a dangerous hobby! Quote Link to comment Share on other sites More sharing options...
Dday[501st] Posted February 23, 2013 Report Share Posted February 23, 2013 Wow, can't work for two weeks?! More time for building the armor I guess! Quote Link to comment Share on other sites More sharing options...
Psych007 Posted February 23, 2013 Author Report Share Posted February 23, 2013 Haha yeah that was my thought too! I will be able to work on it but I'm not allowed to bend my left index finger for 10 days. Good thing that I'm righthanded tho. The work might take a bit longer time then it would. Quote Link to comment Share on other sites More sharing options...
Clamps[TK] Posted February 23, 2013 Report Share Posted February 23, 2013 Take your time and cut with care for the rest of the build. Quote Link to comment Share on other sites More sharing options...
Psych007 Posted February 23, 2013 Author Report Share Posted February 23, 2013 I think I have learned my lesson. Quote Link to comment Share on other sites More sharing options...
Psych007 Posted February 25, 2013 Author Report Share Posted February 25, 2013 I got the helmet and white striping from CFO this morning. Couldn't have been waken up better when I realized what the delivery-guy had for me.. I've been working a bit on the striping, gotten the backpiece fixed up, haven't been glued yet tho. I've cut down the 'fake-stripe' that comes in the shape of the Rubies so the new stripe would cover it. Tell me what you think. There was a wider angle on one of the two top sides so I marked that up and cut the other one in the same shape, worked great with the stripe. Trying on the stripes. The whole piece covered in stripes. I had the joint on the right side where it will be hidden by the belt. Made some cuts in the crotch-area. I made a small cut on the inside for a better fit when being glued later on. Close-up on the inside of the bottom. I'm pretty satisfied with the result so far, hope the rest will fit just as good. Quote Link to comment Share on other sites More sharing options...
Locitus[Admin] Posted February 25, 2013 Report Share Posted February 25, 2013 Looking much better already! Quote Link to comment Share on other sites More sharing options...
Psych007 Posted February 25, 2013 Author Report Share Posted February 25, 2013 After some glue-shopping the bottom-piece have been glued and the back-piece fitted. I decided to have the joint in the middle underneath where the shoulderstrap will go. Quote Link to comment Share on other sites More sharing options...
Psych007 Posted February 25, 2013 Author Report Share Posted February 25, 2013 All pieces are fitted and glued, no picture on the Ab-plate tho but it's all the same.. Not wide enough angle on the bottom of the cod so I had to make a cut. I'll post a picture with the armor on tomorrow. made some shaping of the back, cod and ab-piece also so I'm curious how it turned out.. Quote Link to comment Share on other sites More sharing options...
gmrhodes13[Staff] Posted February 25, 2013 Report Share Posted February 25, 2013 Nice job on the edging looking good, keep up the great work Quote Link to comment Share on other sites More sharing options...
SolderMaster Posted February 25, 2013 Report Share Posted February 25, 2013 (edited) My bad and sorry about your knuckle. I think I have shed blood on every armor set I have helped build...comes with the territory..lol You know, when I first read that this was a Rubies I automatically thought...."oh, no". But you are really doing a great job fixing it up. Impressive! Edited February 25, 2013 by SolderMaster Quote Link to comment Share on other sites More sharing options...
Psych007 Posted February 26, 2013 Author Report Share Posted February 26, 2013 Thanks for the kind words guys.. Yeah 'Oh no' was something I thought alot also when I started to realize what I've given myself into.. After fitting and strapping my shins the joint on the right one didn't look that satisfying so I made a little touch-up on it as seen below. Before. The gap on top there doesn't look that bad on this pic but it didn't look good. Made a cut in it and started working on it with a hobby-iron until I got it to fit better. Cut a small piece of abs and fitted it in and added some abs-paste. Final result after some sanding. Can't really get rid of the bubbles, gonna try and do a tiny bit more sanding, I don't want it to be too thin either. Any tips on using abs-paste the best? Have read through some short guides. Some say that thin layers would prevent the bubbles but I haven't got that to work so far. Quote Link to comment Share on other sites More sharing options...
Locitus[Admin] Posted February 26, 2013 Report Share Posted February 26, 2013 I realized one thing last night and that is that you have a ANH/ESB style canvas belt and not the ROTJ webbing. You'll need to change that. Quote Link to comment Share on other sites More sharing options...

Recommended Posts
Join the conversation
You can post now and register later. If you have an account, sign in now to post with your account.