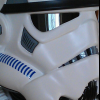
Whitestuff[TK] Posted December 23, 2012 Report Posted December 23, 2012 Name: Stefan Wolff ID: TK 7645 Forum Name: Whitestuff Garrison: German Garrison Armor = Movie FX (Germany) 2mm HIPS; Mic tips, lenses and humbrol colours from trooperbay Helmet = Movie FX (Germany) 2mm HIPS (hand painted) Blaster = Doopydoo´s resin (with metal spring and faked plastic lenses) Height = 1.80 Weight = 65 kg Boots = TK Boots Neck Seal = stormtrooperundersuit.com (UK) canvas belt = trooperbay Inner drop boxes = selfmade with heat gun and spare styrene pulled over a selfmade metal box Hand Plates = Sonnenschein white gum Gloves = Sonnenschein Black Rubber Holster = selfmade leather Helmet fan = noiseblocker black silent xm1 40mm with 2 x 9V-Batteries Electronics = icomm + voice amp (Intenso FunBox) EIB Approval: http://www.whitearmo...-status-mfx292/ Helmet: 3 screws, 4 bumps, hand painted details Green lenses Hovi mix aerators S-type neck trim Shoulder straps: Held down via a white elastic band connected to the white fabric that connects chest and back plate Forearms without return edge, Rubber gloves with latex hand guards Ab / kidney plate: Split rivets on the left side Male snap on top right corner of ab plate Split rivet on crotch tab Single piece ab buttons Butt plate: Separate from kindey plate Two male snaps on crotch tab Belt: Canvas, plastic corners trimmed at 45 degree angle, holster connected from behind Inner drop boxes Thermal detonator: Attached via metal clips Thighs: Thigh ammo belt connected by split rivets, bottom corners rounded off Washers on inside Lower legs: Sniper knee plate aligned with ridges, no rivets Boots: No seam on front, lightly scuffed / matching condition of armor Blaster: D-ring Full size pictures from front, back and sides and w/o helmet: Action shots: Quote
gmrhodes13[Staff] Posted December 23, 2012 Report Posted December 23, 2012 A very nice and clean application, would just say the screws ont he TD need to be flat head and tapered, also looks like you may have trimmed a bit too much off your belt, can just see he recess section on thee left side. You may not have to do anything about them, good luck with approval Quote
FunkyTrigger[TK] Posted December 23, 2012 Report Posted December 23, 2012 I like the like the look of your Armour on you for size and fit. I admire you for making your own holster and inner drop boxes. My only critique would be your choice of fitment hardware to attach the holster to the belt. I am also interested in learning more about your TD panel detail. Good build, well done. Quote
captsafe66[Admin] Posted December 23, 2012 Report Posted December 23, 2012 Looks Great!! Good Luck Trooper!! Quote
Whitestuff[TK] Posted December 23, 2012 Author Report Posted December 23, 2012 Thanks to you guys for the improvement suggestions and encouragement @ Glen: Hardware shops will be closed when I get home from work tomorrow, but I´ll get some flat head / countersunk screws right after the christmas holidays. @ Phil: The holster is attached via poppers, the idea was to be flexible for events where weapons wouldn´t be allowed - but I can change these if required. Indeed there hasn´t been any need to leave my blaster in the box up to now... I must admit the diameter of these poppers might be to much.The TD panel was produced by Movie-FX like the rest of my armor, what exactly would you like to know about it? More pics? Quote
Locitus[Admin] Posted December 23, 2012 Report Posted December 23, 2012 You could redo the holster poppers so that the female half is on the holster strap, and then use a pop rivet to hold the male half like it was a washer on the inside of the belt. It's a very good method for attaching the holster when using snaps/poppers. The TD screws are good as they are, leave them. Quote
Whitestuff[TK] Posted December 24, 2012 Author Report Posted December 24, 2012 (edited) OK, I'll change the rivets like you said and will post a new picture as soon as possible. Are pop rivets the first choice or will cap rivets be the ones to be attached? I saw these beeing used for the holster in other application threads. Just asking, I have both types here, but which would be the preferred ones? Edited December 24, 2012 by Whitestuff Quote
Locitus[Admin] Posted December 24, 2012 Report Posted December 24, 2012 I should be clear on this though, you don't have to change them for approval, I could approve you now if you'd like to. But I think you would really benefit from the holster snap mod I described. Quote
Whitestuff[TK] Posted December 24, 2012 Author Report Posted December 24, 2012 Oh cool, that's good to know! I would like to be approved then, but I will change the holster snaps anyway, promised! Unfortunately I have to work during the next few days, but will try to get some minutes for completing the modification. Once again, thank you very much! :-) Quote
Locitus[Admin] Posted December 24, 2012 Report Posted December 24, 2012 Approved. And please show us the holster mod once you're done with it. Quote
Whitestuff[TK] Posted December 24, 2012 Author Report Posted December 24, 2012 Yes sir, I´ll post a pic of the modified holster as soon as I can. And: Thank you! Quote
gmrhodes13[Staff] Posted December 24, 2012 Report Posted December 24, 2012 Congrats and well done trooper Quote
Clamps[TK] Posted December 25, 2012 Report Posted December 25, 2012 Welcome to Centurion Trooper! Well done. Quote
Dazauto[TK] Posted December 26, 2012 Report Posted December 26, 2012 Welcome to centurion, congrats trooper Quote
Faie[TK] Posted December 26, 2012 Report Posted December 26, 2012 Welcome to Centurion Trooper!!!!! Quote
Boltstrooper[TK] Posted December 29, 2012 Report Posted December 29, 2012 Great job on the armor. Congrats. Quote
Whitestuff[TK] Posted December 29, 2012 Author Report Posted December 29, 2012 Update on my holster attachment: I found two options and test fitted both of them for you to see. Which would be the better choice? Personally I´d prefer the one on the right, a cap rivet approximately 7-8mm in diameter. A third option (not depicted) would be a blind rivet aka pop rivet. Is it known which type of rivets they used back in ´76? Quote
gmrhodes13[Staff] Posted December 29, 2012 Report Posted December 29, 2012 I am using the one on the right but both either would be fine Quote

Recommended Posts
Join the conversation
You can post now and register later. If you have an account, sign in now to post with your account.