

Sgt JB
-
Posts
444 -
Joined
-
Last visited
Content Type
Profiles
Forums
Gallery
Articles
Everything posted by Sgt JB
-
any chance I can get you to take a close up pic? I'm alot better at replicating, than I am at going free-hand, if you catch my meaning.
-
ok, so for the shin, what do you guys recomend for width? I was going to do 1.5" but that looks too wide. so now I'm thinking 1" that sound about right for the front piece?
-
yes, I could barely hold 3 things together, much less 4...lol. I think I'm also putting the horse in front of the cart with the knee, should just worry about getting the shin together first. knee second.
-
yea, I guess I'm afraid of trimming too much, but I also looked on the inside, and there's a nice sharp seam on the inside where the mold ends and the piece starts, so that made it easier too, just had to look a little closer
-
I was able to hold it at a better angle, but by then my daughter wasn't able to take pics as she was in bed. I think I got the right idea now, I just gotta wait till payday Thurs to get my hobby iron to turn the edges so I don't have to quarter inch excess hanging over everything, I should be good to go then. I think that's my problem right now, is the excess I left on to fold in.
-
ok, hard to hold together, and get a good shot, but hopefully you can see what I mean I just need to see what someone else's knee looks like from the inside, so I can see how much I should be taking off the shin under the kneecap.
-
Hi all, I'm working on my ATA build, I need some assistance with the knee cap. I think I'm being too squemish, and not trimming enough off the shin to align the knee cap, and I was wondering if anyone could throw up a couple side and inner shots of their knee so I can get an idea of where it should be lining up on the inside. Thanks for the help.
-
As far as sizing, I'm 6'2" about 195lbs. I'm in the process of trimming and fitting my ATA right now. at 6'2", the grieves go from my ankle bone to my knee perfectly. I'm a runner, so I have big calves. I barely fit the back 'bulge' in the grieves, but with the front and back strips, I should have no problems. I've trimmed my fronts to 3/4" on each side, and the rear to 5/8" (just giving information.) Also, I have a little bit of a belly, so I will need to shim the ab plate about 1-2 inches on each side. other than that, initial fittings seem to suggest that this is a very well proportioned suit for me.
-
----------
-
possibly, don't know, I plan on painting, either high gloss with a few coats of clear, or auto paint, haven't made up my mind on that yet.
-
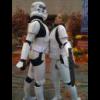
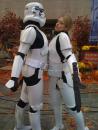
Showing it off. Finally!
Sgt JB replied to TK8776 jgarrettg's topic in Hard Armor (General Discussion)
Beautiful build, you should be proud. I agree, your GML should have an easy time... -
don't need to tell me that Boss!! I'm very thankful. ATA did a very good job IMHO. I'm very pleased. I have 4 pieces rough trimmed. going to be turning all the edges with an iron to give them thickness, so I've got alot more to do. but so far, feeling good. pics soon....
-
I agree 100%, there is going to be work involved with an ATA build no doubt about it, plus painting. It's made from HIPS, but I'm suprised at the durability. I flexed the butt plate quite a bit, and it didn't tear, or crease, or anything. I wouldn't suggest football, but for general trooping should be fine. but it all comes down to what you want to do, what you can afford, and how much effort you're willing to put in. Good Luck with your decision!!!
-
hope that's not YOUR Fiance!?!?!?! If she was mine, she'd be my ex-fiance!
-
see my "worst day" thread....just unpacked my ATA set..I think it's beautiful. but that's just IMHO
-
I was all excited, looking forward to it....now that I'm looking at it, kinda scared S#%@LESS!!!! LOL BTW, there's 3 little circles indented in 3 Squares, you can see them at the bottom of pic #4, on the right. Anyone tell me where those go?
-
So, I was having the crummiest day ever, bad day at work, not feeling too hot. So I'm walking home from my bus stop on the way home from work, and I see this box...... needless to say me day got MUCH better all of a sudden!! Thanks ATA, you really made my day. beautiful stuff. great pull!!
-
sent you a PM, hope everything irons itself out. Anything we can help with, we're here for ya bro.
-
Beautiful job, you should be proud. it's inspiring.
-
Vern, I didn't see arrogance from the replys you got, Just as you saw nothing wrong with the tone of your comments. I agree that you came off a little too strongly to start your thread. Jus realize there are tons of people that log in, ask "WHERE DO I GET THIS?" "WHERE DO I GET THAT?" and don't act with much class for the 10 posts they leave before moving on. Thanks for clearing up what you ment, as well as how you ment it. The 'look before you post' remark was bad form, and rude, so please don't criticize others for being arrogant, when you started with what, in my opinion, was a little too much attitude for someone with 28 posts, most of which are in this thread. Not trying to be mean spirited, not at all, just pointing out that you had a bit more attitude in what you said than I think you ment to.
-
HOWTO : Painting Basics and Weathering
Sgt JB replied to Sgt JB's topic in Tutorials, Tips and HOWTOs
Washing is a painting technique that involves...well you guessed it.....washing. By this I mean using diluted paint, or ink to 'wash' an area, and give in a tint, or hue, without covering the color behind it 100%. Again, most hobby shops should cary some brand of washes, or inks. If you're looking for a rusty, or even muddy look, I recomend getting a brown wash, brown paint, as well as orange paint. Start by drybrushing with your metalllic paint so you have a starting point that's worn looking. next, drybrush a light coat of brown on the area you want to look rusted. next, drybrush some orange over the brown, but allow the edges to still have the brown show through. Next you'd want to get some ink into a small bowl, or small surface in a little puddle. water it down by adding about 1:1 ink to water, mixing throughly. Then begin by filling your brush with the wash, apply to the area you have drybrushed. This should 'mute' the color, and give it an overall brownish tint. Depending on the level of weathering you're looking for, it's ok to let it run a little bit, as this will add to the weathered, unkept look. When using washes, you need to let it dry 100% otherwise it will get all over anything else you do after that. So after drying, go back over the area with your drybrush, and add a tiny bit of brown and orange to the raised highlights, this will bring out the contrast, and make it look like real rust. Again, it's a little trial and error, I recommend finding something that has similar levels of raised bits as say the grip of the blaster to practice on first. but when you get the hang of it, you can really do a great job with little additional $, and time. Adding a layer of silver under the black and then removing the black winds up marring the overall look, because you have to scratch off the black paint. Real guns do not have paint, but rather blueing that does not chip, but rubs off after time. That's it for now, more to come later. -
Hello all, I'm at work, so no pics till this afternoon, but I'll get started with some basic painting and weathering techniques. First off, I'd like to talk about paint. There's many options on what paints to use, and for you blaster, and other side props you may want to paint, I recommend starting with a matte finish primer. Matte finish paints tend to obscure less detail, and are not as runny as gloss paints, so I recomend doing all your painting of your blaster / props with matte paints. If you want a sheen on it afterwards, use a gloss, or semi gloss clear coat when finished painting. This will prevent chipping, and give it a nice sheen. Gamesworkshop, Tamaya, and Reaver all make very good plastic primers for models. These are very good to use as primers / base coats, as they are designed to 'shrink' when drying. See, normal spray paint is designed to fill in small blemishes, and details. While this is fine for armor, it will detract from the details in your blaster or props. So, to start with, when your blaster is all ready for paint the first thing you want to do is wash it in soapy water, and rinse with clear water. This will prepare the surface for paint, and remove any little particles that may be on it from sanding, and the like. Allow to completely dry before starting your painting. Hang your blaster, or prop, and get your paint. If using spray paint, shake the can for at least a good minute or more to get the paint mixed correctly. When painting with spray paint, it's better to do several thin coats of paint than one heavy coat. Heavy coats of paint will run, and fill in details. To do light coats, begin by holding your can aprox 6-8" from the surface, and begin painting a few inches to the left or right before the paint gets on the blaster. This allows any clumps of paint to shoot out before going on your blaster. Move your hand quickly from left to right in an even motion, this will get you good coverage, and reduce pooling, and running. Don't worry about making the whole thing black on the first pass. in fact, the color of the plastic / resin / metal should show through the first coat if you did it right. Wait for the paint to dry, but not cure all the way before adding a second / third coat. Usually about 45 minutes to an hour. After you get full coverage with your primer, allow 24 hours to dry before continuing. Now, After getting the whole thing black, we want to start in the weathering. The first technique we'll look at is drybrishing. Drybrushing is a way of painting where you get very little paint on the brush and 'dust' the object with very, very small amounts of paint on just the raised edges, and details. This allows the interior or recessed parts to remain your starting color, while bringing the details out with the new color. On my blaster, I used GW Citidel paints, as that's what I have, but any hobby shop whould have a decent range of model paints for just a few $ a pot. Again, they shrink up a little bbit, to prevent you from obscuring the details. So to start, get a brush that's about pencil thickness. Use only horse hair, or natural brushes, synthetic brushed tent to not hold paint very well, and you wind up getting a very streaky, unnatural paint job. You can use a standard 1' paint brush, but your details will come out streaky, and not look natural. Start by dipping just the tips of the brush head in the paint. removing as much back into the bottle as possible, as we're trying to get as much paint off the brush as possible. Next, use a paper towel, or old wash cloth, and start wiping the paint off the brush until almost all the paint is off. You should be able to drag the brush across the towel and have nothing come out of the bristles. Begin brushing the area you want to weather with light, short strokes. (think of cops dusting for prints) Don't worry if at first you don't see too much paint going onto the surface, as it takes a bit to build up. I always start on areas that I think would be worn down the most in real life. (like the edges of a sight, or the barrel end) Keep this up until no paint is comming off the brush at all. Redip, and continue until you get the light brushing of metal paint on the areas you want. here you can see there's very little metallic paint (about half a thimbles worth) over the whole blaster, but the metallic highlights come through nicely. If you really want the metal color to come through, use a lighter metallic color just on the raised edges, like the rear sight teeth, or the cross hatching on the blaster grip. So, after drybrushing what's next? Well, depends on what you want as an end results. Next up is washing, and the results.
-
The sanding, I used a Black and Decker mouse with a fine grit sand paper, I then sat with 'Empire of Dreams' on the PC, and went SLOWLY. Took about 2 hours sanding total. I started with Games Workshop's Citidel model paint primer, several coats of Chaos black model paint, then drybrushed with several metalic paints, I'll be doing a painting how to thread tomorrow, so stay tuned.