


troopermaster
-
Posts
3,638 -
Joined
-
Last visited
-
Days Won
12
Content Type
Profiles
Forums
Gallery
Articles
Everything posted by troopermaster
-
That's the one! It doesn't look too long on the finished armour but a shorter strap allows less movement. Also, if you have original strapping, it kind of forces the armour to hang a certain way and the chest brackets could be forcing your abdomen down. Try having longer loops at the chest only and see how it feels.
-
Everything is looking really good. The knee plate problem is pretty common and I think a bit of foam inside the back of the thigh (at the knee) cures the problem. The side strap between the kidney and abdomen looks too long in your build photos. It really should be very short and only long enough to reach the snap on the abdomen. Trim the tops of the thighs by all means.
-
JSB Build Thread
troopermaster replied to jasterstrikesback's topic in Build Threads Requireing Maintenance
Photos of the main torso parts and the face plate are what I would like to see more of. I already know where the arms came from. -
JSB Build Thread
troopermaster replied to jasterstrikesback's topic in Build Threads Requireing Maintenance
More importantly, I think we would like to know who you got it from? -
JSB Build Thread
troopermaster replied to jasterstrikesback's topic in Build Threads Requireing Maintenance
Now the truth please! -
JSB Build Thread
troopermaster replied to jasterstrikesback's topic in Build Threads Requireing Maintenance
Who did you buy that kit from? -
The brown boots Mathias posted are original brand boots. Here are a few more photos of originals to help make better replicas.
-
I haven't seen those photos from Matts' Yahoo account for years now. How time flies....
-
Here is another with the original (?) flat lens in one eye.
-
LOL beat me to it while I was searching for a photo
-
Nice photos Joe! Some there I haven't seen in a while. Hmmm...not sure about the prop. I'll ask ziggy, he should know
-
When you asked me about the cloth for the belt I was under the impression you wanted material to make your own.
-
You have almost got it right. The top of the inner half of your forearm should have a flat ridge just as your outer half does. I don't know if your kit has one originally but that is how ANH armour is.
-
This is not surprising to see. I facepalm on almost every thread I read lately
-
Right Button Plate
troopermaster replied to Boba_Skywalker3's topic in Hard Armor (General Discussion)
You have over painted them making them look too big. There should be a nice gap between each button and they could be neater. -
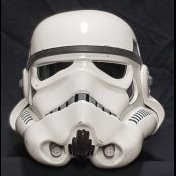
I believe this is the actual helmet in the auction. I wonder where the rest of the armour is? The last ROTJ helmet went for double this estimation if I remember correctly.
-
The gap at the shoulder bells will be reduced once the biceps have been trimmed. The biceps were made to suit the incorrect measurements I was given and are oversized through no fault of my own (just want to make that clear ). Also to note, anyone who is larger than a skinny 70's guy cannot expect to look they do one screen. So if there is still a gap at the bells it is because David is a stocky guy and has nothing to do with the armour (just want to make that clear too )
-
The diagram is wrong. The ridge should be on the top of both the inner and outer parts so there is a flat surface to glue the butt joining strip to. The back side of the forearm has no ridge and allows you to trim where you want (within reason) and close them using the butt joining strip again. Use this information if you want to go screen accurate. You do not have to do it this way, but it is the way the original suits were assembled.
-
I trim 10mm in from the top and bottom and 13mm in from the sides. I don't think there is any set measurement here, but most belts seem to have slightly more off the sides than the top and bottom. Here is an original ANH belt for reference.
-
No, you are not doing it right. ANH forearms have the ridge on the front side of the forearms and none on the back side. Same goes for the shins and thighs. Only the biceps don't have any ridge.
-
You could also make a double strap down from under your shoulder strap so that the bell is independant from your bicep and should help since there will be no real tension placed on your bells.
-
It looks like you might have issues no matter which way aroundy you try. The original pieces had the backs trimmed so anything you see has been sculpted and does match the originals unfortunately. I think you may end up keeping them as they are and trimming the backs of the knees since it looks like they won't match up any better. These are the correctly assembled shins in the LFL archives just for reference.
-
Do they match up better the opposite way or not?
-
Now you know how they should be assembled if you follow my advise. If the RS parts are labelled L & R and you followed them then I think they should have a think about what they are doing. As they are you are forced to assemble them incorrectly when you could get them to fit much better if they were labelled correctly. I have noticed this on almost all of the RS builds and people are complaining about how badly they fit. Not surprising if they are marked incorrectly. If you are in doubt, post a photo of your parts and I will let you know how they should fit together.
-
I think you have glued the two modified inner parts together by the looks of it. You can tell this by how the back of the knees point upwards in the middle compared to how a correctly assembled left slopes down to the right and the right slopes down to the left looking from the back. Those are the two modified pieces made to look like inner parts or simply made to look different since the original shins were duplicate outer pieces.
