

Gep
-
Posts
81 -
Joined
-
Last visited
About Gep

Recent Profile Visitors

-

A Fat Guy's Build Attempt - Anovos
Gep replied to mudhawg's topic in Build Threads Requireing Maintenance
Another shim option is sign plastic in a pinch. -
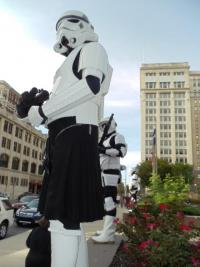
My First Armor Build Thread ANH-S CAP Armor.
Gep replied to Stormy1992's topic in Build Threads Requireing Maintenance
I had it backwards, in my head, I was thinking of this..... (the gap between the edge of canvas and plastic looking at the belt from the back.) Kyle is in good shape with his boxes. Brain fart on my part. -
My First Armor Build Thread ANH-S CAP Armor.
Gep replied to Stormy1992's topic in Build Threads Requireing Maintenance
I stand corrected. My figure was based on the measurement from the edge of the canvas to the edge of the ammo belt so the drop box would just hang below the plastic. The number was in my head from one of the 3 or 4 tutorials I used on my build. -
For those wanting to stick with the stock ATA trim, like myself, I have found a decent solution. Clear silicone (GE Silicone II) adhesive sealant mixed with E6000. The silicone sticks just enough to the trim, and the E6000 adheres to the ABS. Holding better than any of the other glues I've tried in the last 2 years.
-
My First Armor Build Thread ANH-S CAP Armor.
Gep replied to Stormy1992's topic in Build Threads Requireing Maintenance
Kyle, based on the pics here things look pretty darned good. A couple of items I'm wanting to bounce off the FISD community - Are drop boxes too tight to the belt? There should be a 1/2" or so gap there, correct? The CRL show them flush, but I've seen others called out for riding them high. - The ab buttons still look on the smallish side. Can you paint them a bit larger? 11mm diameter is your target. - What is the black bit showing on the front of your left boot? Is it boot or something hanging from the shin? -
My First Armor Build Thread ANH-S CAP Armor.
Gep replied to Stormy1992's topic in Build Threads Requireing Maintenance
You are actually asking 2 questions here. Do you want to know where to put rivets and snaps for EIB/Centurion, or are you wanting to know how to do a snap harness system? A lot of people use snaps (get the good ones at Lowes or Home Depot, not the Wal Mart junk, they hold better) I used a method very similar to the one here: http://www.whitearmor.net/forum/topic/19265-another-am-armor-buildam/page-4 All you need are a bunch of good snaps, some nylon straps (Wal Mart has this in the craft section), and snap plates made from sign plastic, and some E6000 to glue them down. -
My First Armor Build Thread ANH-S CAP Armor.
Gep replied to Stormy1992's topic in Build Threads Requireing Maintenance
Kyle, on your boots, I would steer you away from the method you used on your first attempt at painting. The gloss and excessive peeling at the wrinkle points are a little much. There was a fair bit of overspray on the sole as I recall. If you use a regular rattlecan, the stuff may never dry. I believe tkboots is still selling, but there's a wait. If you do go with painting, look into a fabric or flexible type paint (acrylics may work or Krylon H2O series if they still make it) or actual leather dye/paint from Tandy. -
My First Armor Build Thread ANH-S CAP Armor.
Gep replied to Stormy1992's topic in Build Threads Requireing Maintenance
If you are still looking for rivets, try Rural King if there's one near you. They usually have a really decent selection -
My First Armor Build Thread ANH-S CAP Armor.
Gep replied to Stormy1992's topic in Build Threads Requireing Maintenance
Personal preference, but you may want to tighen up the gap between the back and kidney plate a bit. If you have not mounted the shoulder straps, you should be able to lower it just a tad. -
My First Armor Build Thread ANH-S CAP Armor.
Gep replied to Stormy1992's topic in Build Threads Requireing Maintenance
So, we should ignore CRL's? As a GML, my tool is the CRL. You can say it's pathetic, but at the end of the day, I have to use that document as my guide. The tooth count is currently spelled out in black and white. Some costumes, I'm very familiar with, some I have to do some research when the applications come in. Every CRL has minor or major issues that are not 100% clear. I would hope the other GML's work with the DL in those cases as was done here. -
My First Armor Build Thread ANH-S CAP Armor.
Gep replied to Stormy1992's topic in Build Threads Requireing Maintenance
Don't be afraid to leave it a little on the large side and add padding. You don't want the armor to be skin tight. If you put on weight, you'll regret that, particulary on the ab/kidney joint. I received a PM from the DL regarding the teeth count, so you're good with 5, but I'd like to see a CRL change for this. It's spelled out pretty black and white in there that it's 4 teeth per side. If there's room for variation, then have a range like with the tube stripes. If you want to fill in the tooth, take some of your HIPS and shave off some thin bits. soak them in acetone overnight, and you'll have a nice filling sludge that will take care of it. It works the same for HIPS and ABS, just make sure you use the same material. -
My First Armor Build Thread ANH-S CAP Armor.
Gep replied to Stormy1992's topic in Build Threads Requireing Maintenance
For approval, you'll need to have 4 (8 total) -
My First Armor Build Thread ANH-S CAP Armor.
Gep replied to Stormy1992's topic in Build Threads Requireing Maintenance
Kyle, on your bucket pix, did you go 5 teeth per side? If so, you'll need to fix that to 4 per side (8 total). This is straight from the CRL. -
My First Armor Build Thread ANH-S CAP Armor.
Gep replied to Stormy1992's topic in Build Threads Requireing Maintenance
Steve, I'm the GML at Bloodfin, so I'm asking from the approval standpoint, as Kyle would be sending his application in through me. I was under the impression that 4 teeth were the requirement per CRL for Stunt (EIB or Centurion not withstanding). -
My First Armor Build Thread ANH-S CAP Armor.
Gep replied to Stormy1992's topic in Build Threads Requireing Maintenance
So, is a 5 tooth (10 total as Kyle has done) approvable for basic? The CRL is pretty specific about this for ANH Stunt with 8 total.