

NoVATie
-
Posts
3,869 -
Joined
-
Last visited
-
Days Won
1
Content Type
Profiles
Forums
Gallery
Articles
Everything posted by NoVATie
-

TK-5597 requesting EIB status[142][FX]
NoVATie replied to NoVATie's topic in Request Expert Infantry Status
Thanks Brian -
TK-5597 requesting EIB status[142][FX]
NoVATie replied to NoVATie's topic in Request Expert Infantry Status
Yes, my xmas present to myself! Thanks guys -
TK-5597 requesting EIB status[142][FX]
NoVATie replied to NoVATie's topic in Request Expert Infantry Status
Thanks Mason! Happy holidays to you too -
TK-5597 requesting EIB status[142][FX]
NoVATie replied to NoVATie's topic in Request Expert Infantry Status
Okay, belt and action shot. -
TK-5597 requesting EIB status[142][FX]
NoVATie replied to NoVATie's topic in Request Expert Infantry Status
Gotcha, coming up shortly. -
TK-5597 requesting EIB status[142][FX]
NoVATie replied to NoVATie's topic in Request Expert Infantry Status
Do you need a closer picture of the gap or a pic from the inside? Or you need a picture with the belt ON showing the split? -
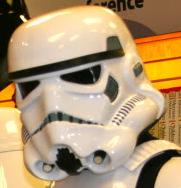
Long overdue.. Here goes. Armor: FX Helmet: CAP Blaster: Hasbro w/ Doopydoos Boots: CABoots Belt: homemade Handplates: FX on nomex flight gloves Electronics: 2 12V fans in helmet with SPST slider switches Neck seal: homemade Holster: homemade Front Rear Side gaps closed Ab buttons Shoulder elastic Cut Butt (teehee) Drop boxes Neck seal Blaster Helmet Mic tips w/ screen Ear screws Green lenses
-
Granted, Marcel
-
Elly, taken care of. Carlos, when your 501st page is updated to say TK (right now it says no costumes on file), I will grant you 501st Stormtrooper access. For now I am granting 501st access.
-
Happy Birthday!
-
Congratulations Alex! I have updated your status.
-
I'd say ANH or ESB are the easiest. The armor is the same, helmet paint schemes, blaster and holster are different. ROTJ armor is different than ANH and ESB, as is the helmet. GML = Garrison Membership Liaison ----- Shimming is where you add plastic between two pieces to bridge a gap where there would otherwise be no plastic. For example, if the ab and back plate do not meet on the sides of your body and there is a gap, you can add plastic between the two pieces to bridge the gap so no black undersuit shows. Terry has a great writeup here that includes some info on shims----
-
I think I pried open the bottom of the gun to get the trigger out and then just shaped it with diagonal side cutters so that it was thinner. You may end up sanding it to get everything smooth.
-
Taken care of, Brad.
-
With the right construction, any suit can be made to fit just about anyone. The AM would work fine for you and may need a good amount of trimming. The helmet is acceptable for the 501st I believe, but not for EIB. There are plenty of vendors for more accurate helmets here on the forums.
-
Got you covered Tom and Jim, congratulations
-
ESB build -by evnltr[*ATA]
NoVATie replied to evnltr's topic in Build Threads Requireing Maintenance
Bucket looks great! -
More items for a trooper repair kit, or to keep in your tote: Hot glue gun Soldering iron Extra snaps and snap tool Elastic
-
That ab plate and bicep don't look like FX and AM wasn't around in '07. Do you have pictures of the shin pieces?
-
TrooperMaster 1mm ABS Sandtrooper coming up.[*TM]
NoVATie replied to Rolf's topic in Build Threads Requireing Maintenance
You're the man, Rolf! Great job on this suit. -
Some info: http://forum.whitearmor.net/index.php?showtopic=8001&st=0&p=102148&hl=vt%20helmets&fromsearch=1entry102148 http://forum.whitearmor.net/index.php?showtopic=3409&hl=vt%20helmets&st=0
-
Maybe some helpful info here? ----
-
Little TK Boys Boba Fett costume DONE!
NoVATie replied to TK-6202's topic in Build Threads Requireing Maintenance
It looks great! -
You're not the only one to have painter's-taped the parts to yourself . As others have said, getting the proper undersuit will allow you to better see how things will fit.
-
Are you trying to log in on the passport site with your screen name or your email? Email has always worked for me and then I was allowed to choose a display name for whatever detachment I was trying to login to.