

BigJasoni
-
Posts
316 -
Joined
-
Last visited
-
Days Won
4
Content Type
Profiles
Forums
Gallery
Articles
Everything posted by BigJasoni
-

Making my own armor
BigJasoni replied to lizardking422's topic in Getting Started - Read this First!
James, Welcome aboard. I think the easiest thing to do is just provide you the link to my 3d print build thread. https://www.whitearmor.net/forum/topic/49826-the-bigjasonis-rotk-3d-print-build-thread/ Unfortunately, you're not going to find any accurate ROTJ style 3d files. If you have your heart set on a TK, I would strongly encourage you to look at the Rogue One/ Anthology style armor. There's several makers who have designed files, but I would reach out to them first to see if they're willing to work with you in case you find things that need to be changed (you're going to find plenty). Please look at my build. Also, spoiler alert... on page 4 of the build, I break down the cost. When it was all said and done, I still spent nearly $1000 on my armor, soft parts, boots etc. If you do want to go forward with this, this is what I'd encourage you to do: Get Nico Henderson's helmet and start with that. You can buy the files from his Etsy store at https://www.etsy.com/shop/DesertFareCosplay You can also message him on Facebook. His helmet is pretty accurate and pieced together very well. The helmet file I got was designed by Nerdforgedesigns, but I really had to do a lot of modifications to get it to an acceptable level (some things I didn't document in my build thread). Ultimately, even if you don't go forward with building armor, you'd still have an awesome helmet. Build everything with either PETG or ABS. I used PLA+ which was very easy to print, but doesn't have the flex @Sly11 talked about. All of my new stuff is being printed with PETG which is almost as easy as PLA, it's flexible, and not susceptible to warping from heat. It's a much better plastic. ABS is difficult, but if you can figure it out, it's a great product. Finally, while I enjoyed doing the build, I probably should have started with something else like the Shoretrooper. I'm not trying to discourage you, there's just some dead accurate files out there and a solid support network full of people who have already 3d printed their armor. I love my 3d printed TK armor, but I'm going to be doing something else with it in the future. My primary trooping armor will be the Jimiroquai kit I'm currently working on. Oh yeah, Nico is currently working on a set of Rogue One Armor. I just spoke with him and it sounds like it's still a ways off, but you better believe that when it's done it'll be good. Please hit me up if you have any questions. 3D printing armor is very fun, but man, it's a lot of work... a lot of work. -
Black Series Captain Cardinal FO Helmet Discussion
BigJasoni replied to Ericnathan811's topic in Off Topic
Definitely a kids show, but I enjoyed it. Also, Dave Filoni was the series creator and executive producer, so it was put together very well. Personally, I feel like the show kind of opened a door to link the OT with the sequel trilogy. Ultimately, Resistance was just a fun show. Cardinal and Pyre were also players in the Captain Phasma novel; Cardinal in particular. They're good characters. Regardless of the direction you go, this sounds like a fun project. I'm interested in seeing what you come up with. I'd probably grab one of these buckets too, but I've got my heart set on the new Black Series Dark Saber. Have fun! -
Black Series Captain Cardinal FO Helmet Discussion
BigJasoni replied to Ericnathan811's topic in Off Topic
Ugh... something else for me to want. I'm not a big fan of the FO, but I really like Captain Cardinal and Commander Pyre; I've got both of their Black Series figures sitting here in my office. Plus, I love how this helmet looks, it's probably one of the better looking ones in the Black Series line. Question though... are you thinking about painting this white for a FO costume, or keeping it as a red Cardinal bucket? I know there's been previous discussions regarding realistic vs. animated helmets, so I'm just kind of curious. Thanks! -
Jeff, Thanks for the feedback. I played around with some hips and did a trial run on a 3D printed Scout Trooper helmet. The HIPS was very easy to form and laid down great. Rather than making frames, I was thinking about just "wrapping" the HIPS inserts in the fabric and then mounting them. However, I was kind of fumbling around with how to keep them in place, so I'll just glue them in place like you mentioned. That's what I did with the 3D helmet and it worked fine; I got a little messy with the hot glue, but I'll probably go that route again. Definitely not going to glue the front of the shins or any of the clam shells. Though the fiberglass has a certain degree of flexibility, I think that solid connection would just ruin it. I was just glad those shins fit; they were the first things I dug out of the box and tried on. Also, Justin (@TheRascalKing) kind of attacked some of this in his thread a few nights ago. I did notice that the forearms are kind of tight, so I may have to get creative. His use of magnets was pretty good. So, I didn't do anything to the armor this weekend. In all honesty, this was a Christmas present from my wife, so I kind of feel bad doing anything with it this early. Again, big props to Jim for getting this kit finished and shipped so fast. I just happened to be the one who opened the door when the BBB arrived. This has given me plenty of time to game plan some of the details and try out some new techniques. One big thing to note however, I'm very impressed with the durability of that Rustoleum High Performance Enamel. Last night as I was weathering the clone helmet, I decided to give it some realistic damage and skipped it across my concrete basement floor. It got some dings and a few scratches in the orange paint, but any damage in the white was practically unnoticeable. I'm still thinking about the Eastwood's 2K, but I really need to determine if it's worth the price.
-
I'll look into that. Sad thing is this is typically the time of year when we make the trip down there. If this were not 2020, I'd probably be looking at the stuff right now. I heard that there were some issues, but had no idea it had gone that far. What a shame.
-
Ugh. That stinks, I really wanted to grab one of their DIY kits which I could have sworn was $150 the last time I checked. Now they have the kit listed for $300, but it's Interest List only. I'll check out the links. What's funny is that it was a FOTK costume at Galaxy's Edge that started me down this path to begin with. I was told the one they had there for $6,615 was an Anovos kit. Regarding the spam mail... yup... I have absolutely no interest in Star Trek, but apparently that's what they're pushing now. I signed up for the OT helmet interest list, but now get one email per day about their other stuff. Nope. Guess I'll look elsewhere.
-
So, more Remnant Stormtroopers appearing in this week's episode of The Mandalorian. Oh, and since we were talking figures a few weeks ago, look what I was able to pick up last week. I think I have enough screen shots and given the fact that I have two different Remnant Stormtrooper action figures, I'd say they have made this a reoccurring character. I'll start getting everything organized and see what I can come up with. Also, can anyone tell me how the Anovos interest list thing work. I put my name on the list a few months ago and still haven't heard anything. Now I just get Star Trek costume junk in my email everyday. I'd put it in my junk mail, but then I'd be afraid I'd miss word when they finally do a helmet run.
-
@TheRascalKing and @11b30b4 thanks a ton for your insight. I think you guys confirmed a lot of my suspicions, so I'm probably going to get cracking on this thing this weekend. First, regarding the paint, I've heard tons of good stuff about the Eastwood's 2K, but I'd probably break the bank if I went for it. This was the result of that CT Bucket I mentioned a few days ago: Ok, I'll try not to put non-TK pics in this build thread, but I wanted to try that High Performance Enamel on something before I started spraying the good kit. This is a semi gloss finish, but earlier today before I sprayed the Husqvarna Orange, I was second guessing whether I grabbed the wrong stuff. You can't tell too much from the pics but the white came out almost as glossy as my last TK, so I think I'll go with it especially if I hit it with the clear. The way the High Performance played nicely with the Rustoleum Farm and Implement paint was pretty impressive. I haven't had too many issues if I stick to the same name brand, but the issues I did have previously were catastrophic. If the TK paint behaves similar to the CT, this will be a good build. Regarding the temp, this was somewhat tricky. Since it's so stinking cold in Virginia right now, and only going to get colder, my can felt like I pulled it out of the fridge. I sprayed it regardless and it splattered like crazy on the first coat. For the second coat, I gave the can a nice hot bath which caused it to come out super smooth and a little too fast. This is why I used a "doner helmet" for this test. In the end, I got it pretty good, but I also bought a bunch of plastic to build a pseudo booth in my garage; that should help. Regarding humidity, I learned that lesson during the Mando build. I still need to re-paint my armor. Last time I painted the ab details, the paint just kind of flowed into the recessed "buttons," so that should work fine. For the helmet, now that I know that the High Performance works well with other Rustoleums, I'll probably stick with the smoke grey, but I definitely need an airbrush for future builds. Too bad I've got my eyes set on the resin printer and Anycubic Wash and Cure Machine. I'll hit up the Praetorian guys again. I didn't realize they're on the gulf, I think I reached out during one of their hurricane evacuations. So when I unwrapped the green lens material (acrylic I think), I realized that it's actually convex and shaped for the eye sockets, so Jim already hooked us all up. Maybe a little trimming, but it's all good. Also, since I'm going to start this weekend, like any good build, I'll do the helmet first. Since I'm building to the new CRL, I get to make an eye bump again... Yay. Jeff, I looked through your build again last night and I don't know why I didn't notice how you did your helmet tubes, traps, and tears fabric. You kind of made little frames for each cut portion. How did this work out for you? I've got some left over HIPS from my belt build and will try to copy what you did. How did you keep them from pulling away/ moving around inside the bucket? Also, when I test fit everything (and got real itchy) it didn't appear that I was going to have to do any major alterations. Honestly, I think cutting the thigh armor in order to close it with Velcro will be the biggest thing and that's not bad at all. Thank God the lower leg armor fits around my calves. I was worried about that the whole time I was waiting for my kit to arrive. Finally, I saw on FB that some guys already designed a 3D file for the Mortar and Backpack, so yeah, I'm probably going to end up painting my 3d print ROTK. Regarding future spoilers, I'll give everyone two days from now on... but no more.
-
Thanks guys, I'm really looking forward to the build. Something tells me this is going to be a lot more enjoyable than the 3D Print. You know what I'm really looking forward to... not working with pounds of Bondo Spot and Glaze putty; now I'll actually be able to use it as the package instructions tell me. So @TheRascalKing brought up some great points. Let me go through them; I'm going to have tons of questions over the next few months: Amen! I painted a few things way too early last time and paid the price for it later i.e. shoulder strap trapezoids. Strapping is something I hadn't really thought of, but it totally makes sense. I do need to get some new suspenders, the ones I got for ultra cheap on Amazon last time were way too stretchy. I do have a lot of black 2" webbing left over though, so I may just make my own like Jeff and Kyle did on the @Kal Akaan R1TK WIP thread. What do you guys advise? Any suggestions on suspenders? Also, last time, my leg armor was the bane of my existence. I actually wore one of my old Marine Corps Martial Arts Program belts and strapped the thighs to that. So, I totally started putting pieces all over my arms and legs as I pulled them out of the box. Yeah, fiberglass is very itchy. When I went for my run I was feeling it. I'll hold off on the sanding. This is one that I've been tossing around. I was going to use automotive paint with hardener, because I wasn't happy with how beat up my Rustoleum paint job got after one day of costuming. However I was kind of talked out of it. After painting my Mando costume, I started to love the Montana Gold paint, but after doing some research it appears that others don't advise it for TKs. So, I picked up a can of Rustoleum High Performance Enamel Spray (the stuff in the chrome can) and will be spraying a clone helmet tomorrow. I've read great things about it and will discuss this afterwards. The reason I'm probably going to rattle can it again is for the ease of touch-ups and cost of products. Also, with all the disasters I encountered last time, I've learned my lessons and am far less concerned. So, this all happened so fast I didn't even have time to put together a shopping list for myself. Fortunately, I've got plenty of stuff left over from my TK and Mando builds but this is where I'm reaching out to you guys. Let me go over a few things that kicked my butt last time. Keep in mind, I'm looking directly at centurion. 1. Paint. I've got all the Model Masters colors I need, but what are the opinions on this. Is Humbrol a better choice? - I just talked about the Rustoleum High Performance Enamel. I'll test it tomorrow on that CT Bucket and even though it's satin, it should give me a decent indication of what it's like. What are your opinions? Let the debate begin, or direct me to a thread where the argument has already ensued. 2. Strapping. I've got plenty of black elastic, including the 10" material for my back closure. I already asked for recommendations on the suspenders, but what am I missing? I feel that the suspenders and abdomen are the base of the entire costume, so I want to get this right. Last time I tossed my snaps in favor of high strength Velcro but the Velcro tore up my Darkside Closet undershirt. Ideas? 3. Speaking of undersuits, since I already have the shirt and knee gaskets, I declined to purchase Jim's set. However, my cycling tights are probably going to be retired soon (they've been doing double duty and since it's cold in Virginia, I actually need them for cycling). I need to grab something new, but I really don't feel like going to Lululemon with my wife. 4. Blaster. Jeff provided me a pretty good list last time I asked this question, but some of the companies are no longer making blasters, or all I saw were OT weapons. I'm going to be picking up a resin printer in the next couple weeks, so that's an option, but what are the rest of you trooping with? According to the build roster there's still only one EIB/ Centurion ROTK, so has anyone else crossed this bridge yet? Also, I know the blaster is an optional accessory, but did I read somewhere that for EIB and Centurion it's required? Maybe I'm wrong. 5. CRL. With everything I learned last time, and after seeing what I'll be working with, I'm not worried about missing the mark on anything. But, regarding the lenses, what does "very slight curve and (are) convex in style" mean? Last time I did the basic welding shield lens trick, but I don't think that's enough this time around. Jims kit came with a nice piece of green acrylic, but it seems like it would fit into the flat category (even though the piece is curved). I told you I write a lot. Any help is appreciated. Also, please throw out anything I may have missed. I don't do these build threads for just myself, in my real life I'm an analyst, so I actually enjoy building these "databases" for everyone to learn from. Hmm... database... that actually gives me a few ideas. Oh. One more thing... Mandalorian spoiler alert. I finally saw a anthology (ROTK) costume with a pauldron and no back pack. Also, what did you think about the TK Mortar-man? I'd gladly paint a yellow stripe down the front of my old armor and get that guy going.
-
--EDIT-- Future Jason here... So for those who have followed my rather sporadic build down below, well, actually over in the ROTK section, you'll know that I've been kind of all over the place. However, one reason I've been slow-rolling this build is because I've kind of been pestering people about the possible inclusion of a Remnant Stormtrooper CRL. The thought first occurred to me after watching a few episodes of The Mandalorian season 1, but my thoughts really ramped up after the season 2 trailer dropped. My comment/ question in the 3D ROTK build thread was (referring to my 3D kit): "My original plans for this armor were to eventually weather it and turn it into a Jeddah trooper kit. But, if I wanted to do a Remnant Stormtrooper instead, what's the process for approval? Does this require a new CRL? Would it basically say "refer to ROTK and weather it?" [September 15, 2020] With that said, I'm not using the 3D Armor for this build. There's other plans for that. So, yeah. I've wanted to make a remnant for almost a year, but haven't really felt the push until now. With that said, I do reference another post later on in this thread because there's been a few of us discussing the Remnant and Anthology TKs for a while. If you haven't done so yet, please view the conversation here: https://www.whitearmor.net/forum/topic/48305-new-anthology-tk-crl/ So, how did my ROTK build thread end up over here in the new Remnant/ Anthology section of the forum? Well, future Jason (page2 of this WIP) posted that he will be turning this build into a Remnant Stormtrooper and then went on to post pics of a cool OT helmet that will become part of this costume. I also requested that this thread be moved over to this section so I can officially begin transitioning this to a Remnant. Here are my goals: 1. The original title of this build was "Centurion from the Start." The idea behind that is to build to the highest standard from the beginning, that way you don't have to make major modifications to the costume to take it from basic to tier 3 approval. So far I'm on the right track, so I'm going to continue going down that path. 2. Finish this as a ROTK/ Anthology build, then make the transition to Remnant towards the end. I've already got a good plan for this build and don't want to deviate too much. Additionally, I still think value will be added to the build community by carrying on the way I've been going. In the end, this WIP should be a good example for others traveling down either the Anthology or Remnant paths. 3. You'll see later on that I've done a lot of things that are different than other builds, but more accurate. Since I started this build, I've gotten another costume approved that has some of these modified characteristics, i.e. the shoulder/ bicep 'j-hook' bungee connection. By the way, I can't emphasize how good this works, nor can I imagine doing my arms any other way now. For this build, I'll pull out a few things that haven't been tried previously, but make the costume a) more accurate, b) more comfortable, and c) more functional. I'll try to explain each as I go along. 4. There have been questions about whether this is a different costume or not. I think we laid out a good case in the aforementioned thread, but as I start transitioning from anthology to Remnant, I'll explain the differences in better detail. So, you've heard my musings and now understand why my build thread has moved over here. Please enjoy the build and I promise to keep on it, even if I'm doing it from a little apartment, which I'll talk about later. So with that all laid out, future Jason is now turning back over to the past. Please enjoy my build thread as I now send you back to December 4th, 2020. So, this just happened: For those who observed my insanity for the last few months as I did the 3D printed ROTK build, bear with me as I photo dump, type extremely long posts, and showcase what @TheRascalKing called in his own build thread, a "descent into madness." Ultimately, I enjoy doing these and hopefully later down the road, others can learn from my success and failures. First, I want to thank @11b30b4, @gmrhodes13, @Sly11, @TheRascalKing, @tarok, and all the others who I've previously bothered with questions, and who have been more than gracious in helping me out. I know there's others, this community has been great. Additionally, I really want to thank @jimmiroquai for the exceptional service over the last few weeks. I'll get to the product in a minute, but what really needs to be showcased is how well Jim answered all my questions, went above and beyond in his customer service, and really just showed pride in his work. If I could write him up for an award, I would. Thanks. So it begins... I titled this build thread Centurion from the Start. Now, some may look at that and think it's kind of cocky, but that's not the intent. Over the last 9 or so months, I've been fairly active in all the 501st forums and everywhere I look, people keep advising others to build to the higher level standards from the beginning. While this seems like sound advise, or even common sense, I've also followed up on these threads and observed less than half going there. That's a rough number which is probably even smaller, but it's similar to what I observed with the 3D printed armor build; plenty of people started, but then... Honestly, I think it has something to do with just getting worn out after doing a build. Sometimes after dedicating so much time to something, a person just wants to rest. I've seen this at work, with sports, and in life in general. That's what I did after Halloween, but that soon turned to restlessness. It just didn't seem right not hearing my 3d printer at all hours of the day and night. So, while I waited for this to happen, I printed off an entire scout trooper and finally figured out my Simplify3D PETG settings. I will say this; of all the forums I'm active in, FISD members seem to listen to the higher level advise more-so than others. I think the Pathfinders comes next, but really this idea seems to be a mantra in the FISD. Because of that, this is the direction I'm taking this build. Additionally, for those who saw the 3D print build, you saw that I attempted to build things to the higher standards, but ultimately I decided to hold back at basic approval. Though I reigned myself back, every one of those little things I learned about the 3d print build, I can apply here. This includes the eye bump I'm so proud of. So, that's enough rambling for now. I'm getting ready to go for a run, because a huge portion of this build, for me, is to get my body looking screen accurate. This is going to take a lot more work than the armor. Here's what I got: First, Jim sent me this pic and a tracking number last Friday. Knowing that it was coming from the Philippines, I actually wasn't expecting it for a while. However, just seeing the pic got me excited. Then this happened: This has to be highlighted. I saw when the BBB was dropped off, but once FedEx actually processed it, the BBB's journey across the globe happened in a freaking blur. Keep in mind, this is during a world-wide pandemic. Much kudos to Jim for the service and for keeping me updated. Wow! Unfortunately, a box just can't travel across the world in three days without it's Fragile sticker being disregarded. At first I got a little freaked out, but honestly after seeing the video Jim posted about his flexible fiberglass I wasn't worried. Also, with all the bubble wrap and great packing job, I knew it would be fine. After laying it all out, everything checked good. So here we go. This should be a lot of fun. Thanks for looking and I'll start updating soon.
-
Hey all at 501st very pleased to be here
BigJasoni replied to DravenArt's topic in New Member Introductions
Glad to have you aboard Stuart, -
The BigJasoni's ROTK 3D Print Build Thread
BigJasoni replied to BigJasoni's topic in Rogue One Build Threads
So, I haven't posted anything in a while, but I thought I'd finish this thread off with one last 3D print discussion thanks to this quote from @gmrhodes13: I've had a profile set up in Simplify3d that I've used for finer prints. It's essentially been the same as my larger prints, except I slow the speed down to around 60mm/sec and run layers at .100 or .150. The results have been good, but not perfect. Please ignore what I printed and take a look at the quality in these pics: This a prime example of two totally different settings. First, on the helmet, you can see the results of .2 layer height at 180mm/sec. Lots of bondo, sanding and filler primer in my future. Next, the Snout Greeblies were printed at .100 and 60mm/sec. They're very detailed and will pass muster, but in the flat sections you can still see the line separation and on the "strainer" there's a lot of stringing. Also, the mesh doesn't look good at all. This is one of the primary reasons I'm going to be purchasing a resin printer; I'll turn that thing into a Greeblie Factory. So, the hot bed heater cable shorted out on me and I had to bust out the soldering iron to fix it. When I was done, I ran one of the prints that's embedded on the SD card that came with the Creality printer. Here it is: I thought it would be a fast print, but the thing actually took somewhere around 8 hours. However, when it was finished, I was absolutely blown away by the detail, the total absence of layer lines, and even more impressive, the thing printed on a raft that just snapped off with little to no effort at all, leaving a perfectly smooth surface under the cat. It was enough that I couldn't believe it was my printer that did it... stupid lucky cat. This got me thinking about Glen's aforementioned quote, and since I don't have anything better to do while I wait for my BBB, I decided to print a few armor pieces off using the profile I pilfered from the cat file. By the way, in case you didn't know already, if you ever find a perfect profile embedded into a .gcode file, you can just upload the file using the upload FFF profile function in Simplify 3D. The Upload FFF function recognizes the FFF in the .gcode. Neat! Here's what happened: Just like the cat, the level of detail blew me away. These are very small items (as you can tell by the 1" squares on my mat). But what happens when you print a larger armor piece like this? Pretty cool. These will require no Bondo or initial sanding. One layer of filler primer should be all it needs before paint. Also, I'm either going to have to resize these greeblies, or fill in the gap with resin. If I do, the resin will likely be rougher than the print and that's saying a lot. The only downside is that these biceps took 34 hours to print and if I were to print a full helmet with the cat settings, it would take a week. That doesn't sound like fun, but maybe I'll try it when I run out of things to print. So, Glen, thanks for the tip and thanks to Creality for supplying the amazing FFF file. If anyone is interested in how to pull a FFF profile from a .gcode file, check out this video: https://youtu.be/SRQ-3nnSa-4 Lol. He even used the cat to do it. -
Oh. I'm going to have to find that. Seeing the different colored TPUs really got my mind wandering. I'm printing a Scout Trooper right now with a mix of PLA+ and PETG, but I'm really thinking about picking up some of that white TPU even if all I print are shoulder straps and a few things for my kids. If I can figure out how do do a bigger piece, and it looks good, I'll post something. Maybe I'll make a flexible cod just for this thread.
-
Funny this comes up again. Here's the pic I posted in my build thread of my shoulder straps: The only issue I had was painting the TPU. However, last week I wandered into Microcenter to pick up some PETG and I saw that they are now carrying 1kg spools of Gloss White TPU. This may change how I do some of my builds. Additionally, please see the following video from Nikko Industries' "How to Smooth Flexible Filament- 3D Printed Armor" found here: https://youtu.be/PcAd0kxbI4I The product he uses is made by 3D Solutech and can be found on Amazon here: http://amzn.to/2CUOeiV. The difference between his and what I used is the flexibility. The TPU I used is incredibly soft and flexible and likely wouldn't stand up to a full print. His is more rigid, but obviously flexes as needed. Though we won't know for sure what the chemical properties of the FOTK bending cod is, this filament may be a great solution.
-
Ahh, got it. That's pretty good. I wasn't sure if you made the head or not. I'm going to have to try this out.
-
Glen, Perfect. I'll start generalizing things because I was really getting down to the details in my search. If anything, I'm learning a lot more about the armor and finding things that need to be tweaked on mine. Elements of the CRL are also starting to make a lot more sense to me as look closer at the screen-used props. Back to the figures for a minute. How did you do those faces? They're great. My son has a few loose TKs from when he was a little guy. One may have to be sacrificed to build a custom figure.
-
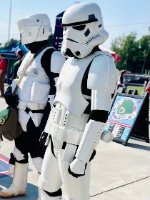
Also, to kind of get this thread back on track a little bit, I just went through the entire first season of The Mandalorian and picked out every screen reference I could. There's a lot of things in there, but what I can confirm is that the Remnant Stormtroopers are in fact wearing Rogue One armor and an OT helmet. The more trained eyes already identified these as Anovos helmets which I think is accurate, but one of the things that was crazy about these TKs is that they are definitely a rag-tag group of troopers. Let me post just a few pics for now: First this guy with his "old-school" boots. And then this guy with the flat soles. Also, Mr. Flat Soles doesn't have a Thermal Detonator, nor does this guy: But he does. I'm finding lots of things like this as I go along. This will be a fun little project.
-
THIS IS AWESOME!!! I would totally add the black series figure to my collection. Love it.
-
Lol. This is only a fraction of the collection. Until I get the man-cave finished, the figures rotate. I may have to come up with another name for the man cave, maybe Sarlacc Pit, or something more Star Wars related.
-
Ugh. I know. I've missed the last 7 Target exclusive pre-orders as well as the Walmart exclusive Clone Wars Black Series figures (I've got a problem, I know). I think it's street-dated for the 29th, which means I'll be standing there waiting for the doors to open. My son and I have been collecting for years, I need to dust. Lol. Back to finding screen caps.
-
Andrew, You got it. I'm digging them up now. Gives me an excuse to re-watch the Mandalorian. I'm waiting for them to make an appearance in season 2 as well.
-
Ugh. So Hasbro just released these pics. Unfortunately I missed the opportunity to pre-order, but again here's specific reference to the Remnant Stormtrooper. I know we don't go by toys alone, but I'd really like to follow suit with what the Pathfinders did. I've started a folder on my desktop called "Remnant" which is going to get filled with reference pics.
-
The BigJasoni's ROTK 3D Print Build Thread
BigJasoni replied to BigJasoni's topic in Rogue One Build Threads
Rudi, That's funny about Nico. I reached out to him back when I first started thinking about doing this and he said he didn't have any plans to make the armor. I almost don't even want to see what he comes up with because it's probably going to be awesome. I'll probably reach out to him again. I'm not on the Shoretrooper Fam FB page, I've only started my research for that project, but this helps. I'll get on and continue digging around. Thanks for the info. -
The BigJasoni's ROTK 3D Print Build Thread
BigJasoni replied to BigJasoni's topic in Rogue One Build Threads
Glen, I understand completely. Fortunately my hands have held up fairly well, but I had to make significant alterations to other parts of the armor to compensate for joint issues. I probably should be printing at a higher resolution (finer), but I think I lack patience when it comes down to larger prints like helmets. That's one of the reasons why I'm experimenting with different techniques during this "down time" between builds. Funny that I consider building a Scout Trooper "down time." Regarding the large resin printers... wow! If I had an extra $3000 floating around I'd have a Peopoly Phenom L running around the clock (if I could afford the resin). Right now I'm trying to muster up an extra $300 for either a Phrozen Sonic Mini 4K or Elegoo Saturn 4k. However, when I first started researching 3D printers, something the equivalent of my CR-10s would have cost the same as that Peopoly. Let's give it a few years. Thanks for the comments. -
Please enable me for 501st access. Bigjasoni ID: 51923 https://www.501st.com/members/displaymemberdetails.php?userID=33108 Thanks!
