BigJasoni
-
Posts
316 -
Joined
-
Last visited
-
Days Won
4
Content Type
Profiles
Forums
Gallery
Articles
Everything posted by BigJasoni
-

The BigJasoni's ROTK 3D Print Build Thread
BigJasoni replied to BigJasoni's topic in Rogue One Build Threads
I saw that one too. I actually really liked their helmet and was originally going to buy that file. The only issue I had was they didn't seem willing to work with me on correcting a few small things. That's not a huge issue though, I'm just some random dude hitting them up asking them to change something they probably worked pretty hard on. They have some awesome models in their store; the b-wing helmet is phenomenal, but their prices were a little steep. Jeff, I love the 300x300x400 build volume, but I'm already looking at picking up a CR-10 Max or a CR-10 S5 around Christmas. As much as I love this printer, I love the idea of printing out my ab armor without slicing it into 4 parts even more. What's cool though, is right now I have a Mando helmet (my next build) printing off in one piece, and next week I'll be printing off a Phase 2 Clone helmet for my Commander Bly build. The clone helmets are huge, but still fit on the build plate. For the second part of your post, when I saw that the ammo boxes are supposed to be separate, I also caught the detail on the top of the two boxes. I reached out to my favorite designer again (akira-yuming) and they shot this over to me in less than a hour. I can't recommend them enough. So, progress slowed a little after the great helmet debacle of 2020. But, I was able to find an accurate vocoder and have started working with the designer of my helmet file on a few minor changes. The helmet I posted earlier is probably going to find a new life as a Jeddah Sandtrooper. So, as much as it pained me to do so... It's back to urban camouflage. However, now that I've grown used to these long 2-3 day prints, printing a new helmet doesn't phase me too much. Especially now that I understand how to do it in one piece. I needed to get going on this project, so I printed the chest armor off in a few different pieces. While I felt this made the most sense, I really don't like "welding" the pieces back together. Additionally, filling the seam isn't much fun. If you look down in the lower left corner of my print bed, I created some alignment pins to help me get this thing perfect, but I ended up tossing them. Also, if you look closely, you can see that I have the entire chest printing in one shot here. I have the right side sitting directly behind the left. I think this was a 48-60 hour print. For this print, I should have kept the chest together, and just cut off the sides. This would have allowed me to fit it at a 45 on my print bed. While the print worked out, a person should not situate big prints like I did. The Y axis is the most "jerky." I think I got lucky, especially since I'm printing at 180mm/sec. This would have been a better slice. Also, when you separate shells, this automatically separates the shoulder strap slots. I totally forgot to take a picture of the chest armor covered with Bondo, so here's a sub: Really, it was almost identical to this. As always, I sprayed the chest with my favorite gold paint, which seemed to work perfect on the seam, but for some reason, I kept getting these small cracks, no matter what I did. If you look at the bottom right where I sanded through the paint, and directly in the center, you can see what I'm talking about. Then, I remembered a video by Nikko Industries https://youtu.be/PcAd0kxbI4I where he discussed using Alex Flex spackling on flexible filament (TPU). Unfortunately, neither HD or Lowes had any, but on a whim I put some Alex Flex caulk on the cracks and it worked like a miracle. I also got the side "extenders" (not sure what they're called) sprayed in gold. On these, I didn't use Bondo. This was sort of a trial to see how the filler primer would work at getting out the print lines. I would only advise doing this on flat surfaces that aren't as highly visible, but in the end, they turned out great. Yes, I got a "booger" up by the pectoral, but the cracks were immediately eliminated. Really happy how this turned out. Here's the chest and extenders together: I think it's good, when I can see the reflection of my basement in the pic. Finally, since I mentioned it earlier, here's Mando just getting started. I needed to do something since I'm done printing my TK armor. Also, I threw on a mirror for the print bed. I heard great things, but I didn't want to try anything new until I was done printing out everything else. Take care! -
The BigJasoni's ROTK 3D Print Build Thread
BigJasoni replied to BigJasoni's topic in Rogue One Build Threads
Art, The helmet came from NerdForgeDesigns on Etsy https://www.etsy.com/listing/808047010/ro-style-stormtroop-helmet. I'm actually working with them to get a couple tweaks done to the model i.e. vocoder and rear tears. Though I'm happy with how the helmet turned out, the vocoder gap needs to be increased a bit and the tears were almost impossible to cut. I asked if they could modify the file so that the teeth, tubes, and tears are not filled; they said they would tweak the file. Absolutely great customer service. As soon as they're done with the file, I'm going to print another helmet and start tracking the progress here immediately. I may turn the current helmet into a Jeddah Sandtrooper. The armor has been a small adventure. It came from akira-yuming on CGTrader.com https://www.cgtrader.com/3d-print-models/art/other/star-wars-rogue-one-tk-first-imperial-stormtrooper-armor. The reason I call it an adventure is because I've thrown something like 20 suggestions to them for adjustments, and they've made them all. This includes everything from the rib cage flare on the chest armor, to correcting the hand plates. Every time I've reached out to them I've thought they're going to get sick of me, but on the contrary, they've been extremely helpful and have even hit me up with unexpected changes to the armor based on the CRL and movie references. They've got a perfect 5/5 Star rating on CGTrader, and respond quickly (typically at night while I'm asleep). Hope this helps. Both designers have gone above and beyond what I would have ever expected, and I will be buying from them again. I've already been working with akira-yuming on their Captain Rex armor. Please see the below pictures for examples of how these guys have worked with me. NerdForgeDesigns: I talked about this in my original post. This is the "bridge" that extended from the left tube to the vocoder. This was a result of holes in the mesh. I notified the designer and they corrected their file within 30 minutes. Also, I'm kind of glad I caught this because this was before I knew that I could print a helmet without dome supports. Look at that mess in the middle of the bed. This is the corrected file. No bridge, no holes, and no dome supports. akira-yuming: Original chest armor pic provided by designer. notice how wide it looks and there was absolutely no flare on the bottom. The redesign looks awesome and printed out even better. I'll post pictures of this later. Original back pic sent by designer. Notice how there's no "flare" on the sides for the "arm holes" and no curve on the bottom. The new design follows the CRL reference. Changes were made within hours. Also, the 8mm indent is missing, but I thought this should be added by the costumer as the position may change a little based on the shoulder strap placement. Some of my notes on the hand plates included increasing the "fanned out" shape of the top trim, making it flush with the rear trim, including the indent, and decreasing the thickness. New hand plate is consistent with R1 shape, it's thinner, and includes the indent. Changes were made within hours. Finally, here's some changes they found through their own research. When they were able to find things in the CRL, on the forums, and in references that I missed, and then make the corrections without me requesting, it was confirmation that I found the right designer. Pic sent by designer annotating the correct shape of the shoulder bells. Corrected design. Pic sent by designer showing the chamfer on the belt ammo boxes. I'm not sure if anyone has caught this. However, I just noticed that for Centurion level, the CRL states that "The ammo boxes across the front are all made separately from the main belt and are secured to it." That's interesting. I can't tell from any pics that these are supposed to be separate, but I may slice this myself and see how it goes. The front belt doesn't take incredibly long to print. Corrected belt. Very detail oriented. -
The BigJasoni's ROTK 3D Print Build Thread
BigJasoni replied to BigJasoni's topic in Rogue One Build Threads
Ok. So I think I've got all the 3D print and slicer info out of the way. I can actually start treating this like a typical build thread, except without the BBB. For the time being, I'll stick with the helmet, because it's the furthest along. It was complete two days ago, but that's when I decided to get stupid. More about that later. The cool thing about the helmet is that even if I were to go in a totally different direction later down the road, I'll always have this helmet on display in my Star Wars Cave. Here's the one thing I wish I would have done different. I really should have either asked the file creator to provide a helmet without a vocoder, or sliced it out before printing. I think I could have either modeled a good one that is "tubular in nature with a visible gap between the outermost section and the helmet," or found another to print or buy. After sanding, primer and paint, I'm proud of how it looks, but not having the gap is starting to drive me crazy. I almost pulled the Dremel out a few nights ago, but my wife spoke some sense into me. Worst case scenario is I print another helmet and take care of this later. Here's the other reason why I'm going to print the helmet as one piece next time. Even though i sliced the helmet perfectly under the brow, the layer that adheres to the bed is typically rough, similar to the chin shot I posted earlier. This makes for a lot of sanding and smoothing just to get everything sitting flush. Overall, I am still happy with how it turned out, but this was the result of almost a week of sanding, filling, and priming. Bondo Glazing and Spot Putty is my friend. I don't think the vacuum formed armor builds require this level of fun, but please correct me if I'm wrong. Fortunately, this stuff is easy to sand, but of course finding cartridges for my respirator is impossible right now. I've been using a cloth dust mask and keeping the fans blowing, but if there's anything that would dissuade someone from trying one of these builds, it's this step. After I got the Bondo somewhat smooth, I went for the filler primer. Again, this step gets repeated several times; putty, sand, primer, repeat. Putty, sand primer, repeat. Eventually, you end up getting a pretty cool urban camouflage effect going: This is also the point where I started cutting out the teeth, tubes, traps and tears. The tears on the back of the helmet is something I refuse to do again. This part almost lead me to throw away the helmet, but I kept trying until I got something reasonable. This picture is bad, but now that the helmet is done, the results are much more presentable, and it definitely passes the "ten foot rule." I finally got the "camouflage" helmet sanded down to around 800 and sprayed one last coat of Filler & Sandable Rustoleum. After a quick sanding, I blasted it with some white primer and got this: Yes, I printed a Darksaber and Baby Yoda. Also, I was not happy with the Hovi Mics in this pic, so I found KamikazePigeon's file on Thingiverse, which I've seen several people on the FISD forums use. The file is found here https://www.thingiverse.com/thing:3510123. These Hovi Tips allow you to add the wire mesh and look great when finished. This next trick is something the paint shop used to do at the luxury motor coach manufacturer I used to work for. I was reminded of it when I watched Bryson Michael RC's 3D Printed Stormtrooper Helmet DIY Build video on YouTube. https://youtu.be/erxzsImux2Q If you can make it through the music he plays throughout the video, right at the 4:35 mark, a gold helmet appears out of nowhere. For the next 2+ minutes he discusses and shows the benefits of using a gold metallic undercoat. At the coach factory, we used to do this under a pearl coat and I was always blown away by the results. Even in a rattle can, the gold flake just seems to flow into any scratches and lines, and seems to work just as well as any filler primer I've tried. Additionally, you can really lay the gold paint thick, and wet-sand it down to 2000 and beyond for a smooth-as-glass finish. I've found that when I do this, the white seems to flow onto the surface, and just looks brilliant. Here's some closeups of my runs: And then the finished gold helmet: I love it. It's almost like a Rogue One version of Captain Pyre. After the gold, like I said, the white just seems to flow. I know that's the second time I've said that, but it's the only word I can think of to describe it. I've got a bad habit of not leaving good enough alone. After a full day of taking pictures such as the one above, posting them to social media, and admiring what no longer resembled a 3D print, I decided that if the first coat looked as good as it did, surely another wouldn't hurt... I was wrong. This isn't the disaster I've been alluding to, but as you can see in the pic, gone is the glistening white, and gone is the "flow" I've been so proud of. The helmet still looks good enough, but if you look closely, the paint has a texture to it, and would require additional wet sanding and polishing to get it back to where it was. I think the issue was that the paint was not fully cured and introducing another layer of wet paint caused a reaction. This also happened during the hot/ humid spell we had in Virginia last month. Since I was letting the paint cure in my garage, I think the humidity became a factor. Since then, I've let pieces dry in the garage for a day, and then after any noxious fumes are gone, I move into my basement to finish curing in a cooler, dryer climate. This seems to have made all the difference, also, I decided that I would add a layer of clear coat to bring back the luster. My next step was to mask up and spray on the Rustoleum Gloss Protective Enamel Smoke Gray for the teeth, traps, and tears. Additionally, I picked up some 16th inch pin-striping tape and began preparing for a very simple layer of Plasti Dip on the brow, vocoder, and neck trim. I didn't even take a picture of the Plasti Dip; I peeled it off just as fast as I sprayed it on. Rather, I went with the Rustoleum Satin Black which actually turned out pretty nice. After I added the Hovi-mic Tips, lens, and outlined the gray with an Extra Fine Point Sharpie Oil Based Paint Pen I was ready for my first Zoom conference. In this pic, I still have blue painter's tape in the tubes. Can anyone tell me if it's OK to touch up the inside of the tube cut-outs with some Testors Model Master French Blue paint? I bought a bottle for my ab armor, but was thinking about brushing a little on the inside of the cut-outs to accentuate the tubes. Here's this pic again. It's where I should have stopped. But again, I can't leave good enough alone. Remember I said something about adding clear coat. And, remember my Bold, Italicized, 16 Point, Red lettering up above? They don't mix... I didn't take a picture, but it looked something like this: So, It's Sunday, 9 August 2020, and I'm back at this: I got the flow back. I also know how to wet-sand, when to clear-coat, and the best way to do the gray and black. But, that stupid Sharpie. Can someone tell me how to draw those outlines straight? I'm done for tonight, but here's what I'm working on now: Good Night! -
The BigJasoni's ROTK 3D Print Build Thread
BigJasoni replied to BigJasoni's topic in Rogue One Build Threads
So this is where the fun stuff begins. 3D printing requires a lot of patience, trial and error. For the helmet, I initially really didn't know what I was doing and was limited to what I was discovering online. One of the first things I kept seeing was people breaking their prints into several smaller pieces, hoping they'd fit together, and going through what appeared to be an endless supply of E6000 and CA Glue to get it all put together. Again, something didn't seem right about doing this, plus with a 300 X 300 X 400 print volume on the CR-10S... why? I was excited to see that I could get the entire helmet to fit on the bed, But after hitting "Prepare to Print," I was greeted by this screen: Look closely: That's a nearly 5 day estimate, and anyone who's used Simplify3D knows that the program is a liar. My best guess is that the actual time would be closer to 130-144 hours, basically 5 1/2 to 6 days. But, this was using the standard settings, not the ones I showed earlier. I decided to break the model into three parts, a face, rear, and dome. My thought was that this would limit the "puzzle" aspect that I was talking about earlier and it would give the machine less opportunities to screw up the print. Unfortunately, I learned a valuable lesson about 5 hours into the face print when I started seeing a bridge being built from the left tube, through the left hovi mic area, into the vocoder. Unfortunately, I didn't take a picture of this, but after talking about the issue with NerdForgeDesigns, we realized that there were holes in the mesh, which the designer corrected immediately. Regardless, the lesson learned is to inspect your prints thoroughly on the slicing software before beginning the print. Since this was my first attempt at a helmet, I let the print finish and was left with what I decided would be a practice piece. In this picture, you can see all the bad lines as well as the seam where the bridge traveled from just under the tube stripes through the hovi mic area and into the vocoder. Additionally, after I pulled this off the bed, that's when I noticed the deep lines on the bottom of the chin, which apparently is common with printing helmets. I keep seeing videos of people 3D printing helmets where they barely do anything to these lines. Maybe a little putty and some filler primer, but no one seems to really take the time to clean this up, probably because it's not in a highly visible area. Regardless, it doesn't look good. I decided to reprint in two pieces, but if I had to do it over again, I would print the entire helmet in one shot. My final pieces of armor should be done in the next couple days. Afterwards, I'm going to print a Mando helmet and just let it go. I'll let you guys know how that turns out. Here's my two piece print: Notice that I don't use any supports under the dome. Again, check out this Nikko video where he explains how this works: https://youtu.be/LF10A1UEAaU. Basically, you put supports around the perimeter of the model, but nothing on the inside. The printer operates in a sort of "stair climbing" fashion, which creates supports for the next layer as it goes up. The difference in print times is astronomical. Again, look at the whole helmet with full supports: And now without the dome supports: Wow! Even the material cost difference is crazy. What's notable about this is that I forgot to adjust my filament cost settings in Simplify3d, so it's still assuming $46 per kg, which is crazy. The Inland filament costs $18 which is 39% the cost built into the Simplify software. The real filament cost for the full support model would be $53.43. Without supports it breaks the bank at about $10.56. Next, I'm going to actually start putting pictures of the work in progress. This is where it gets cool. Please let me know what you guys think. Also, if anyone has any questions about 3D printing, I'll try my best to answer. -
This is my 3D printed helmet. I decided to lead with this, because there's going to be a lot of boring 3D print talk before I get into the fun stuff. I guess throwing the helmet up there gives you an idea of what we're building up to. SPOILER ALERT... I had to repaint my helmet after I took this picture; we'll discuss that another day. Also, I was originally going to post this in the 3D Parts and Technical forum, but ultimately, regardless of the method, this is a ROTK build, so here it lies. Throw my name in with the other ROTK threads, but let's do this with a 3D printer, and finish the project. This should be fun. About two months ago I started searching the forums for complete 3D Print builds. This started somewhat out of curiosity, but honestly I think it really started because my wife asked if it could be done. Right off the bat, I found a few threads that looked promising, including Andrewhitc's 2017 thread where he was designing some pretty awesome ROTK models, and most notably, Cricket's Kid-sized FOTK build. After reading through miles of forum posts, I decided that I was going to 3D Print a full ROTK set and see if I could get it approved. Not to sound too cheesy, but this is my journey. I'll try to update this as much as possible and use this forum as motivation to complete everything by Halloween. I started by researching full armor builds on YouTube. Of course I ran into some interesting videos, but noticed that everybody seemed to be printing the same file from Thingiverse (https://www.thingiverse.com/thing:391664) While a fun prop, it just doesn't look very accurate and all the results I keep seeing seem somewhat fake, if that makes sense. They looked 3D printed. In my searches, I came upon the Galactic Armory videos, which I thought were great. Though The Big Baby sticks to clones (which I'll build next) his Coruscant Guard build was pretty impressive and was ultimately what led to his 501st approval. Additionally, in one of his videos, he mentioned NerdForgeDesigns which brought me to this: Not bad for an $8 STL file. If you're interested look here https://www.etsy.com/listing/808047010/ro-style-stormtroop-helmet?ref=shop_home_active_4&crt=1 The designer was very helpful and worked with me when I ran into a few issues. I highly recommend them. After dropping the 8 bucks, I fired up Meshmixer, Simplify3D, and the CR-10S and got to work. For this print, I'm using Inland PLA+ and ABS in 1.75 from Microcenter. Here's a look at my settings: These are basic nozzle/ layer height settings. I've fiddled around with everything up to a 1mm nozzle @ .5 layer height, but haven't been pleased with the results. Until I'm done with this armor, I'm sticking with the .4 @ .2. I like to slow down the first layer height in order to assure proper adhesion. I typically "babysit" the printer for the first few layers. I experimented with rafts and immediately threw away my prints. Building a brim seems like a great approach. This teamed up with the helper discs I'll show later almost guarantee proper bed adhesion. Standard infill settings Supports are tricky. In the Max Overhang Angle, I currently have this set to 70, but I'm almost always generating my own supports. I'll explain this later. Temp is where this starts getting fun. I'm pushing my filament out at 225 which is the max advertised for Inland PLA+. Check your filament specs, but I've found that if I'm pushing out higher temps on both the extruder and bed, adhesion isn't an issue. Another approach is to run the first layer higher and then settle down a little lower for the remainder of the print. I tried this and had some good results, but if the filament can handle higher temps, do it. Of course, this all needs to be monitored. If I start running into misprints or shifted lines, this and speed are typically where I make adjustments. Cooling is pretty much standard. No G-Code changes Standard Script settings. SPEED, SPEED, SPEED. Nicco Industries did a great video on speed settings. Check it out here https://youtu.be/UJF7vnJ1rNg Essentially, he found little difference between 60mm/sec prints and 180mm/sec. Basically, with the amount of filling, sanding and painting you're doing post-print, the quality differences are negligible. Ok. Now that the boring stuff is out of the way, let's start making some armor. I'll start dropping pics like they're hot soon. SECOND SPOILER ALERT... I'm currently printing out the last two pieces of the entire armor set and ordered most of my soft parts. Additionally, I've already reached out to the community with general questions and others regarding sizing; everyone's been super helpful and incredibly friendly. The reason I'm saying all this is because with the entire armor set completely printed, the only reason I won't finish by my self-imposed deadline is if I lack motivation. I know that 3D printing isn't for everyone, but I haven't seen many threads where someone actually completes one of these projects. Additionally, If I can contribute to the community in some way, I'll be happy. I'll add more later.
-
Good evening. Can someone provide me with the dimensions of the ROTK kidney plate? Mine seems small and I’m pretty sure it’s too thin. Thanks again!
-
Absolutely! Man I wish I was there.

-
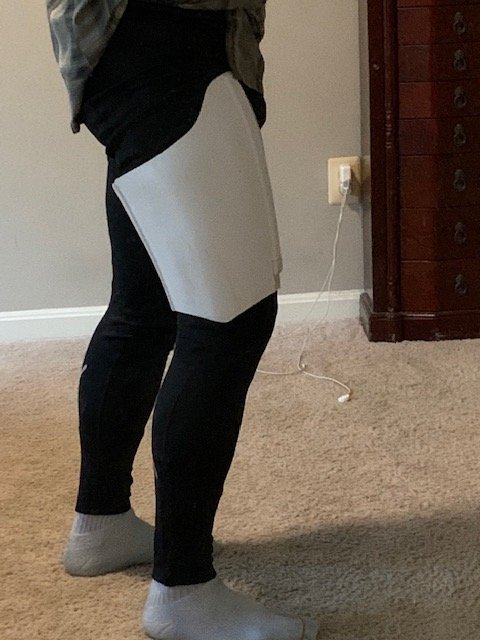
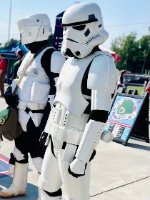
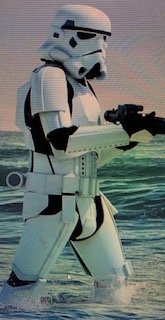
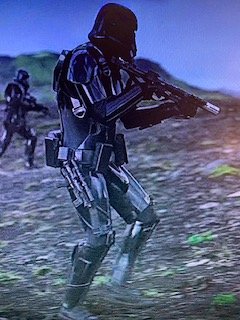
Thanks again for the assistance. I did hike the cod up a bit when I taped it, plus I think not having my drop-boxes is kind of throwing off the visual. I think I'll actually do my strapping and hit the community up again. On the plus side, I haven't heard anything negative about the lower portion above my knee. I can fix the upper gap, but the knee portion was going to send me to the doctor if I didn't get it up high enough. Question about the cod, specifically about strapping. I've seen several posts about strapping and there almost always appears to be a strap connecting the cod to the posterior. The CRL pics show a snap down in the nether region, but doesn't mention anything about it. However, in the movie, the stormtrooper's cods appear to be swinging free, i.e. no strap. Please see the attached pics and let me know. I know that the second pic is a deathtrooper, but it illustrates my point. Thanks!
-
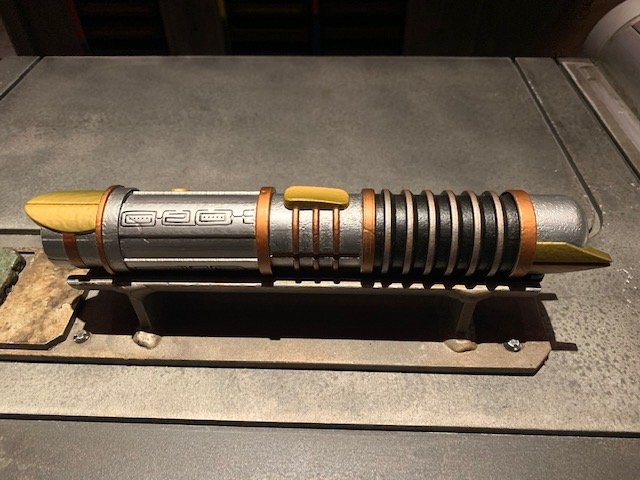
Thanks Shawn. Sorry your spring trip fell through. We've been watching YouTube videos of what Disney's like right now... pretty empty. We're already looking towards Christmas 2021 for our next trip. My son and I did get to make lightsabers at Savi's Workshop and loved the experience. I included a pic below. But, one of the highlights was being the first guests into the Cantina early in the morning. It was unbelievable.
-
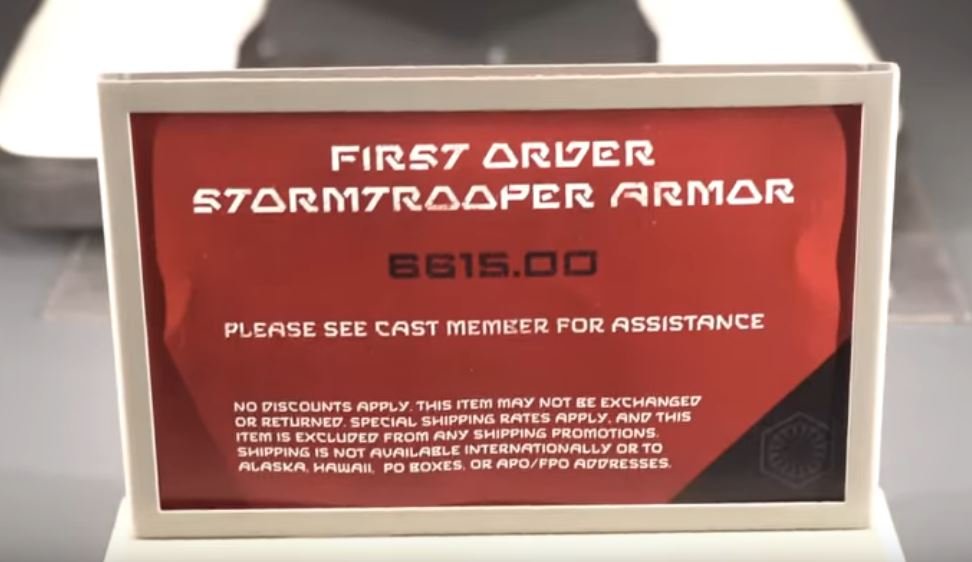
Good afternoon! I signed up a few weeks ago and have been intently studying the forum ever since. I started posting stuff last night, but just realized that I neglected to introduce myself (I think I overlooked this because I had just introduced myself to my local garrison). Anyways, my name is Jason and I'm from Stafford, Virginia. It's hard to define exactly what Star Wars means to me. All I can say is that one of my earliest childhood memories is my family searching for a theater that was playing The Empire Strikes Back. The funny thing is that I was only 3 1/2 years old when that happened and the memory is still vivid to me 40 years later. From that day forward, Star Wars has always been huge to me. Let's put it this way, when I visited Galaxy's Edge at Disney World last year I almost cried. I decided to go about this adventure slightly different from most. When we were at Disney, my wife saw some FOTK armor that was selling for $6,615 (see pic, LOL). We both nearly collapsed. Of course, I searched around and discovered that this was the exception not the rule. But, since I'm a huge fan of episodes 4-6, Rogue One, and the Mandalorian, I started looking around for TK armor from one of these rather than the First Order. However, because I like to make things difficult on myself, I decided to 3d Print my first TK. So far, I love how it's turning out, but will need some community help along the way (please see my recent post at https://www.whitearmor.net/forum/topic/49811-need-help-with-thighs/?tab=comments#comment-697082 ). Well that's a lot of info. I look forward to speaking with and meeting as many people as possible.
-
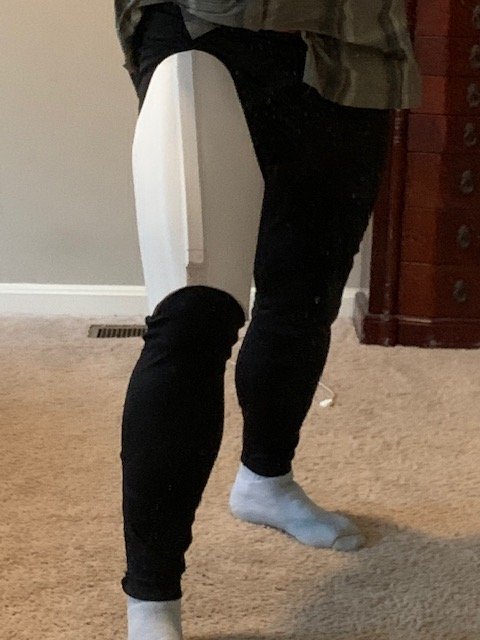
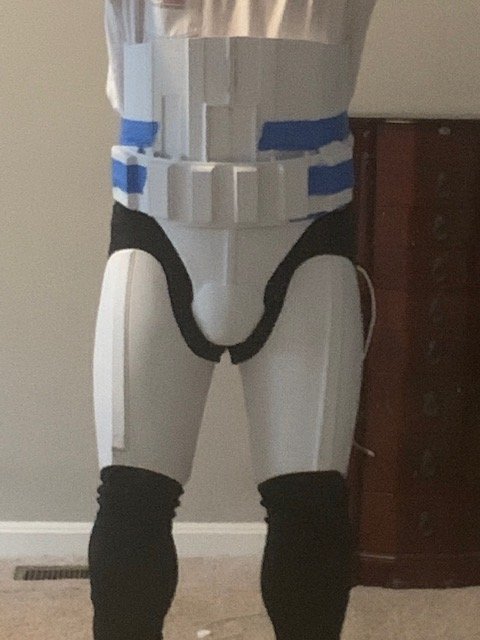
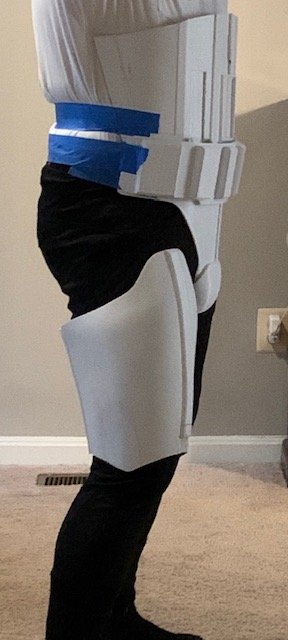
Ok. Here's two more pictures to show the gaps. I put my legs together as shown in the CRL pic. Also, it looks like the posterior armor slid up a little while I was moving around. If you guys can advise, it would be greatly appreciated. Thanks!
-
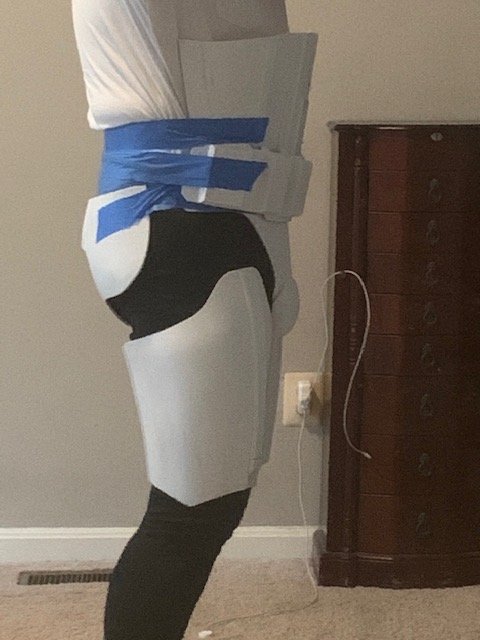
Thanks for the reply! Along with the CRL, these pics and 11B30B4's phenomenal thread at https://www.whitearmor.net/forum/topic/44463-11b30b4’s-rotk-build/ are what I've been using as my references. Please see the below pics of me all 'blue taped' up and let me know what you think (the thigh may have slid down a little bit in the second pic since it's not connected). My concern is how high I have this above my knee, but from the pics it appears to be about right. Thanks a lot for the assistance,
.jpg.d207a763be2aa1fe8c990a213ea1a7a8.jpg)
-
Good afternoon everyone! I posted most of this to my garrison forum as well, but wanted to throw it out to the broader community since I think there's a few people out here with 3D printing experience. When I originally started traveling down "TK road" I decided that I was going to 3d print some ROTK armor. So far, everything has worked out great; maybe a few snags and reprints, but overall, very good. However, I'm having a hard time with my thigh armor. Though I'm 6' tall, I've realized that my thighs are shorter than average and the more I trim, the more nervous I get that they're not right. Also, it's worth noting that no matter what material I use (3D print, vacuum formed, etc...) I have knee problems and I've got to keep the armor off the sides of my joints. I built the thigh in the pictures, and have been hacking at it for a few days, but before I finalize my model and build another, can I get some advise from the community? Is it too short? I had to remove about 7cm at the bottom because it was hanging below my knees. It fits comfortably now and I realize the sniper plate will cover my knee, so I feel it's good per the ROTK CRL pics, but I really need some feedback. Also, please ignore my shirt in the picture. I've ordered an undersuit from the Darkside Closet which will serve me well for this and future (non 3d-print) builds. Thanks a bunch, Jason