First0rder
-
Posts
202 -
Joined
-
Last visited
About First0rder

Recent Profile Visitors
2,806 profile views


-

Some of our own in the new Mandalorian TV show??!!!
First0rder replied to Ericnathan811's topic in Off Topic
Congratulations gents and fantastic seeing 501st on set!! Was this filmed on set in LA? -
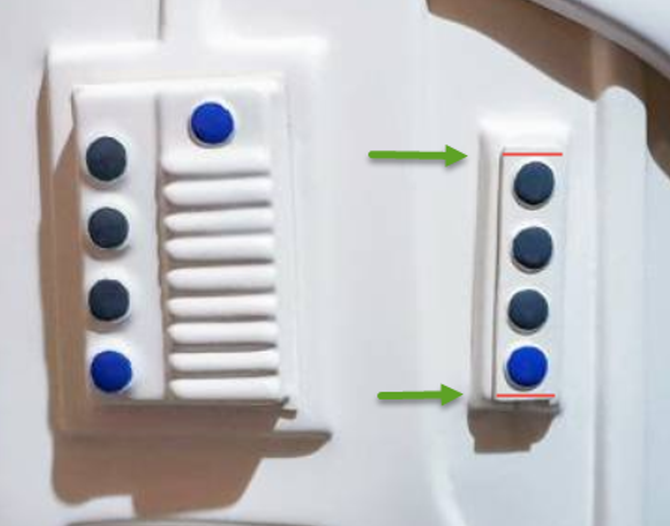
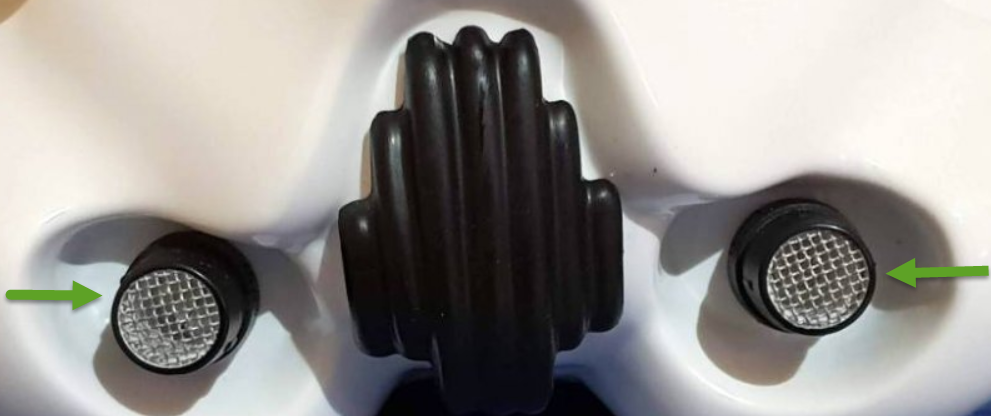
Hi Candido, Welcome back and thank you for your Centurion application. CRL and Centurion Application Requirements: All required submission photos appear to be present. Firstly, I would like to thank you for making the changes suggested in your EIB application. We appreciate that each of the items were addressed, however may seam trivial, those changes taken make for a beautifully built set of armor to an even higher level. Secondly, on behalf of myself and the FISD Deployment team, I'd like to welcome you to rank of Centurion. Congratulations! Other-Armor Fit/Assembly: In this area we discuss any areas still needing some improvement. Though they will not hold you back from Centurion, Centurion is the elite level of accuracy and what we suggest here will help you reach that. The Mic tips look great, however the rims of the tips should be painted white. Ive included a Reference photo. Reference Photo The smaller ab plate could use a bit more trimming and remounted in a slight skew as seen in the reference photo. Reference Photo Excellent job on the placement of the clips on your TD. It's not a huge deal but worth mentioning that the corners of the clips should be squared off. Ive included a reference photo to follow along. Reference Photo A simple dressing issue here: The gap between the cod and thigh can be either way you have it (left or right leg, whichever is more comfortable) but the gap should be pretty much equal on both sides. Reference Photo Reference Photo Nice work on the E-11, but the scope on an E-11 can and should have a bit of brass weathering. The Brass color is very subtle and not over applied. You can see in the reference photo that its very minute. Reference Photo Once again Congratulations and Wonderful Job!!! Andrew Tanski - FirstOrder Detachment Officer


-
Well done Candido! Much better looking. Shouldnt be much longer now. Andy
-
FANTASTIC Work! Well done!!! Wont be much longer now Andrew
-
Haha!!
-
TK-21523 Requesting ANH Centurion Status (AM) [428]
First0rder replied to Commander Gree's topic in Request Centurion Status
Congratulations Jordan! Well done!! -
TK-24576 requesting ANH-Stunt Centurion Status (RS) [429]
First0rder replied to HSM76's topic in Request Centurion Status
Congratulations Sven!! Well Done! -
Thank you and let us know if you have any questions at all. Andy
-
Definitely add the white paint to the hovi tips as well be looking at that. Thx.
-
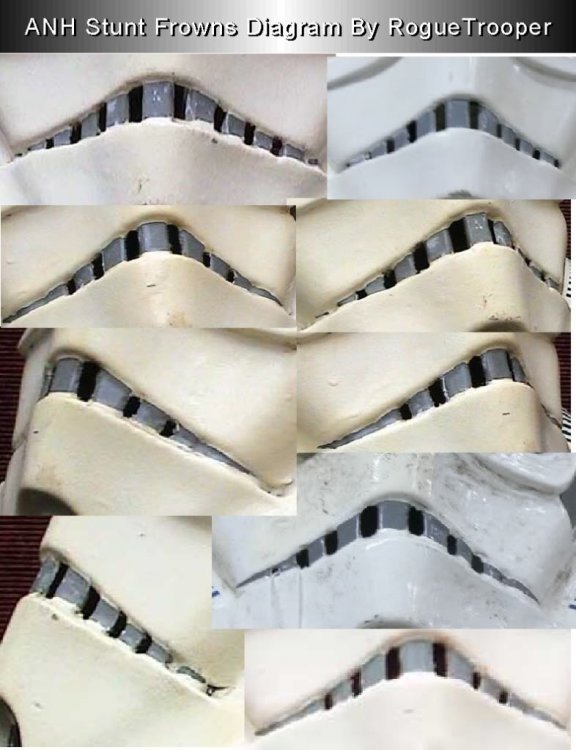
Hi Candido and thank you for your patience. while reviewing your submission, we have found one item that would stand in the way of the Centurion. Although it was not mentioned in the EI review, we have to be consistent, so the paint on the teeth will have to be fixed for level 3. As per the requirements for basic approval, Frown is painted gray and does not leave the teeth area You may also want to replace the tube stipes as they are a bit thick and few in number, they are also on backwards. The tops should lean forward, not back. The tube stripes are not deal breakers, but definitely worth mentioning and hopefully you may replace these to better match the reference images. Reference images Let us know if you achieve these. Thanks Andrew
-
Hi, Candido. thanks for your patience while we review your Centurion submission. Not much longer now. Andy
-
TK-24576 requesting ANH-Stunt Centurion Status (RS) [429]
First0rder replied to HSM76's topic in Request Centurion Status
Hi Sven, May we see a closer picture of your Ab buttons? thanks kindly -
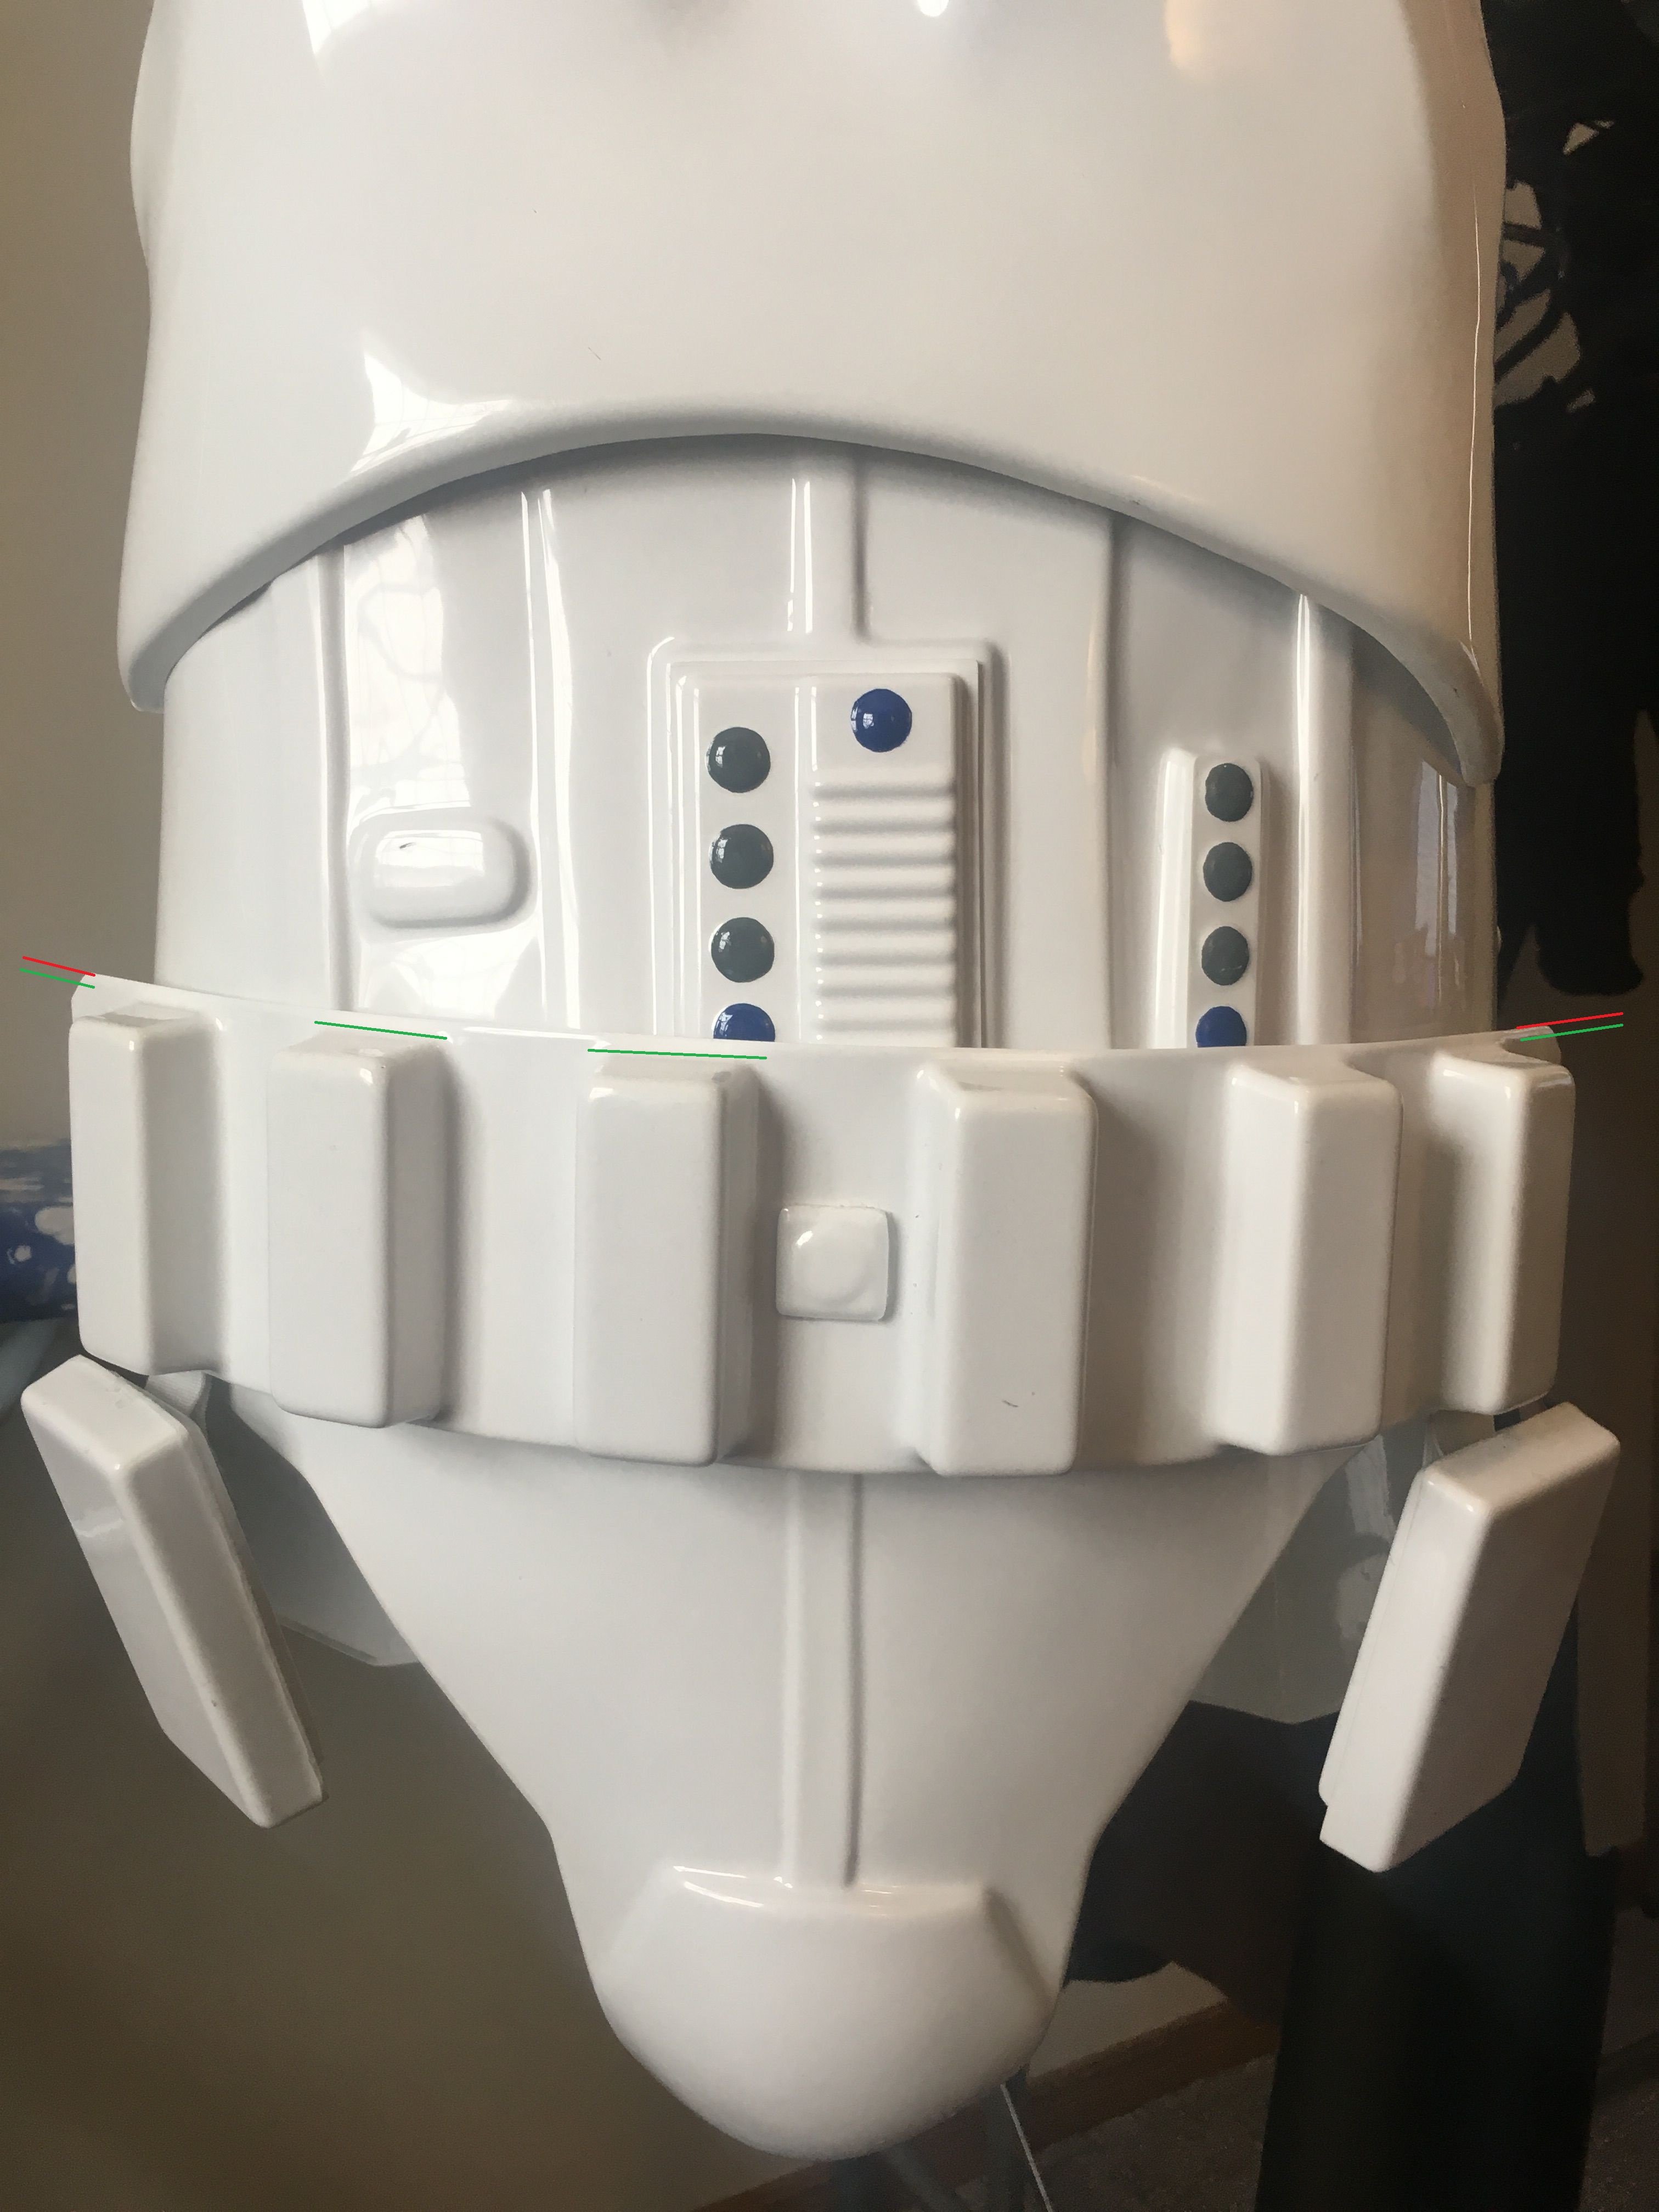
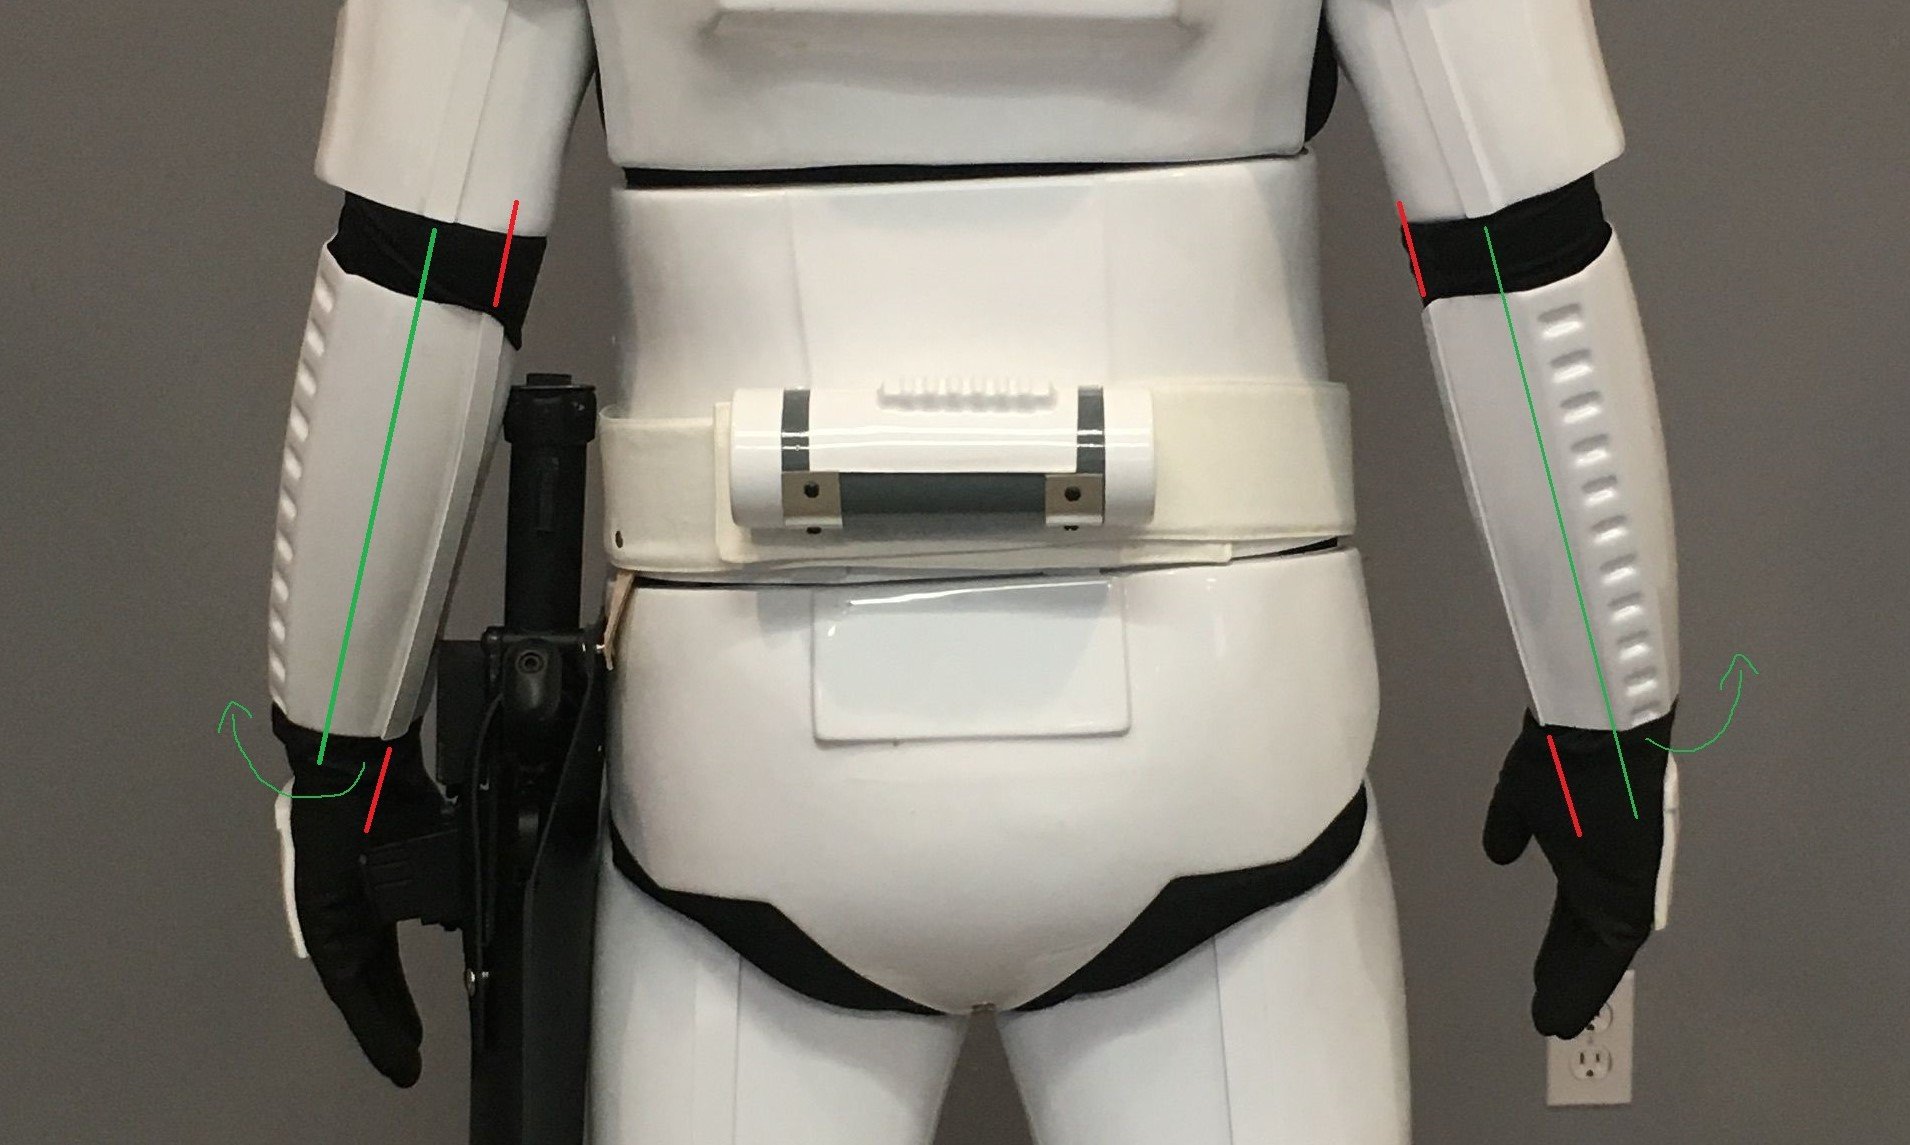
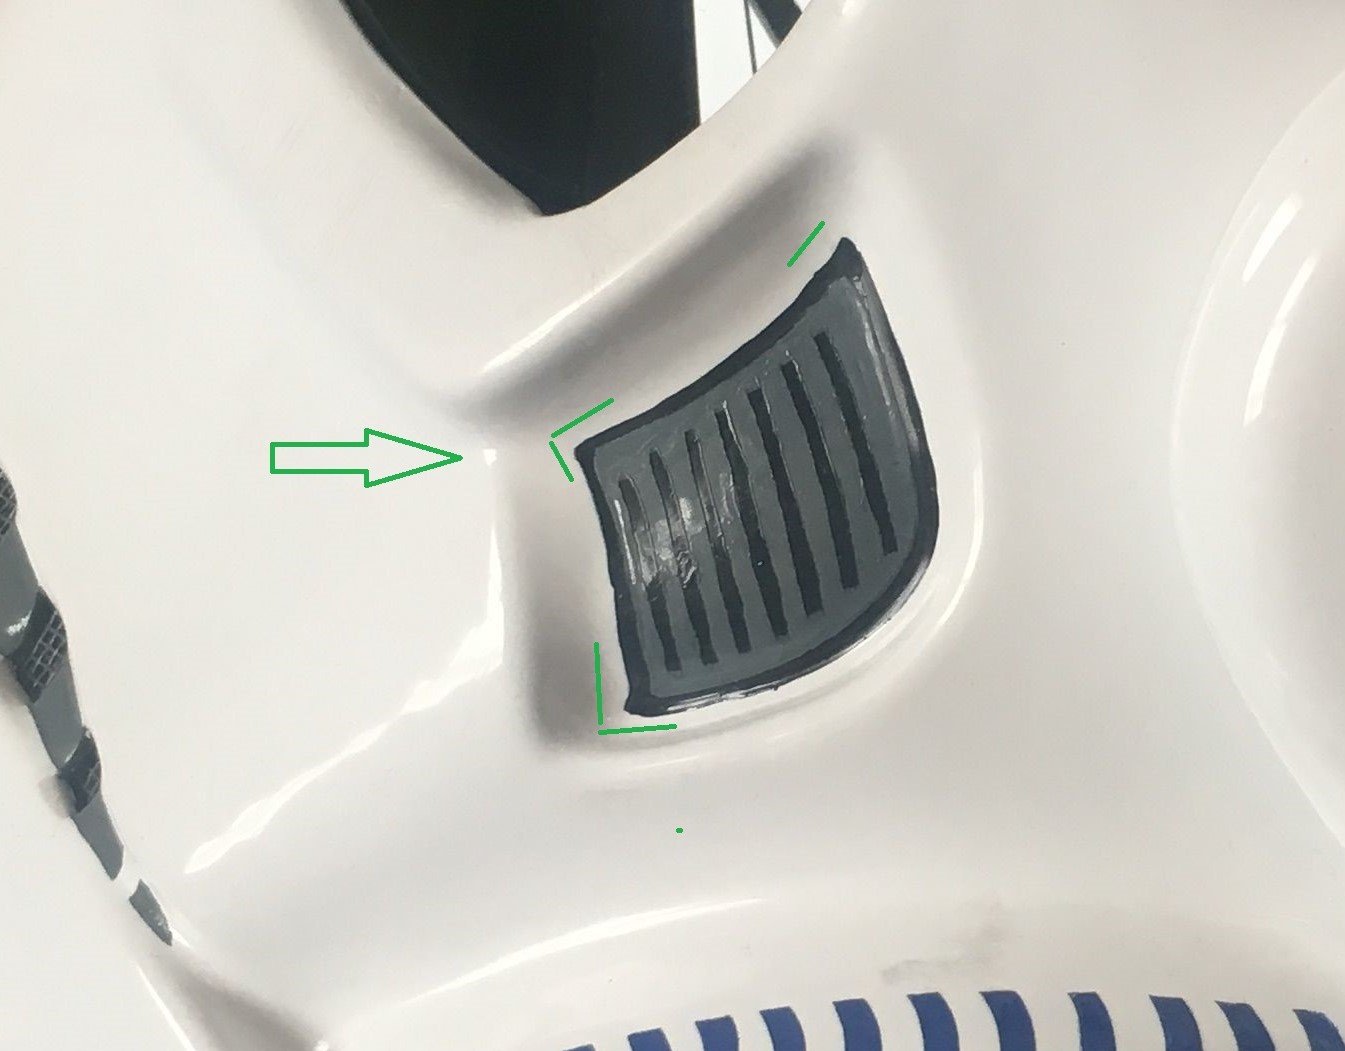
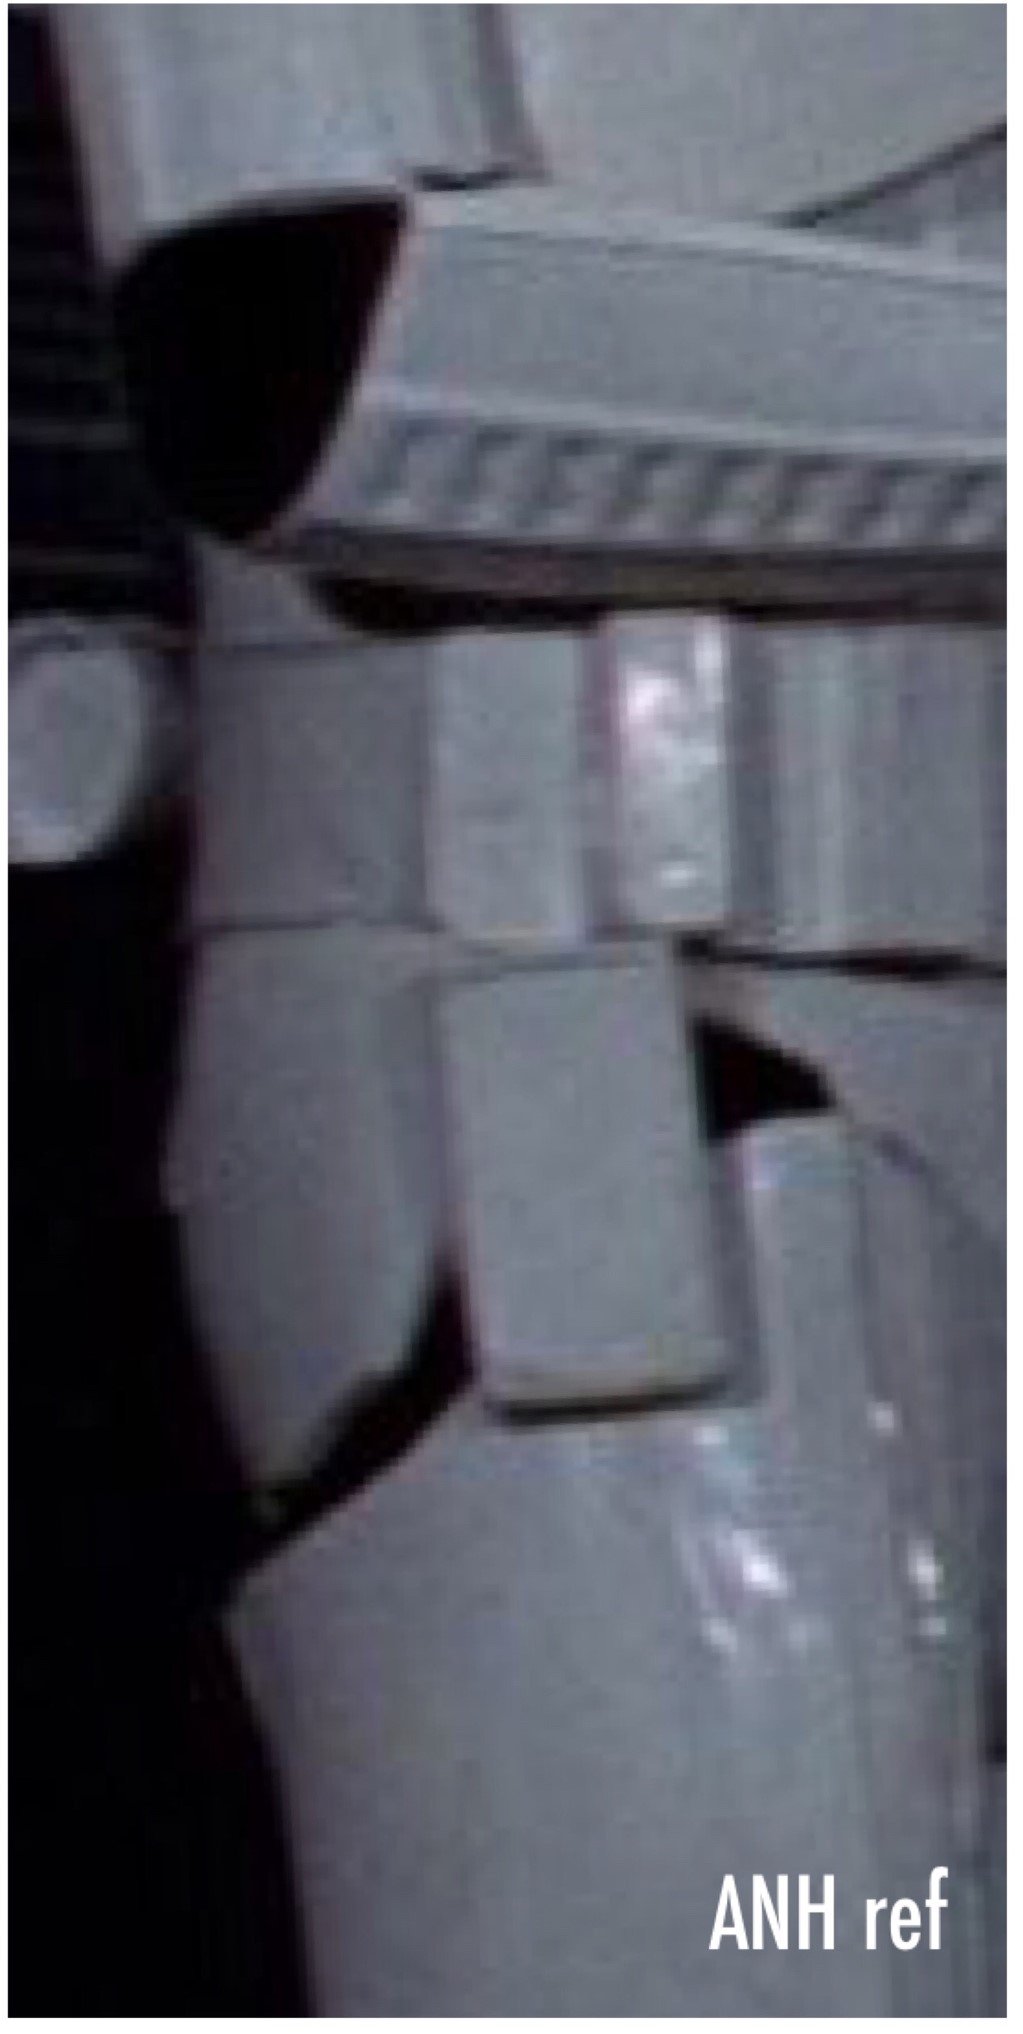
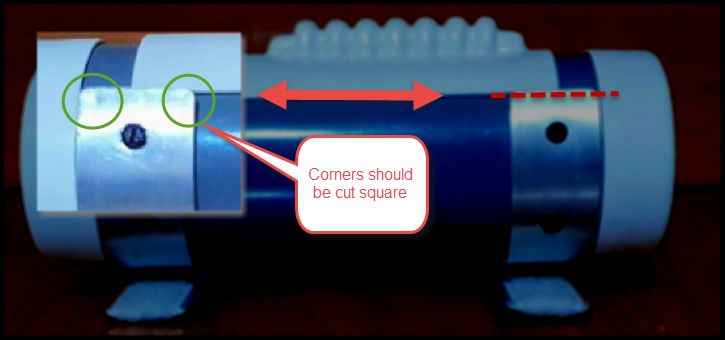
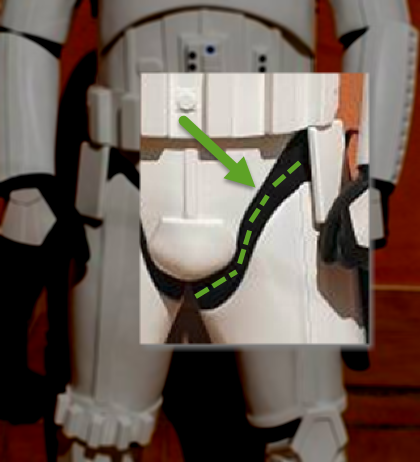
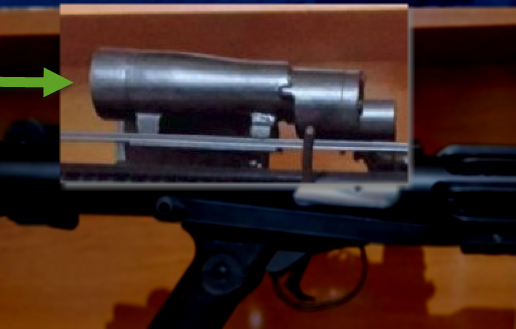
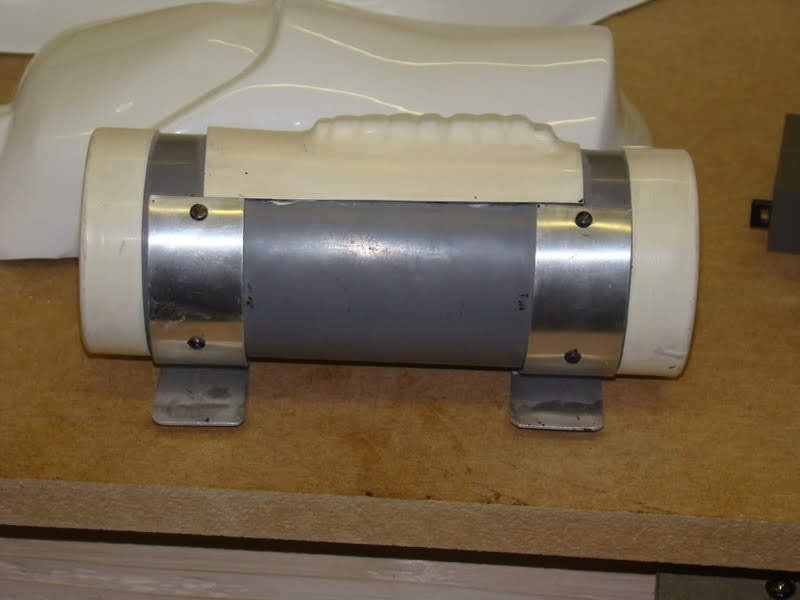
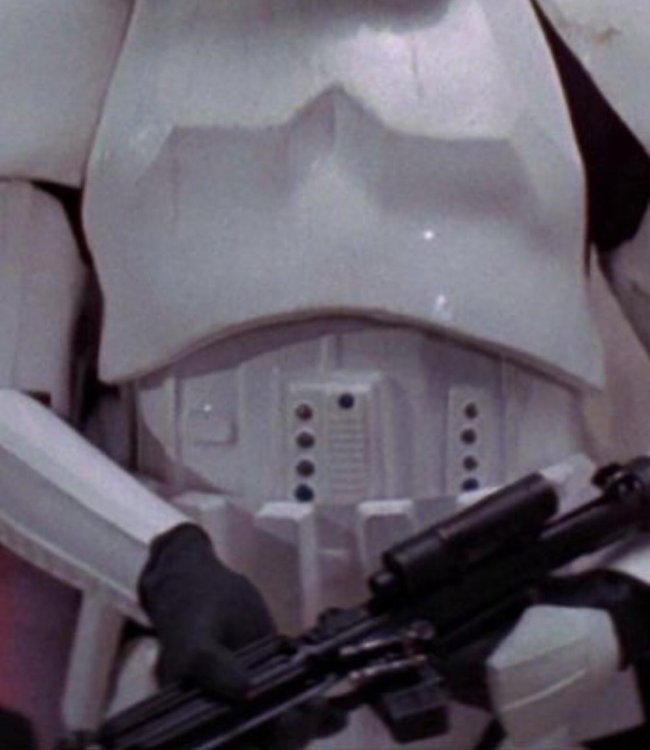
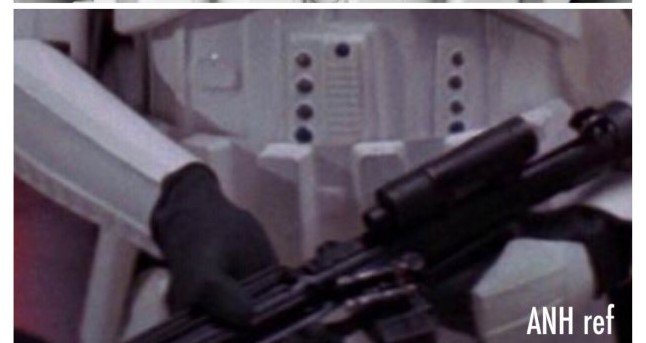
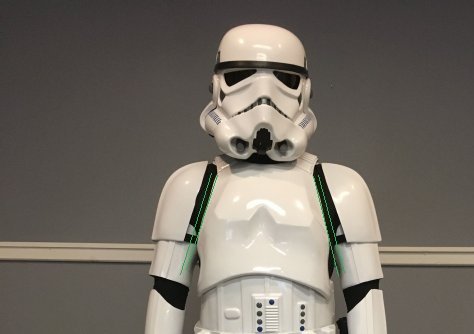
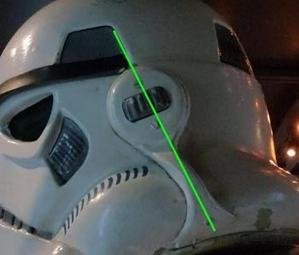
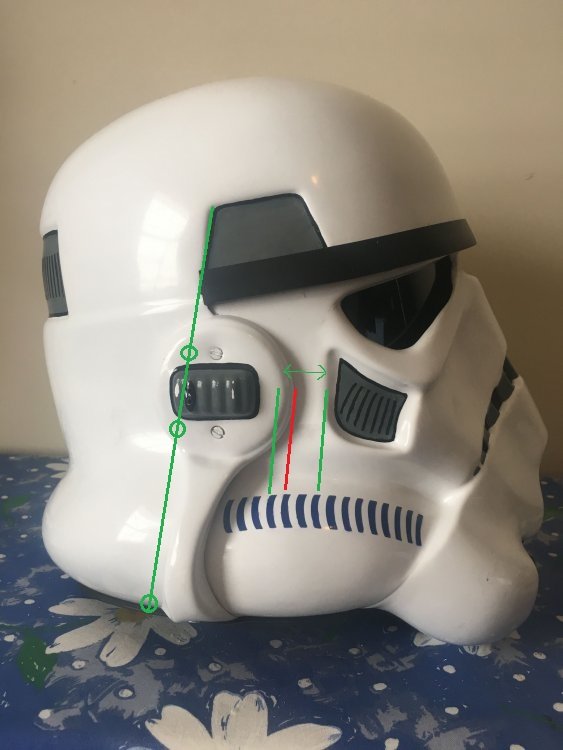
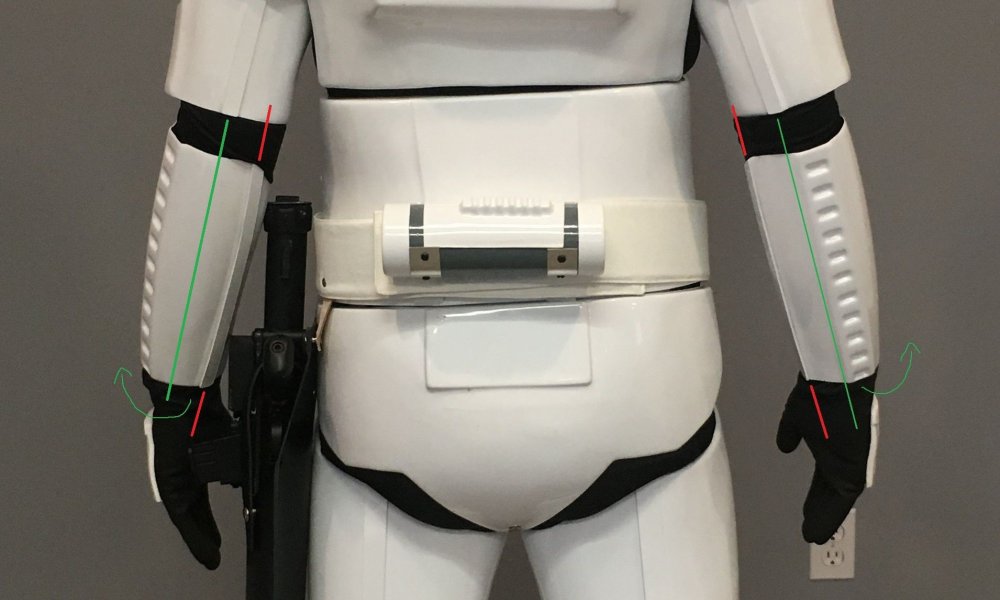
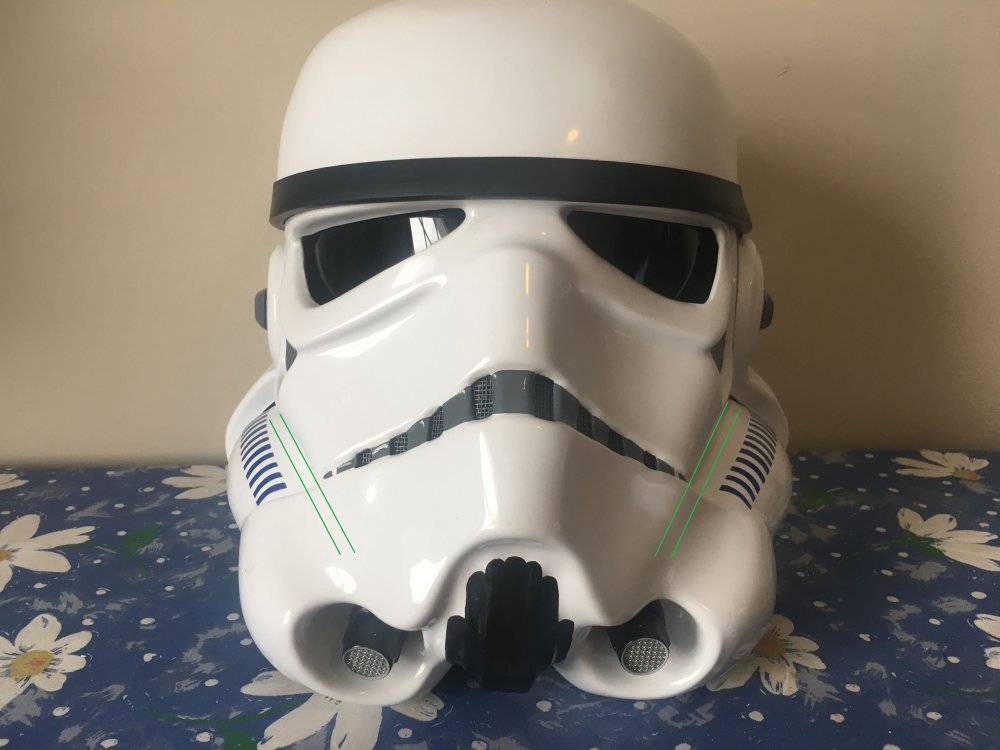
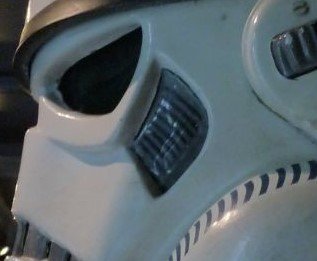
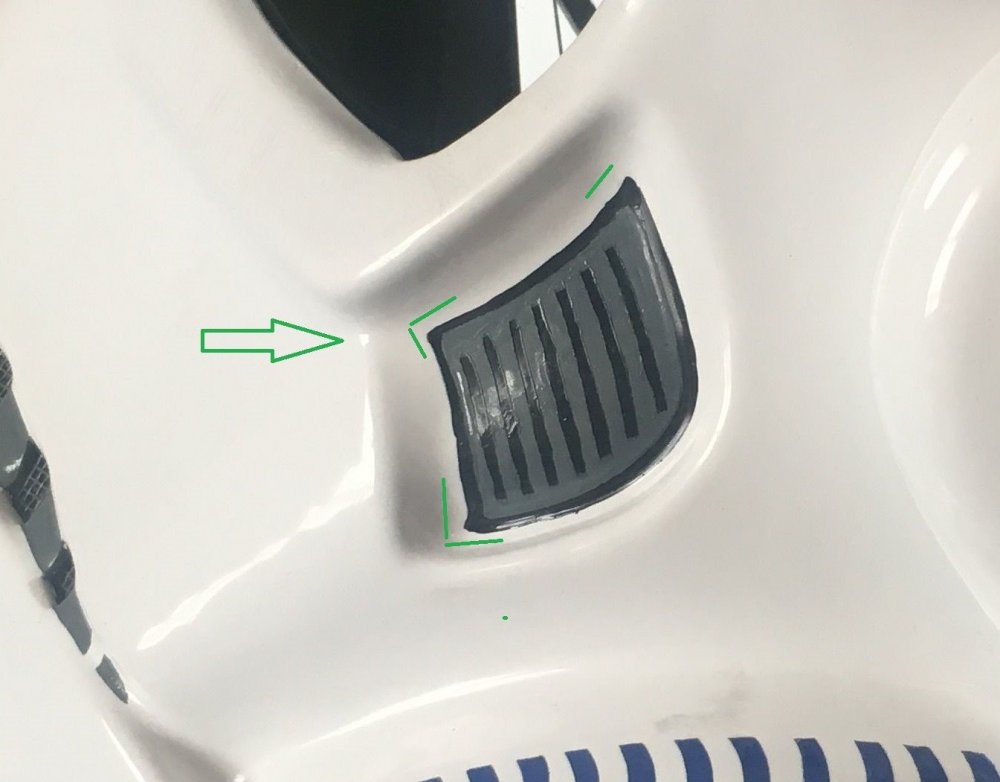
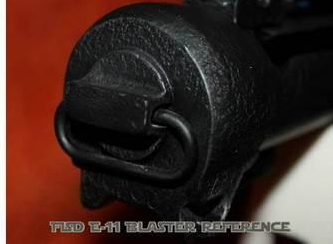
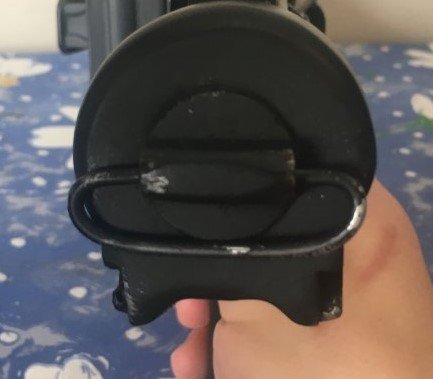
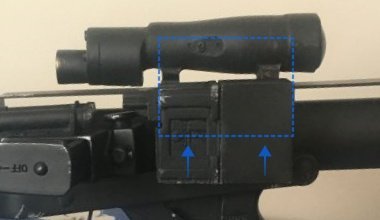
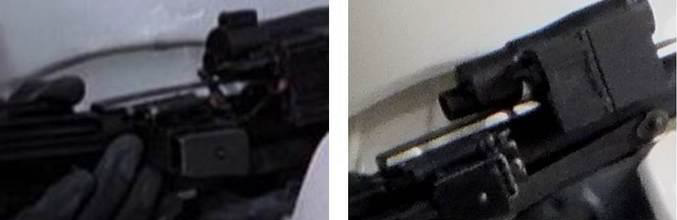
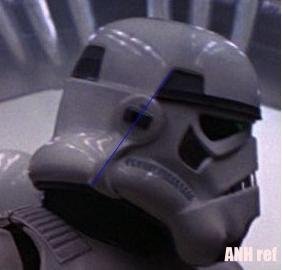
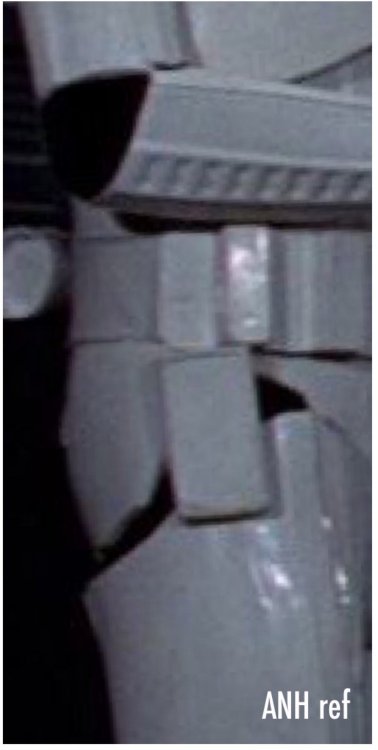
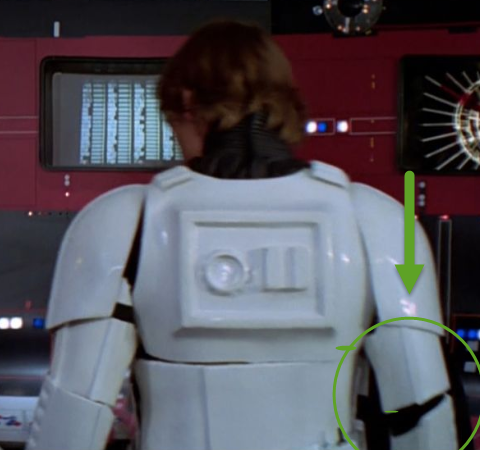
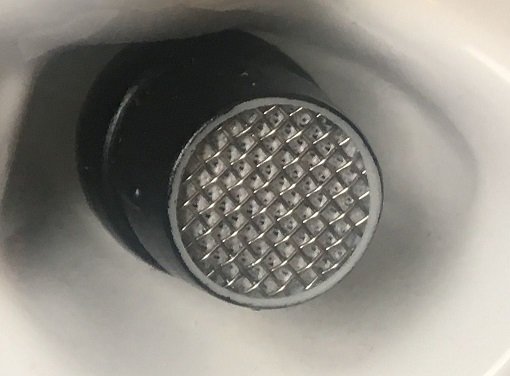
Hi Brendan and thank you for your EIB application - In this review I will ensure that your armor follows the requirements set out in the CRL L2 Expert Infantry and also point out what I can to prepare you for Centurion, should you choose to apply. I hope you do! Let´s get started shall we! CRL and EIB Application Requirements: All required submission photos have been posted and I am very pleased to announce your armor displays all the necessary elements to qualify for ANH Stunt Expert Infantry. On behalf of myself and the entire D.O. Staff, congratulations! Other-Armor Fit/Assembly: In this section we review observations made by your fellow troopers and ourselves. Some observations may lead to suggestions to improve the overall look of your armor. You have a great looking set of armor and you should be proud! Although at first glance it may seem like a lot, most of my suggestions that follow below are minor. Starting from the helmet and working our way down. Frown - The Paint looks great, however I did notice one tooth has a bit extra paint past the ideal line. If you can kindly clean that one up. thanks Reference: Ears - In this adjustment request, and it might be more of the angle the helmet picture was taken in, were looking for the ear screws to be within a straight line following the edge of the Trap, I have drawn this green line and a reference picture. Really the bottom screw is off a bit. See what you can achieve to get the lower screw closer to the green line. thanks Reference For the Right side, see if you can move the ear back a bit getting it closer to the green line. This will also improve the distance between the Tear Drop and Ear. Reference: The Tube stripes appear to be a bit low. The distance of the tube stripes should be a bit closer to the cheeks. Reference Photo: The Traps on both the Left and Right side of the helmet look a bit small. If possible fill in more area closer to the Green reference lines. Reference Picture Easy amendment. Looks like your forearms are twisted a bit off axis, but that's easy, just twist them back Reference: The 4 button ab plate could definitely use some trimming, and the paint on the buttons is much wider than we like to see. It should ideally be within the edges of the button itself and not extend past the edges. Reference image For the Belt, see if you can kindly trim off a bit more from the top. On the screen they had little return edge to none. Ive included green reference lines to achieve too. Reference photo: Blaster D Ring - Looks a bit wide. See if you can squeeze it a bit so the overall width matches the reference picture below Reference Picture: The Henglester appears too low and needs to be raised. See about raising it to be within the blue box. Reference Centurion Suggestions:In this section we prepare you for Centurion. More photos may be requested in the future that allow us to make better decisions on possible adjustment etc. If there are any areas of concern they will be discussed here. Because Centurion photos show much more detail than EIB, items pertaining to Centurion might be seen there and not here. We try to point out all we can from what is seen but the final accuracy is the responsibility of the trooper. Although the wire screen mesh is the correct size, the white area underneath will have to be removed for level 3. This should be fairly easy by removing the wire mesh, using a Dremel or razor knife to remove the plastic mesh and then adding the wire one back in. Reference images Shoulder Bells - Look to tighten up the space on the bells distance to the chest. Ideally we would like to see minimal to no space. You may achieve this easily by tightening the strap which holds the bell to the shoulder strap. Reference Pic Looks like the Right and Left belt boxes are off alignment, the left looking better. You may have to re-affix the strap on the rear for that one drop box. The drop boxes are vertically aligned with the end of the ammo belt with minimal gap between belt and box. Reference Photo Besides that all looks Fantastic and Congratulations once more!!! Let us know if you have any questions and or concerns on these. Thanks again Andy


-
Hey Glen and thanks. So we thinking Commander Prye is going to be a WhiteArmor CRL or some other Detach going to get him?
-
Hi Candido, time permitting, can you kindly include a close up of the boots and one of the Thermal Det with a ruler showing the total length. thanks