

DBoz
-
Posts
59 -
Joined
-
Last visited
About DBoz

Recent Profile Visitors
1,201 profile views


-
I actually have not made any progress on this build. In fact, I have been absent from the board for quite a while. It was just luck that I happened to stop by here and see your post. My TK build has kind of taken a back seat to my R2D2 build and as such remains in the box in the garage. Some day I will get back to it.
-
Agreed. Especially since the whole point of the notches is to get the back plate to line up with the butt plate. Seems silly to require the notch be moved entirely away from the butt plate. But, as has been stated, it is what it is.
-
6/32 is not actually a fraction when referring to machine screws. It is sometimes written as 6-32. The 6 refers to the diameter of the bolt (don't know what the actual measurement is off hand) and the 32 is the thread pitch (1/32).
-
You need a couple of clamps like this for the thermal detonator. Should hold down the control panel pretty well while drying. http://www.homedepot.com/p/DEWALT-Small-Trigger-Clamp-DWHT83191/204987956
-
Wow. I got really lucky with my belt. Sorry you guys didn't. As for using a dremel, be very careful. Those rivets will heat up fast and melt the belt plastic. I tried this on one of mine and got some melting on the belt. I stopped before it got too bad.
-
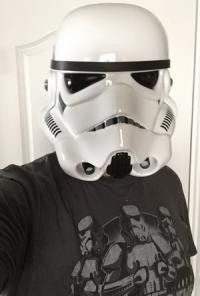
Undersuit came from ANOVOS today. It's not awful, but a set of under armor or the like would probably be better. The gloves are rubber. I have not tried it on, so can't comment on fit at this time.
-
Double post.
-
Still haven't decided. Kind of waiting to see how ukswrath's build works out using it. Kind of leaning toward snaps, though because the ANOVOS abs is so thin. It seems like a snap system would be more durable.
-
eBay is also a good source. I just got a set on there for $13 shipped.
-
Great job on the shims. It is something I'm going to have to tackle as well, although I will probably need more than 2". Just wondering if the way you've done them will be passable for Centurion because of the notches. I like that they are molded in on the ANOVOS Kit, but this presents a possible problem for those larger troopers who want to go for Centurion approval. Is it acceptable to shim like you have, or will it be necessary to trim off the molded in notch (thus requiring an even larger shim) and then cutting the notch into the shim itself? Something I am pondering.
-
Thanks! It was really easy. If you use the same T-nuts I did, just make sure to snip off the spikes before you glue them in place. It will make things much easier and nicer looking.
-
Not much progress. I'm generally lazy, so I only do a little at a time. Right now I'm focusing on the helmet and I'm waiting on an order from Trooperbay before I can really move on with that. Anyway, today I installed the lenses. As shown above, I'm using T-nuts as a base to screw the ANOVOS supplied lens material to the helmet. First, I placed the lens material in the helmet and marked where I needed to drill holes for the screws (the marks, if you can make them out, look off in this picture, but it is because of the angle of the camera): I had originally intended to make the lens a one piece deal, but noticed when I marked the holes that, because I had misaligned my T-nuts, this would have put stress on the lens in order to get it to line up the way I wanted. So, I split the lens piece in two and with the pieces screwed in place, I drew a rough outline of where I wanted to cut with a sharpie. Next, I did a rough trim using the shears. And then cleaned them up using the Dremel and sanding drum. Cleaned up lenses installed: I also got around to gluing in my scope reticle on my Hyperfirm. My new belt from TKittell should arrive tomorrow, so that will probably be the next thing I tackle. I just need to pick up some white elastic to replace the stuff supplied on the drop boxes. I most likely could reuse the stuff already on it, but as I detailed earlier, I had some problems attempting to take apart one of the drop boxes and I would rather not mess with it again, I am just going to cut the elastic off. Plus, it will be cleaner to use new elastic. I may also make an attempt to clean up the wonky right side of the frown. Nothing too drastic, just some filing to open up the teeth some. Once my Trooperbay order arrives with my replacement brow, neck trim, correct ear screws and paint, I can get the helmet reassembled and start on the Plastidip/cheesecloth coating of the interior.
-
Dark Energy Creations Metal M19 Scope Kit.
DBoz replied to PGHtrooper21's topic in Build Threads Requireing Maintenance
DEC's stuff is excellent. I've got both his budget DL44 Kit and his droid caller Kit. Both beautiful. -
I've got a ticket in now with no response as well. I am assuming they are probably overwhelmed with all the kits that have gone out. My experience with them in the past has been quite favorable, so I'm willing to give them the benefit of the doubt.
-
I'm using T-nuts for my lens mounts. Haven't gotten to the actual lens install yet, but there are some notes about my experience so far here: http://www.whitearmor.net/forum/index.php?/topic/35115-DBoz-ANOVOS-TK-Build/page__view__findpost__p__463933 I think they should work fine, just make sure to trim the spikes off before you install them.
