Cody42
-
Posts
98 -
Joined
-
Last visited
Content Type
Profiles
Forums
Gallery
Articles
Everything posted by Cody42
-
LadyInWhite Phasma Build
Cody42 replied to LadyInWhite's topic in Build Threads Requireing Maintenance
Have you tried out a triangular shape for the cape? To me it looks like one corner is attached a little bit off an edge over the right shoulder and the edge around the neck and hanging down along the right arm is one and the same. The two other corners are at the right knee and at the left foot. To me with your pattern there is too little fabric at the left arm. -
Bryanmc's Build Thread - Complete Newbie
Cody42 replied to Bryanmc's topic in Build Threads Requireing Maintenance
How does ist look it you move the 10M thing a bit downward? On my armor it did not cover the raised detail on the thigh completely. I just threw on a lot of abs-paste and putty and then sanded it to shape. The staircase shape on the top and bottom face that you might get actually helps to get the angle on that part right. Check out this reference picture: http://www.originalprop.com/blog/wp-content/uploads/2015/04/Star-Wars-Celebration-The-Force-Awakens-Props-Costumes-Exhibit-Characters-Models-046.jpg -
I'm afraid the second run just closed. Maybe you can still slip in if you are lucky. Here it is: http://www.whitearmor.net/forum/topic/33111-tfa-episode-vii-accurate-stormtrooper-metal-holsters/
-
Sources for the soft black pouch for TFA belt
Cody42 replied to TK-Sonic's topic in TFA Stormtrooper
The soft pouches are simple, box shaped pouches from cordura or similar material. They should be fairly easy to create yourself, maybe even easier than modifying a found part. Could you link a picture of the pouch you found? I haven't found anything that looks like the soft pouch searching for the name. -
I know and I'm already on the list. But the list is long and in the meantime I have to make the best of what I have at hand. I'll try to connect them to the armor parts using snaps and see if that helps.
-
I'm having some trouble with the gaskets from Anovos. Are some of you having similar problems and have already come up with a solution? The material is very sticky, so putting on the armor is quite cumbersome. It's almost impossible to put on any armor parts over the gaskets. Also, once in armor the material sticks to the armor and pushes it around when I move. Especially the chest and back plate catch onto the shoulder gaskets. Also the shoulder gaskets fold up in a way that there are huge folds on the front an back of the shoulder which push the yoke and back plate apart.
-
The only reason why we will ever be allowed to make any details public is when that information is already available to the general public through someone not bound by an NDA. So posting a build publicly would only be allowed once the kit is available to everyone and build threads by people who bought the kit after the public release are out or once a sufficient number of detailed build threads by troopers whose NDA expired are out. Some information however will remain confidential. For example if all parts of the armor where shipped accoarding to schedule or if they where free from defects. I heard that quite some helmets had to be returned. If that is the case, the general public should never be able to infer that from anything we post. So if something like that happend to you, that information shouldn't be in the build thread (i.e. don't post something like "two months after the first shippement finally the other parts arrived") (Half of this post is presumably also confidential.)
-
LadyInWhite Phasma Build
Cody42 replied to LadyInWhite's topic in Build Threads Requireing Maintenance
My first guess would be something like denim. Synthetic fiber can be extremly shiny. So my guess would be something denim like with synthetic, shiny, white weft and black cotton or even wool warp. On the picture to me the surface looks frayed. If that impression is correct, I doubt that it is coated or painted, since that would prevent fraying. -
Bryanmc's Build Thread - Complete Newbie
Cody42 replied to Bryanmc's topic in Build Threads Requireing Maintenance
The edge marked red should line up with the blue one. You trim the blue edge on the yoke back and sand of the return edge on the main back plate until you can assemble the parts, so that the red line is a little bit above the blue line. After assembly you sand down the red line (top edge of the back plate), following the contour of the yoke's blue line, until the two marked lines line up perfectly. From the side it should look like this: Red outline marks where the back plate should be and the blue one marks where the yoke should be. If there is still a return edge on either of the two parts where they are supposed to meet, you might not have trimmed them enough.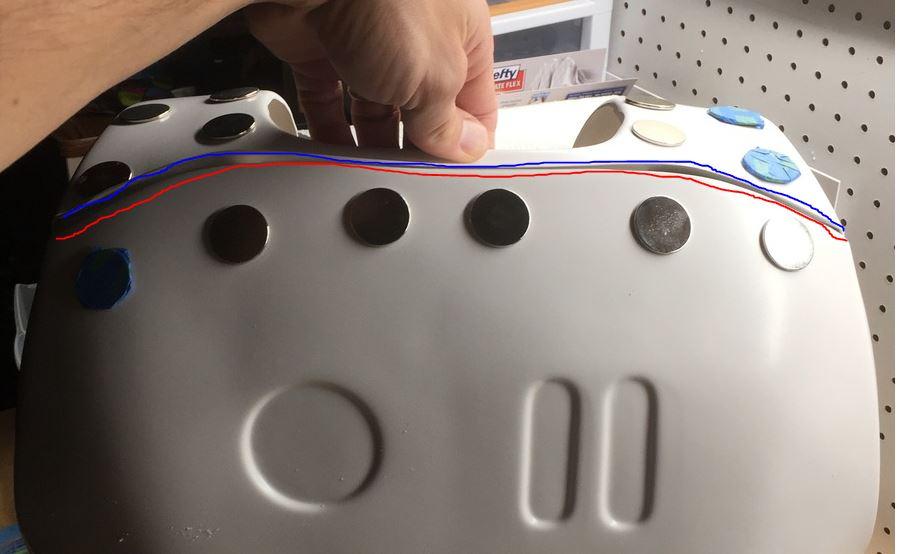
-
Bryanmc's Build Thread - Complete Newbie
Cody42 replied to Bryanmc's topic in Build Threads Requireing Maintenance
I'd say it should sit flush. It is hard to tell but maybe you should trimm off a little more on 5A. Later, 1A should cover the edge of 5A when looking at the parts from the perspective of the first picture. -
Bryanmc's Build Thread - Complete Newbie
Cody42 replied to Bryanmc's topic in Build Threads Requireing Maintenance
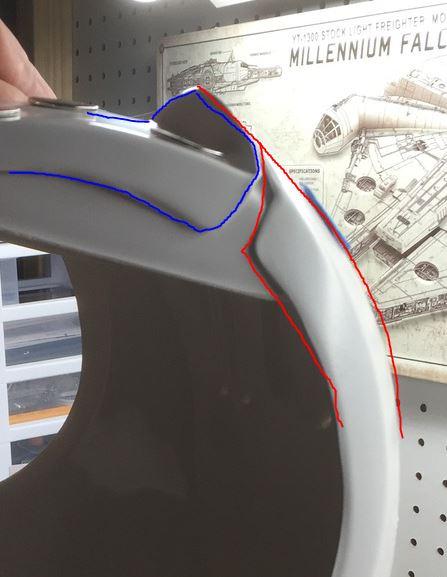
Check out this post from Zaphod's build thread! You have to trim the edge where yoke and back plate meet on both parts to match up as well as possible. There should be a sharp corner where they meet, with the edge of the yoke facing the inside of the back plate. The top edge of the back plate should line up with the face where the two slots are. -
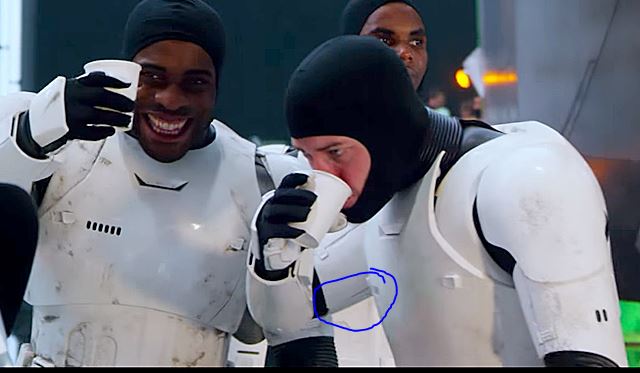
I'd suggest changing it to: There is a seam on the side that faces forward, an additional seam may be on the inside facing side. The rest of the bicep must be seamless. A clip greeblie is present low and across the seam Two black ovals are present on the outside facing side of the bicep We should not encourage any of the alternatives as long as we don't know what is seen more frequently in the movie.
-
From Teaser #2, Trooper on the left side From Comic Con reel, Trooper on the right Second seam on the inside is circled in both images.

-
Episode 7 "F11-D" Stormtrooper Blaster WIP (Pic Heavy!)
Cody42 replied to jjarmoryinc's topic in Weapons of the First Order
Like this. It should be mirrored horizontally.
-
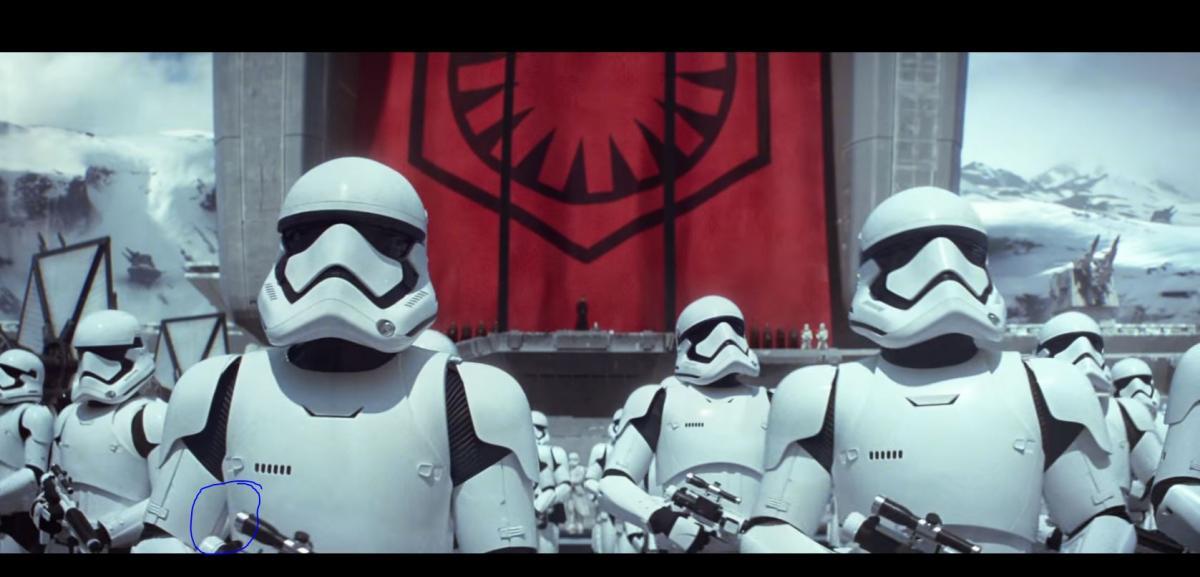
Looks nice and seamless. The legs have the holster and the two detail bars on one of the shins. Don't underestimate them.
-
Episode 7 "F11-D" Stormtrooper Blaster WIP (Pic Heavy!)
Cody42 replied to jjarmoryinc's topic in Weapons of the First Order
Nope, the muzzle is completely asymmetrical. So it can't be just mounted wrong. Outstanding work so far nevertheless! -
Barcoder's First Order TK build thread (TK-12175)
Cody42 replied to Barcoder's topic in Build Threads Requireing Maintenance
That blaster looks interesting. I'd imagine it with a larger flash hider like on the DL-44 or Power 5. -
Looking forward to see that! Unfortunately mine had a lot of bubbles trapped inside that I had to fill afterwards.
-
Great progress! That stuff takes forever to dry... I started sanding after about 24hrs and found that the parts still had a foamboard like consistency on the inside. Only after about three days my parts had dried completely.
-
Barcoder's First Order TK build thread (TK-12175)
Cody42 replied to Barcoder's topic in Build Threads Requireing Maintenance
Painting is always "fun". Some tricks that work for me: - Do just short bursts of at most one second, never spray continously - Always wait a short while before going over the same spot again. - Better risk a slightly patchy first and second coat. Just do three, it is less frustrating than getting this rought spots. And, although it might be too late for you: - Use a primer (preferably same brand as the paint, as they are meant to be used in combination), it just has a better surface than the mixture of sanded plastic, not so much sanded plastic and bondo. Good luck with the next coat! -
Episode 7 "F11-D" Stormtrooper Blaster WIP (Pic Heavy!)
Cody42 replied to jjarmoryinc's topic in Weapons of the First Order
Hi, I just noted another detail that might be off. From these pictures (Link 1, Link 2, Link 3) I get the impression that the muzzle of your blaster should be mirrored. -
PM sent! The pictures in your RPF thread look great!
-
Episode 7 "F11-D" Stormtrooper Blaster WIP (Pic Heavy!)
Cody42 replied to jjarmoryinc's topic in Weapons of the First Order
Look at the red circled area. That is where you model seems to be slightly off. In your renderings in the first post it looks better. So it might just be assembled imprecise.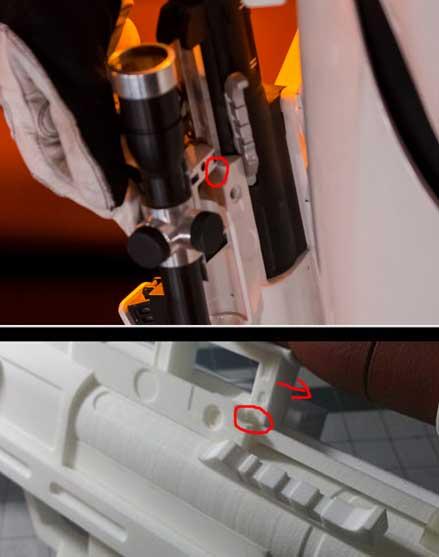
-
Episode 7 "F11-D" Stormtrooper Blaster WIP (Pic Heavy!)
Cody42 replied to jjarmoryinc's topic in Weapons of the First Order
Amazing progress! Exactly as I would have done it. Two additional things I noted: The white painted ring where the front sight is mounted seems to long. It should only be half as long, so that it ends in the middle of the front sight. The main barrel might even get thinner right before the white ring. See here. The rear post of the scope mount should be mounted behind the white rail, completely on the silver rail. So about half its width further to the rear. However the model looks realy great. I could not find any other difference with reference pictures. Great work! -
It's flexible polyester putty for repairs on plastic parts of cars. By the descriptions it is similar to some products suggested "bondo replacement" thread. The product called "Kunststoffspachtel" (translates as plastic filler or plastic putty) by a brand "presto". I found it in a lokal hardwarestore.